The envelope is called a shell made of paper or paper -like materials for letters, documents, and other not too voluminous items. In addition to sending postal items, envelopes can also be used in everyday life, in creativity, in them you can hand over beautiful invitations, give cards, cash gifts and small presentations.
Content
- How to make an envelope for writing from paper
- How to make an envelope made of paper without glue
- How to make simple rectangular envelopes from craft paper
- How to make designer paper envelopes
- How to make triangular paper envelopes
- Beautiful paper in the shape of a square
- How to make origami paper envelope
- How to make an envelope for money from paper or cardboard
- How to make a monetary envelope from A4 paper
- How to make an unusual envelope for money from paper or cardboard
- Conclusion
Below we will talk about how to make different types of paper envelopes in stages. For greater clarity, the instructions will be equipped with photographs of the process and the video classes shot on video.
How to make an envelope for writing from paper
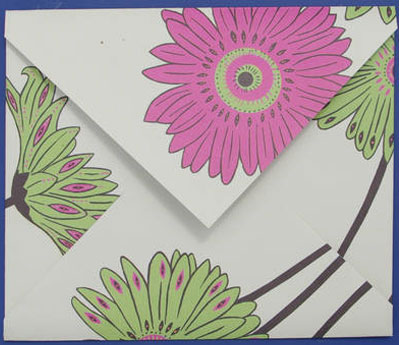
This product is done in a matter of minutes. But even such a simple design can look interesting due to bright or multi -colored material.
Required:
- paper;
- glue or double -sided tape;
- ruler, pencil;
- scissors.
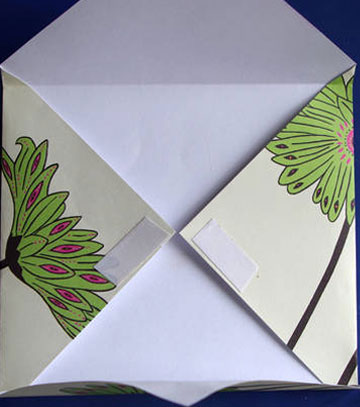
How to make a basic envelope, paper envelope circuit:
- Paper is given the shape of the square.
- By diagonal bends or using a ruler, the center of the figure is determined.
- Two diagonally opposite corners are bent to the center.
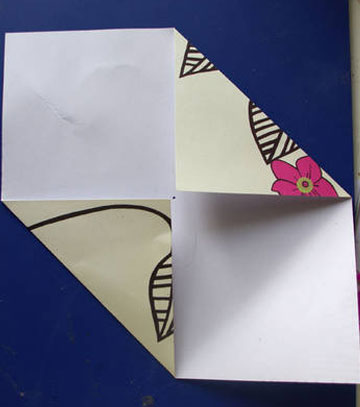
- The lower part of the figure is bent so that the angle covers the center of the square.
- Places of overwhelming parts bent upstairs are fastened with glue or double -sided tape.
- The upper part of the rhombus is also bent so that the angle covers the center of the square one. The envelope is ready.
How to make an envelope made of paper without glue
Required:
- a sheet of paper of square or rectangular shape;
- scissors.
Making a paper envelope with your own hands:
- The envelope is based on a square sheet of paper. To give the necessary shape, the rectangular sheet is taken over the lower left corner and is folded so that the narrower side is located on the same line with the wider side of the rectangle.
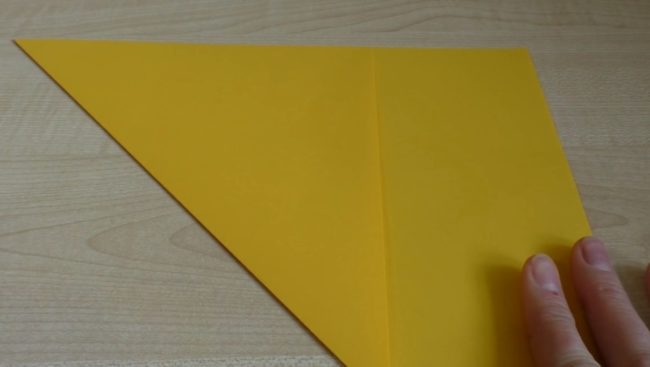
The excesses formed to the right of the resulting figure are carefully cut off with scissors. The square workpiece must simply be folded diagonally.
- The workpiece is revealed. The lower corner, lying opposite the diagonal, bends to the center.
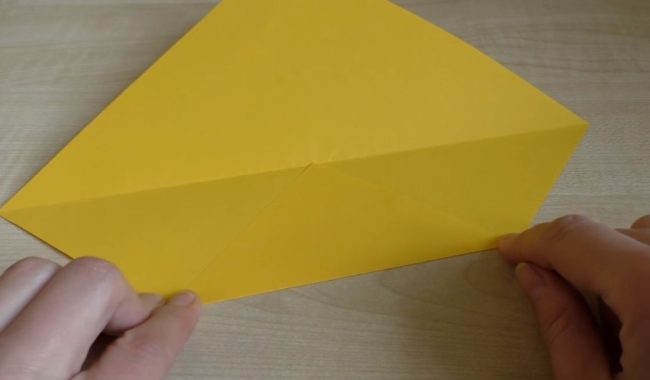
- The workpiece folds again along the diagonal fold.
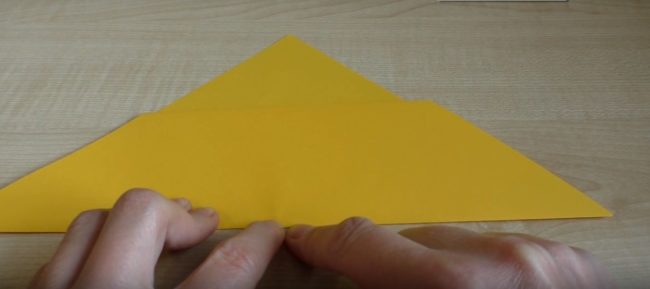
- Next, the base of the resulting triangle is visually outlined. The corners lying at the base of the figure are wrapped in such a way that rectangular triangles turn out, the lower sharp corners of which are 0.5 –1 centimeter beyond the center of the base of the large isosceles triangle.
- To fix the envelope, the lower sharp corner of one of the obtained rectangular triangles is laid inside the lower sharp angle of the second rectangular triangle.

- A simple envelope with the upper location of the closing valve is ready.
How to make simple rectangular envelopes from craft paper
Another option is simple in envelopes. Convenient for creating large products. The highlight and vintage raid to these envelopes gives the craft paper.
Required:
- rectangular sheet craft paper. Can be replaced with another paper;
- scissors;
- ruler;
- quality glue.
How to make a large paper envelope:
- The lower edge of the vertically located sheet craft-paper bends upward, not reaching a few centimeters to the upper edge. The bend is being worked out.
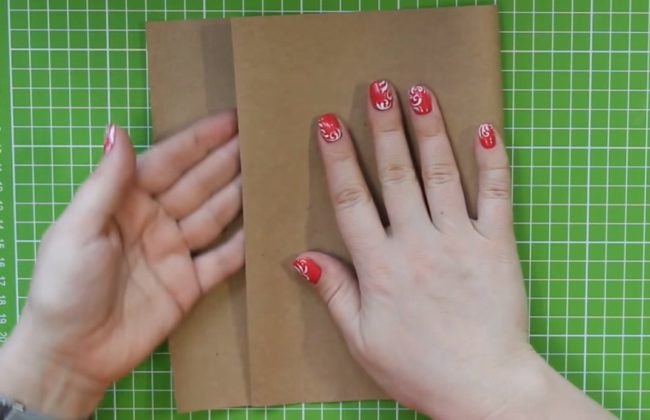
The part unfolds, the fold line divides the sheet into two rectangles.
- The side edges of the smaller of the obtained figures are shortened by a centimeter.
- The corners of a larger rectangle lying at the fold line are cut off.
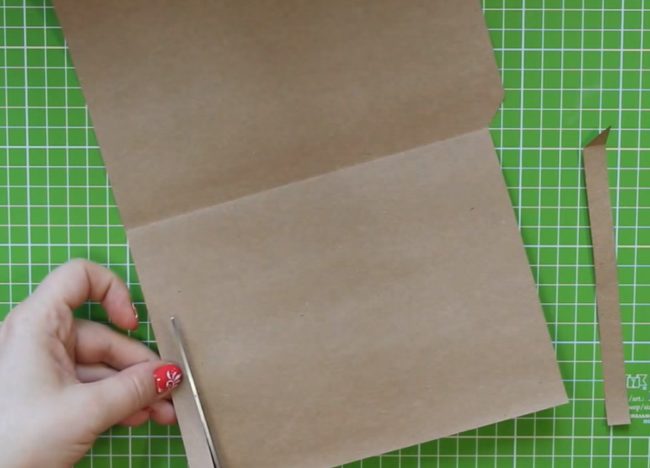
- The part is folded along the fold line, after which the closing valve is designed: the side edges of the future valve are shortened by a centimeter, corners are cut symmetrically.
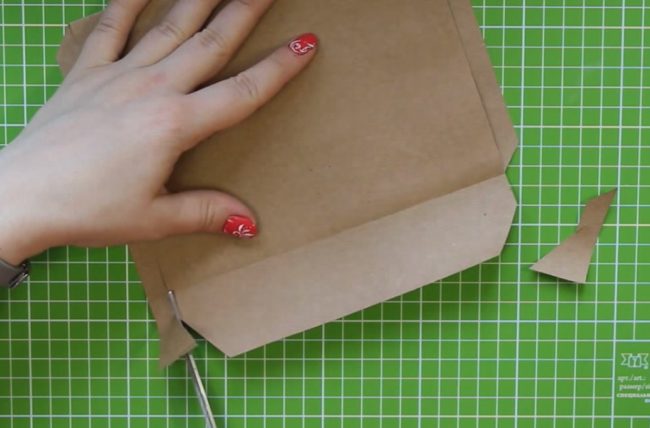
- Side valves are designed: they bend up, the remaining corners are cut off.
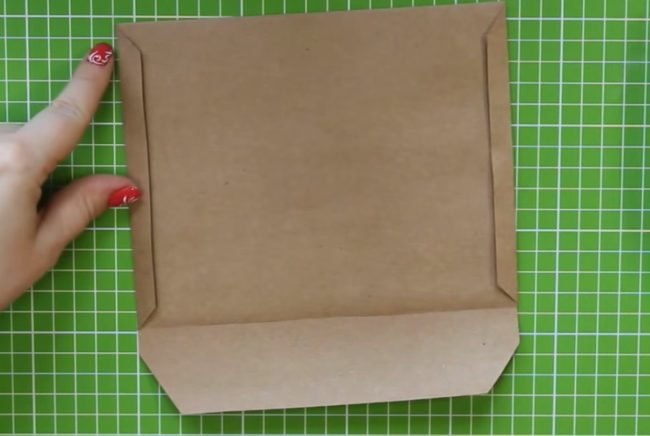
- The workpiece is opened, the side valves are carefully lubricated with glue and the part is again folded along the fold line.
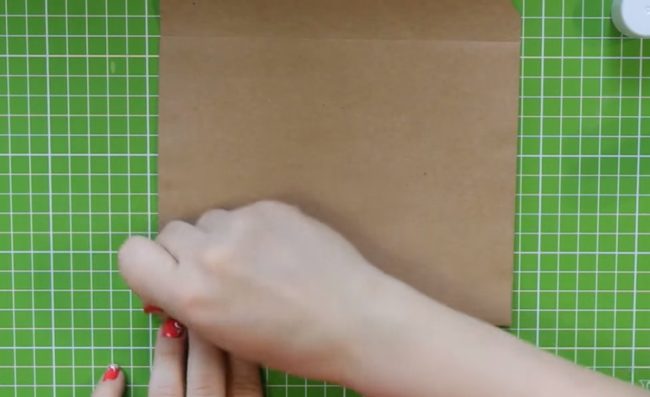
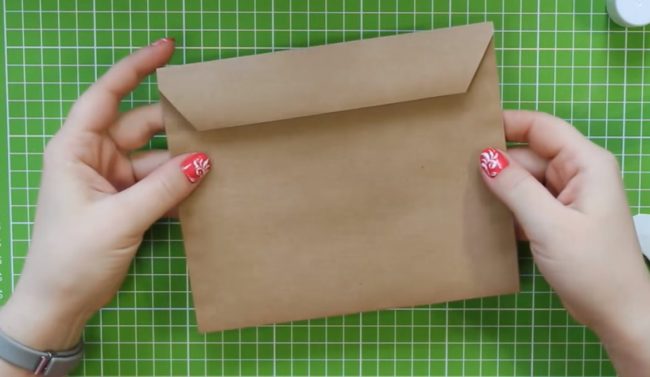
- The closing valve bends. The fold line can both coincide with the upper side of the paper “pocket”, so be 5 millimeters above it. The envelope is ready.
How to make designer paper envelopes
With the manufacture of these envelopes, you will have to tinker a little, but the result is worth it. Cute, elegant - ideal envelopes of birthday paper or other celebration.
Required:
- square sheet of paper for the base of the envelope;
- designer paper or colored cardboard;
- scissors;
- ruler;
- simple pencil or pen;
- glue;
- narrow tape from brocade or atlas.
How to make an envelope from colored paper:
- First of all, the basis of the future envelope is made. To do this, the paper is folded first in half, and then - diagonally.
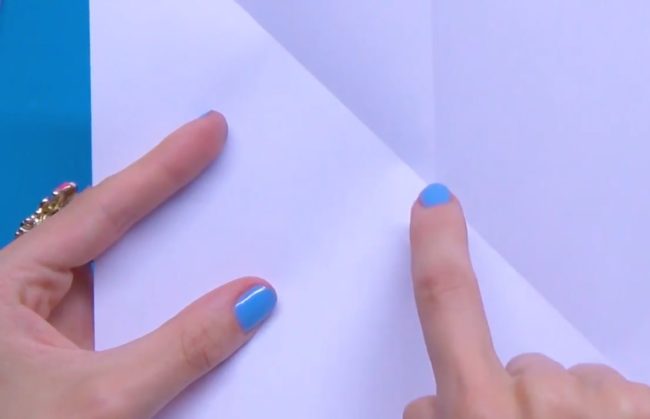
- Next, the part is revealed. The corners are bent to the center of the square planned by previous folds.
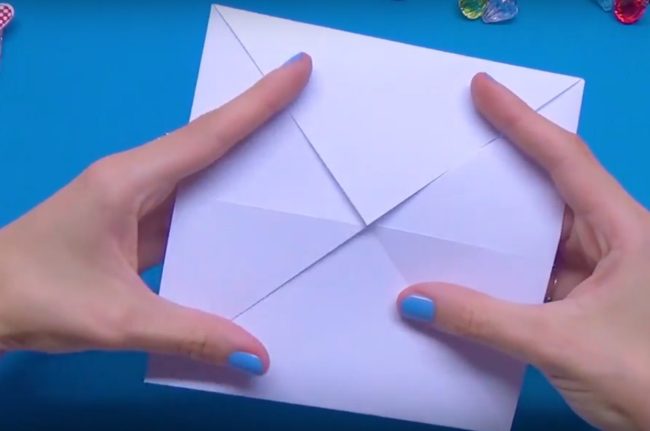
- The resulting small square is folded in half in the same way inside along the previously planned fold. As a result, a double -sided basis of the future envelope is formed.
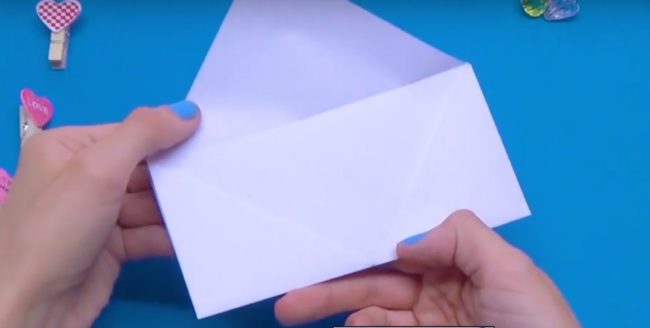
- The sides of the basics are fastened with glue.
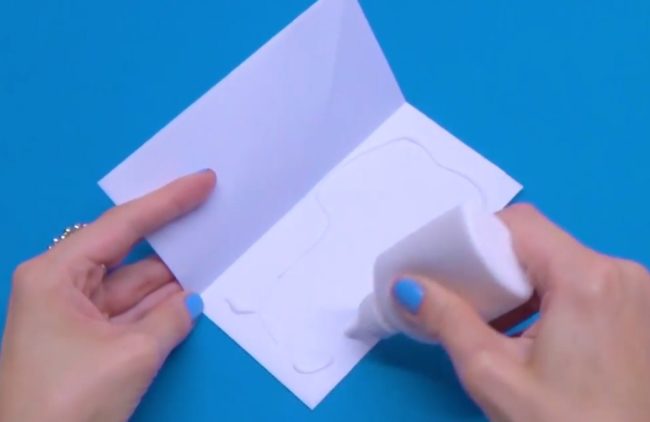
- On the wrong side of designer paper or cardboard in two copies, a rectangle equal in terms of dimensions for the envelope is transferred in dimensions. One part is immediately cut out with scissors, the second - after preliminary breakdown into three triangles by carrying out segments from the center of the lower side of the rectangle to the corners on the opposite side.
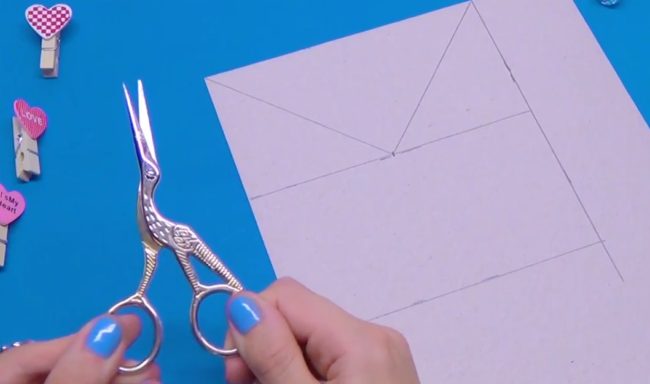
- The ribbon about half a meter long is folded in half. The center of the tape is located on the top valve in the right side of the envelope.
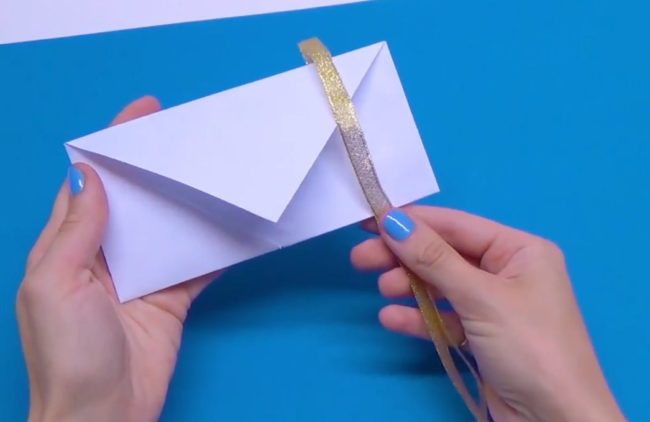
- The back side of the base with a ribbon passing through it along the perimeter is lubricated with glue, a rectangle of designer paper is glued to it.
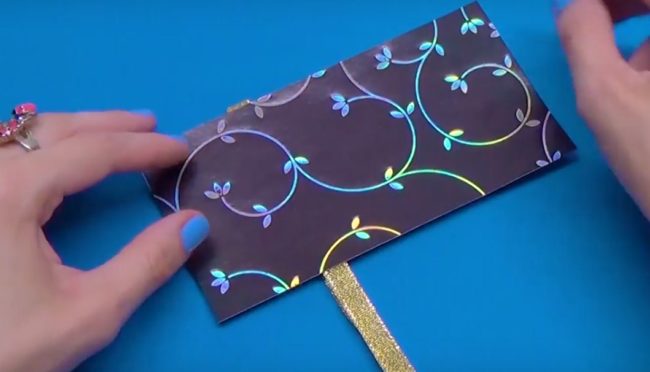
- The workpiece is turning over. The top valve with a tape passing through it is also lubricated with glue. A triangle from designer paper is glued on top.
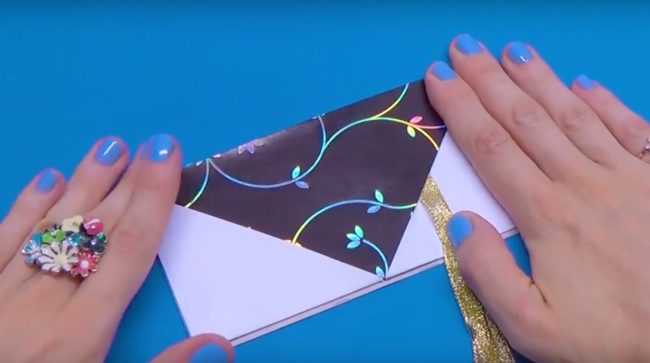
- The side sides of the envelope are also decorated with designer paper. Before gluing, it is recommended to protect the envelope from random gluing parts by placing inside a sheet suitable in size.
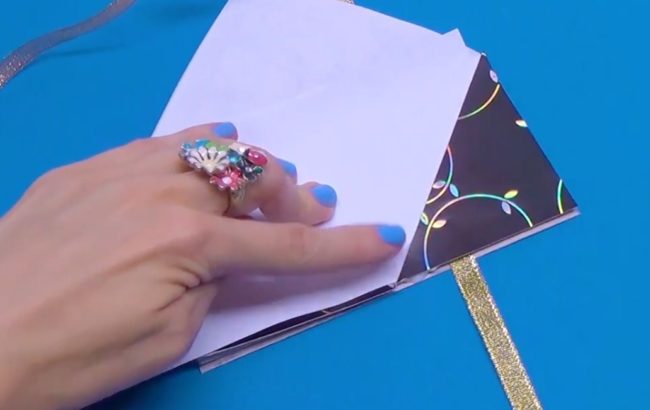
- After drying, an elegant envelope on the ties is ready.
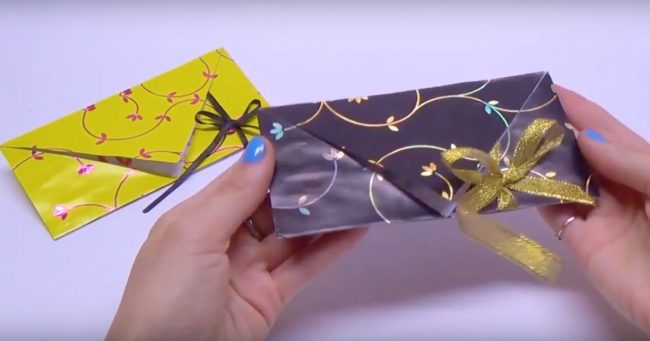
How to make triangular paper envelopes
During the Second World War, the paper was in short supply, it was irrational to spend it on envelopes. The way out was found: a sheet on which the message was written to relatives was so that additional packaging was not required.
It will be required:
- rectangular sheet of paper.
How to make an envelope triangle from paper:
- The sheet is located vertically, takes over the right upper corner and bends inside so that the upper narrow side lay on the left wide side of the rectangle and a two -layer rectangular triangle and a single -layer rectangular residue are formed.
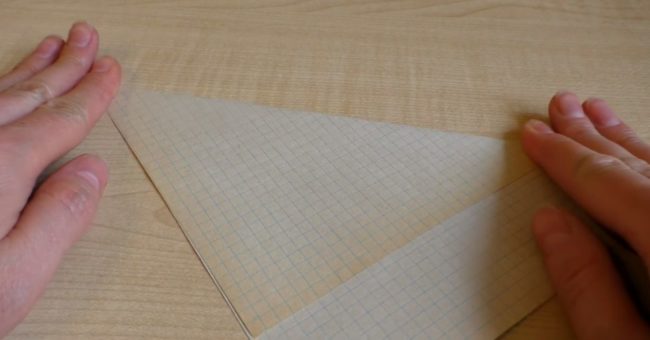
- The triangle is folded so that its upper sharp angle lay on the lower sharp angle. It will turn out an isosceles triangle.
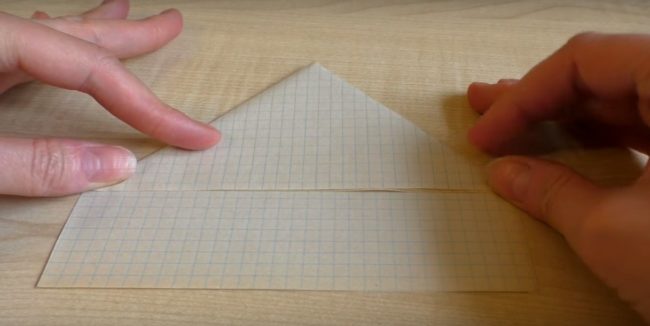
- By bending the rectangular residue, the bend is worked out at the base of the isosceles triangle.

- The angles of the rectangular residue are bent inside to the base of the isosceles triangle.
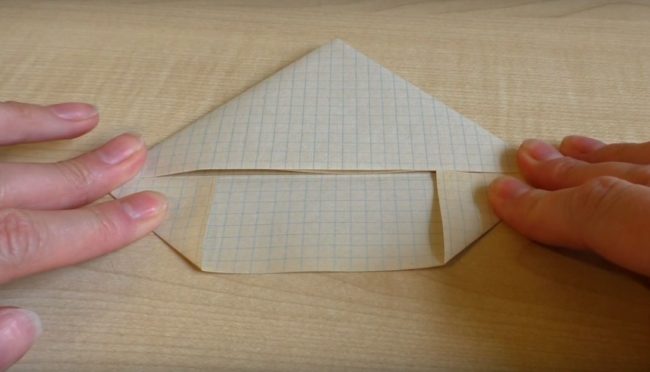
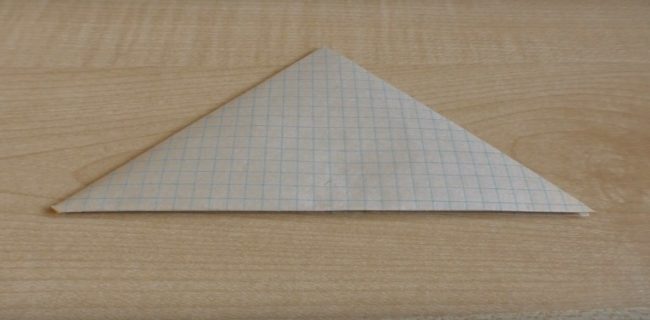
- The trapezoid is invested in the upper isosceles triangle.

- The envelope is ready.
Beautiful paper in the shape of a square
These simple and unusually looking envelopes can be used both for postcards and giving money. Small envelopes from paper of such a plan look especially nice, a small jewelry can be presented in them.
You will need:
- paper. For this envelope you can use up to 4 different colors;
- scissors;
- glue;
- glue brush;
- circular or something round for the template.
How to make a square paper envelope:
- On paper, 4 circles of the same size are drawn using a circul or template.
- Elements of the envelope are carefully cut.
- Each circle is folded in half, the resulting bends are well worked out.
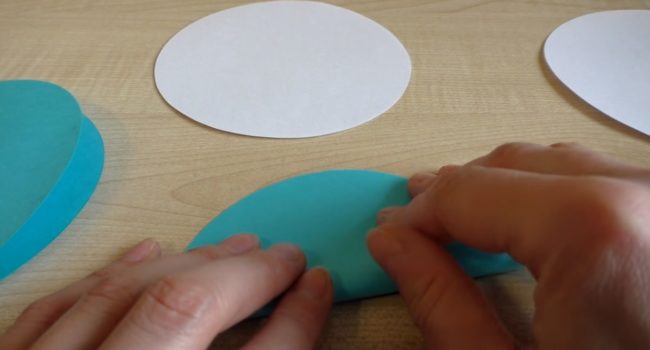
- The semicircles are inserted into each other so that their chords form a square, and each subsequent semicircle is applied to the right part of the previous semicircle.
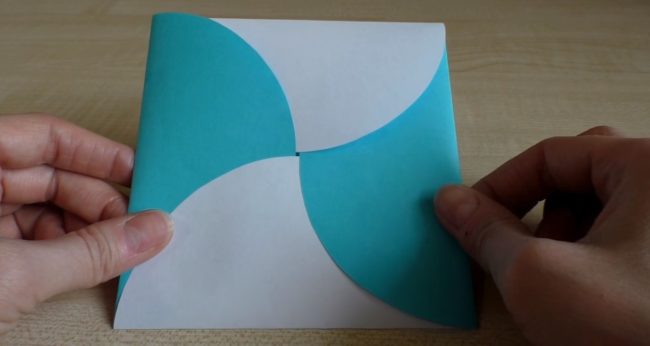
- The resulting figure on the one hand is smeared with glue in the places where the semicircles are overwhelmed.
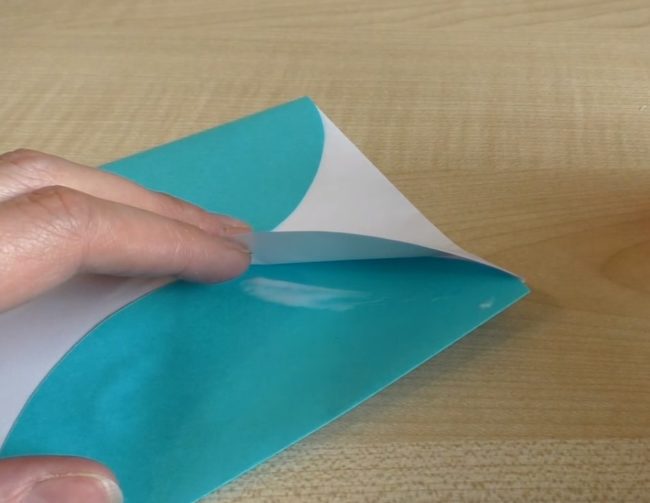
- After drying, the envelope is ready.
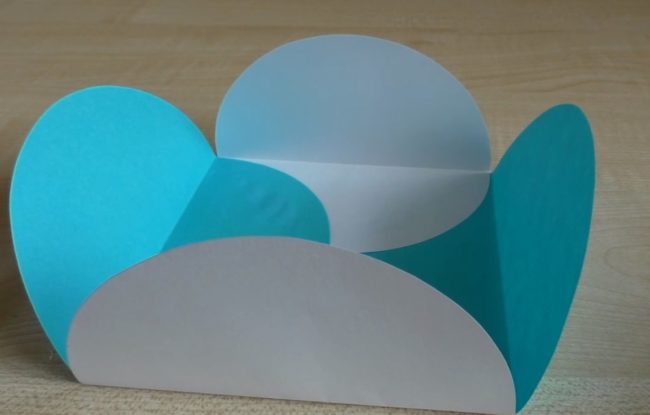
To simplify the creation of paper envelopes, templates are used. The envelope of this plan is obtained by transferring to paper, cutting, elaborating the bends of the bends below the template.

How to make origami paper envelope
When creating products in the technique of origami, more importantly, accuracy and thorough development of the fold lines are important.
It will be required:
- square sheet of paper.
How to fold the Origami envelope from paper:
- A sheet of paper is folded in half with the back side, afterwards and is located and is located the back of the side.
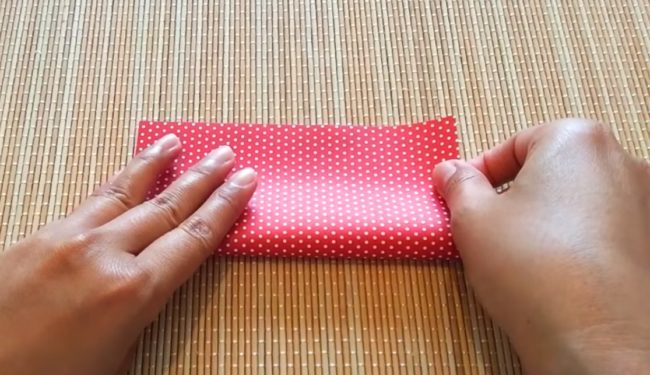
The fold line should divide the square into two horizontally oriented rectangles.
- The lower rectangle is folded in half with the back side, after the figure it unfolds.

It turns out two even smaller rectangles.
- The resulting lower rectangle is also folded in half with the back side. You do not need to unfold the figure.

- Next, a rectangle with the lower side obtained in the previous step and the upper side in the form of a dividing square into two equal parts of the fold line is folded in half with the back side.
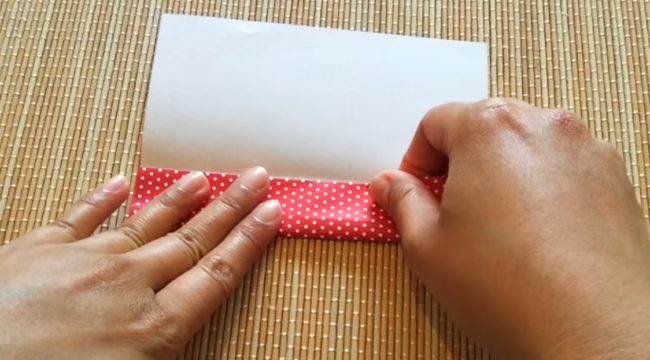
- The resulting figure is folded to study the next fold line with the back side inward almost in half: the remainder should be approximately 1 centimeter in width.
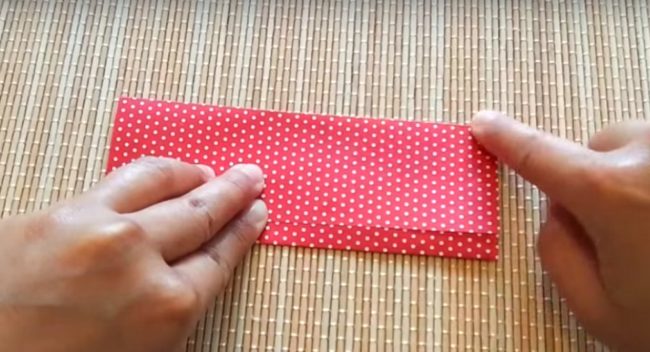
- Next, you need to work with a colored rectangle: its lower edges are bent up so that it turns out an isosceles trapezoid.

- The sides of the parts should be bent inside. The fold line should pass along the legs of isosceles triangles, which are on the sides of the trapezoid.

- The upper corners of the parts are bent to the center so that it turns out an isosceles triangle. He will play the role of a closing valve.
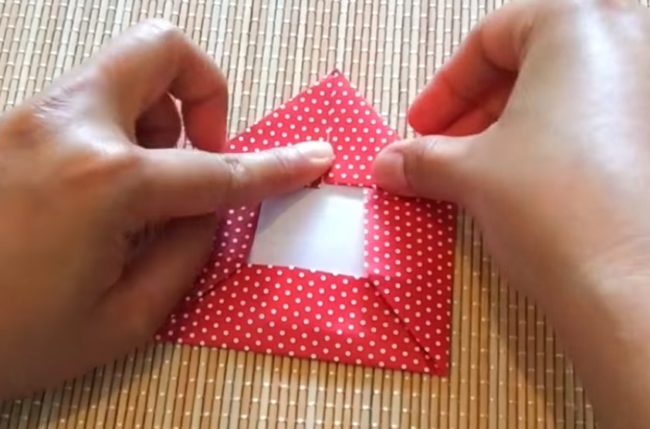
- The product is ready, it remains only to season the tip of the valve inside the envelope.
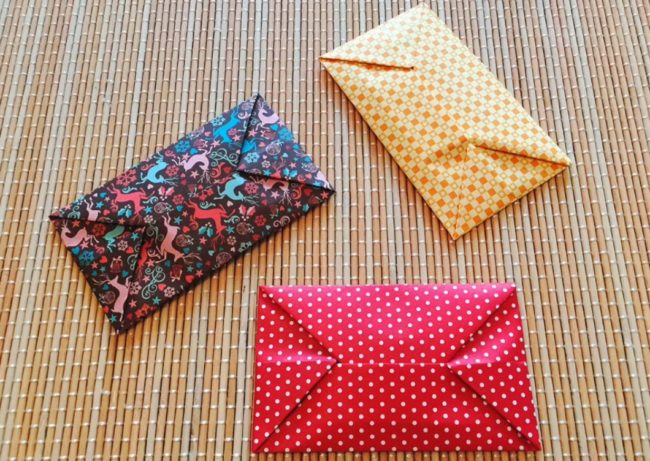
Read more about how to make origami a paper envelope in a video, which is published below.
How to make an envelope for money from paper or cardboard
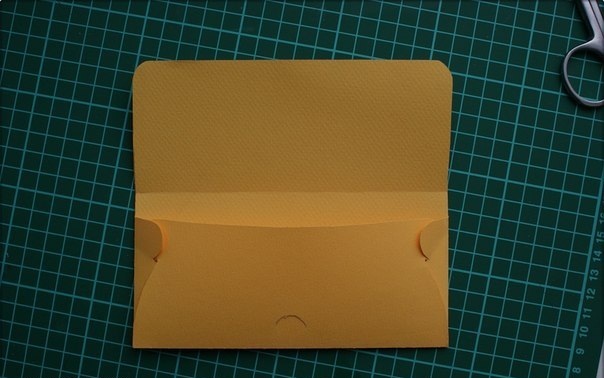
The classic type of money is easy to make using a template.
Required:
- paper or cardboard;
- printed template;
- scissors/Chancellery knife and mate for cutting.
Production of a cash envelope from paper:
- Print a template, carefully cut and transfer the part to paper or cardboard. If there is no printer in the reach, then the picture is transferred to the paper “by eye”.

- Work out the bends that form a rectangle from dashed lines in the figure. Cut off the arc drawn by a dotted line with a clerical knife.
- Collect the envelope by bending inside the side valves, the lower part of the figure and their fixation among themselves.
How to make a monetary envelope from A4 paper
Required:
- sheet of paper;
- glue for mocking the closing valve.
Production of a cash envelope from paper instructions, photo:
- A sheet of paper is folded horizontally in half, unfolds, folds vertically in half and unfolds again.
- Liszt orientation is album. The upper corners are folded so that the rectangular isosceles triangles are obtained, the cuttings of which lie on the same straight line with the central horizontal line of the fold.
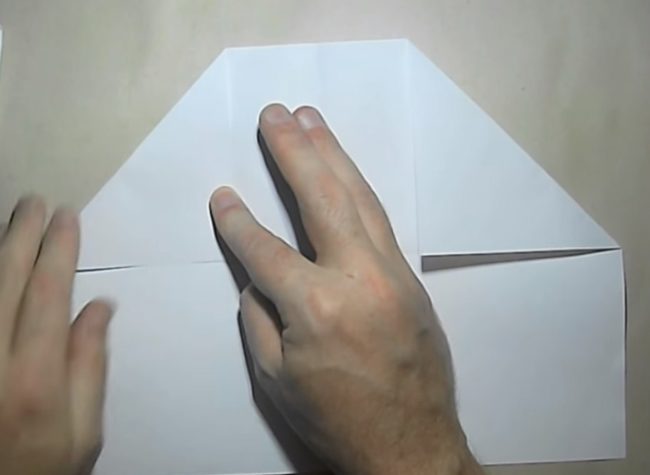
- The side sides of the figures are wrapped in the central vertical line of the fold.
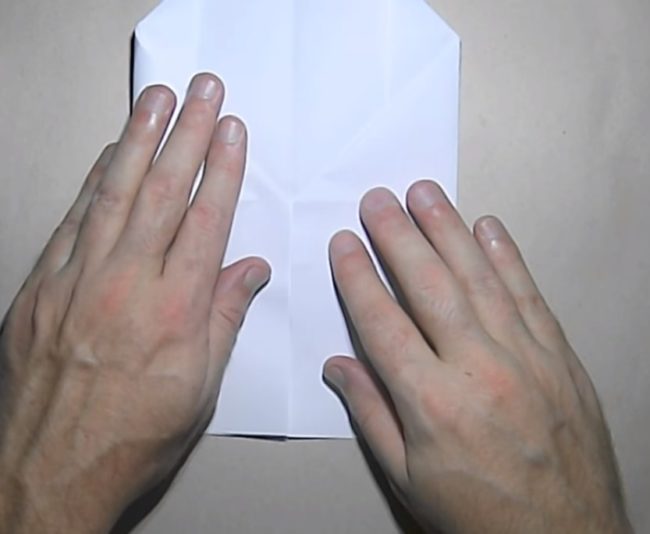
- The tops of the sharp corners of the obtained trapezes are connected by an imaginary segment. This will be a fold line along which the upper part of the workpiece bends inward.
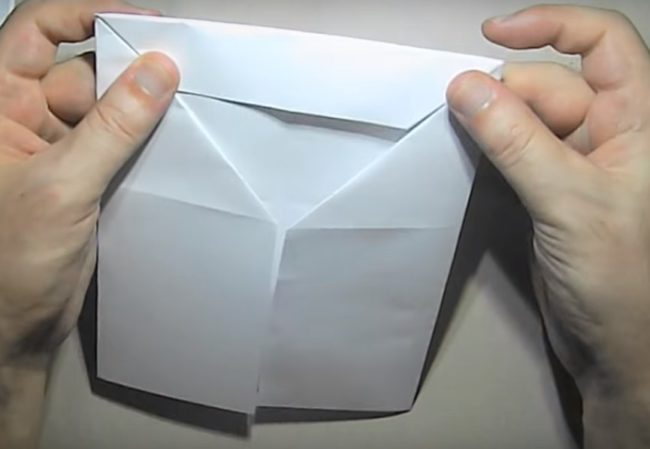
- The next bend inside is carried out in a straight line dividing the trapezoid into a triangle and a rectangle.

- The protruding edge of a larger rectangle is wrapped on a smaller rectangle.
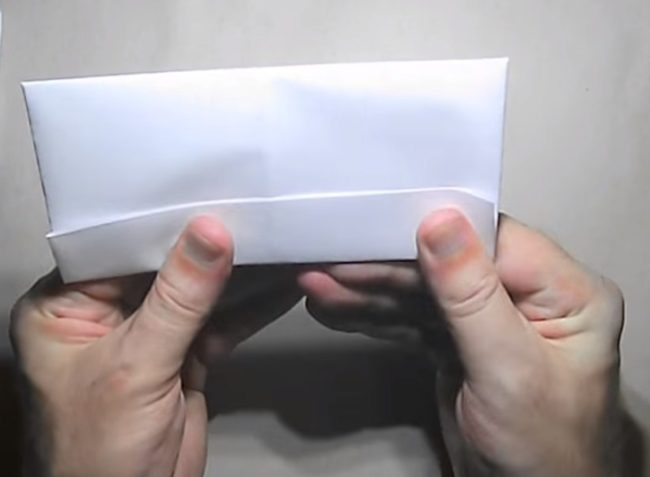
- The figure unfolds to the type described in paragraph 3 and folds the back side inward.
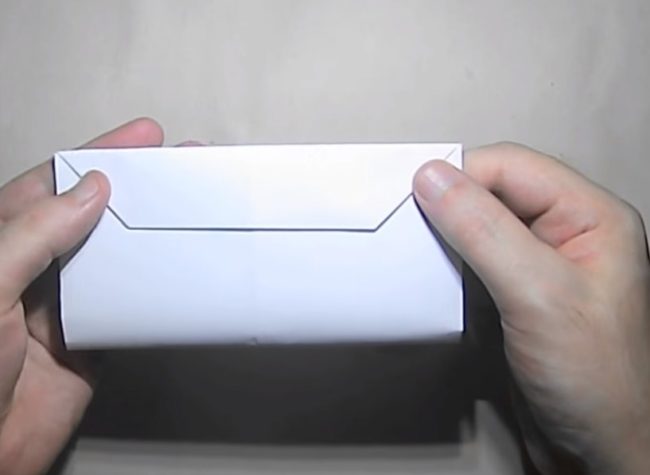
- A small rectangle formed by the fold line in the lower part of the part is refueled into the envelope.


- The closing valve bends. The product is ready.
How to make an unusual envelope for money from paper or cardboard
You can present money in any of the above types of envelopes. But this envelope penetration is designed specifically for non-trivial donation of banknotes.
Required:
- thick paper or cardboard;
- tape 2–2.5 cm wide, best satin;
- chancellery and dining knives;
- mat for cutting;
- simple pencil;
- a ruler, better metal;
- scissors.
How to make an envelope of paper/cardboard:
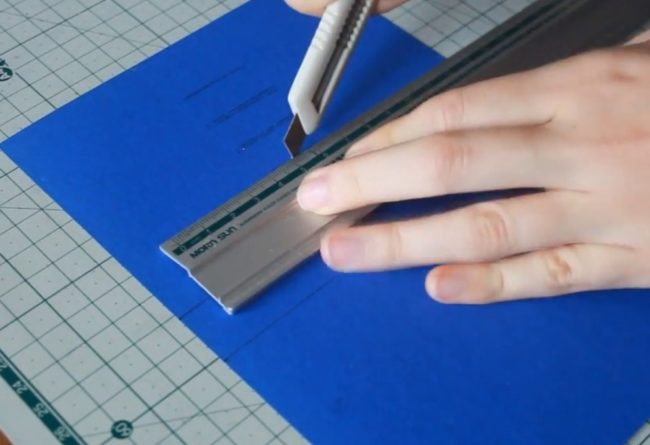
- On the inside of the horizontally oriented sheet of cardboard or A5 paper, marking is carried out. Using parallel lines equivalent from the side edges, a plot of two centimeters wide (the future “spine” of the convert penis) is noted.
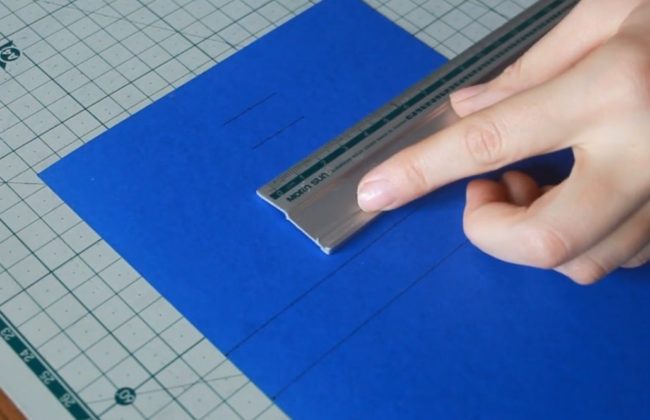
- For better flexion, the lines are worked out under the line of a dining knife with a “spine”.
- In the center of the right side of the workpiece, 4 vertical lines 3 centimeters long are cut out at the equivalent distance. At a distance of several millimeters near the second and third cuts, two more slots of the same length are made.
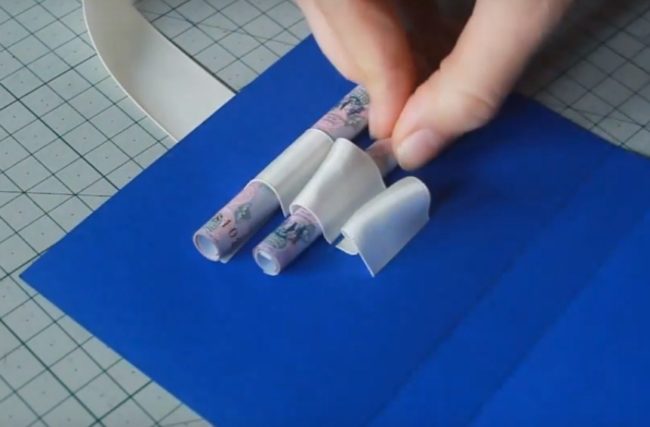
- The tape is threaded into the holes. Decoration begins with the opening closest to the edge. Direction of the tape: from the front side to the internal.
- In the loops formed on the inside of the product, the bills folded into a tube are inserted.
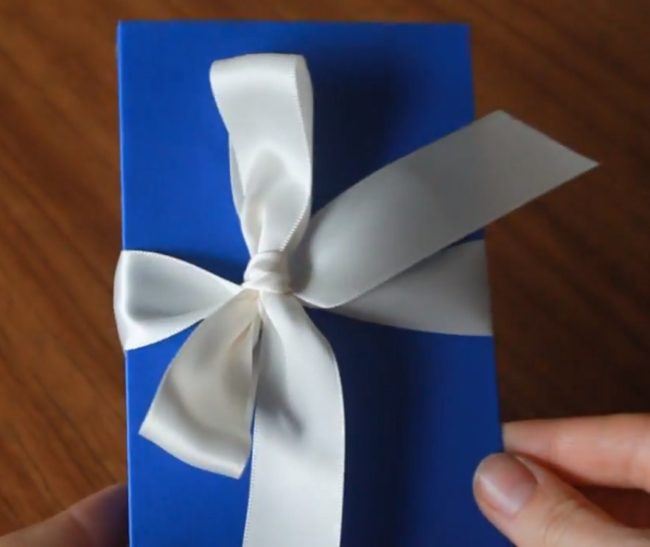
- The envelope penet is closed, the ends of the tape are tied to a beautiful bow. The product is ready.
Conclusion
It is amazing what interesting envelopes are created from a sheet of paper. But this article describes only part of the varieties of envelopes. This item can take the most bizarre forms, you just have to show imagination.




Comments
a couple of years ago, there was no side of metrogils from the same problem, there were no side effects ...
I’m not a fan of peeling at all, it saves from acne of metrogil, it also smoothes it ...
Great article! ...
I take the second course of the Capsules Climafite 911. The tides went very quickly. It became calmer, irritability went away and I sleep well ...
i also noticed - it is worth nervous, everything immediately affects the face. Therefore, I try to avoid conflicts and unpleasant people. Of the creams, I like Miaflow from wrinkles - smoothes not only small wrinkles ...