

Tiles on the floor is a durable and aesthetically looking coating, which is easy to care for and abrasion. All the advantages of flooring tiles will maintain proper styling. It is not necessary to turn to the services of professionals, you can try to make the floor cladding with your own hands with your own hands - this will save significantly, in addition, laying tiles is a fascinating creative process.
Content
Laying tiles on the floor: methods
There are several basic ways of laying tiles on the floor:
- traditional (basic) - implies the location of the tile in parallel to walls and even rows. This method is most convenient for laying square or rectangular ceramic seamless tiles, and does not require professional training. For a visual increase in area, choose large tiles without a pattern. If you think that the monophonic version may look slightly monotonous to give the cladding a bright and contrasting appearance, you can choose a multi -colored tile (make a frame of darker tiles and place a lighter one, or create an orderly or chaotic pattern). For high -quality cladding, a thorough alignment of the base, rows of laying and compliance with the thickness of the seams will be required;
- diagonal is a rather complicated option for laying tiles on the floor, it is advisable to have basic cladding skills for its implementation. Typically, with diagonal cladding, the tile pattern is located at an angle of 45 ° C relative to the walls of the room, for such a styling, a square tile, plain or with a pattern, is suitable. For such laying the floor tiles with your own hands, it is important to properly apply the exact preliminary marking to the floor, as well as cut the material (this method involves the mandatory cutting of the tiles - respectively, the costs of material and time increase). Such cladding is successfully used as a non -standard flooring coating. Diagonal laying of tiles to the floor will help visually align small irregularities of the floor surface, as well as visually expand small -sized rooms;
- chess - is carried out on the basis of a traditional or diagonal styling method. In this case, the lines of contrasting tiles or the material of different shades are located perpendicular to each other to create the effect of a chessboard;
- “Routes” - performed with a displacement of seams, visually resembles a brickwork. The most suitable for such a cladding is a rectangular tile, you can also use a square one. The floor tile coating laid down “scoring” will help to hide minor defects, visually align the surface of the floor, give the room a historical note and will avoid monotony of facing;
- “Routing” at an angle of 45 ° C - this method of laying tiles on the floor is quite time -consuming, it requires a perfectly even perimeter and corners of the room. The presence of surface errors this method of facing will only emphasize;
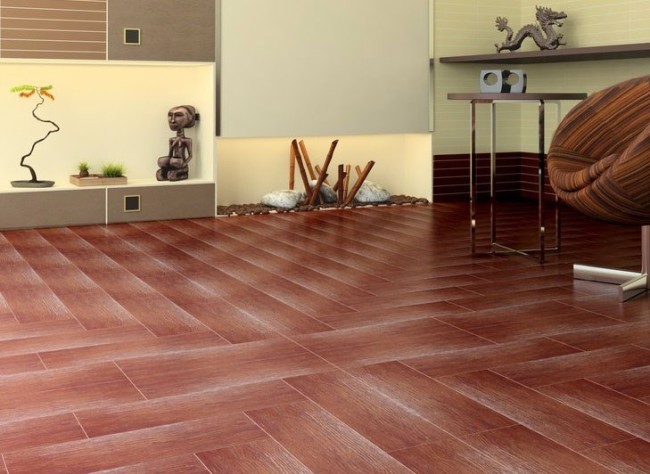
- “In the Christmas tree” - such a lining with a rectangular tile imitates parquet. “Christmas trees” can be placed diagonally or parallel to the walls. When choosing the material, keep in mind that narrow tiles visually expands the space, and the wide reduces and makes the room more comfortable. For styling, you can use both monophonic material and multi -colored several tones, mosaic inserts from small tiles (the so -called lining with a “Christmas tree with an application”);
- kaleidoscope - a pattern laid out of small tiles and several colors;
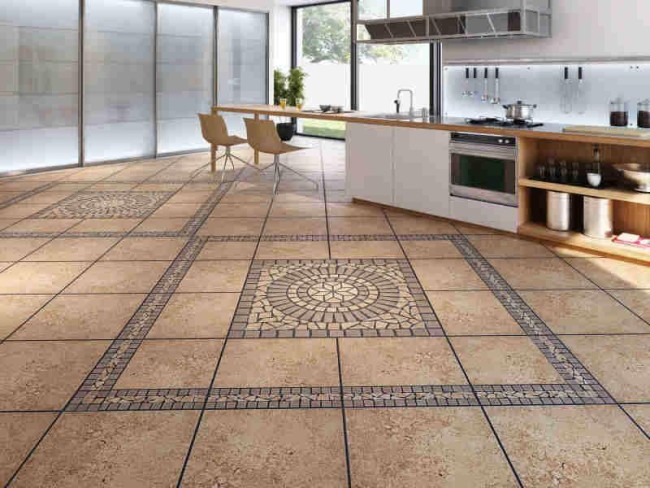
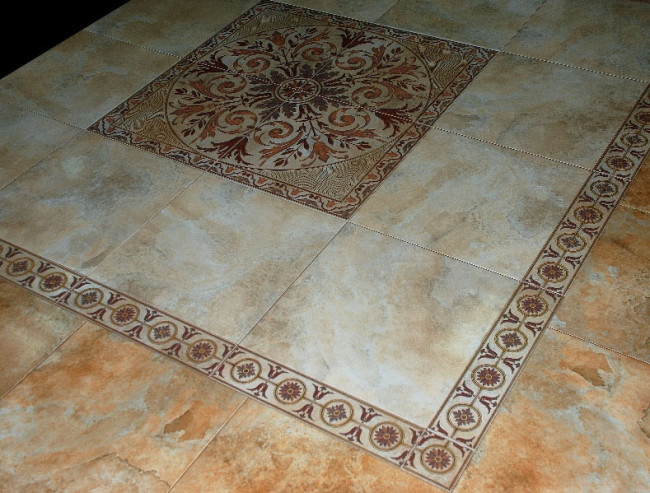
- carpet - in a darker frame, a bright middle part with patterns;
- using "sockets" - on a traditional or traditional corner coating of a square -shaped tile in a well -visible place, a prefabricated pattern of several tiles is laid out (such flooring elements can be purchased in the form of ready -made sets);
- combined - combining tiles of various shapes, as well as various ways of facing, you can divide the room into various functional zones. The modular way of laying involves the use of tiles of multiple of each other size. Many collections of tiles of various shapes and configurations are presented on sale.


There are many options for laying tiles to the floor - for example, you can lay tiles of different shapes in a traditional way or lay alternately using the basic method and at an angle. Successful is the technology for laying tiles on the floor, combining the lining of the Christmas tree and the basic styling with squares. For a “carpet” from tiles, you can make a framing of multi -format tiles. If you lay a large tile with a displacement equal to the length of the edge of the tile of a small size with the base method, and fill the free space with fine tiles, and choose contrasting colors, the flooring will look bright and spectacular.
Laying tiles on the floor: preparatory work
Having read the instructions for laying tiles on the floor, a spectacular and durable coating of tiles can be made with your own hands. After preliminary preparation in such a task, it is quite possible to cope without the help of specialists, while significantly saving on the cost of laying tiles on the floor.

Laying tiles on the floor: choice of material
The following materials are used for floor cladding:
- ceramic tiles - it is made of natural material (clay) by high -temperature firing. Traditionally, the laying of ceramic tiles on the kitchen floor is performed, since this material is characterized by resistance to abrasion and mechanical damage, ease of care and durability. Laying of ceramic tiles on the floor is also successfully used for facing hallways. Since this material is moisture resistant, it is widely used for laying floor tiles in the bathroom;
- tile - differs from ceramics by the presence of a layer of special glaze, giving gloss, high hygiene, strength and resistance to aggressive detergents. For rooms with high humidity regime (for example, bathrooms), tiles on the floor are used. Tiles are much more expensive material compared to ceramic tiles;
- porcelain tiles - is made of natural material, thanks to the technology of manufacturing in its technical characteristics of strength and wear resistance significantly exceeds ceramic tiles and resembles the properties of natural stone. Porcelain stoneware is moisture and frost resistant, resistance to aggressive chemical influences, and high strength. The laying of porcelain tiles on the floor can be done in rooms with high humidity, as well as in high -cost places, because Resistant to abrasion. The disadvantages of the flooring of porcelain tile include the fact that this material is cold to the touch (which is easily compensated by laying the tiles on the warm floor), as well as its slippery surface enough;
- pVC tiles - combines the flexibility of linoleum with aesthetic type of laminated parquet and durability of porcelain stoneware. Such material is adapted for residential conditions, although it contains a certain amount of formaldehyde resins. This flooring is universal, you can lay PVC tiles on any floor, including warm floors.
When choosing, pay attention to the type of tile (the floor is characterized by increased and thickness and strength compared to wall), the operational characteristics of a particular material. For laying flooring in the bathroom, material with a low degree of abrasion, resistant to moisture and chemical influences is suitable. For the kitchen, it is recommended that tiles of the third grade of abrasion, pay attention to its surface - it will be much more difficult to clean the embossed or high -porous coating from kitchen pollution. For the hallway, tiles of the fourth class of wear resistance are preferred.
Before the visit to the store, calculate the surface area, draw a tile placement scheme, taking into account the seams to determine the estimated amount of tile material. Keep in mind that when cutting tiles, the material consumption increases. It is recommended to make a purchase with some margin (usually within 10-15%)-in case of damage to the material or subsequent minor repairs.

Laying tiles on the floor: the necessary materials and tools
After acquiring the necessary material, you can proceed to prepare the basic surface and directly to laying tiles on the floor.
When laying tile flooring, the next inventory and materials will be needed:
- ceramic tiles;
- roulette;
- maular cord;
- marker;
- construction level;
- protective gloves;
- primer fluid for the floor;
- rubber spatula;
- rubber hammer;
- glue for tiles;
- tozda trowel (Kelma);
- moisture -resistant suture grout with antifungal additives;
- crossings for tiles;
- bell with discs for tiles;
- sponges, fabric napkins;
- bucket.
Laying tiles on the floor: preparation of the base and marking
Before performing work on laying floor tiles, it is necessary to dismantle the old coating, clean the surface of dust and debris, align thoroughly with a screed and primed the surface. With proper preparation of the base, it is possible to minimize the use of adhesive composition, while the price of laying tiles on the floor decreases significantly, and also subsequently increases the durability of the flooring. Previously, it is necessary to perform the floor screed with a wet or dry way, it is more convenient to lay the tile on the concrete base, i.e. On the so -called wet screed.

If it is planned to lay the tiles on the wooden floor, it is necessary to carefully strengthen the boards by dry alignment with the subsequent flooring of a layer of moisture -resistant plywood or wood -based plates - or perform a screed a few centimeters thick, and then treat the surface with a primer mixture. To waterproof the floor of the bathroom or bathroom, three or four layers of special mastic are sequentially applied to the prepared surface (each layer of 1-2 mm thick).
Apply preliminary marking to the floor, drawing control lines. For alignment, use the construction level. You can use a painting cord to designate parallel lines with its help. With a diagonal layout or laying of the pattern, it is necessary to determine the center of the room - at the intersection of the lines of the lines stretched between the opposite angles of the painting cord. Lay the tile on the floor to plan its location. Determine the necessary width of the seams.

In the traditional method, it is recommended to start laying tiles on the floor from the far corner of the room. If necessary, the location of the tiles laid first is shifted in such a way that a whole fragment is located near the entrance without the need to cut the tiles.
Laying tiles on the floor: Technology
The sequence of work in stages:
- immediately before laying, it is necessary to prepare the adhesive mixture according to the manufacturer's instructions. Mixing is carried out in two doses with a 10-minute interval;
- we apply a layer of glue on a small side of the surface with the flat side of the spatula, we draw along it using a gear cell to obtain uniform strips of adhesive solution, which can improve the adhesion of the tiles with the floor surface;
- having twisted a slightly right and right, we fix the tile plate according to the marking, also aligning its vertical location using the level-and slightly tap the front surface with a rubber hammer or a kiyanka handle for better adhesion;
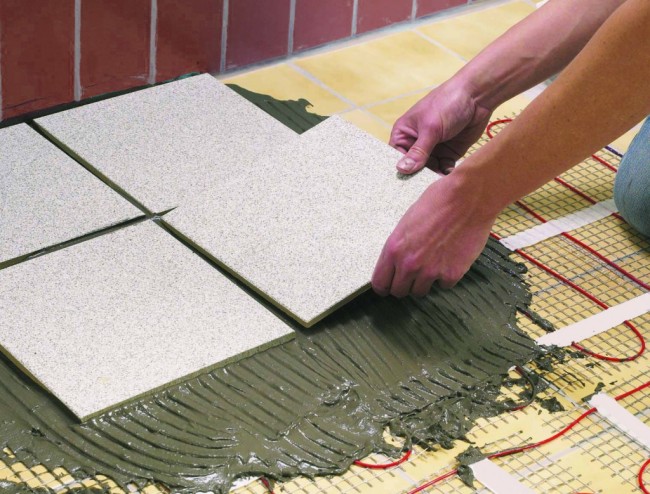
- we lay the following elements according to the marking. To form even technological gaps of the seams between individual tiles, we insert plastic crosses. Subsequently, as the adhesive composition hardened, the crosses are removed. Along the perimeter of the room, it is necessary to leave a gap of 1 cm with the installation of small wooden wedges;
- cut the elements of the desired shape with a grinder with a diamond disk. At the junction with the pipeline, an oval hole is cut out in the tile, after making a template of the desired shape of cardboard in full size;


- we leave the laid tile for drying for 12 hours, after which we remove the crosses and wooden wedges. The holes around the perimeter of the room are filled with rubber or polystyrene foam and a skirting board is installed. The seams must be treated with a rubber spatula using a special grout. After 30 minutes, you need to remove the excess grouting with a sponge or a wet fabric cloth. It is recommended to treat the seams with silicone sealant at the end of the cladding.
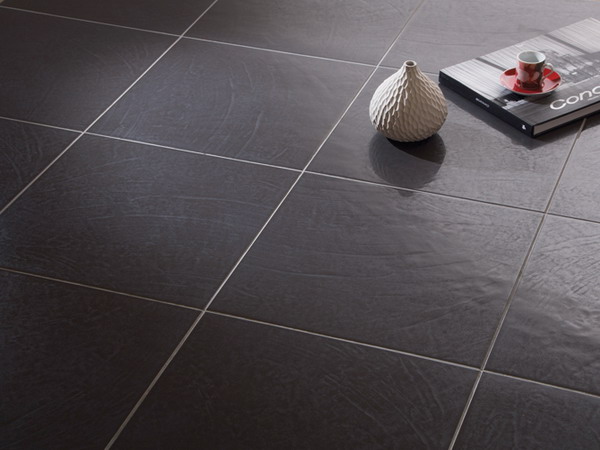
Laying tiles on the floor - photo


Comments
a couple of years ago, there was no side of metrogils from the same problem, there were no side effects ...
I’m not a fan of peeling at all, it saves from acne of metrogil, it also smoothes it ...
Great article! ...
I take the second course of the Capsules Climafite 911. The tides went very quickly. It became calmer, irritability went away and I sleep well ...
i also noticed - it is worth nervous, everything immediately affects the face. Therefore, I try to avoid conflicts and unpleasant people. Of the creams, I like Miaflow from wrinkles - smoothes not only small wrinkles ...