

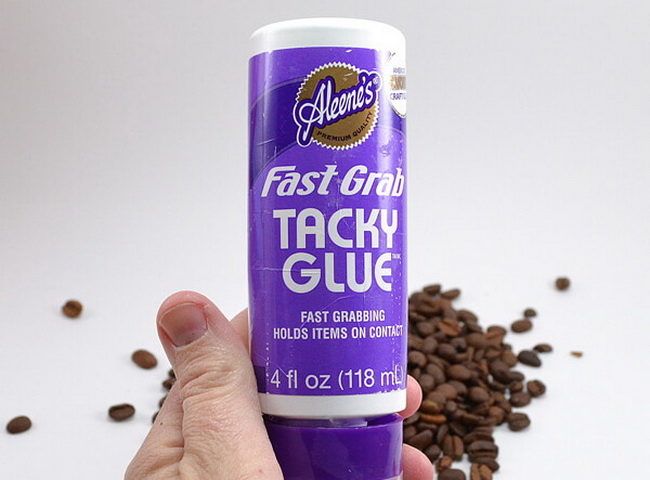
One of the simple materials used for decor is coffee grains. In a fried form, they give the craft an original texture and a unique aroma. Even a beginner can master the art of decoration with the help of such an element. After all, in addition to coffee, you will need only glue.
Content
- Crafts from coffee beans. How to decorate a candle with coffee beams
- Crafts from coffee beans. Swarf and coffee beam candle
- Crafts from coffee beans. How to make a magnet in the form of a heart from coffee grains
- Crafts from coffee beans. How to make a dog from coffee beans
- Crafts from coffee beans. How to make a "tree of happiness" from coffee beans
- Crafts from coffee beans. How to make a coffee tree for the New Year
- Crafts from coffee beans. How to make a hedgehog from coffee beans
- Crafts from coffee beans. How to decorate a cup with a saucer coffee beams
- Children's crafts from coffee beans
- About how to make crafts watch the video
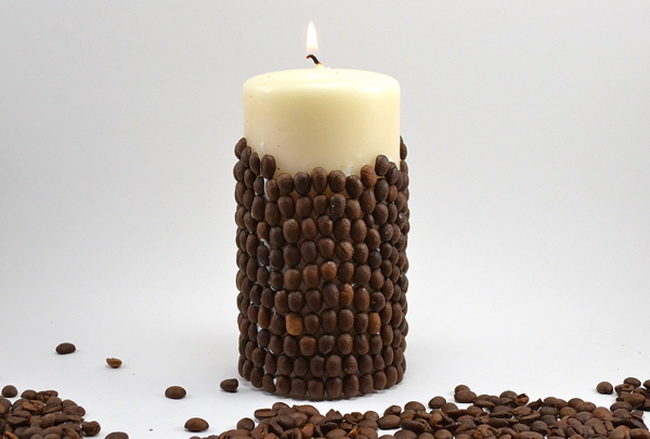
Crafts from coffee beans. How to decorate a candle with coffee beams
For those who have never tried to make crafts from coffee beans, masters are advised to try from the simplest compositions. For example, decorate a candle with coffee beans. Only in this case, keep in mind that from heat coffee will radiate its aroma, so it should be combined with aromatic oils at the candle.
- To create this craft, it is best to use adhesive for decoupage, as it will melt from heat with wax. While the remains of a super-cell can burn and secrete harmful pairs.
- The choice of coffee beans is not important. The main thing is that they are fried and without damage. Therefore, you can buy a cheap version of the product.
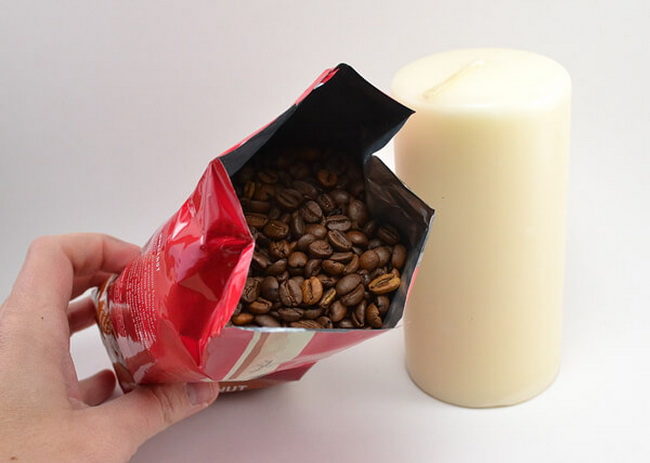
- Using the brush, apply glue to the candle. Take the most beautiful grains and glue them with the flat side to the wax. Work quickly, as the candle melts from the touch of your hands, and the grains can slide. First, try to glue the material on a small part of the wax from the bottom of the candle.
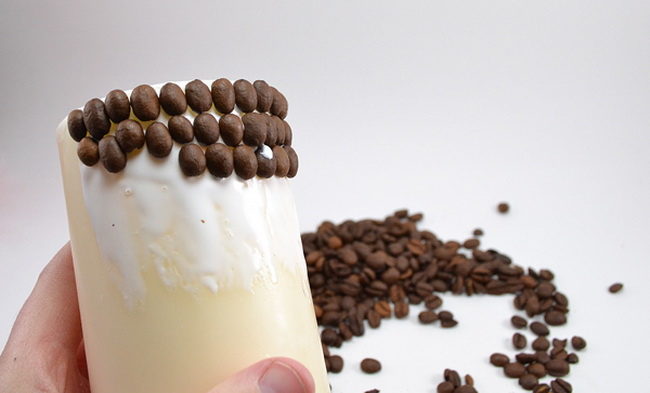
- Put the decor on the table and continue to glue the grains, gradually moving to the top of the candle. After that, leave the candle until the glue dries completely.

- To get an additional aroma of coffee, light a candle, and when the wax begins to melt near the wick, put several grains in it.
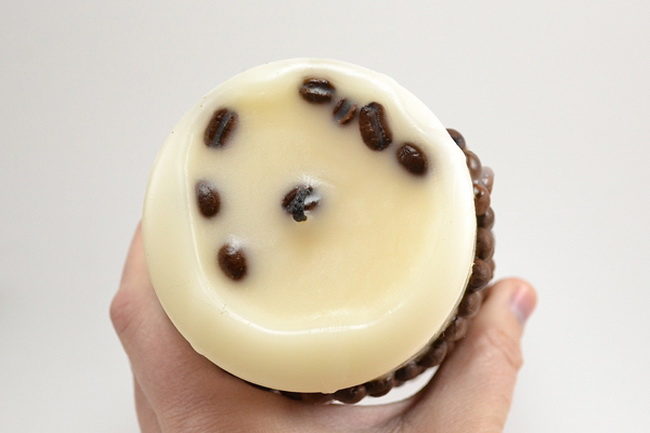
- You can make such a simple candle for a gift or use instead of a flavor.
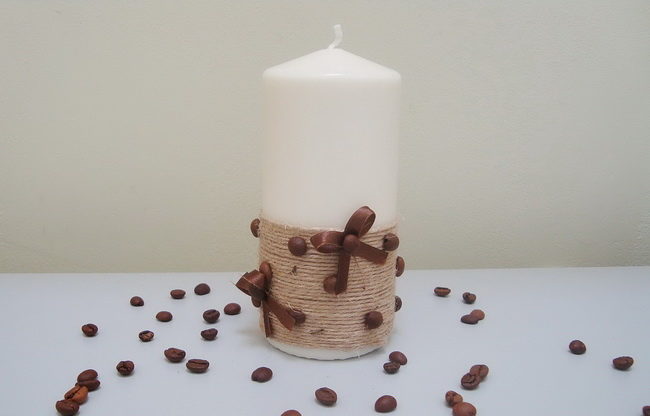
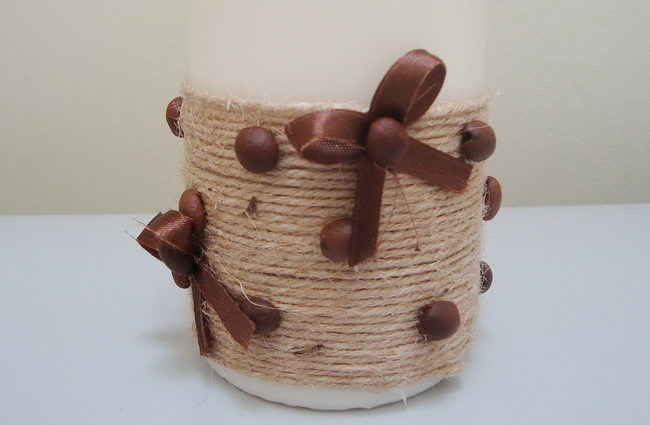
Crafts from coffee beans. Swarf and coffee beam candle
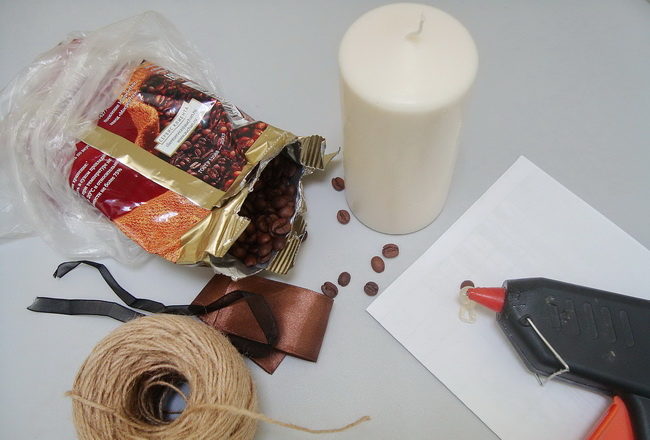
Often crafts using coffee in grains are additionally decorated with twine. These two materials are well combined with each other. They can also decorate the candle for a gift. Additionally, you will need a satin ribbon and an adhesive gun.
- Choose a candle with a flat bottom so that it can stand on a flat surface or in a candlestick. Moreover, the form of the basics for decor is not important. It can be both round and square candle. You can also use helium candles. When choosing a twine, give preference to natural material, since it is necessary to emphasize the naturalness of the craft.
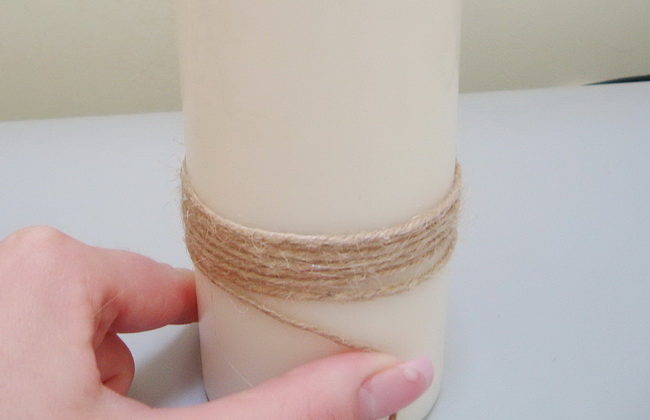
- You can make such a craft of coffee beans yourself if you follow the next master class. Sove the level on the candle where the twine will be located. Start wrap the candle from the upper part of the decor to make the first circle at the same level.
- At the end of the twine, apply glue and immediately fix it on the candle. It is necessary to work quickly, since hot glue freezes quickly. But at the same time, it is easily removed from the surface, so that you can redo the craft if necessary.
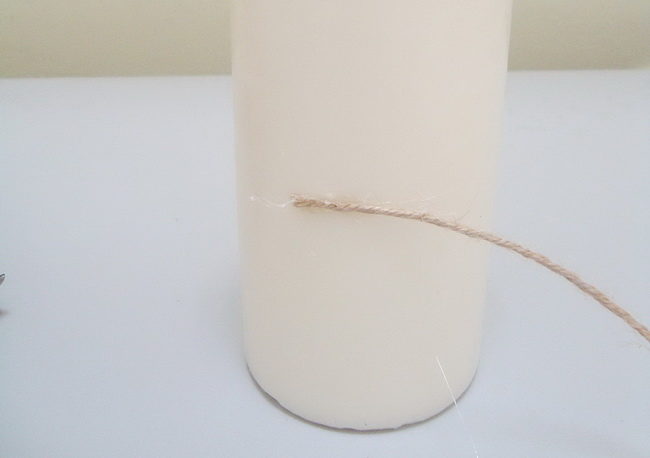
- Continue to wrap the candle with twine. Put each new round of thread as tightly as possible to the previous row. The twine should fit tightly to the wax, so pull it during operation.
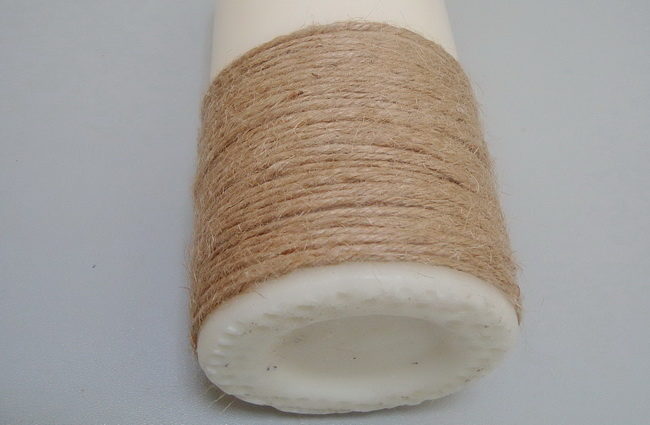
- Wrap the twine in this way to the very bottom of the candle. But at the same time leave 0.5 cm. Free space on the wax so as not to violate the stability of the decor. Glue the bottom row of threads over the entire circle. So she will not crawl while using a candle.
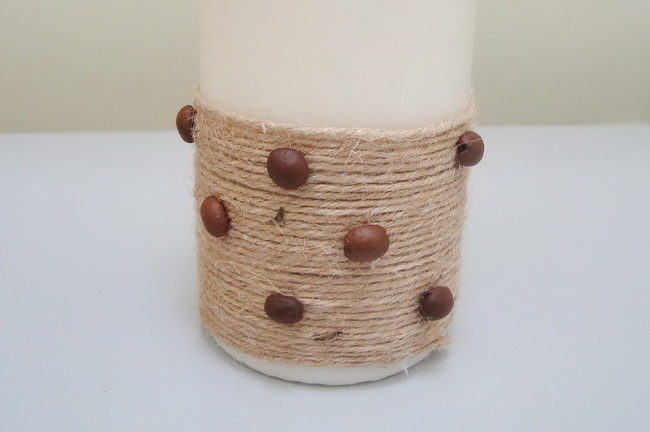
- Decorate the outer part of the decor with coffee beans. Their location can be any: vertical strips or chess order. Glue the coffee by the flat part of the grain.
- Cut the satin tape with stripes of 15-20 cm long. Save the edges so that the threads do not blossom over time. Make a few bows from the tape.
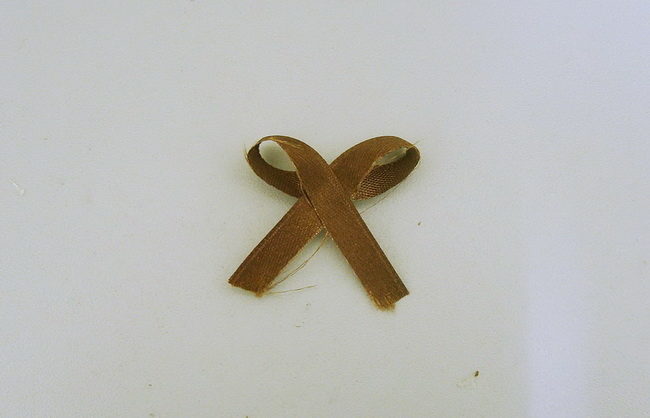
- Glue them onto the twine between coffee beans. To observe the color scheme, select brown tape under the shade of grains. A lighter color will not stand out on the thread.
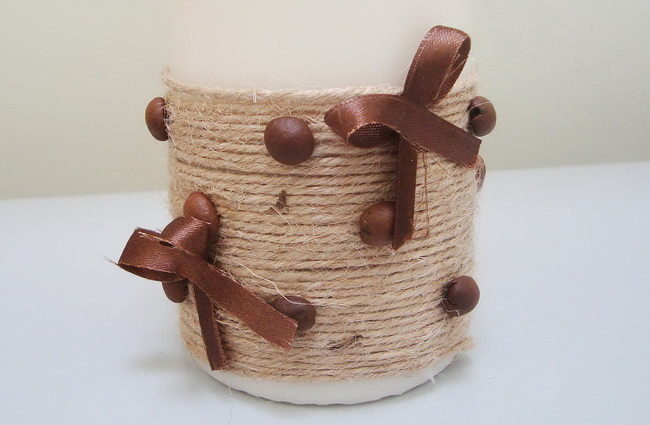
- Make the middle for the bow from coffee, but only choose a rounded grain. The finished candle can be packaged in transparent paper so that the decor is visible.
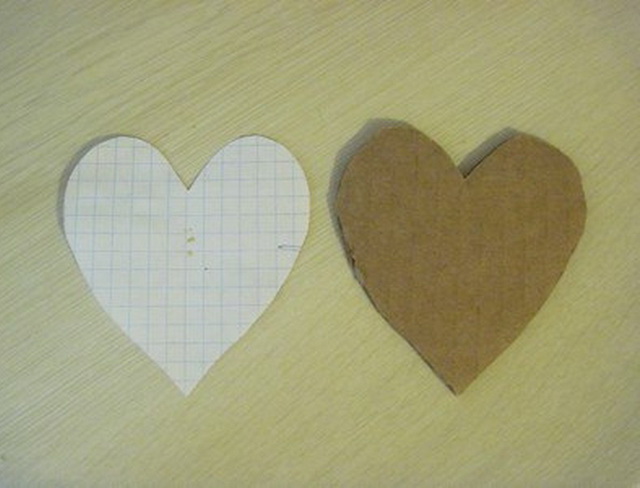
Crafts from coffee beans. How to make a magnet in the form of a heart from coffee grains
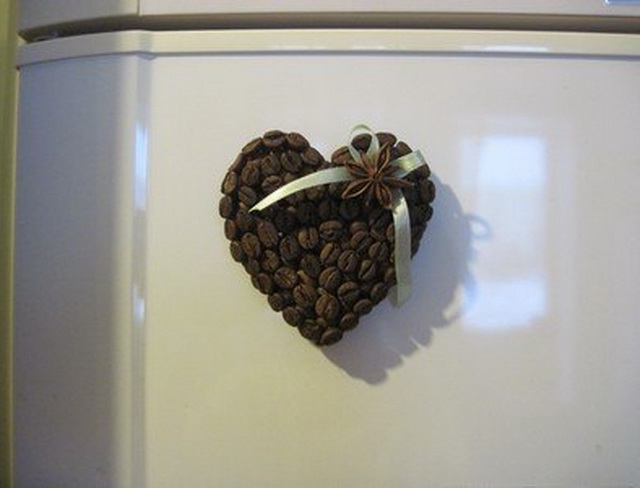
Crafts from coffee beans can be on any topic or timed to the holiday. For example, you can make a heart with your own hands in the form of a magnet. At the same time, you do not need any special skills.
Prepare the following materials:
- coffee grains;
- dense cardboard;
- scissors, adhesive gun;
- magnet harvesting;
- a piece of fabric of any color;
- a brush and decor.
Work instructions:
- On a piece of paper, draw a heart -shaped template, cut it and transfer it to a cardboard. From cardboard, prepare the basis for the magnet.
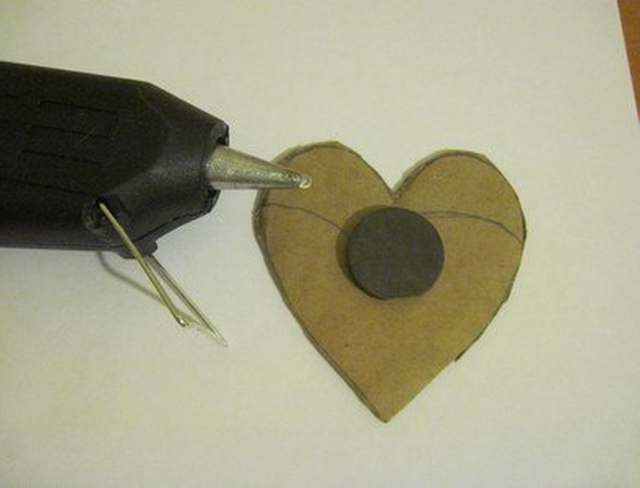
- Glue the magnet on one of the sides. It should not be too big so as not to weight the decor. But at the same time, have the necessary size to hold the heart.
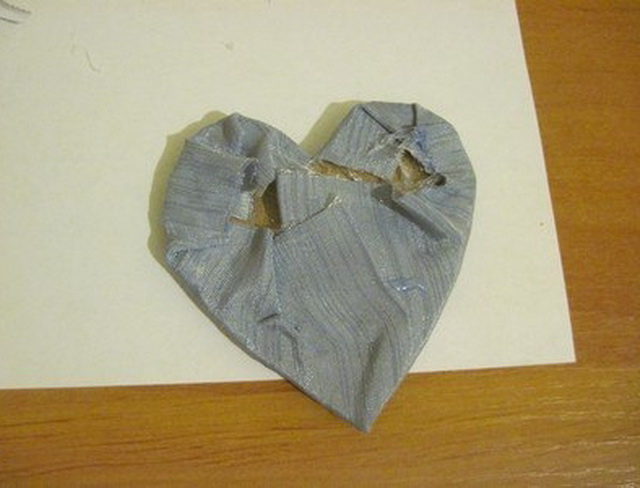
- Cut the square from the fabric and put it on the table with the wrong side to you. Put the workpiece on top of it, with a magnet on the bottom.
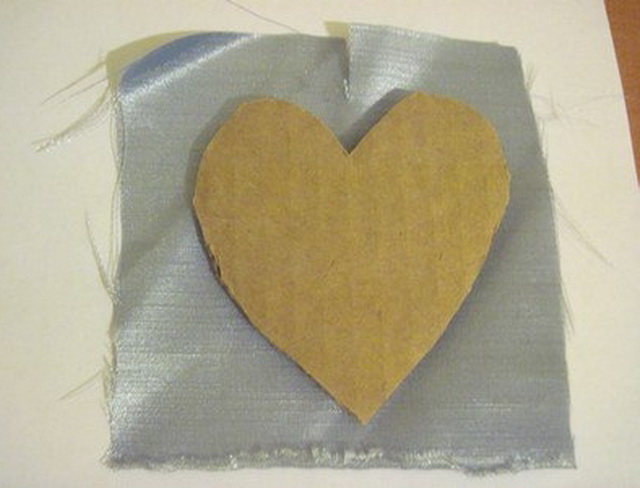
- Bend the edges of the material up and glue it to the cardboard. Try to pull the fabric as much as possible so that it repeats the shape of the heart.
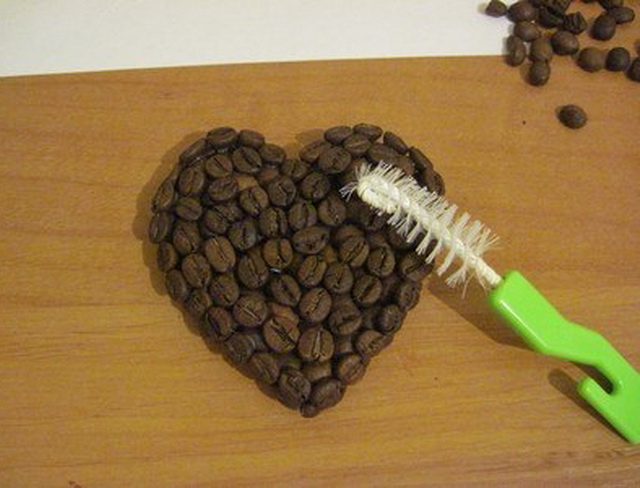
- Glue coffee grains on top of the material with a flat side to the cardboard. Wait until the glue is completely dry.
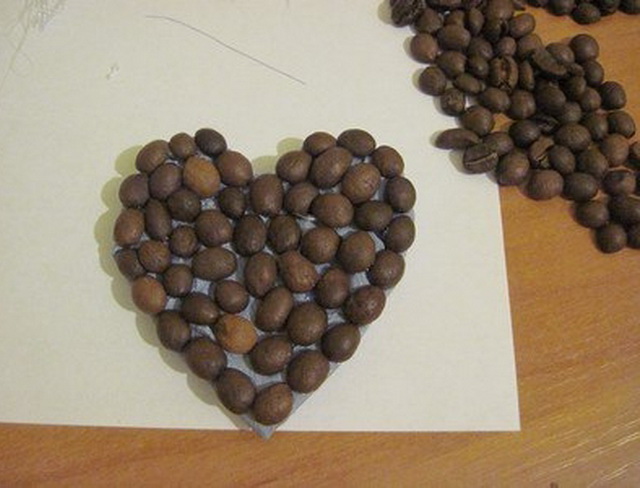
- Then give the volume to the heart. Fasten a few more coffee in the side parts of the figure. But at the same time, choose small grains, otherwise they will prevent the magnet fastening.
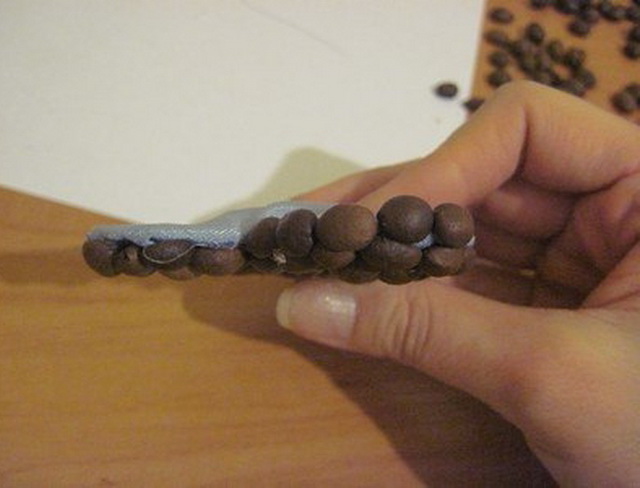
- When the first layer of glue is completely freezed, glue the second level of grains, but this time place them with a flat part up. Using the brush, clean the surface of the remains of the glue.
- Garnish the coffee heart with any decor on top. It can be a bow of a satin ribbon and anise asterisk.
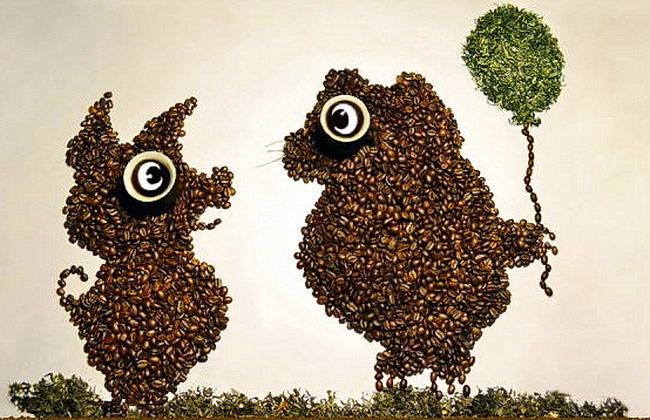
Crafts from coffee beans. How to make a dog from coffee beans
Crafts in the form of panels are becoming increasingly popular. But a flat pattern can become not only part of the picture, but also decorate the card. To designate the edge of the picture, use a thin twine of a thin diameter.
Materials and tools:
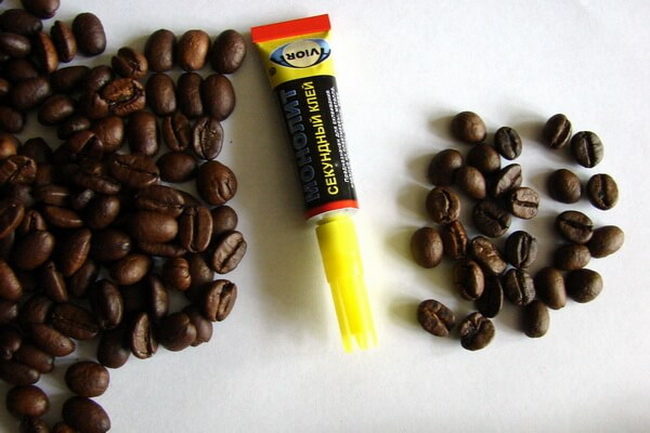
- coffee grains of different brands;
- natural twine;
- paints for decoupage;
- scissors, tweezers, pencil;
- sheet of paper;
- brush and glue.
Master class on the manufacture of dogs:
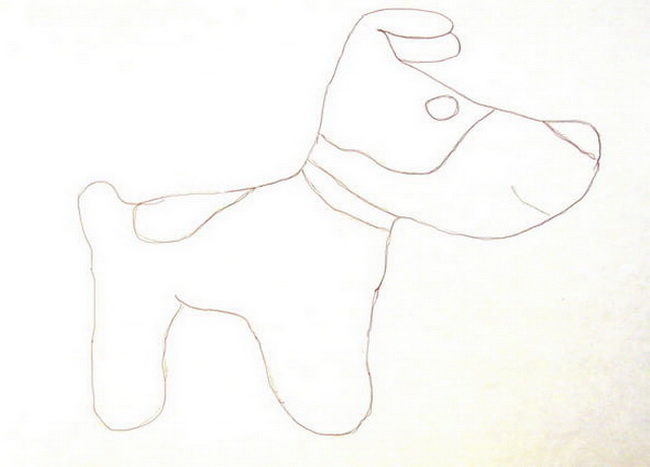
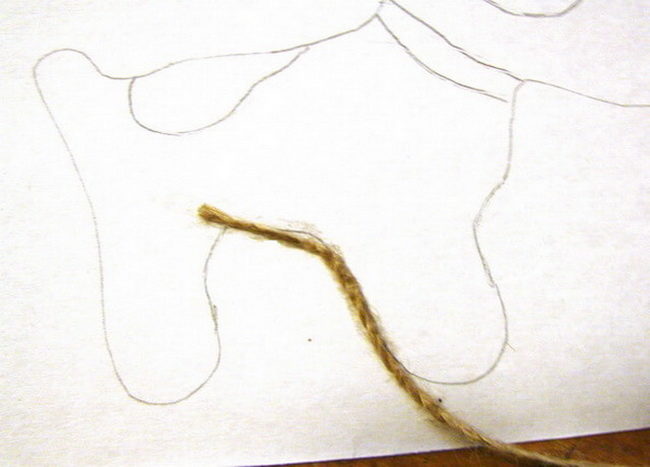
- Draw a dog template on paper. If you do not have artistic skills, then just print it on the printer.
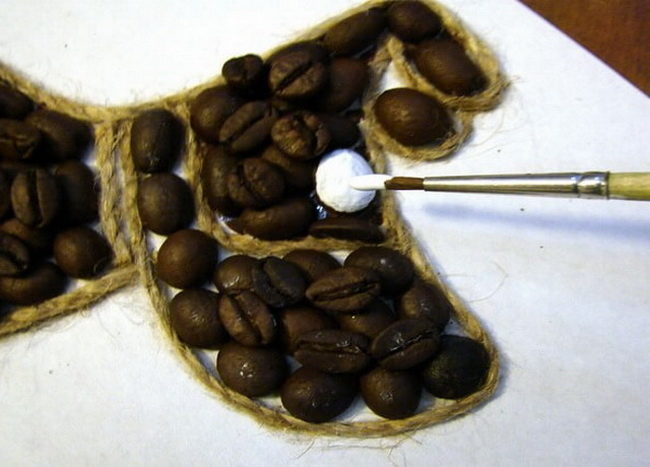
- In this case, it is necessary to use the glue “moment”, since it will not create an additional layer between the details of the decor, unlike silicone. Apply it to the line, wait a few seconds and glue the twine according to the picture.
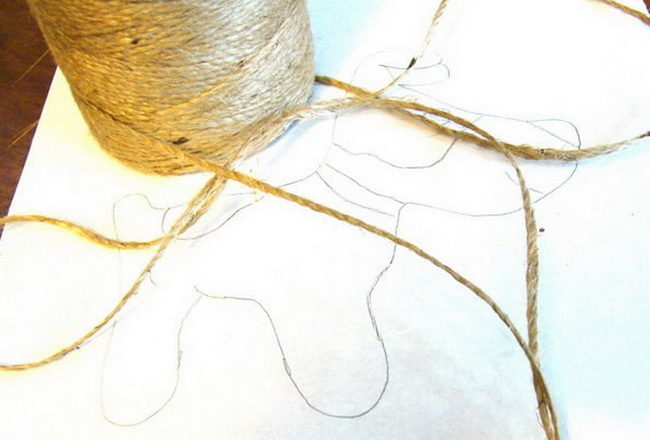
- Work slowly and use tweezers to create the necessary bend on the workpiece. Also glitter the inner lines with twine.
- Distribute the grains of coffee in size. For drawing, it is best to purchase a product of different brands. So you can choose grains of the required size for repeating bends in the figure.
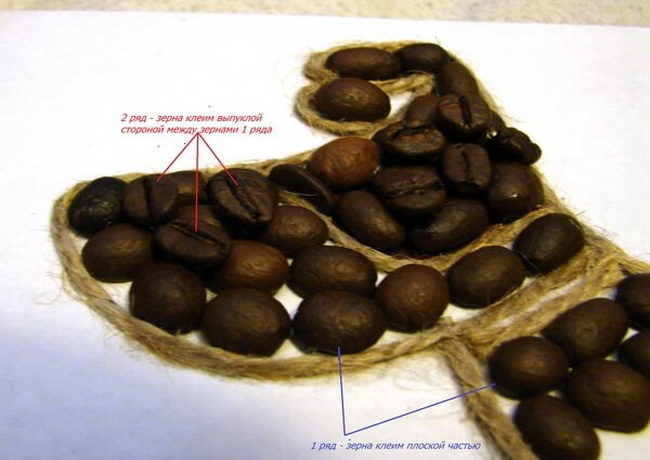
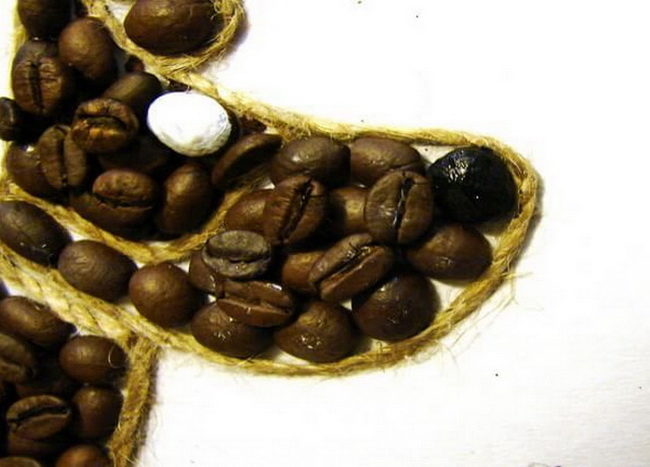
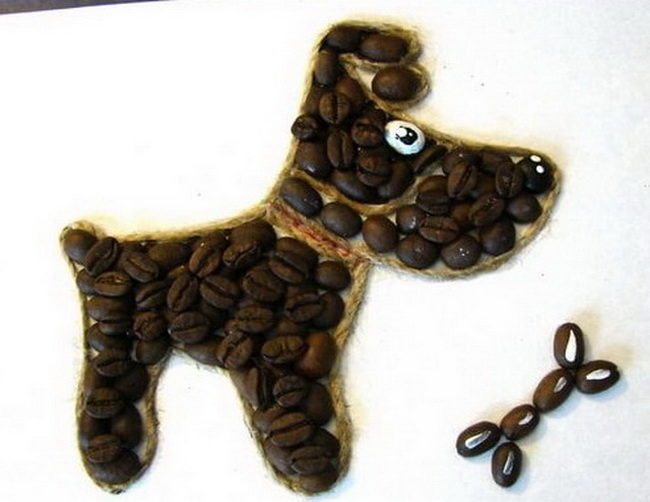
- First, apply brown paint in the place of the eyes and stains on the back on paper. Now proceed to fill the form with grains. Glue them with the flat side to the paper. In place of the paws and tail, place the grains vertically. So the picture will look neat.
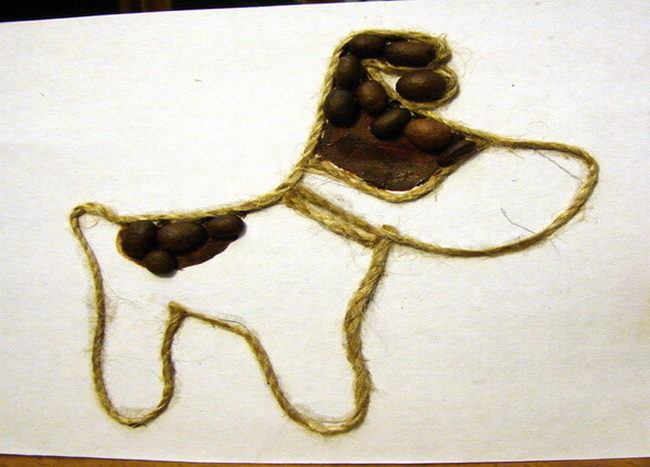
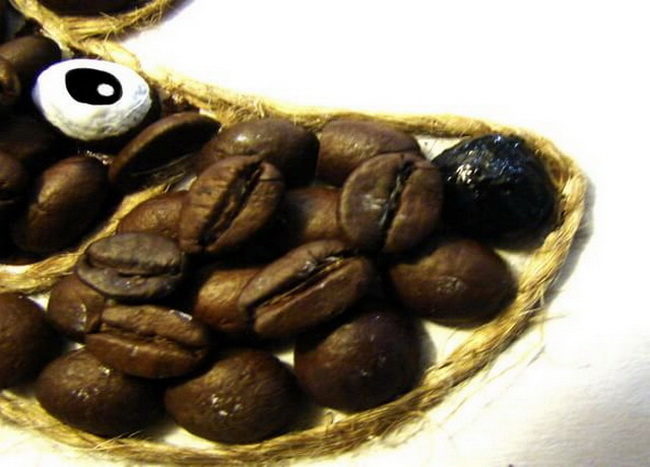
- To hide the gaps on paper, fix another layer of grains, but only now the convex side to the first layer of decor. Pass the second row of grains between other elements.
- White acrylic paint draw the eye of the dog. If necessary, apply it again, but only after the first layer is completely dry.
- Draw the nose of the animal black in color and cover with varnish. So he will shine.
- Then bring the pupil to the animal.
- If you wish, you can additionally make a bone for the dog and paint it with white paint. Such a craft of coffee beans is suitable for complexity for beginner masters. It can be presented as a New Year's gift or decorated your house for a holiday.
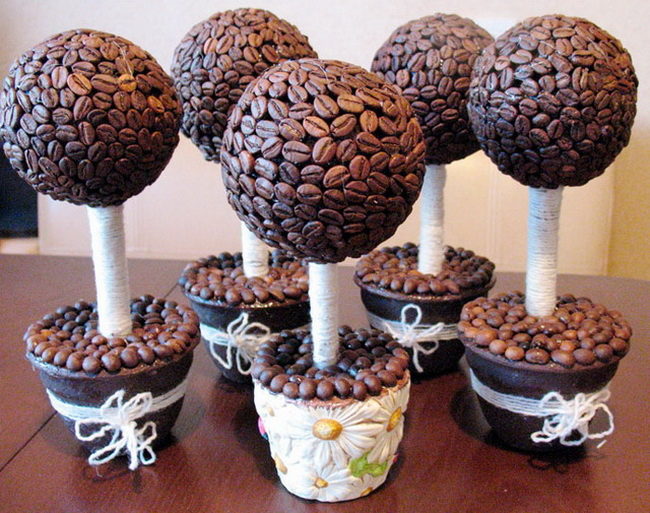
Crafts from coffee beans. How to make a "tree of happiness" from coffee beans
Such a craft is also called "topiary." It is a small tree in a pot, a crown of which can be any figure. Most often, needlewomen use a ball and coffee.
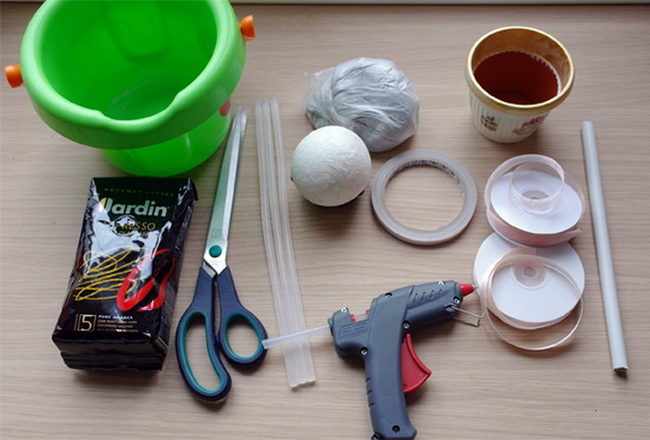
You will need a coffee tree:
- the shape of the foam in the form of a ball;
- coffee grains;
- glue gun, scissors;
- double -sided tape;
- plastic pots;
- container for kneading;
- alabaster or gypsum;
- narrow satin ribbon;
- wide tape from organza;
- plastic tube.
Production instructions:
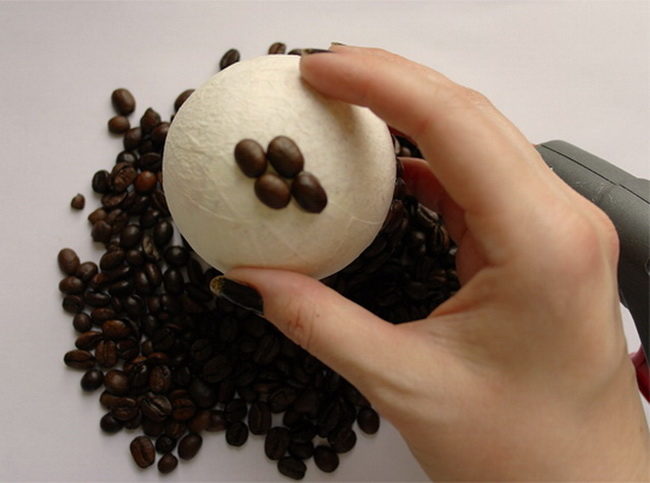
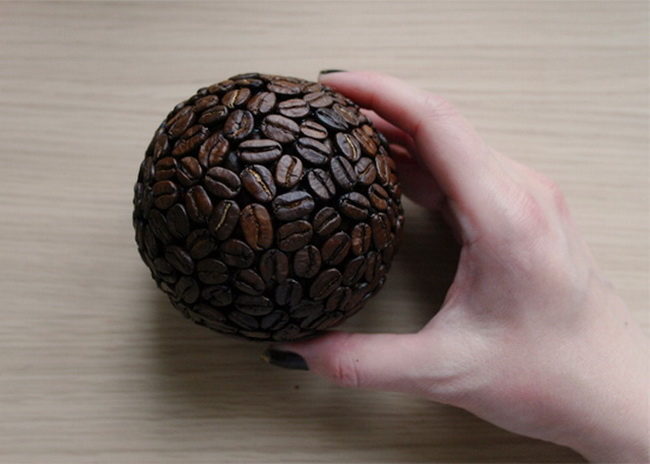
- First glue the foam ball. But since it will be the future crown for a tree, in one place, draw a circle in terms of the size of the stem (plastic tube) so as not to seal it with a decor.
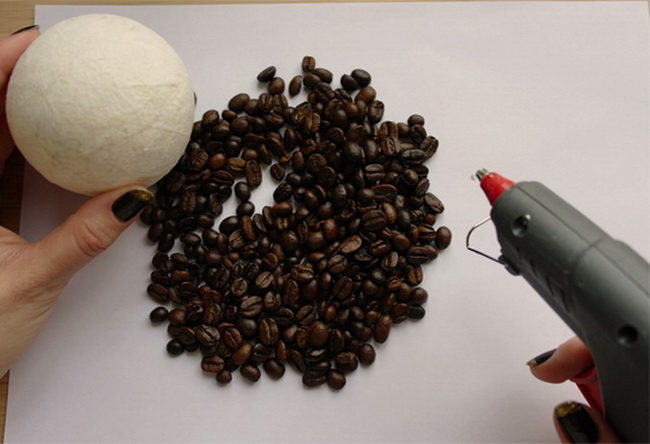
- The workpiece will consist of 2 layers of grains. The first is glued with a flat side to the ball, the second, on the contrary, the convex part to it. At the same time, place the coffee between the grains of the first row. Thus, you will block the white color on the foam.
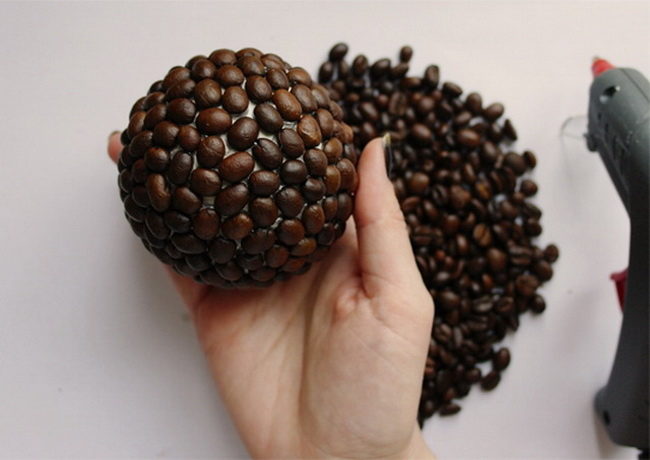
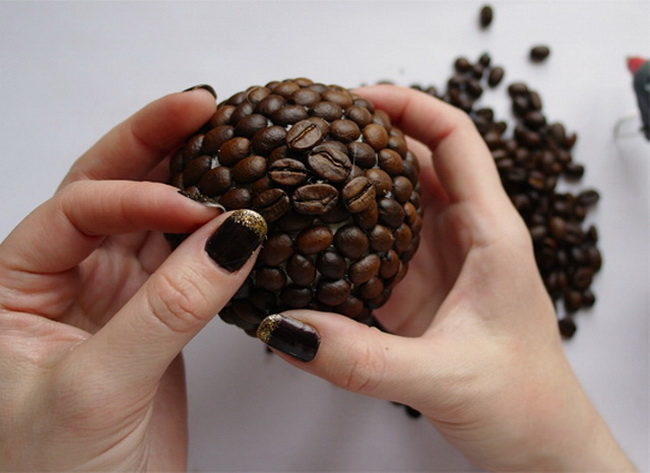
- You should get the same as in the photo workpiece for crafts from coffee beans. If desired, you can cover it with varnish, which will make the surface glossy. But this is how the effect of natural material will disappear.
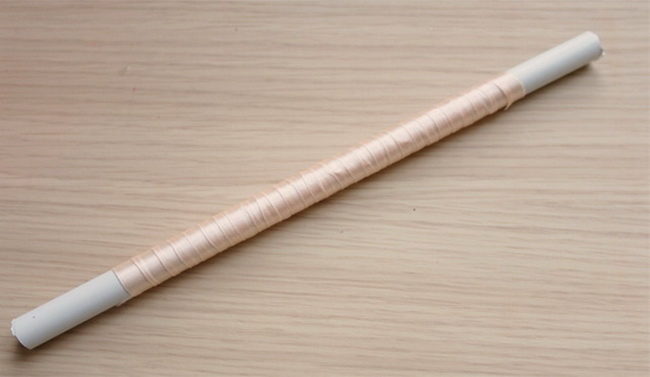
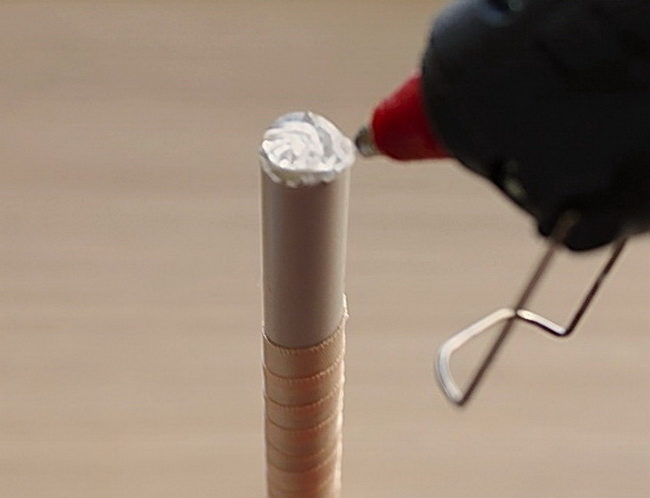
- Prepare a plastic tube. Return from each edge of 3 cm and glue a double -sided tape. Do it obliquely to cover the surface of the base as much as possible.
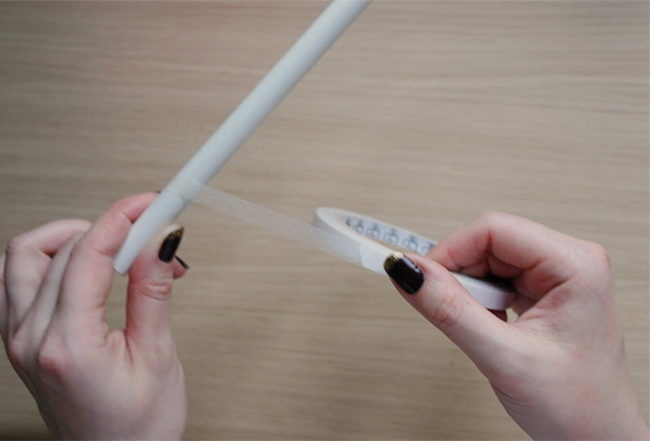
- Save the edge of the satin tape so that there is an even slice. Remove the protective film on adhesive tape and glue the fabric on it. Place the tape in the same angle.
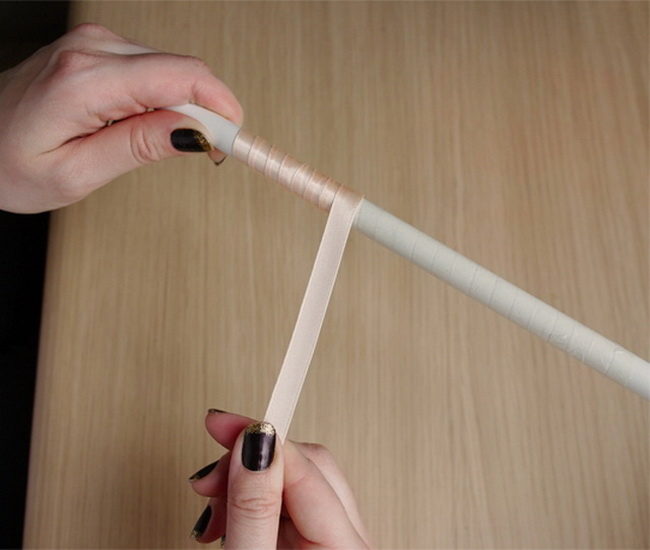
- As a result, you will get such a billet for the barrel, which has side sides without decor. This is necessary in order to then glue it to the ball and pot.
- Pour the water into the container for kneading. Pour the powder of alabaster or gypsum to it in small parts, thereby adjusting the density of the mixture.
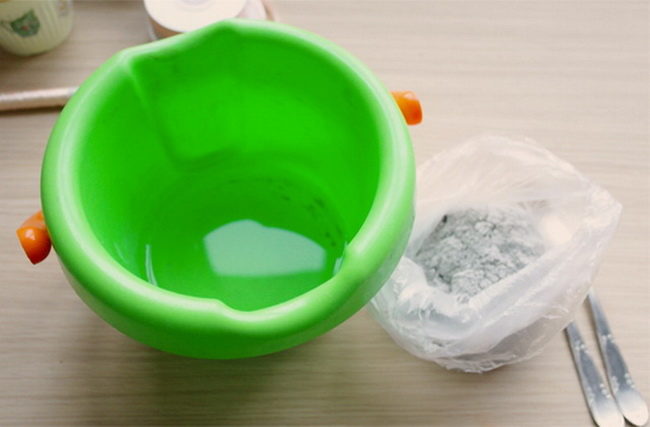
- Knead the mass, similar to density similar to thick sour cream. Stir the mixture thoroughly until a homogeneous consistency is obtained.
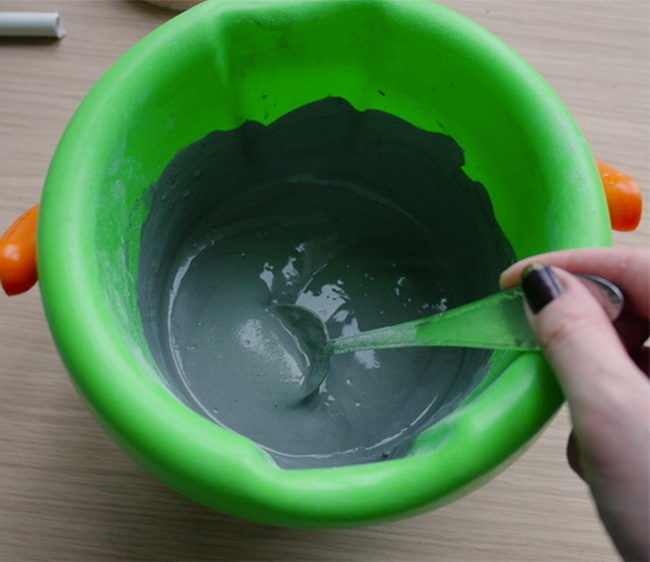
- Since the alabaster freezes very quickly, it is necessary to act immediately after the mixture is kneaded. Gently pour it into the pot and put the barrel strictly along its center.
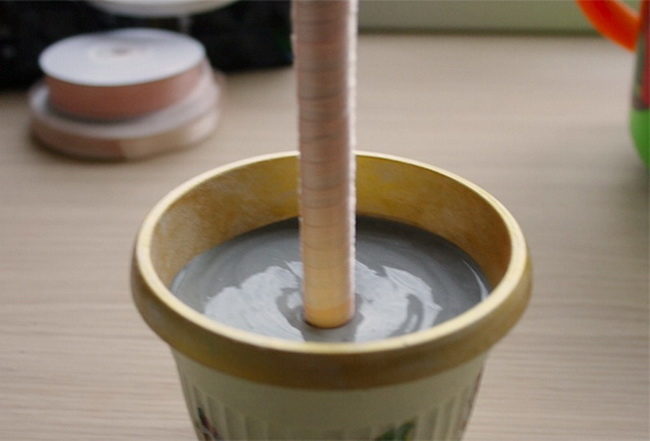
- Hold the pipe until the mass of the mass will not freeze. Check the consistency of the mixture with your finger - it should be dry from above.
- After the alabaster is completely dry, go to the Kashpo decor. As well as on the crown, glue two levels from coffee beans. The first layer will be located upstairs.
- Stick the second with a flat side to you. Try to place the grains in the intervals between coffee from the first row.
- Do not rush, glue the decor evenly and as much as possible to each other.
- On a ball, in a previously intended place, make a small recess. Apply a thick layer of glue to the upper part of the tube.
- Glue the coffee crown onto the stem. Do it quickly, as hot glue immediately starts to harden.
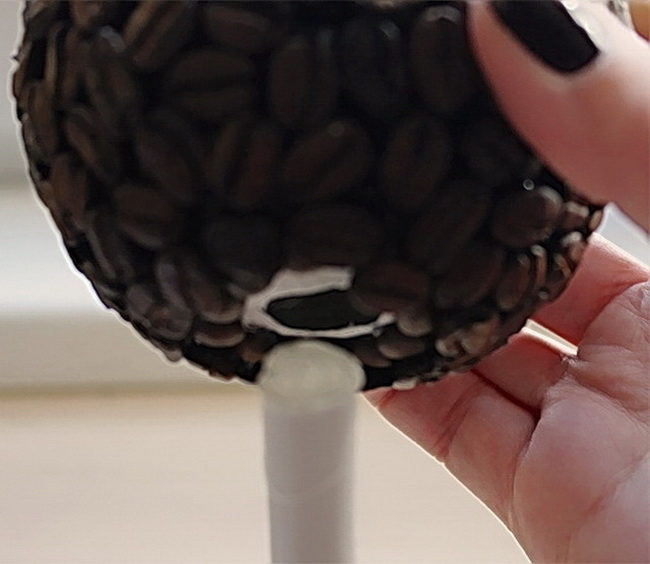
- Set the ball to be strictly in the center of the entire composition, hold it for a few seconds.
- Cut the tape from organza and fall the ends. Scroll around the tube so that it touches the stem in the middle.
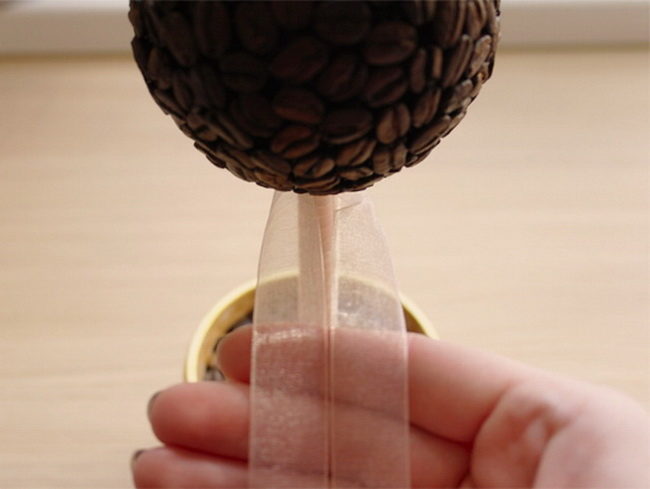
- Tie a bow under the ball. Make a knot tight or fix it with glue. So he will not start over time.
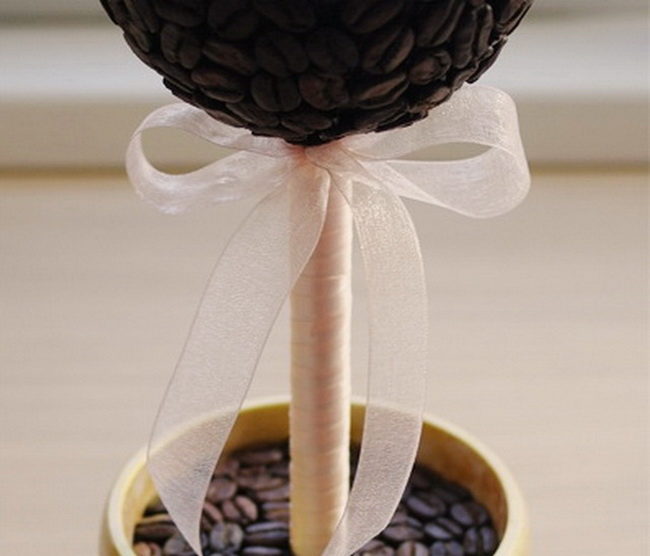
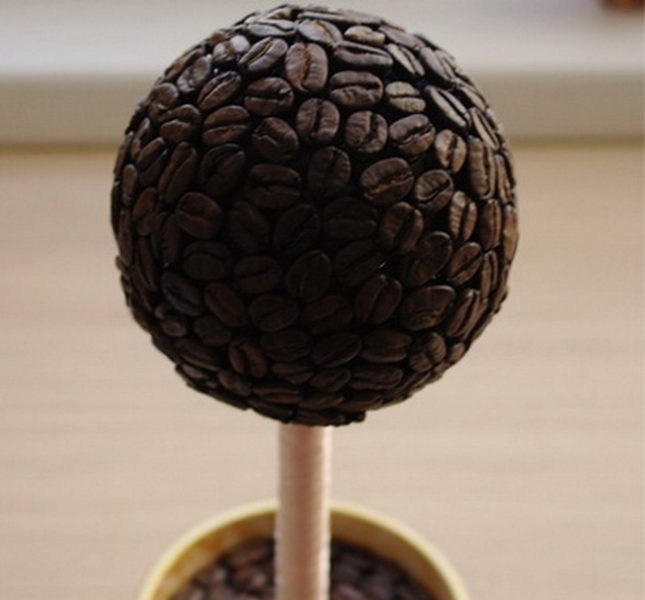
- According to this technology, you can make several variations of a tree of happiness from coffee beans. In this case, the size of the ball, like the height of the stem, can be any.
Crafts from coffee beans. How to make a coffee tree for the New Year
The original gift or an unusual decoration for your home can be New Year's crafts from coffee beans. You can easily master the technique of making coffee decor if you carefully study this master class.
To work, you will need:
- foam cone;
- glass container;
- gypsum, water;
- silicone glue;
- jute twine;
- coffee grains;
- dried slices of orange;
- moss for floristry;
- thin and thick wire;
- a piece of burlap and decor.
Step -by -step instruction with photo:
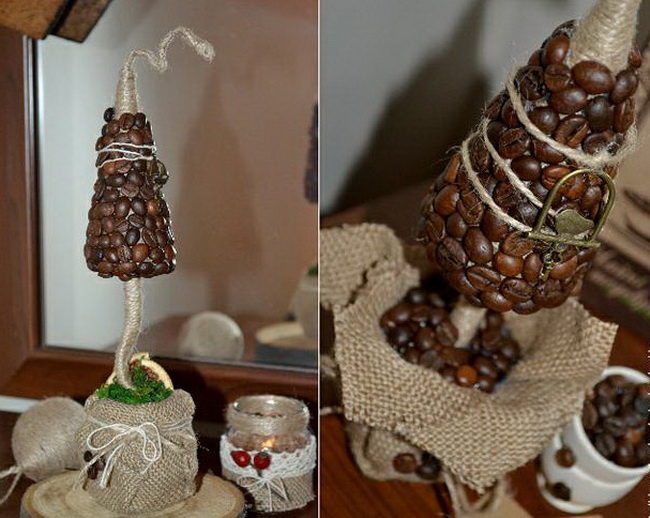
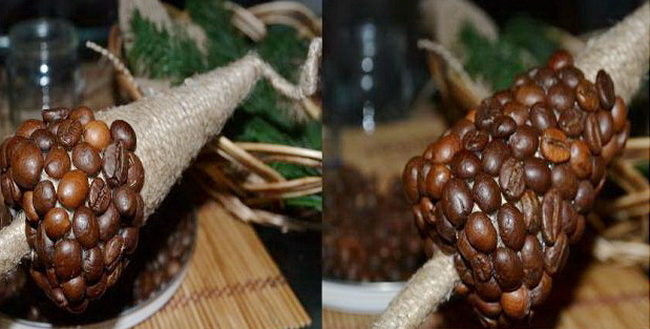
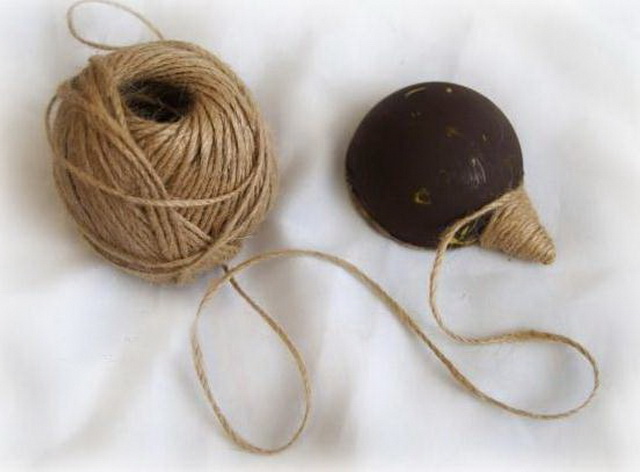
- As a basis for crafts for the New Year, use not only coffee beans, but also a foam form in the form of a cone. Its size depends on the height of the decor. The structure will stay on a thick wire.
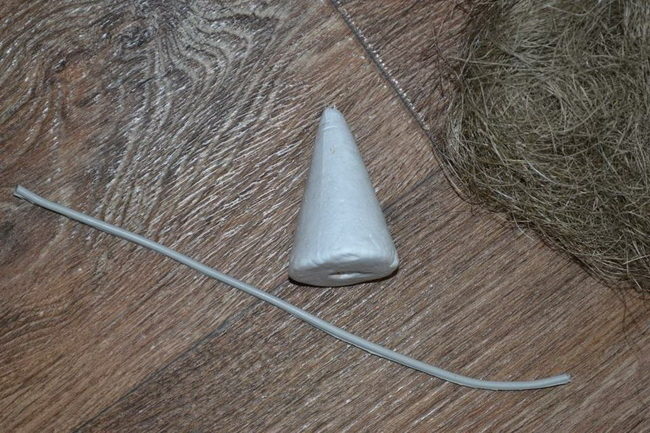
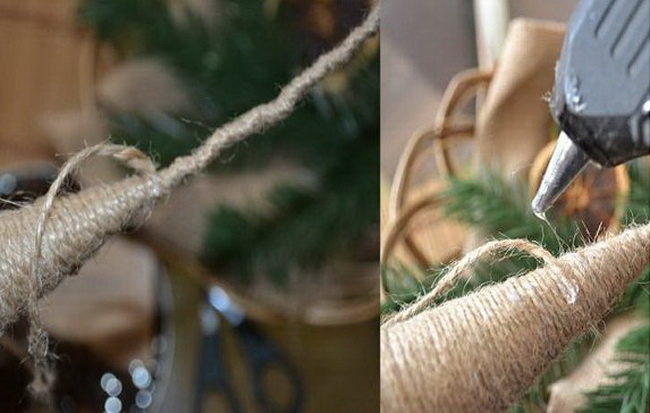
- Based on the cone, find the center. Make a small hole and deliver the wire into it. Additionally fix it with glue. Shpagat must be wrapped in foam. Start doing this from the base of the figure, gradually moving to its top.
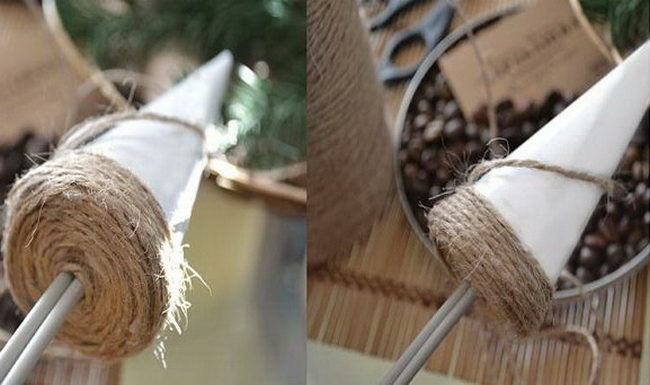
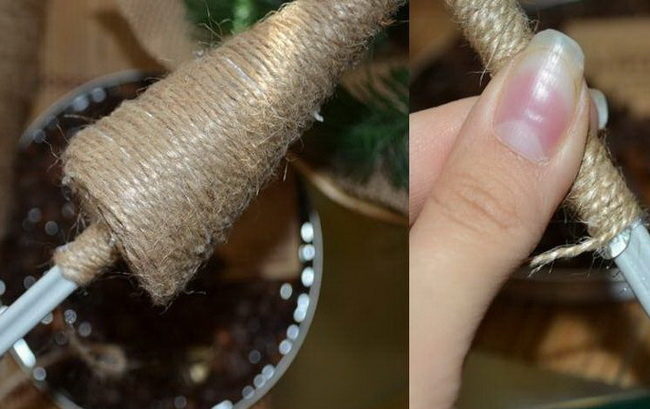
- So that the thread does not spin in time for the use of the decor, after a few turns, glue it to the workpiece. Try to wrap the twine tightly to each other.
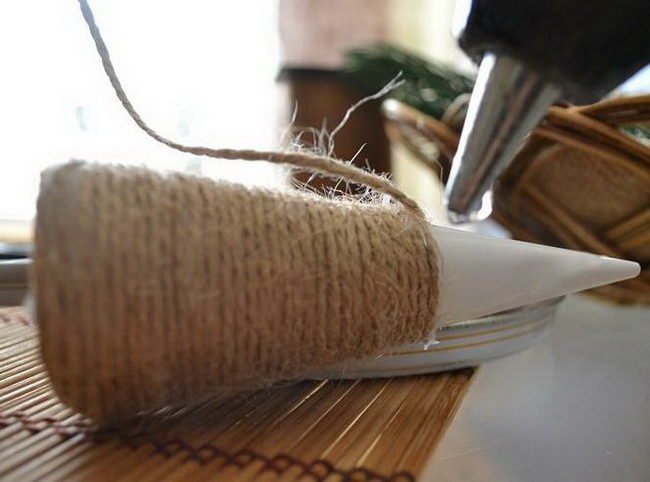
- Fix the end of the cord at the top. Here is such a workpiece should you succeed.
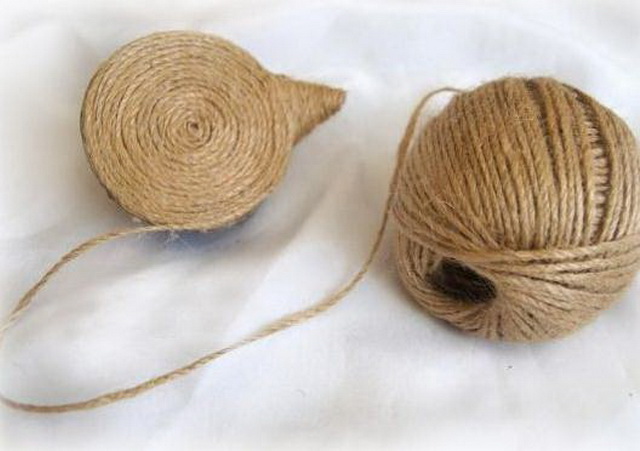
- From a thin wire, it is necessary to make a tail for a Christmas tree. Fold it in half, take the twine in the loop. Tie it around the wire and wrap it along the entire length.
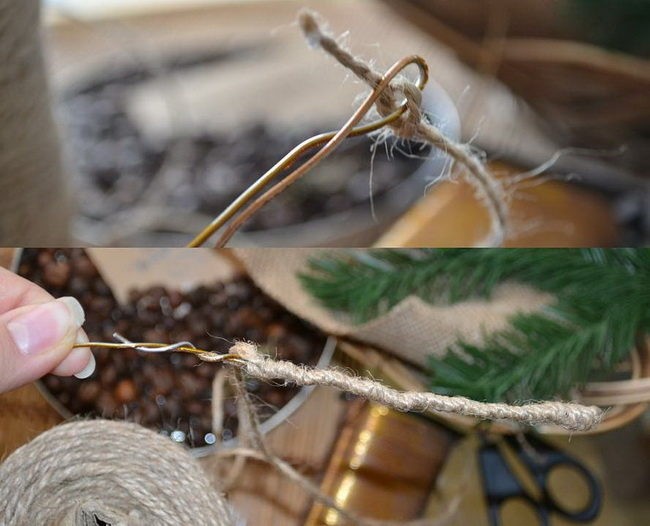
- The free end of the tail pierce into the workpiece in its center. Wrap the end of the twine around the cone and glue it so that it does not spin.
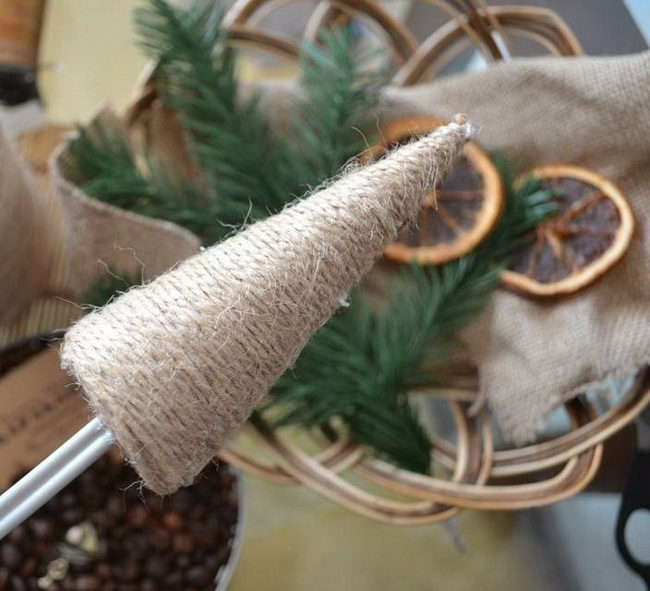
- The stem for the Christmas tree also needs to be decorated with a jute thread. Glue its end on the base of the cone and scroll it around a thick wire. Cut excess twine, and glue the end.
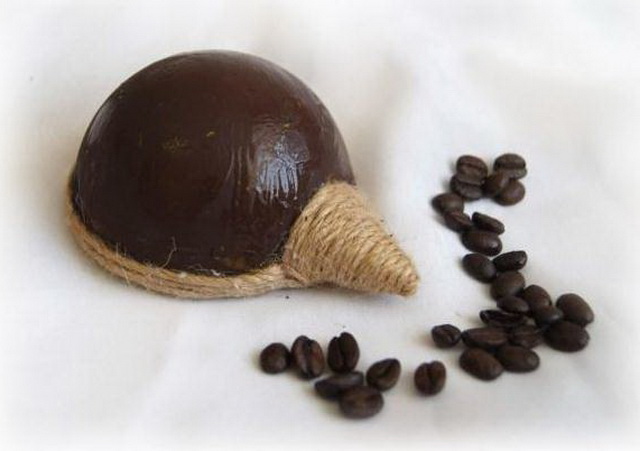
- Now proceed to coffee beans. Sort them by size. Start fixing the decor from the circumference of the base of the Christmas tree. Close the circle, but first place the grains with a flat side to the base.
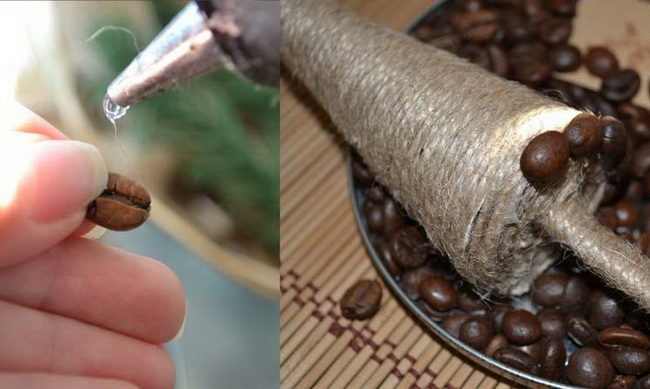
- Those places that are visible through the first layer of coffee, close another row of grains. But this time, fix the decor on the convex side.
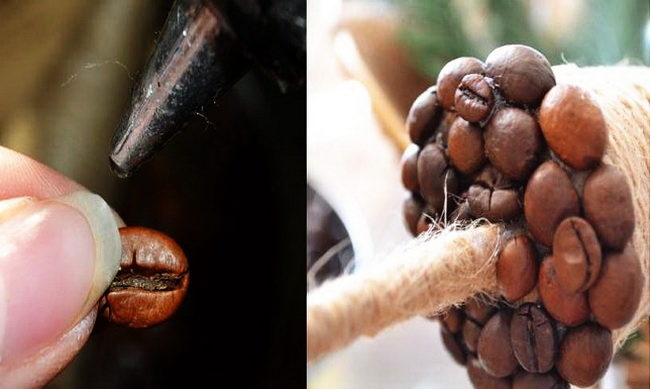
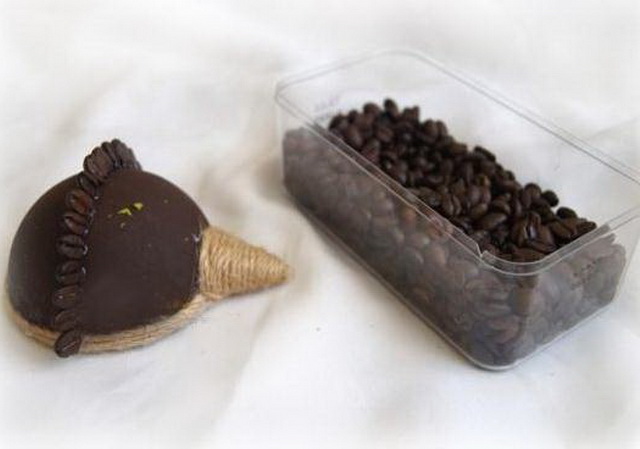
- Glue in this way the entire cone of the base. Work carefully and place the grains close to each other. Then tighten the tail in the form of a spring.
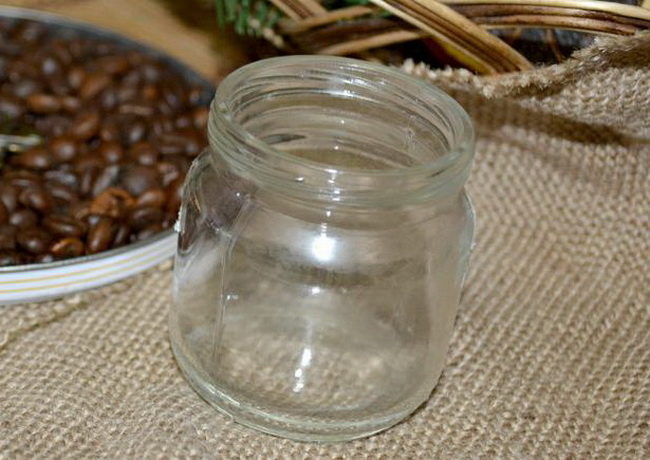
- Instead of a pot, for the base, you can use a small -sized glass jar. It itself has weight, and for a weighting and a core fixer, take a gypsum or alabaster.
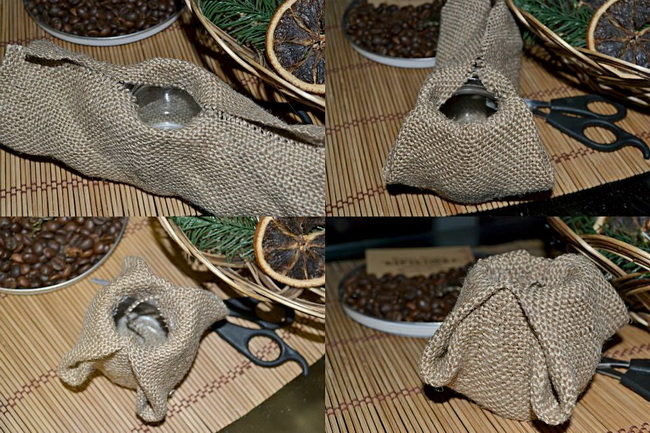
- For decor can use burlap. Cut the square from it in height of the container, plus 5-7 cm for bends. Put the jar in the center of the pattern, first wrap the opposite sides, then bent the rest of the edges and fix them on glue.
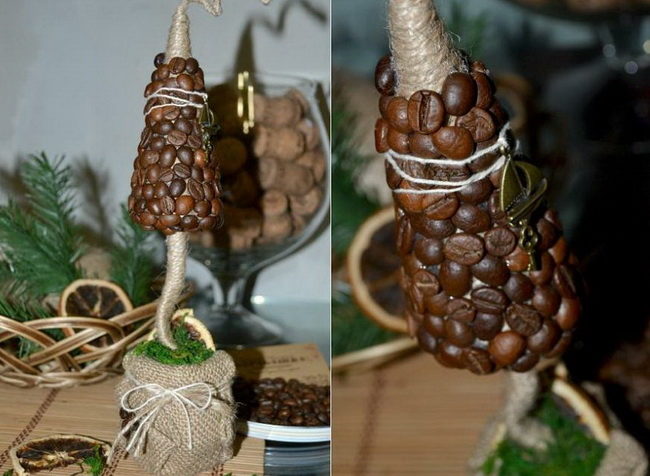
- Dilute gypsum with water to the consistency of sour cream. Pour it into a jar, install the Christmas tree rod on top and hold the Christmas tree until the mixture is hardened. Garnish with artificial moss on top, which is used in floristry.

- Additionally, decorate the New Year's craft of coffee grains with slices of dry orange and a metal suspension. Also tie the braid on the bow around the bag.
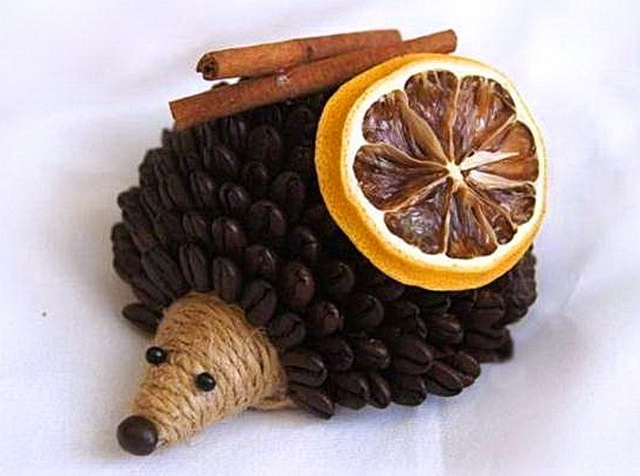
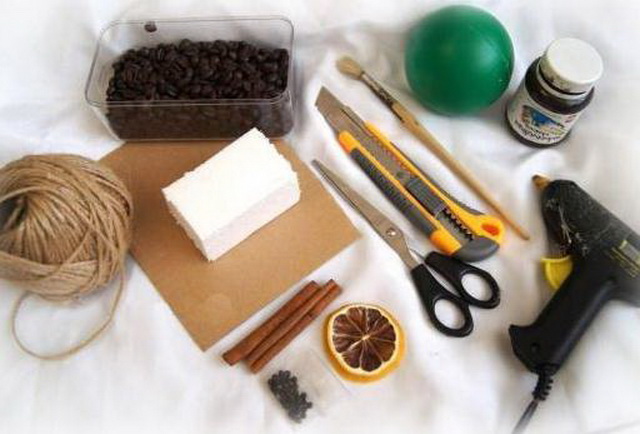
Crafts from coffee beans. How to make a hedgehog from coffee beans
Coffee grains can also be used as aromatic decor in the interior. To strengthen the smell, cinnamon, badiyan and dry citruses are added to the craft. For a children's room, make a hedgehog from coffee grains.
The necessary materials and tools:
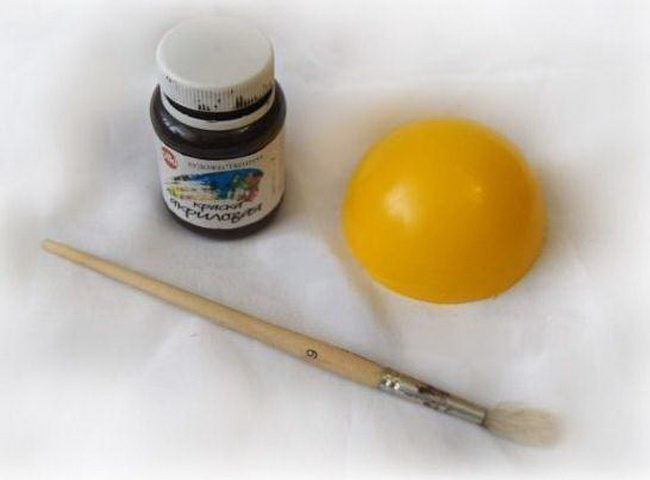
- plastic ball of any diameter;
- brown acrylic paint;
- decoupage brush;
- jute twine;
- foam;
- dense cardboard;
- flavored decor;
- chancellery knife;
- pencil;
- coffee grains;
- glue gun;
- beads and beads are black.
Step -by -step instruction with photo:
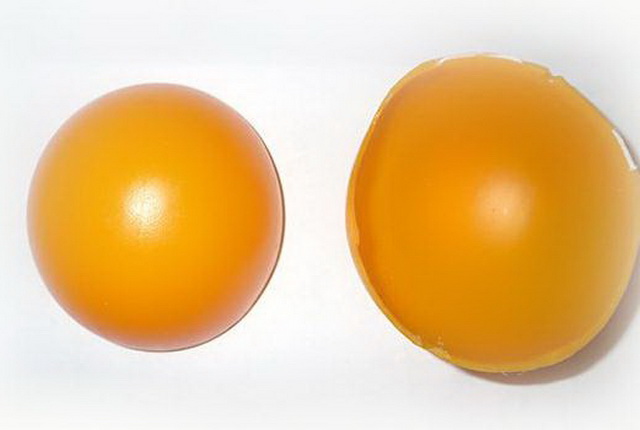
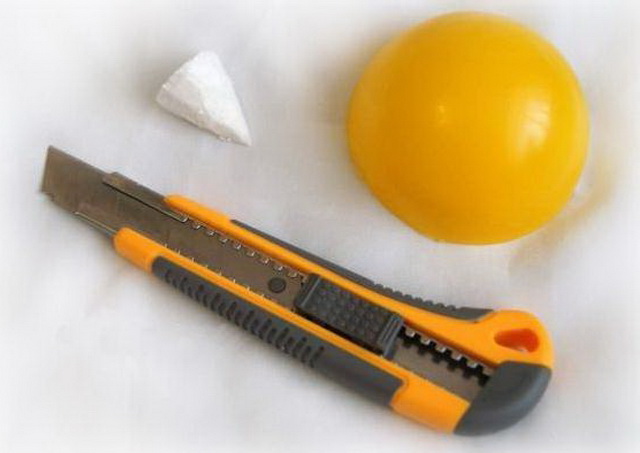
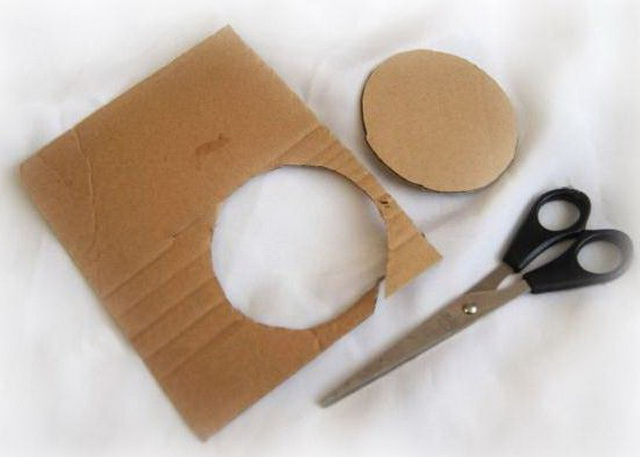
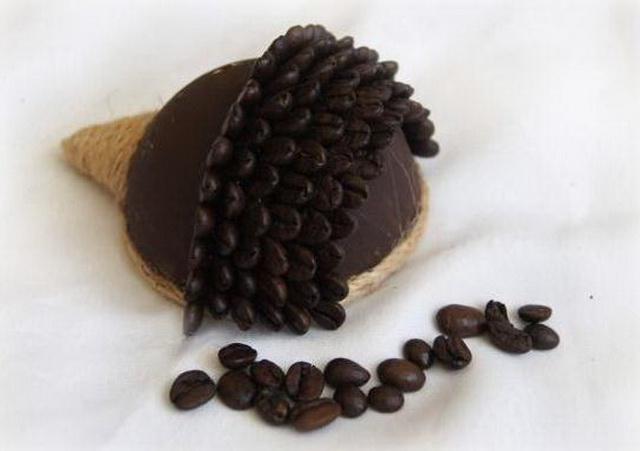
- Cut the plastic ball into two equal parts. You can also use a foam preparation or an empty firing toy made of plastic.
- Cut a small piece of foam of a rectangular shape. Cut a cone from it with equal sides. It will be a muzzle for an animal.
- From cardboard it is necessary to cut a circle to the size of a plastic workpiece. Attach it on paper, circle and cut it along the line.
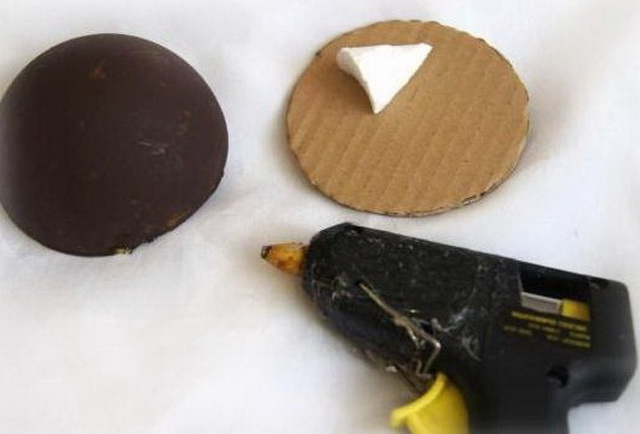
- If you have a bright color, then paint it brown. This must be done so that a different shade is not visible through a layer of coffee. Acrylic paint is best on plastic. Apply it to the surface in several layers and let it dry.
- Glue the cardboard circle to half the ball. Try to apply a thick layer of glue so that the base is firmly fixed on plastic. Cut the foam cone in half.
- You can decorate open parts on the craft with a twine. Also use its natural color. If you take a painted thread of a dark color, then it will merge with a shade of coffee grains.
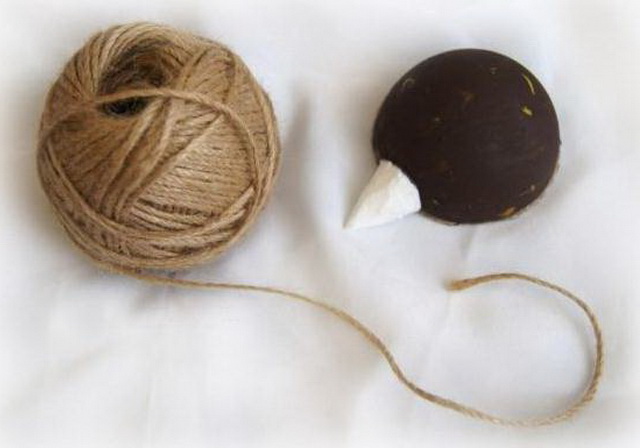
- Start sticking the twine from the tip of the nose, so it will be visible. Gradually scroll through the thread around the foam. Cut the excess part, and glue the end.
- In the same way, it is necessary to decorate the cardboard from the back of the figure. First, turn the thread with a knot and glue it to the center of the paper. Then fix the twine in a spiral to the edge. The side side also glue in a couple of rows of threads.
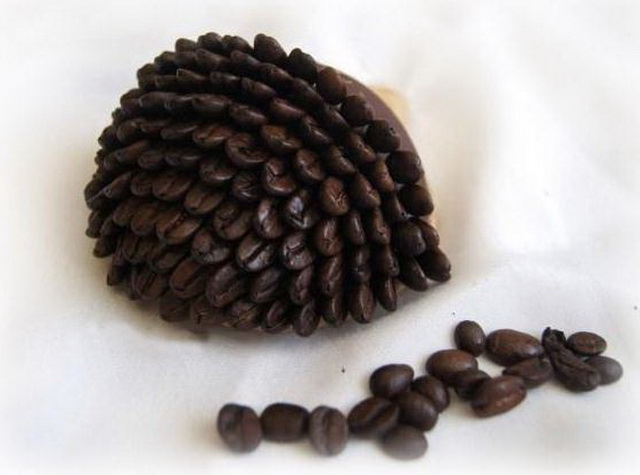
- Prepare coffee beans. The first row will be on top, so select the decor of the same height.
- Unlike most other crafts from coffee beans, the hedgehog will stick in a vertical position, and not in horizontal. Draw a plastic line with a pencil, which passes strictly along its center. Fasten the coffee at the mark. In this case, the flat part of the grain should be turned towards the muzzle.
- Glue each subsequent row of coffee in the same position, but only at a small angle. So the top of the grain should be tilted back.
- As it approaches the hedgehog's tail, tilt the decor stronger. At the very bottom of the grains will be in a horizontal position, but with a flat part up.
- The front part of the craft is decorated the opposite. Gradually, tilt the grains towards the nose of the animal. Start sticking coffee from the center to the bottom of the ball.

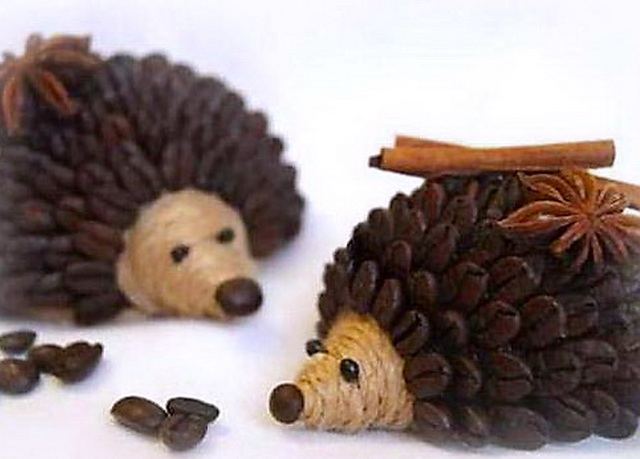
- When you use all the grains, fix the aromatic decor on top of them. It can be a stick of cinnamon, a slice of citrus or an asterisk of a Badyan. Some masters dry the apple circle for credibility and glue it on a coffee hedgehog.
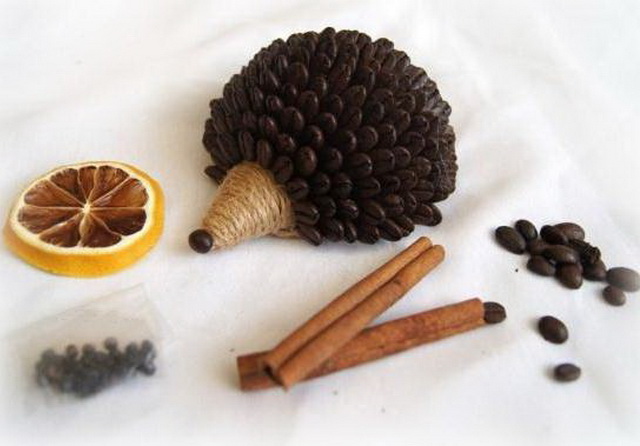
- When the entire decor is placed, make the nose of the animal from black beads, and beads will be eyes. Such a decor will not only like your children, but will also become an original New Year's gift.
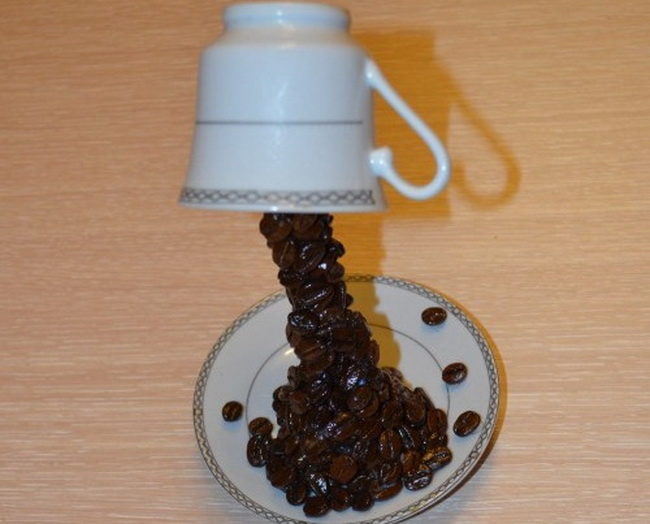
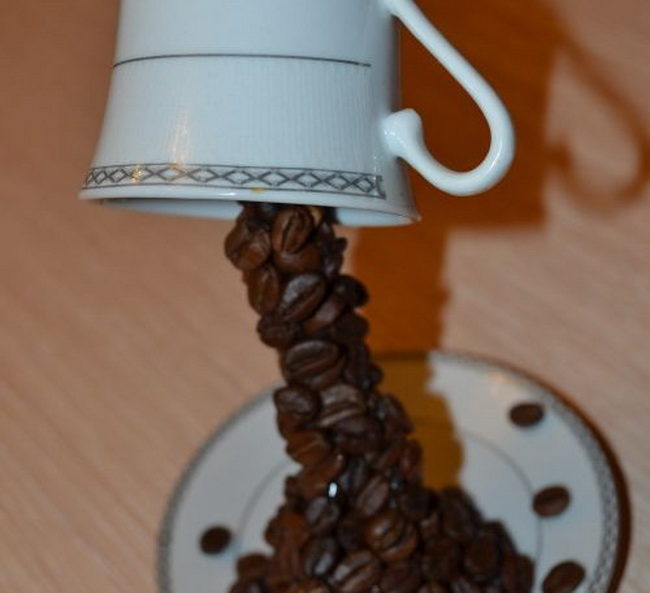
Crafts from coffee beans. How to decorate a cup with a saucer coffee beams
The original craft can decorate the interior of the office or emphasize the comfort of at home. Even a beginner will be able to make a soaring cup and decorate it with coffee grains, the following detailed instructions will help you with this.
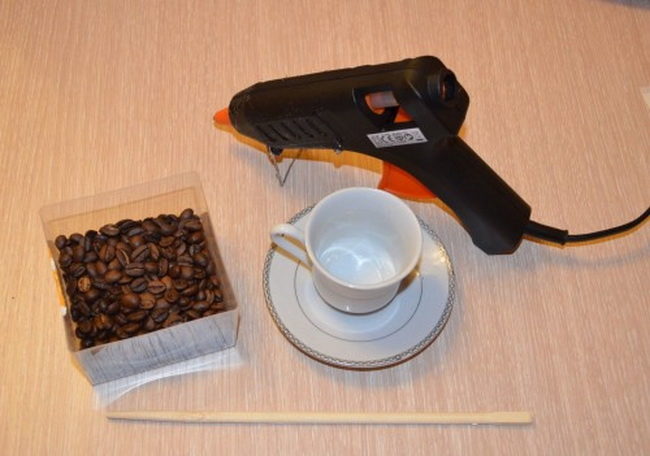
For work, you will need:
- mug and saucer from one service;
- coffee in grains of one brand;
- wooden skewer;
- silicone glue;
- decoupage varnish.
Master class on manufacture:
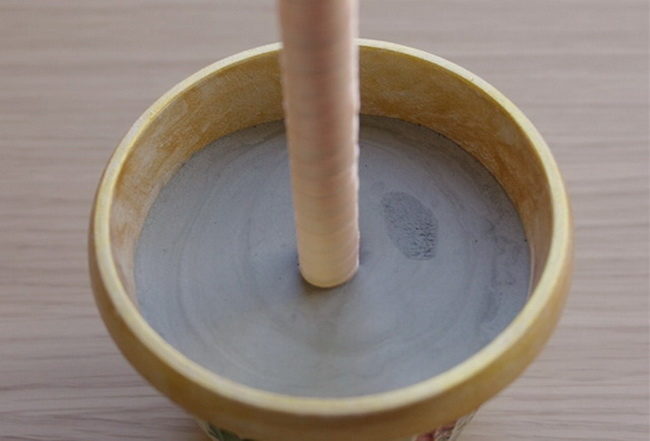
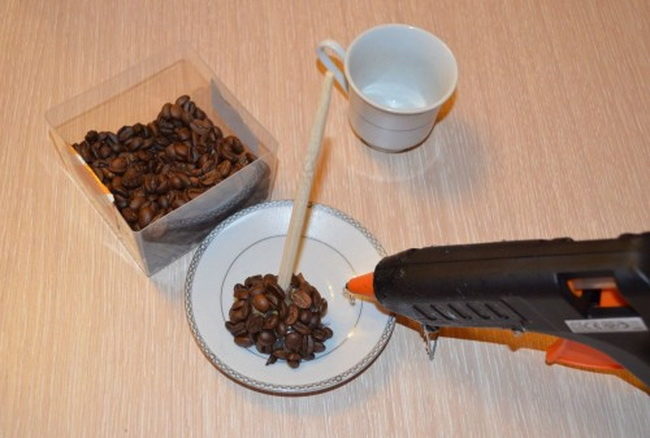
- Wash the dishes and thoroughly grate with napkins. At the first stage, it is necessary to install the guide rod. They can be a wooden skewer, thick wire or even an old fork. In the center of the saucer, apply a large amount of hot glue, fix the skewer in it. With your hands, give her a small slope, hold the rod until the glue is completely solidified.
- Choose one brand. So they will have the same size and aroma. To give the volume to the craft, resort to a small trick. Apply hot glue to the base of the skewer, let it freeze and again squeeze it on top of the first layer. In this way, you can make a seal of any shape.
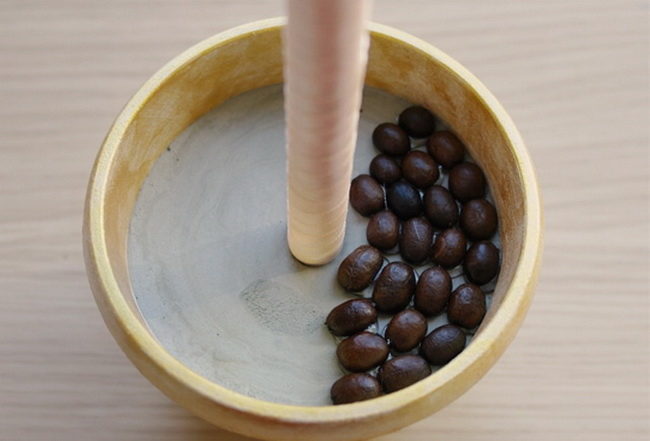
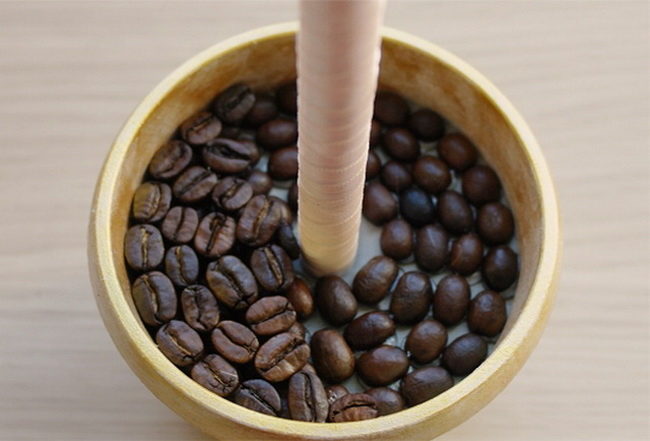
- In random order, begin to glue the grains from below. First fix them on a saucer, then gradually move up. In this craft, even rows of grains are not important, like their position.
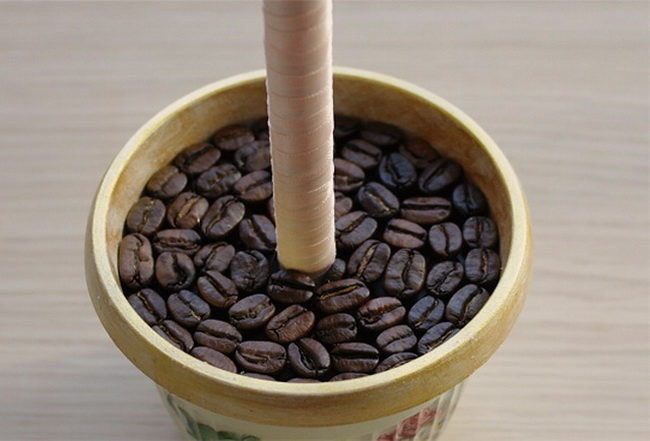
- Clock the stick with coffee grains, but leave a small area for the mug at the top. So that the rod does not seem thin, give it the volume with hot glue.
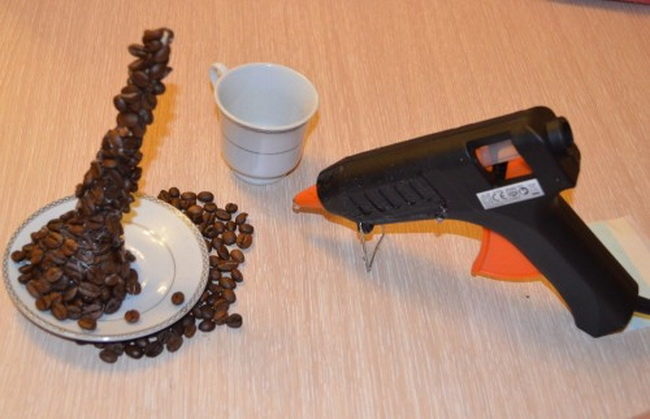
- Now you need to glue the mug on the skewer. Apply glue to the inside of the dishes, not the grain. Otherwise, the glue drains down and stains coffee. Connect the two parts of the craft and hold it until the glue is completely hardened. If the rod is still visible inside the circle, then decorate it with coffee beans. Additionally decorate the saucer with separate grains.
- To improve the appearance of crafts from coffee grains, blow on glue with hot air. Direct the hair dryer to areas where glue is most visible. The warmth will melt it, and you can remove the excess.
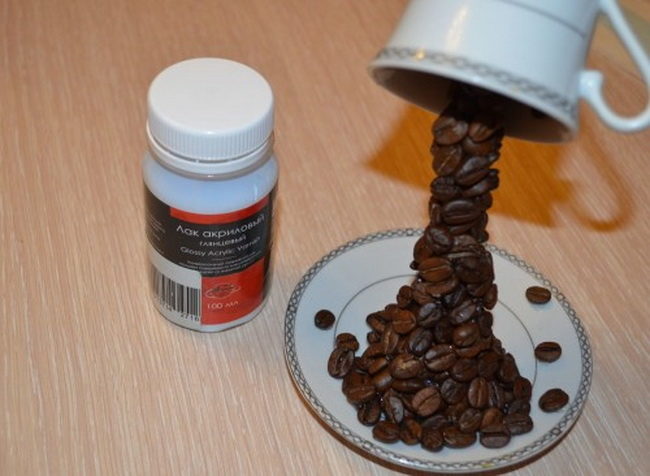
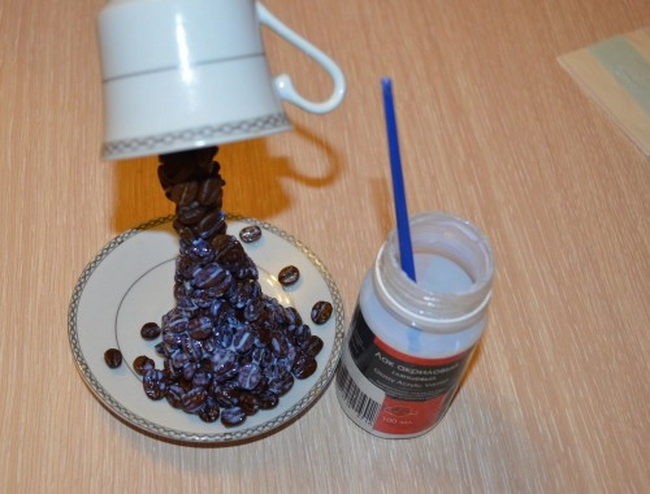
- To give shine for the decor and protect it from dust, apply varnish on top, which is used for decoupage. In its absence, use an ordinary acrylic agent with the same properties. After this process, give the varnish to dry well.
Children's crafts from coffee beans
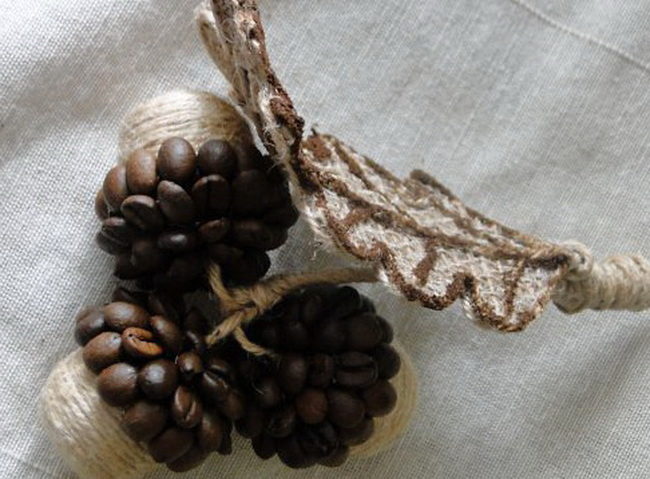
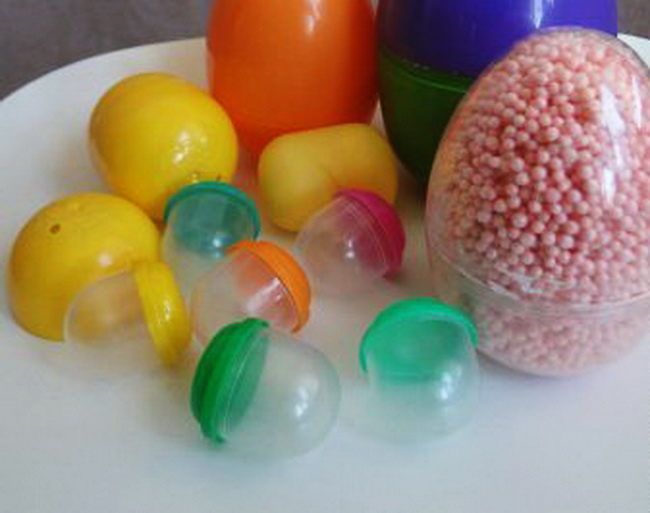
Autumn is the brightest time of the year that gives ideas for children's crafts. The basis for them can be natural materials, and coffee refers to such. An unusual craft to kindergarten can be made of coffee beans in the form of acorns.
The necessary materials and tools:
- small plastic containers;
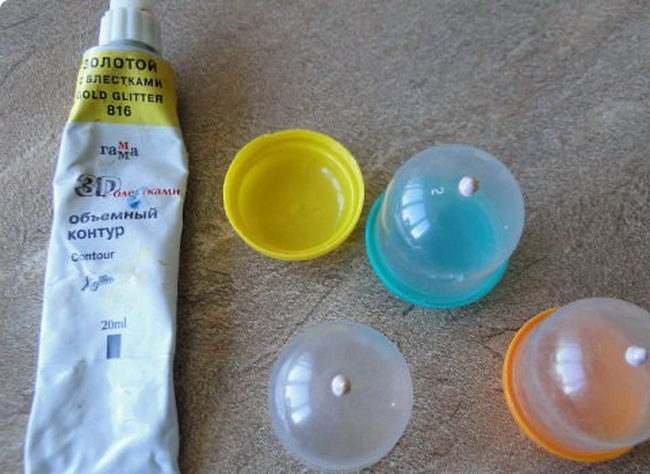
- outline for decoupage;
- glue gun;
- shilo, jute twine;
- black acrylic paint;
- coffee grains;
- ground coffee;
- floristic wire;
- glue gun and PVA glue;
- sackcloth;
- scissors, toothpick.
Work instructions:
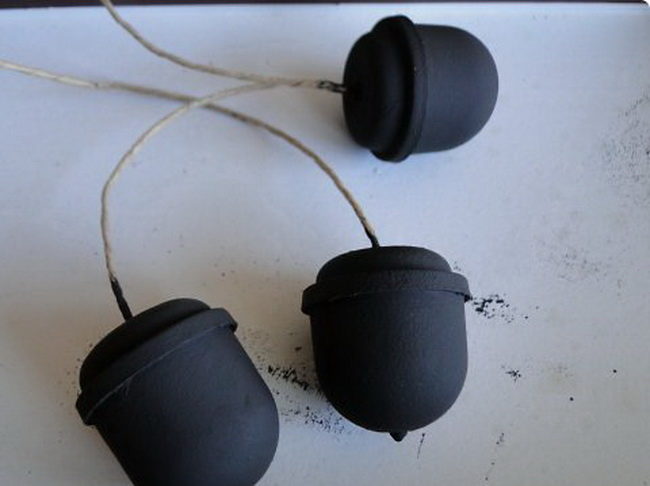
- As the basis for acorns, shoe covers that are sold in machine guns are suitable. You can also use the packaging from Kinder Surprises or any other boxes that resemble the shape of the fruits.
- Real acorns have pointing on the tip, which can be repeated with the help of a volumetric circuit. Apply it a small amount on the main part of the container. Let the product harden.
- Remove the lid and make a hole in the center. Pass the twine into it. Tie a knot from the back. So the thread will not slip out of the form. Or glue it to the plastic.
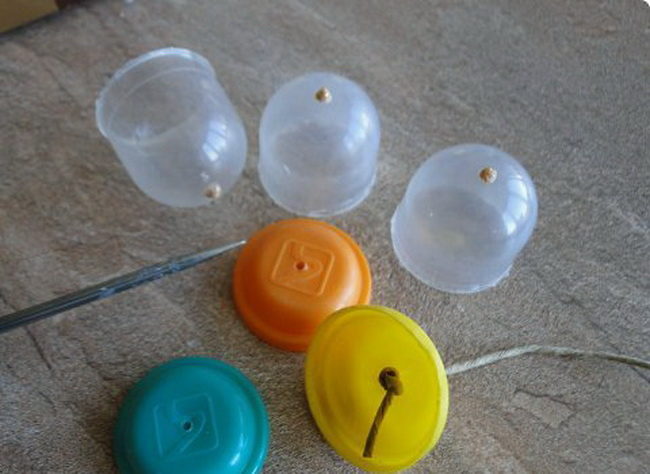
- Apply glue to the edge of the lid and close the container. Repeat these actions with other blanks.
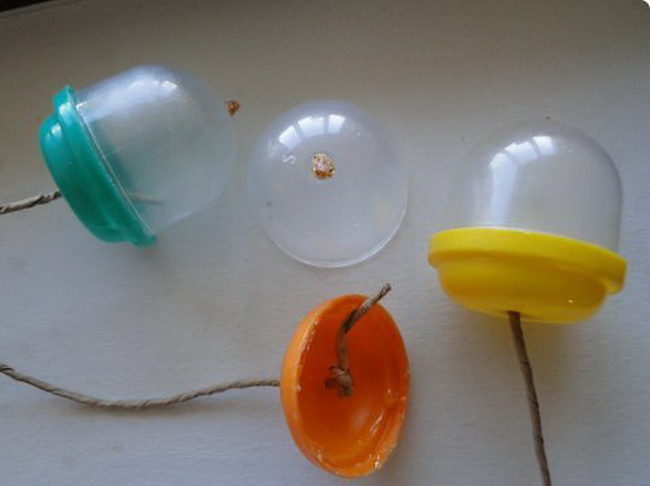
- Paint the plastic shape with black paint. Instead of an acrylic agent, you can use decoupage paints. Let it dry. In black, gaps between grains and thread will not be so visible.
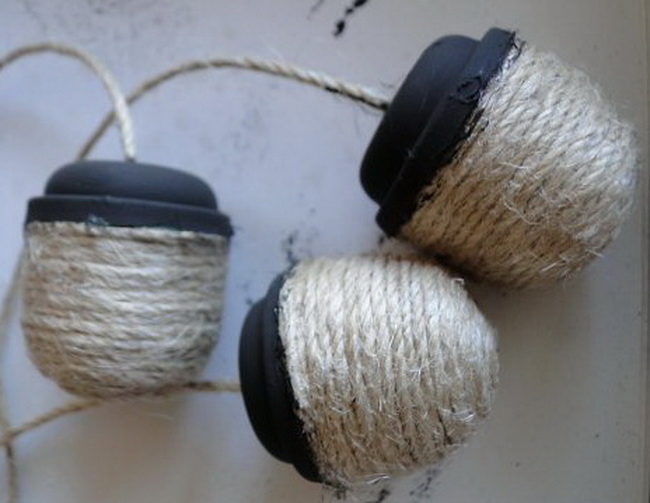
- Decorate the main part of the acorn with a jute twine. Start wrapping it around the blanks from the lid, gradually going down to the edge. In the course of the work, fix the thread to the plastic.
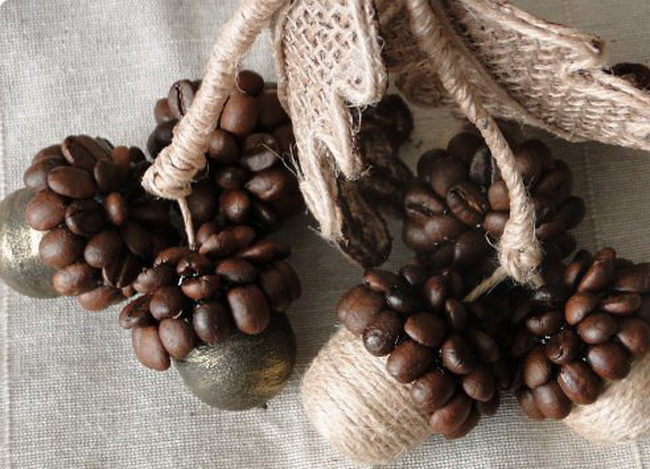
- Glue the grains of coffee on the lid. Place the decor in a circle, forming an even line. The position of the grain can be any, but the slope is different. So glue the first row in parallel to the container, and the subsequent lines at an angle to the top of the fetus.
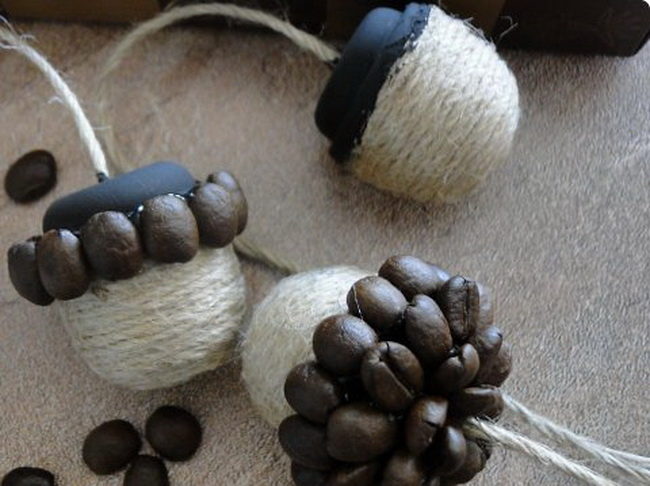
- Decorate other blanks in this way. For one ligament, you will need three crafts of the same size.
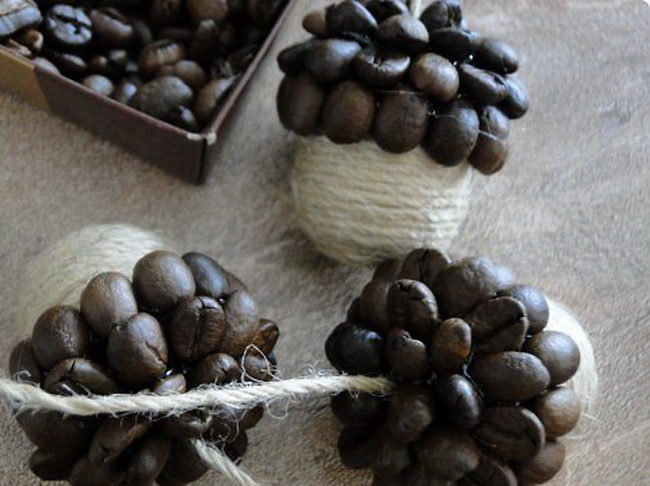
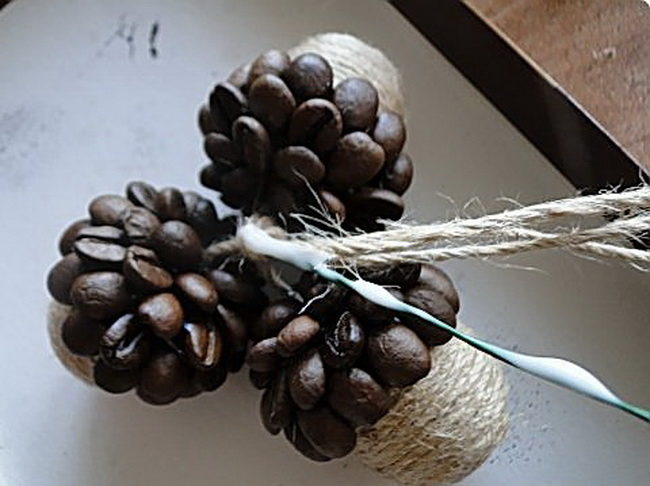
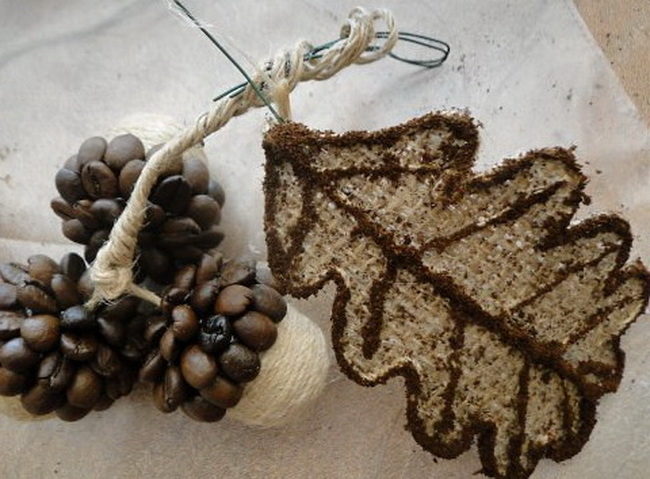
- Turn the acorns with the top to each other, collect the twine together and tie it on the knot. Place it as close to the workpieces as possible to make a bunch of them.
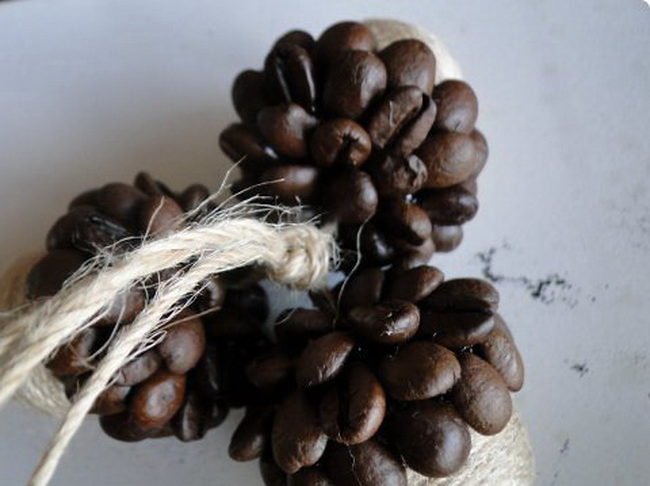
- To give hardness to a branch with fruits, use a floral wire. Insert one end into the knot, glue it.
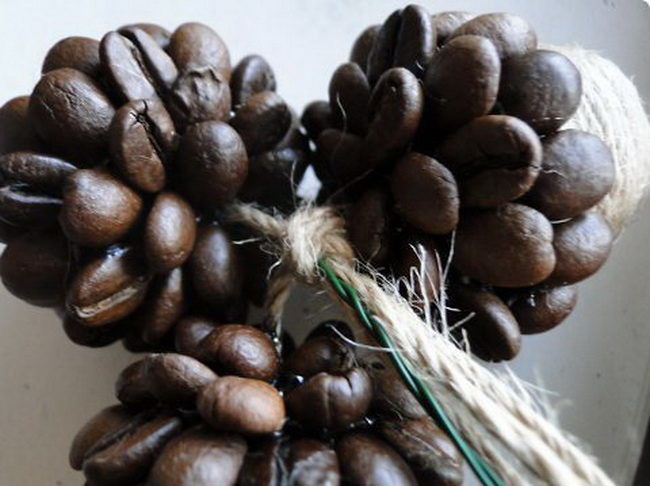
- Then apply glue to the wire and wrap it with twine. Wrap the excess part back, but not yet cut off, as it will be needed for fastening the leaf.
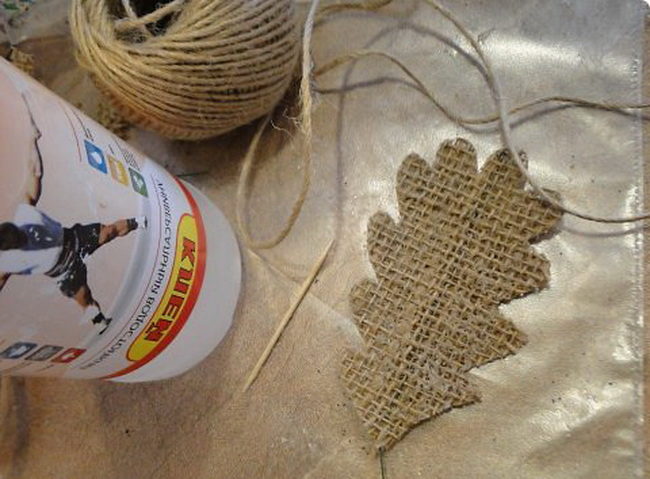
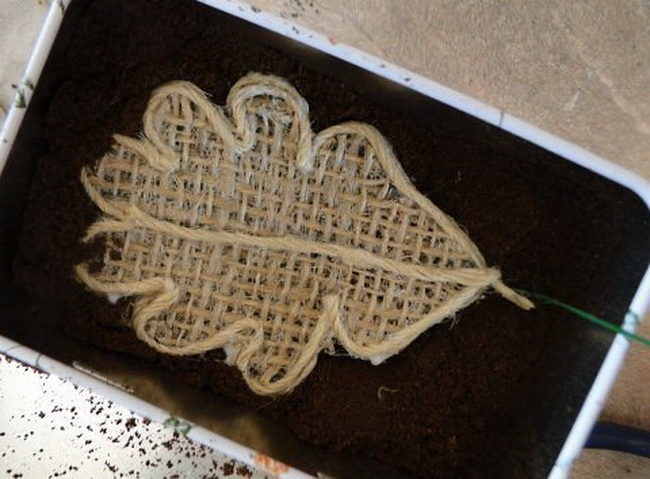
- Make the leaves for crafts from a burlap. Since it spreads quickly, it must be glued. To do this, cut two identical rectangles and fold together. Between them, pass the wire. Apply a thick layer of PVA glue on top.
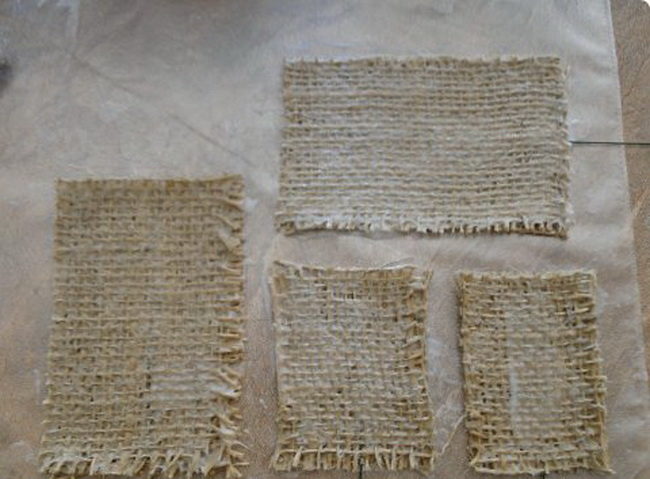
- After the glue, the material becomes solid, and will not crumble. On paper, draw an oak sheet template, transfer it to the fabric and cut it out.
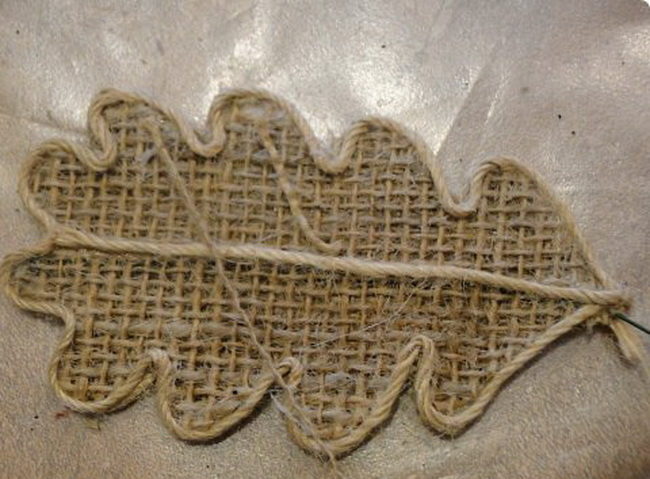
- Put the outline of the leaf with a jute twine. Apply glue only to the edge of the workpiece. Use a toothpick or thin brush for this. Correct the thread with tweezers so that it definitely lay down on the bends.

- On the second side of the material, glue the same decor along the cut line.

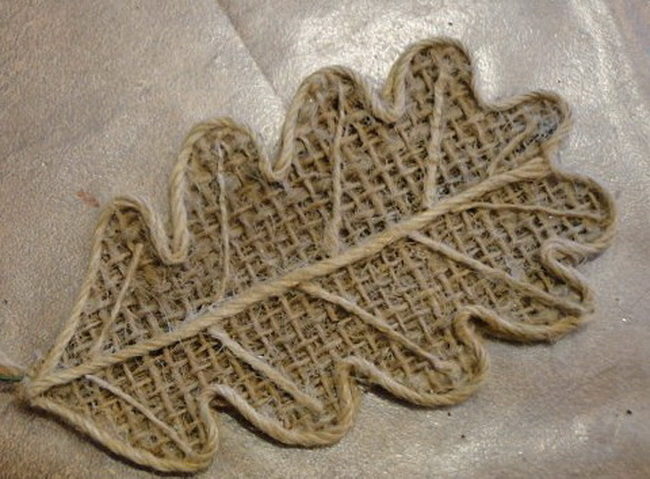
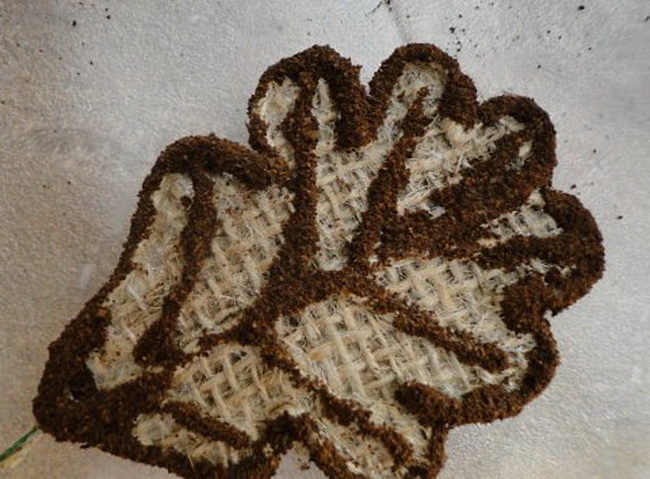
- Now it is necessary to make the veins. In the middle of the workpiece, put a thick twine, and use a thin thread on the sides. Glue them on the basis and wait until the glue dries. On the reverse side, decorate the sheet with only the central line.
- To give the texture, apply ground coffee along its contour and veins. You can simplify the procedure with a little cunning. Pour the glue with a brush on some areas on the workpiece.
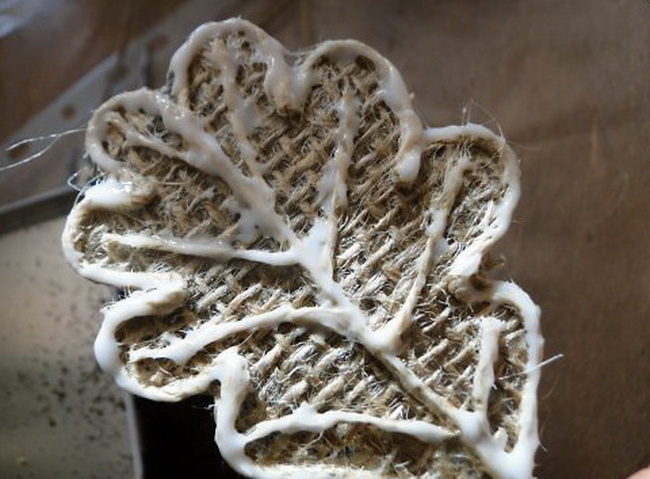
- Until the product has dried up, immerse it in ground coffee. Press the slightly and take it out immediately.
- So coffee will stick to the leaf and you will not need to apply it for a long time on the fabric. Leave the workpiece dry.
- Tie the finished decor with wire to the bundle of acorns. Cut the excess part, be sure to glue the twine.
- According to this technique, you can make the second version of acorns, but only it will not contain the decor of the main part. Leave it painted.
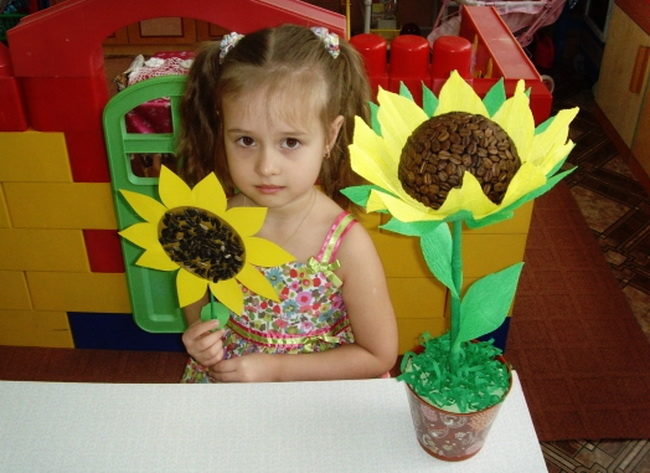
- For the smallest children, you can make a composition in the form of a panel of seeds. In it you can also use coffee beans.
- Or make a sunflower, the basis of which will be topiary with a ball. Cut the leaves from corrugated paper.
At home, making crafts made of coffee beans is quite simple. To do this, carefully follow the step -by -step instructions that are presented in the article. Good luck!
From coffee grains, you can also make a picture that will become a bright accent in your interior.


Comments
a couple of years ago, there was no side of metrogils from the same problem, there were no side effects ...
I’m not a fan of peeling at all, it saves from acne of metrogil, it also smoothes it ...
Great article! ...
I take the second course of the Capsules Climafite 911. The tides went very quickly. It became calmer, irritability went away and I sleep well ...
i also noticed - it is worth nervous, everything immediately affects the face. Therefore, I try to avoid conflicts and unpleasant people. Of the creams, I like Miaflow from wrinkles - smoothes not only small wrinkles ...