A garland is an indispensable attribute for almost any holiday. Of course, you can buy a ready -made garland in the store. But you will receive much more positive emotions during preparation for any holiday if you make a garland with your own hands. You can decorate the interior with a beautiful garland of paper for the New Year, for the birthday, by March 8, by February 23, for Valentine's Day, etc. In this article, we will consider detailed master classes on the manufacture of paper jewelry-garland.
Content
- DIY paper garland - what you might need
- Types of paper garlands
- Paper garlands - photo
- How to make a garland of paper
- Birthday garland
- Garland made of corrugated paper
- Girlyanda-ceremony of paper
- Garland from colored paper
- Garland from flowers from paper
- Garland of paper for children
- Flags-gyrlands of paper
- Paper flower garlands
- Paper garlands for a wedding
- Volumetric garland of paper
- Paper garlands - balls
- Paper garlands for the new year
- Garlands from paper men
- Girlyanda-butterfly of paper
- Garland from paper pompons
- Girlyanda-boots of paper
- Garland of paper from circles
- Paper garland templates
DIY paper garland - what you might need
A specific list of materials and tools for the manufacture of garlands will depend on its type. You can make an extremely simple garland using a minimum set of materials. But you can give free rein to your imagination and make a spectacular garland in complex technique. You may come in handy:
- wrappers from sweets or chocolate;
- old cards;
- glossy magazine pages;
- one -sided or bilateral colored paper;
- white or colored cardboard;
- corrugated paper;
- foil paper;
- color self -adhesive paper;
- ordinary or curly scissors;
- stapler;
- glue;
- one -sided or bilateral tape;
- twine, colored decorative threads, cords;
- decorative beads, buttons, etc.
You can continue the list of materials that can be useful to you for the manufacture of garlands for a long time. A garland can become not only festive attributes, but also a modern interior detail. Designers advise making unusual garlands color accents in the room, divide the room into zones.
Types of paper garlands
A garland is various elements connected in the form of a chain on the tape, cord, thread. People began to use garlands for decorative purposes for a very long time. For example, in ancient Rome, the streets, on which festive processions took place, were decorated with garlands of flowers. Later, garlands became the main attributes of the Nativity and New Year. If they were decorated not only with electric garlands, but also with homemade garlands of candy wrappers, tangerines, cotton balls, etc. The following types of garlands can be distinguished conditionally:
- depending on the material (electric, paper, from improvised materials, etc.);
- depending on the manufacturing method (voluminous and not voluminous);
- depending on the event (garlands for the New Year, garlands for his birthday, garlands for Valentine's Day, garlands for the wedding, etc.);
- from purpose (garlands for decor, garlands for zoning the room).
Paper garlands - photo
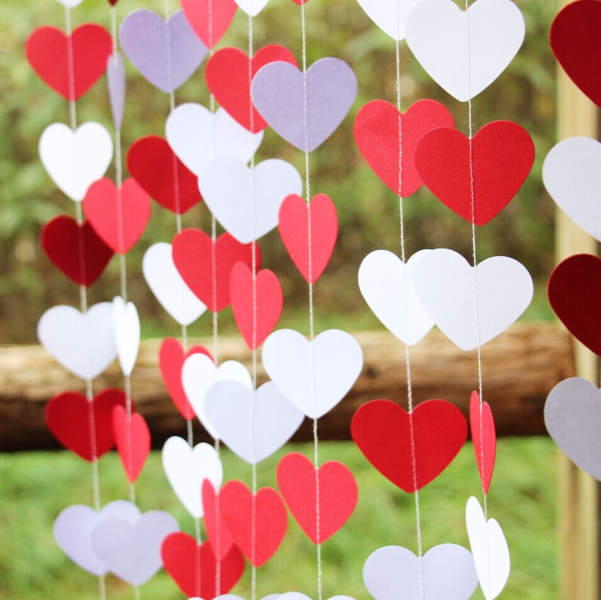
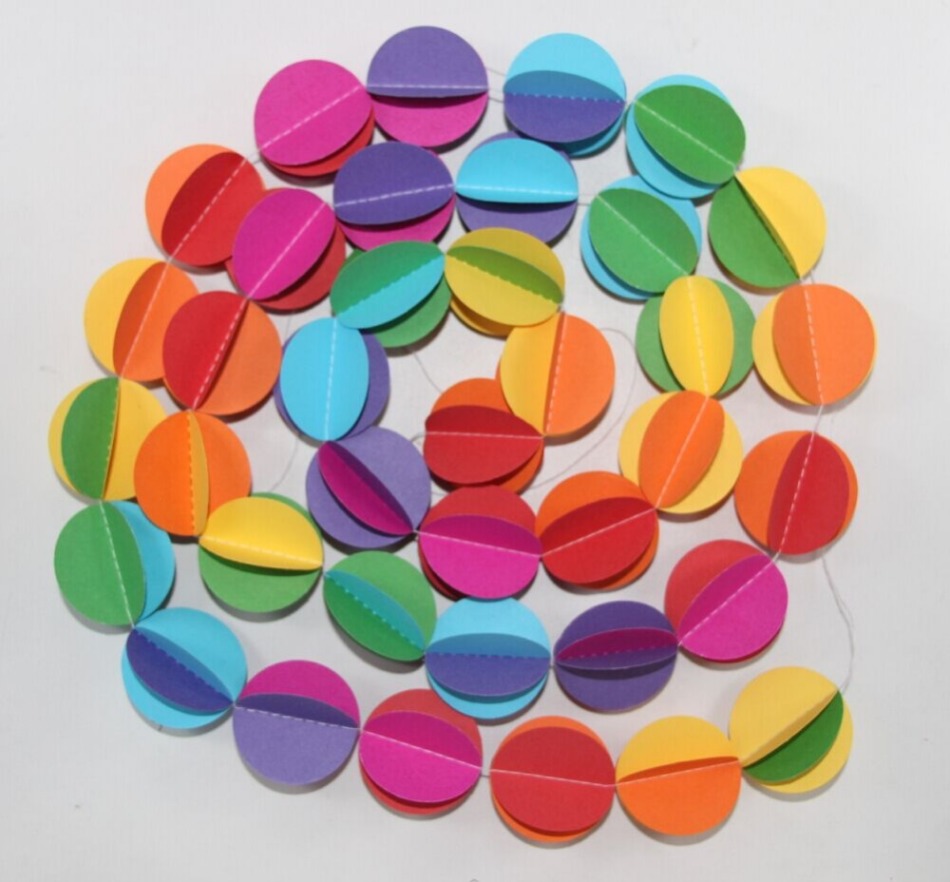
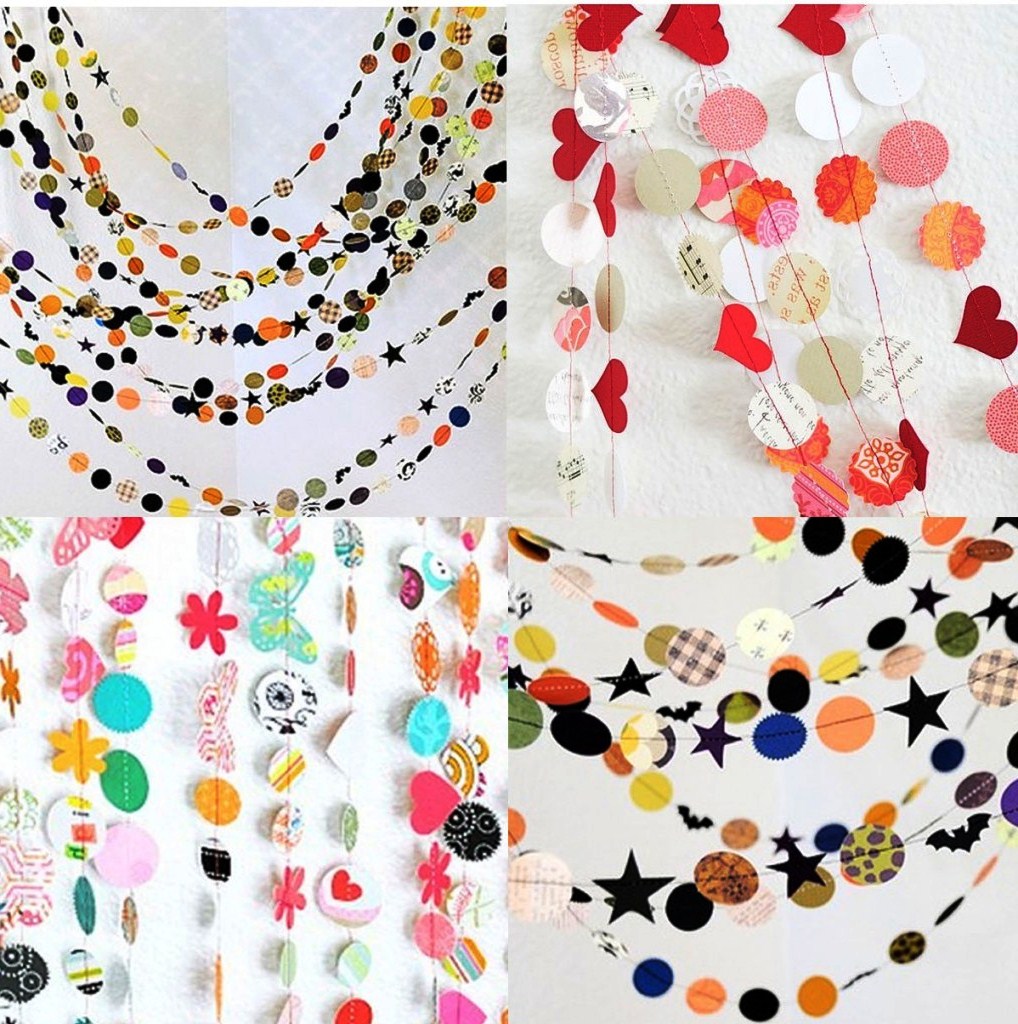
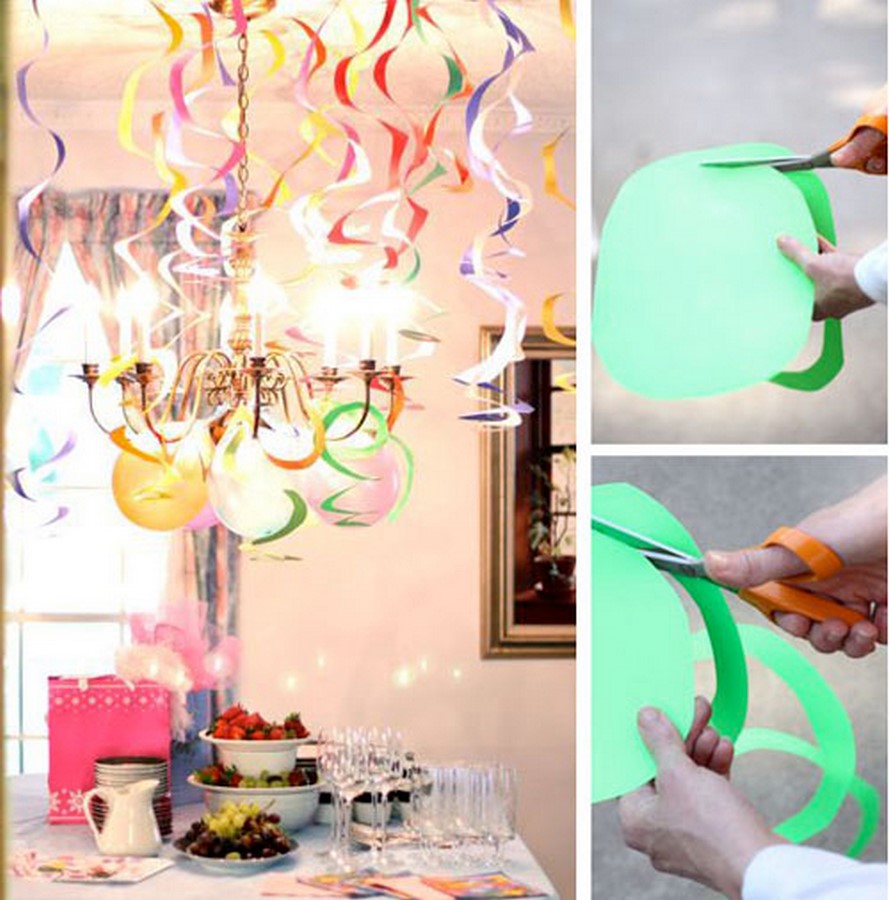
How to make a garland of paper
Birthday garland
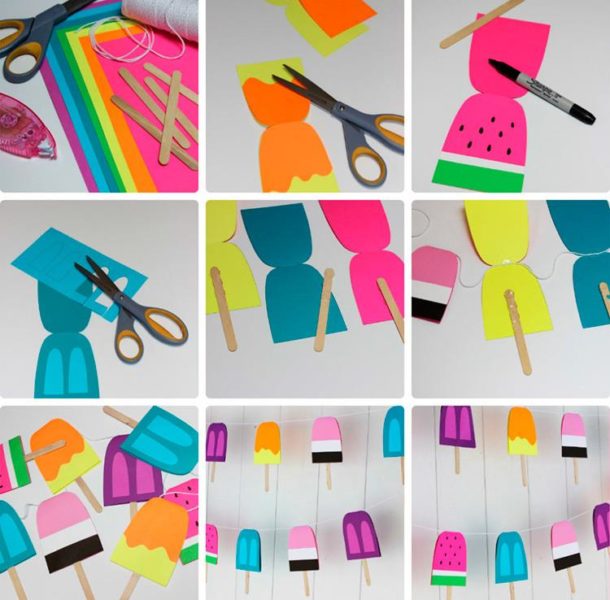
As a rule, their birthday garlands are particularly colorful. Consider the option of making a creative festive garland for a birthday made in the form of multi -colored ice cream on a stick.
- In order to make such a spectacular garland, you will need scissors, double-sided colored paper of different shades, a black marker for decor, thread, PVA glue or adhesive, wooden sticks from ice cream.
- In order for all the elements of the garland to be symmetrical, you can draw a ice cream template on a cardboard. Then, using this template, cut out of paper of different colors as many blanks as you need.
- It is advisable to make sure that every ice cream has its own unique design. For example, one workpiece can be decorated in the form of a watermelon slic, the other with a pouring glaze on top, etc.
- After all the ice cream is decorated, you can start attaching wooden sticks. In the middle of each workpiece we put a wooden stick, fix it with glue or tape.
- Now we hang up multi -colored paper ice cream on a stick on a lace, thread or tape. The lower edges of the workpieces should be stuck with glue. The festive garland is ready for the birthday.
Garland made of corrugated paper
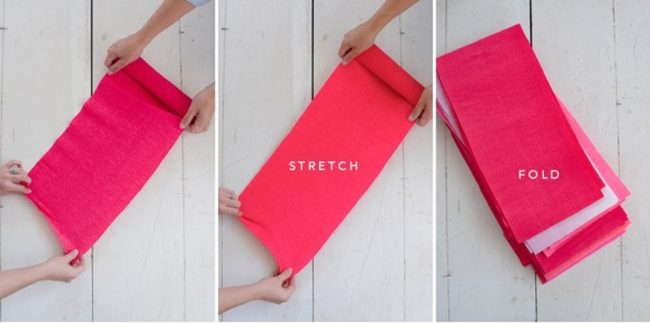
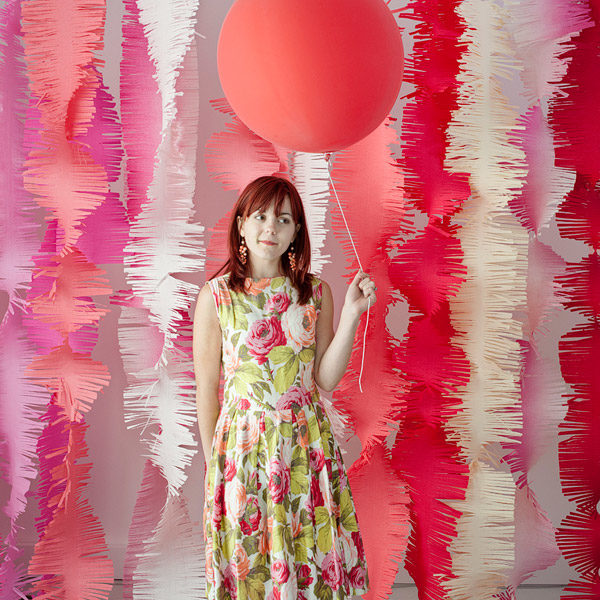
From corrugated paper you can make a large number of voluminous and spectacular jewelry for any festive event. Consider a step-by-step master class on the manufacture of large garlands from corrugated paper of different colors.
- Prepare corrugated paper in different colors, scissors and tape.
- Spin the roll of corrugated paper and cut it half.
- Now you need to add paper in a way that you can see in the photo. To accelerate the process, it is better to seek help.
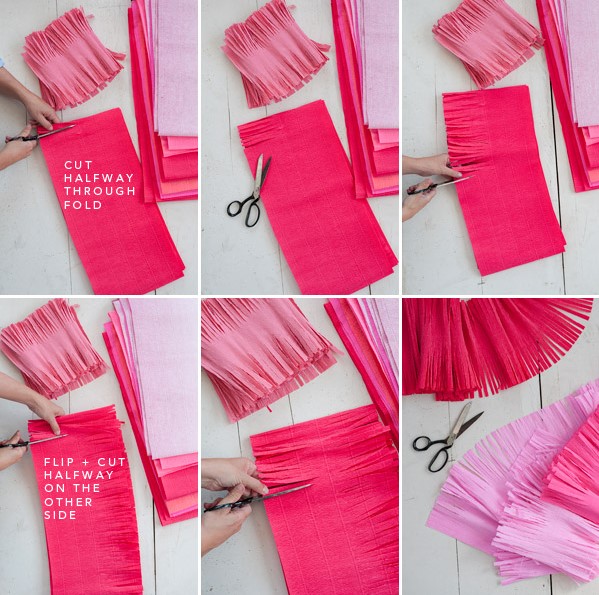
- Now you will need scissors. Start cut the fringe on each strip of corrugated paper. Do it carefully so as not to cut the middle. With corrugated paper of other colors, you need to do the same way.
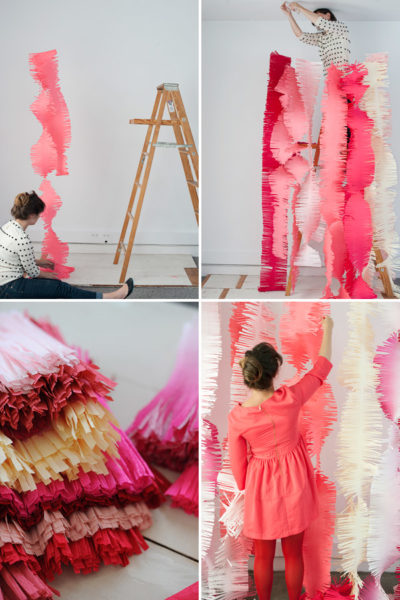
- The festive garland made of corrugated paper is ready. It remains only to attach it with tape on any surface. You can fix the garland on the ceiling or on the doorway. In order for the garland to look voluminous, tighten the garland around its axis several times.
Girlyanda-ceremony of paper
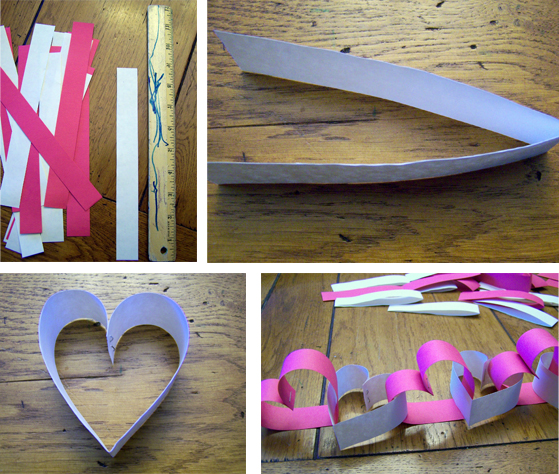
If you do not know how to decorate a room for a romantic dinner, you can pay your attention to this master class on making a simple garland of hearts. The garland is made as fast and simple as possible. Even the child will cope with this task.
- Prepare sheets of double -sided colored paper. The traditional colors of love and passion are pink and red. But you can choose any of the shades. You will also need a ruler, scissors, a stapler.
- From colored paper, cut strips 1 cm thick and 10 cm long. Use the ruler to make the workpieces as smooth as possible. The number of strips depends on the garland how long you want to make.
- Bend each strip of paper half. Then the free edges of the strip should be wrapped in the inside so that the shape of the heart is obtained. The edges are connected using a stapler.
- We take the next strip of paper, again bend it half, stretch the bent strip into the first heart, bend the free edges inward and connect them with a stapler. You got 2 paper hearts interconnected. We continue to make a garland in the same way until we reach the desired length.
Garland from colored paper
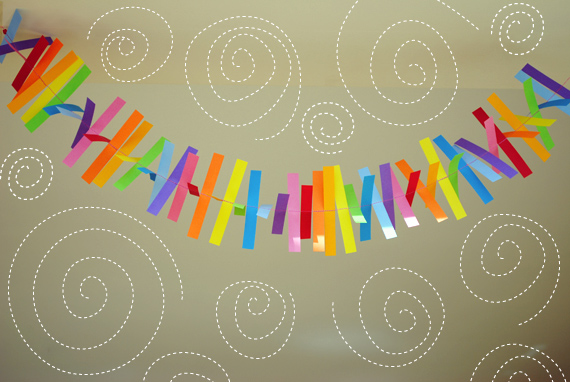
In order to decorate the interior for any event with your own hands, you will not need a lot of costs. It is enough to arm yourself with colored paper and make a spectacular garland.
- In order to make a garland from small strips of colored paper you will need a sewing machine, double -sided colored paper, a ruler, scissors and a pencil.
- You can make a very motley garland using the paper of the most juicy shades. You can also make a more “strict” garland if you use shades of white and gray colors, for example.
- Using a pencil and ruler, draw a strip about 1 cm wide and 8 cm wide on a sheet of paper. Before you start cut the strips, a sheet of paper must be bent so that the fold line is in the middle of the strips. You can cut it with scissors or an office knife.
- After the colored strips are prepared, we proceed to the collection of garlands. We will do this using the simplest sewing machine. By the usual stitch, begin to “sew” the strips along the fold line. As soon as you stitch one strip, immediately substitute the next. If you do not want the garland to be too “thick”, then leave a short distance between the paper stripes. Continue collecting a paper garland until you reach the desired length of the garland.
Garland from flowers from paper
Paper flowers look incredibly realistic. If you make a few magnificent paper flowers, supplement them with juicy green leaves, then you can make a very elegant garland.
- For the manufacture of garlands from paper flowers, you will need colored paper of white and green shades, scissors, glue, toothpick, a cord for collecting garlands.
- In order to make a voluminous flower of paper, first you need to draw and cut the blanks. You can print templates on the printer to make your task easier.
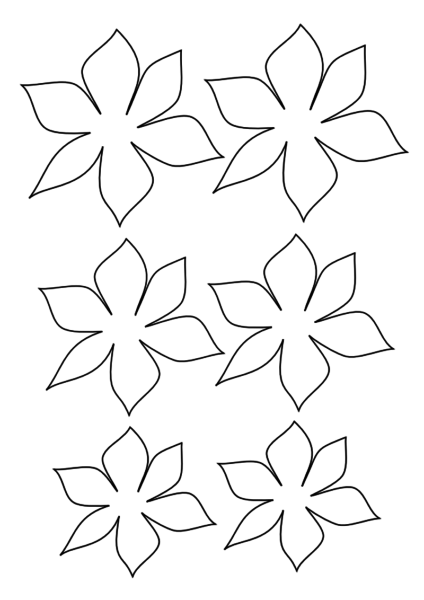
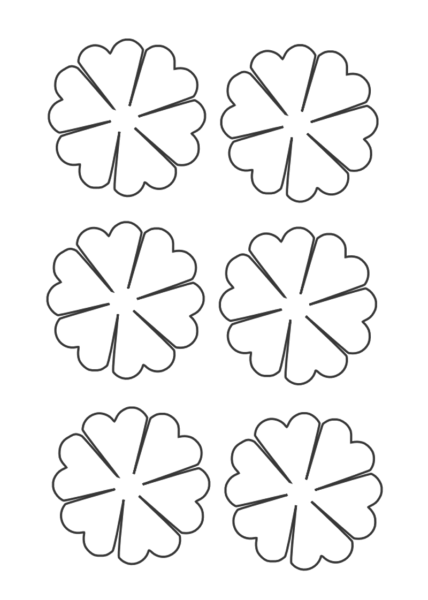
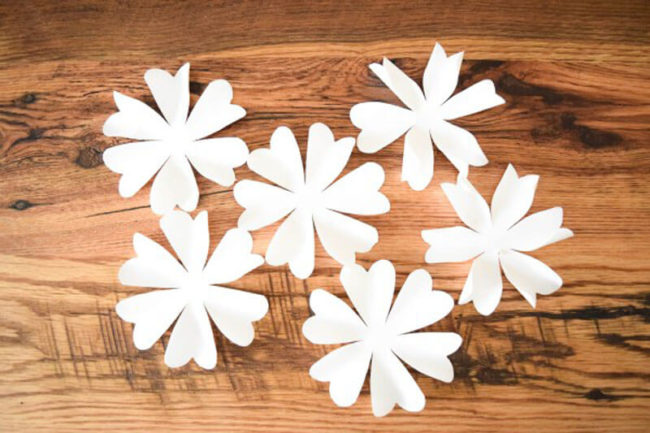
- Transfer the pattern on white paper and cut the flowers with scissors.
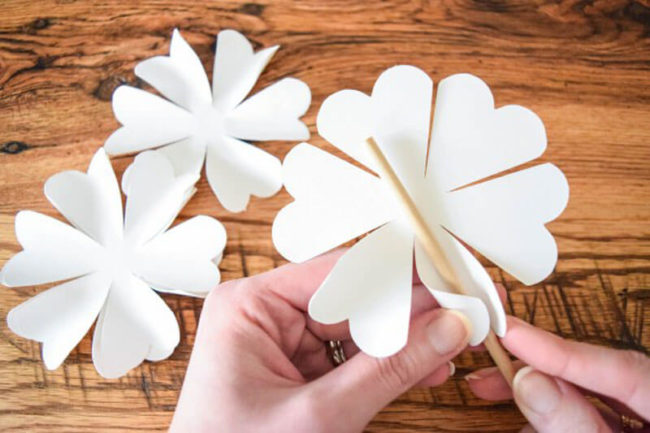
- In order for the flowers do not look flat, you need to treat each petal with a toothpick or any thin stick. The petals must be wrapped around the stick, lifting its edges up.
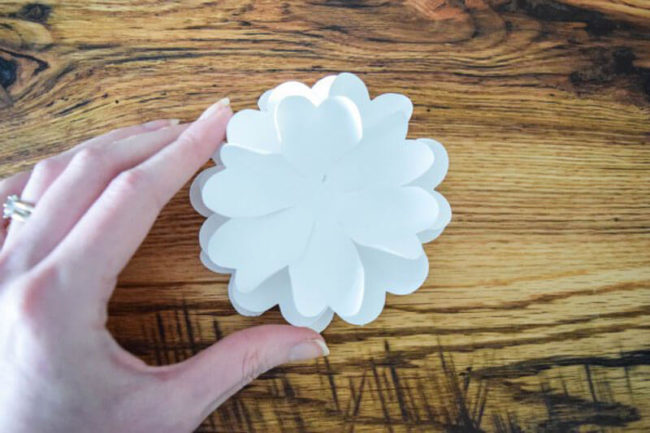
- Next, you need to connect the prepared blanks into one lush flower. Fasten them in the center with glue. In the middle of the flower, the workpieces should be twisted more tightly.
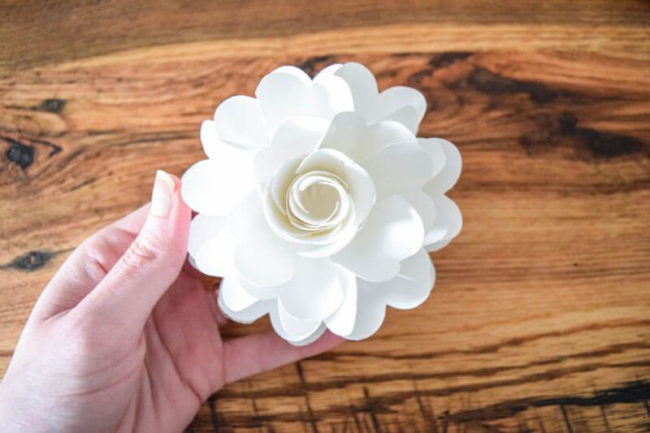
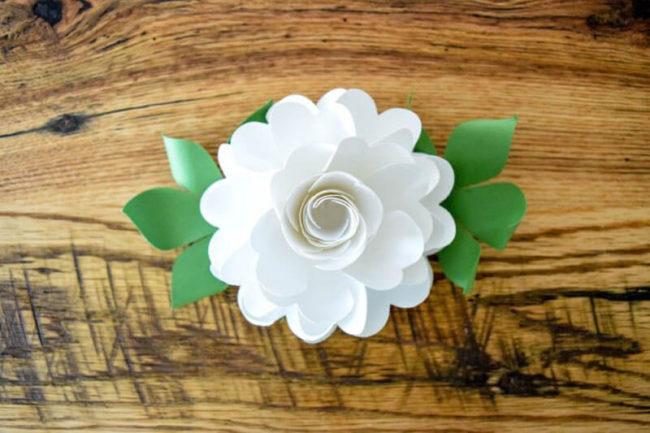
- Next, decorate the flower with green leaves. For their manufacture, you can use the same templates that you used to create a flower. The resulting flower is already very beautiful, and it can be attached to the thread.
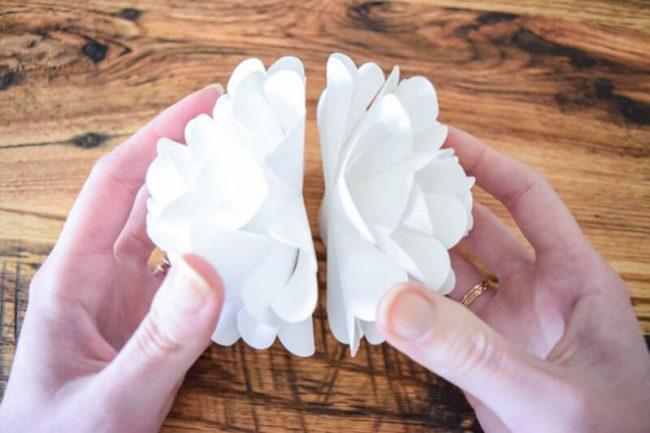
- If you want to make flowers even more voluminous, then you can connect two flowers with each other with flat sides with glue. At this stage, you need to not forget to fix the thread between the flowers.
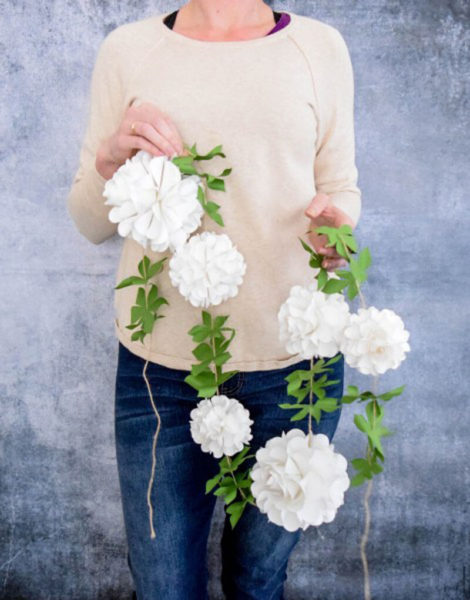
- Garnish the space on the thread between the flowers with green paper leaves. The result was a very spectacular garland of volumetric snow -white colors.
Garland of paper for children
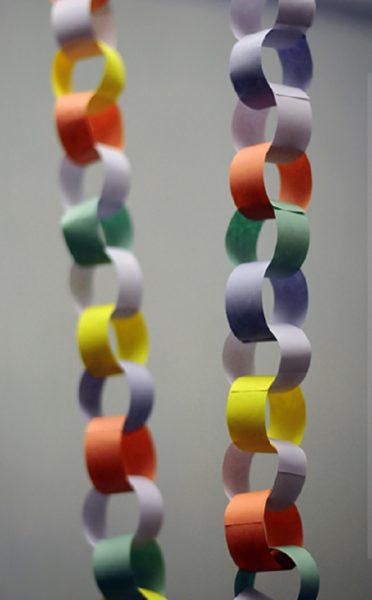
Children can also be involved in the manufacture of garlands. The most popular option is a garland of silt rings of colored paper. If the child already knows how to use scissors, he will be able to fulfill all the stages on his own. A less age child can be offered ready-made paper stripes that you just need to glue each other with a pencil glue.
- Prepare sheets of double-sided colored paper, scissors, ruler, simple pencil, adhesive pencil or PVA glue.
- First you need to cut paper strips. Their size may be arbitrary. If you want a garland to look more air and thin, then make thin and long strips. If you want the garland to look thicker, then cut the strips with wider and shorter.
- Using a ruler and pencil, draw the strips on a sheet of double -sided colored paper, and then cut them with scissors or an office knife.
- Now we start collecting garlands. Glue the free ends of the paper strip so that the ring is obtained. Then take the second strip, stretch it into the finished ring, glue the ends. You will get a chain of two rings. In a similar way, we continue to make a garland until we reach the desired length. Children's garland of paper is ready.
Flags-gyrlands of paper
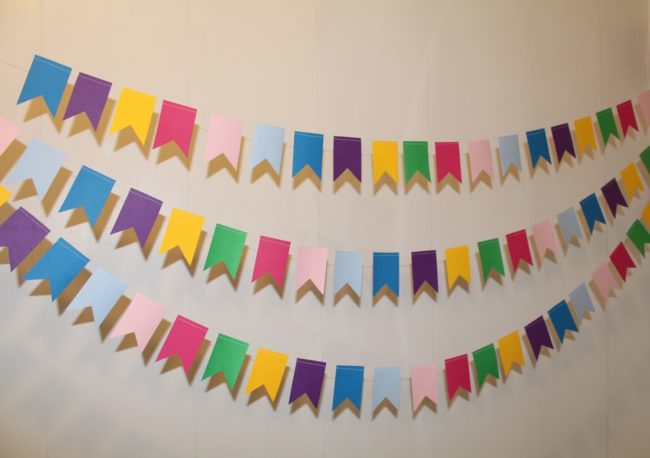
A garland of flags is also very often chosen for the decor of the room for birthday or any other important event. As a material for flags, you can choose paper, cardboard, fabric, old congratulatory cards, etc. Consider an example of the manufacture of one of the simplest and lightest options - garlands of paper flags.
- Prepare the sheets of colored paper. If you plan to hang a garland on the wall, then the paper can be one -sided. If you want to hang a garland under the ceiling, it is better to choose two -way colored paper. You will also need a ruler, pencil, scissors, thread.
- First you need to draw and cut the flags. Take a sheet of colored paper and using the ruler draw as many flags on it as it will fit there. Be sure to be the condition - the flags should be the same. Cut the blanks.
- After the elements of the garland are cut out, you can decorate them. If the garland decorates a children's holiday, then on each flag you can stick an image of a beloved hero from a cartoon, for example.
- Now it remains only to collect a garland. You can attach flags to the thread with tape. You can also sew the flags between you on a sewing machine. You can stretch the thread through all the flags with a needle. A simple but incredibly bright garland is ready.
Paper flower garlands
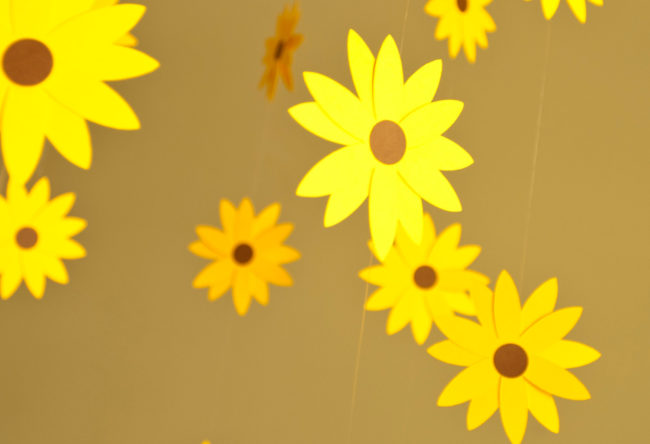
In order for the garland to be beautiful, complex techniques of its manufacture are not always needed. For example, a garland of simple paper flowers will look incredibly delicate and airy.
- Prepare double -sided color paper of the desired color, scissors, glue, thread.
- Now you need to draw flowers. It is most convenient to do this using templates that can be found on the Internet without problems.
- After the blanks are cut out, we proceed to the collection of flowers. One flower will consist of two blanks. Before gluing them, place the thread between them. So you will simultaneously make flowers and collect a garland on the thread. In the center of each flower, glue a circle of contrasting color, which will be the middle of the flower. Place flowers on the threads with some distance from each other so that the garland looks especially delicate and airy.
Paper garlands for a wedding
A wedding is an important event, the design of which is always approached very responsibly. You can not spend a lot of money on ready -made jewelry, but make some of them with your own hands. For example, garlands. They can be made of any length, any color and from any material. It is advisable to withstand the overall style of the celebration. Consider the option of making a wedding garland of colored paper.
- In order to make a romantic and very air garland for the wedding you will need colored paper, decorative threads, scissors, glue.
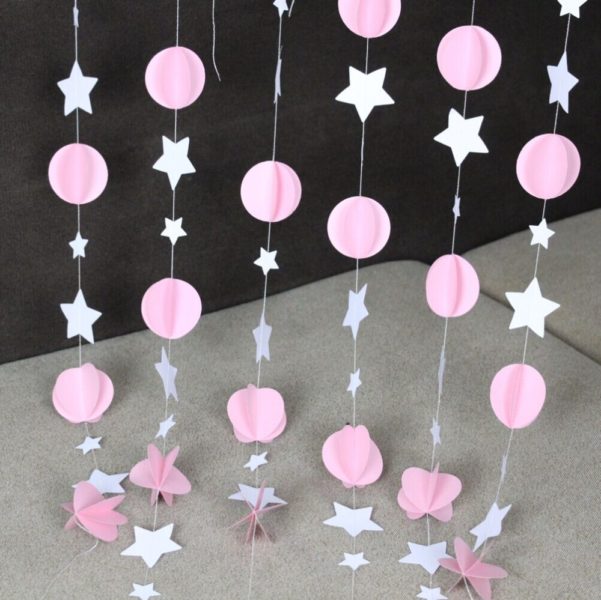
- First you need to decide on the color of the future garland. The traditional flowers for the design of the wedding are considered white, pink, red. Do not forget that the garland should be combined in color with other decor elements at a wedding party. We offer to make a garland of pale pink and white colors.
- Elements of garlands will be stars of different sizes and circles. In order for the elements to be perfectly symmetrical, first draw templates.
- After all the elements are cut out, we proceed to the collection of garlands. Connect the sides of 4 paper circles with glue, placing a garland thread between them. Then step back a certain distance and attach the stars in the same way. Continue until the length of the garland becomes sufficient.
Volumetric garland of paper
The best material for making a voluminous festive garland is corrugated paper. Consider the instructions for making garlands from incredibly spectacular paper colors:
- You will need corrugated paper, scissors, decorative thread. It is better to choose the brightest colors of corrugated paper. You can make flowers of the same color or combine several colors in one bud.
- Corporal paper needs to be expanded and rectangles from it. Choose the size of the blanks yourself. Focus that the size of the finished flower will be equal to the smaller side of the rectangle.
- Place 5 rectangles in a pile and begin to put it in an accordion. The finished accordion in the middle must be fixed with a thread or rubber band.
- The edges of the fan are rounded with scissors to make them similar to the petals.
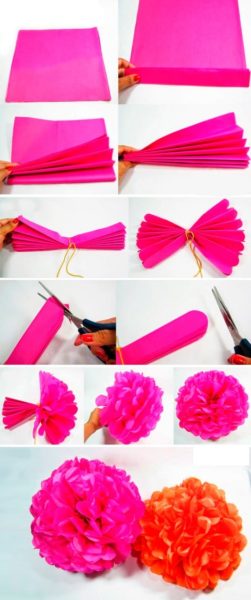
- It remains just to straighten the bud and attach it to the decorative thread. The festive garland is ready.
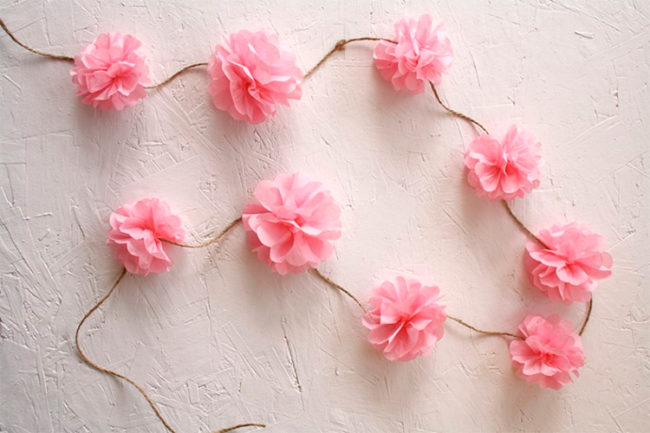
Paper garlands - balls
From ordinary colored paper you can make voluminous balls resembling Christmas tree toys. Such jewelry can be attached to a decorative thread and get a festive garland.
- Prepare double-sided color paper in different colors, scissors, ruler, pencil, PVA glue or adhesive pencil, decorative thread.
- On a sheet of colored paper, draw the same strips using the ruler. Cut them.
- Next, we begin to collect a ball of paper strips. Fix the edges of the strip to get a ring. Next, stretch the second strip through the ring and also fasten the edges. For one ball, you will need 4 strips.
- After you make the required number of balls, you can start stringing them on a decorative thread. A spectacular garland of volumetric paper balls is ready.

Paper garlands for the new year
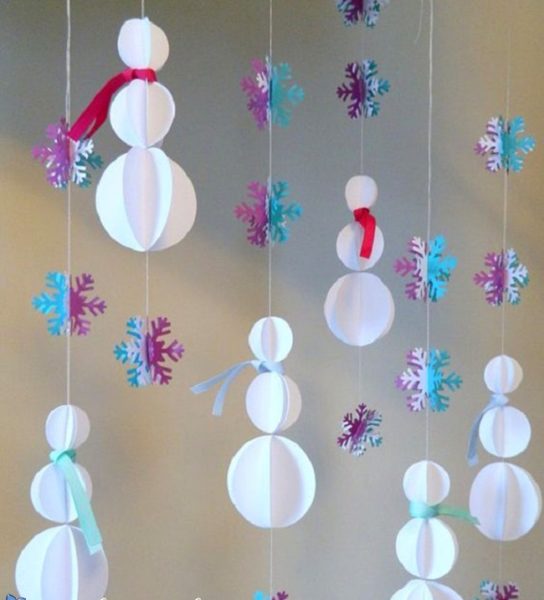
Preparations for Christmas and the New Year are liked not only by children, but also by adults. Girlands are one of the most popular decor elements for these holidays. Despite the fact that recently, electric garlands have been incredible popular, New Year's garlands from paper continue to maintain a special charm in themselves. Consider an example of the manufacture of garlands of paper snowflakes and snowmen.
- For the manufacture of such a garland, you will need white paper for snowmen, blue and purple paper for snowflakes, a small amount of “rain” or ribbons for snowmen decor, decorative thread.
- We proceed to the manufacture of a snowman. You need to draw and cut circles from white paper of 3 different diameters. In order to make the “head” of the snowman, bend the circles half and glue 3 pieces with each other so that a voluminous ball is obtained. For the “body” of the snowman, you already need 4 circles, and for the lowest part of the snowman - 6. At the time of gluing the snowman, you need to stretch the thread between the blanks in time. So that the snowman does not slide down the garland, tie a small bundle directly under it.
- Tie a “rain” or a thin ribbon for decor on the snowman's neck.
- Now cut snowflakes from colored paper. In order to make a snowflake voluminous, you need to glue 2 snowflakes together, folded half. Place the elements freely on the thread. The festive New Year's garland is ready.
Garlands from paper men
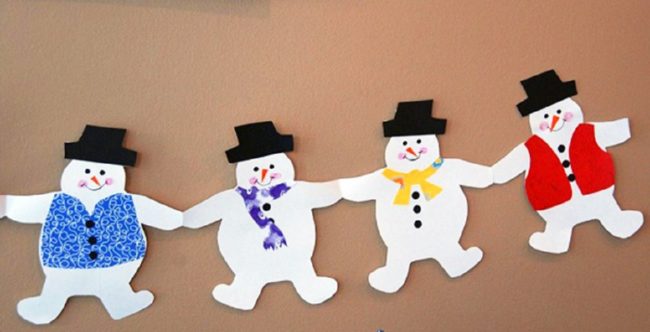
Paper men who hold onto the handles look very funny. Instead of men, you can draw everything you want.
- Prepare the paper of the desired color of the A3 format, scissors, glue, small pieces of colored paper for the decor of men.
- A sheet of white paper needs to be folded 3 times with an accordion. Now cut with scissors on the resulting fold lines.
- Each strip must again be folded with an accordion so that the width is equal to the width of the future man.
- After the accordion is ready, we begin to draw the silhouette of a man. On the part of the sheet, which is closer to the bend, we draw half the man. On the reverse side we draw the second half of the man.
- After you cut the garland, you will receive funny men who hold on to the handles.
- In order to “revive” our heroes, you need to decorate them a little. From colored paper, cut eyes, hats, vests, ties, etc. You can make the heroes the same, but you can make each of them their own unique appearance.
Girlyanda-butterfly of paper
Basochka garlands also look very gentle and romantic. Even a child can cope with the manufacture of such a decoration.
- You will need paper of the desired flowers, a thread for garlands, scissors.
- If you do not know how to draw butterflies, you can print a ready -made template.
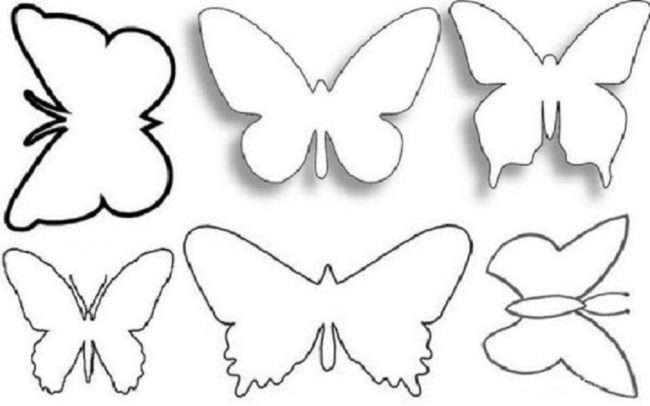
- Transfer the drawing to the paper of the desired color and cut out the elements of the garland.
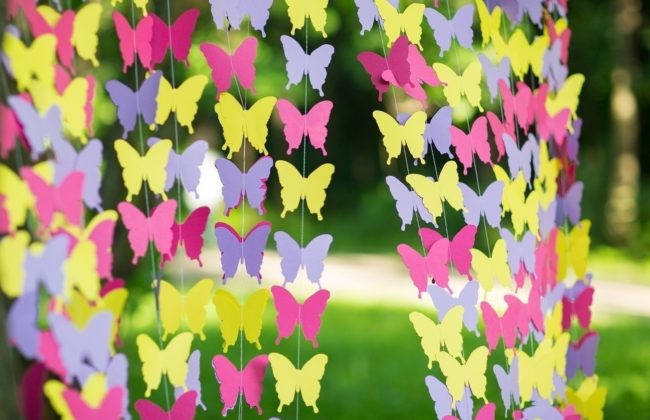
- Now it remains to attach butterflies to the thread. You can do this with tape. You can also glue 2 butterflies together, stretching a thread between them. You can also string butterflies on a thread with a needle. Light spring garland is ready
.
Garland from paper pompons
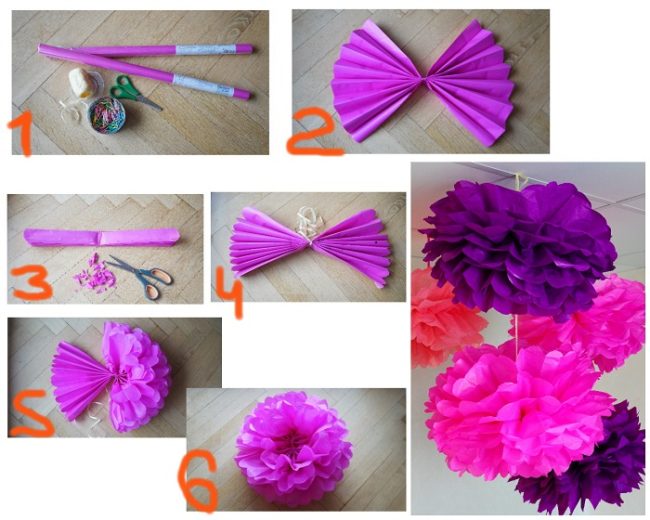
Paper pompons look special and festive in a special way. Girlands can be made of small, large or simply giant pompons. The best material for making such a jewelry is corrugated paper.
- Prepare corrugated paper of the desired color, thread for garlands, thin wire, scissors.
- Turn the roll of corrugated paper and cut it into the same rectangles. The size of future pompons will be equal to the width of the narrow part of the rectangle.
- Fold 8 rectangles in a pile, fold them with an accordion.
- The middle of the accordion must be fixed with a thread or thin wire. If you plan to hang pompons later, then at this stage you can make a small loop of thread or wire.
- Crush the free edges of the accordion with scissors or make them sharp as desired.
- A paper pompom is almost ready. It remains only to “fluff” the paper so that the decoration acquires the volume. From such pompons, you can build a horizontal or vertical garland.
Girlyanda-boots of paper
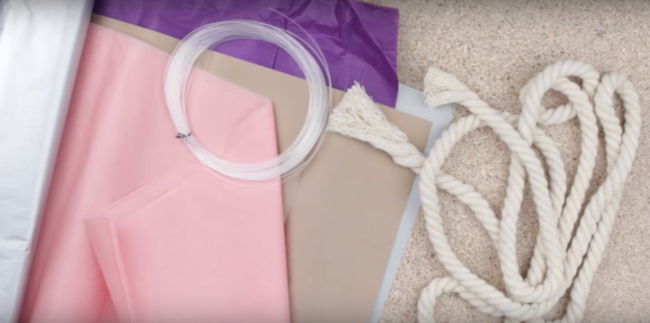
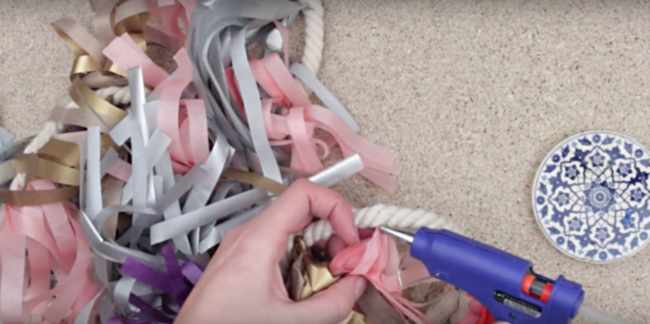
For the manufacture of garlands from paper brushes, you will need a special type of thin fastened paper - TISSU. Consider step -by -step instructions for making a colorful decor for any festive event:
- prepare colored sheets of paper with tissu, adhesive gun, thick decorative cord, scissors, ruler, fishing line;
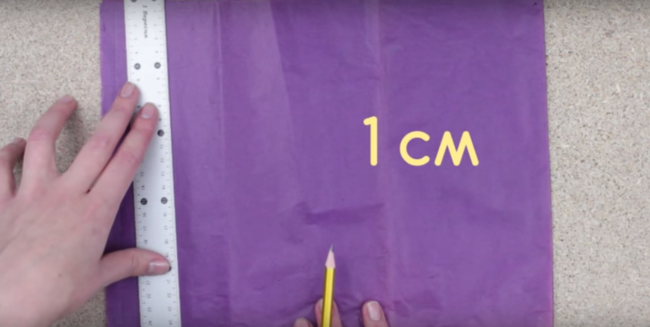
- cut the paper into rectangles. Each rectangle needs to be drawn on strips about 1 cm wide;
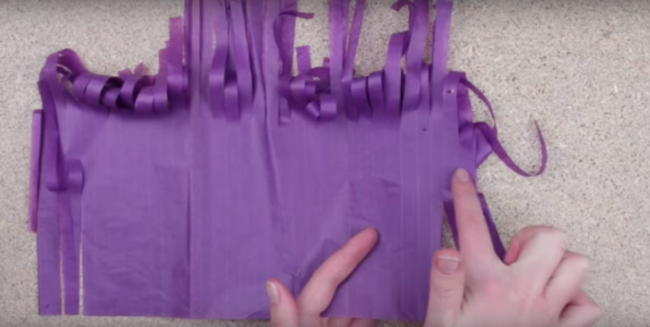
- next, with the help of scissors, begin to cut the fringe, but do not reach the middle. When the fringe on the upper part of the sheet is ready, retreat a couple of centimeters and begin to make a fringe on the bottom of the leaf in the same way;
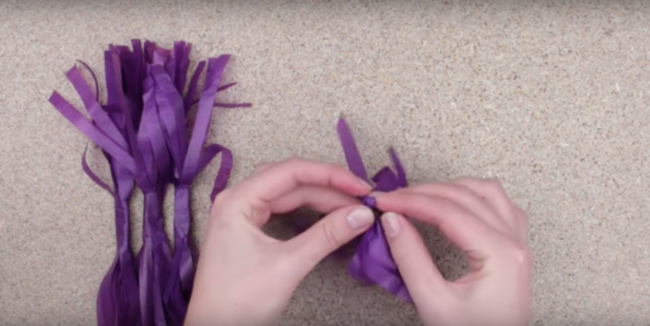
- next, twist the sheet with a fringe into a bundle, then scroll several times and fold it half. You should get an elegant brush;
- after you make the required number of brushes, you can start collecting garlands. To do this, take a fishing line, fix it with a free edge by a decorative cord and start wrapping it with a spiral cord with it. At about every 10 cm, attach the brushes;
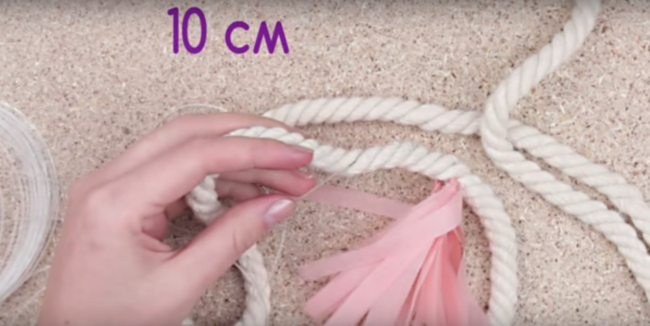
- in order for paper brushes do not slip, fix them on a garland using an adhesive gun. A spectacular festive attribute is ready.
Garland of paper from circles
Ordinary circles of colored paper can be a great basis for garlands. You can decorate the doorway, window, decorate the wall, etc.
- First you need to decide on the color of the future garland. You can use one color of paper, a few close shades or make a multi -colored garland. In this example, color paper of various blue and blue shades is used.
- We proceed to the workpiece of the main elements - circles from colored paper. The longer you want to make a garland, the more time you will have to spend on cutting out circles from colored paper. If you can find a special hole punch with large holes, then greatly facilitate your task.
- A garland made of paper circles will look much more interesting if you make circles of different diameters.
- After the main elements of the garland are ready, we proceed to its collection. Take two circles of the same diameter and glue them, having previously placed a suitable thread between them. Continue to attach the circles until the garland becomes the right size.

Paper garland templates
If you do not have artistic abilities, then you can make a garland of any kind using ready -made schemes for garlands from paper that is easy to find on the Internet. Print the pattern, transfer it to a dense cardboard, cut the part and use it as a stencil. Thus, cutting out garlands from paper will take a minimum of time. 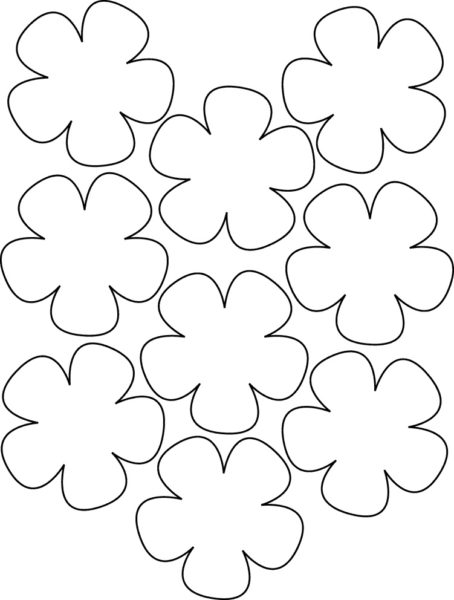
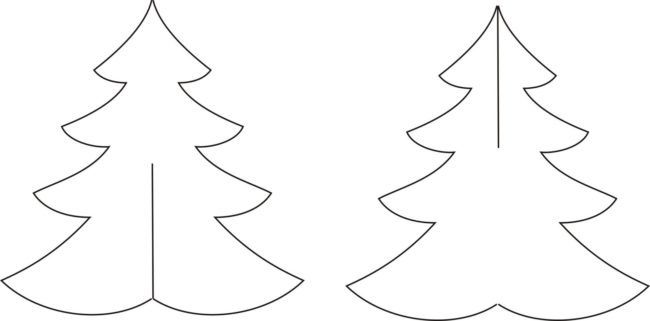
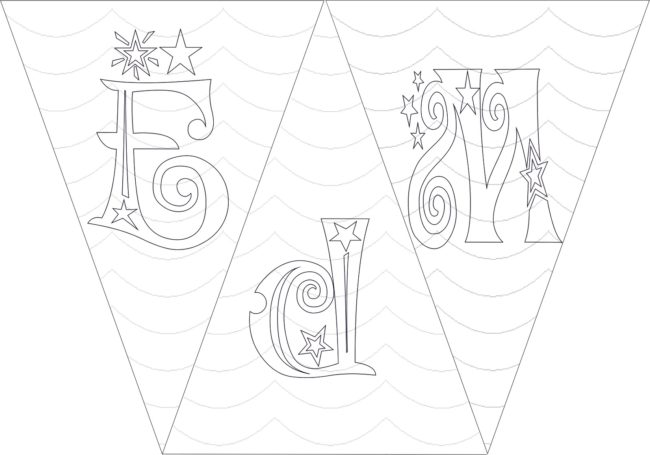


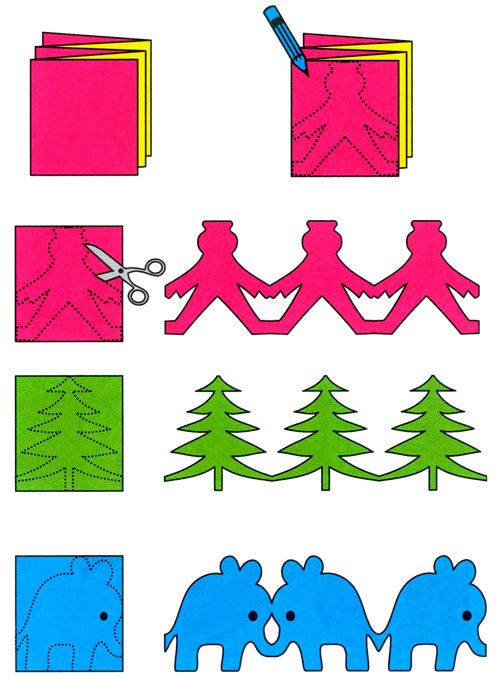
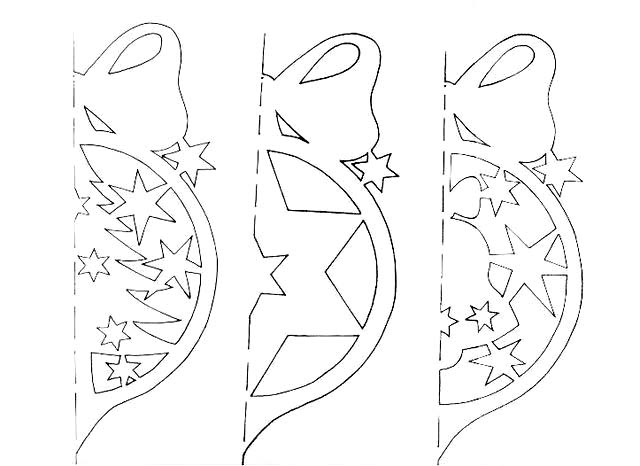
You can decorate your house using simple and affordable materials. From ordinary colored paper, you can make garlands of a wide variety of types and shapes. In addition, you can always print out paper garlands from the Internet, how to simplify your task.


Comments
a couple of years ago, there was no side of metrogils from the same problem, there were no side effects ...
I’m not a fan of peeling at all, it saves from acne of metrogil, it also smoothes it ...
Great article! ...
I take the second course of the Capsules Climafite 911. The tides went very quickly. It became calmer, irritability went away and I sleep well ...
i also noticed - it is worth nervous, everything immediately affects the face. Therefore, I try to avoid conflicts and unpleasant people. Of the creams, I like Miaflow from wrinkles - smoothes not only small wrinkles ...