

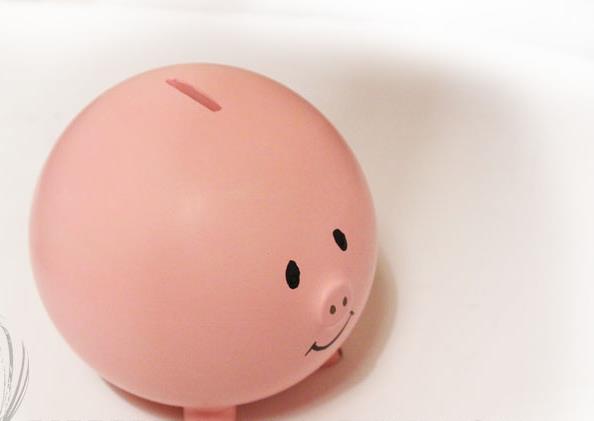
A piggy bank is a place where you are saving money. Perhaps you dream of any expensive thing or just want to have a “nurse”. You can buy a piggy bank in a store, or you can do it yourself, using a minimum of materials, which is much more economical. If you want to teach the child to save money, then attract him to the manufacture of a piggy bank. This can be an excellent family leisure. So what should be the piggy bank? It can be made of various, and sometimes unexpected materials. The piggy bank should not open so that you do not have a temptation to take part of the money from there prematurely. In this article we will consider many ideas for creating a piggy bank at home.
Content
- What can you make a piggy bank from
- How to make a piggy bank at home correctly
- How to make a piggy bank with your own hands - step -by -step instructions
- How to make a paper piggy bank
- How to make a piggy bank from cardboard
- How to make a piggy bank from a glass jars
- How to make a piggy bank from Lego
- How to make a piggy bank from a bottle
- How to make a piggy bank out of the box
- How to make a piggy bank from gypsum
- How to make a wood piggy bank
- How to make a piggy bank from a plastic bottle
- How to make a piggy bank from papier-mash
- How to make a piggy bank for paper money
- How to make a piggy bank - video
What can you make a piggy bank from
You can list the materials from which you can make a home piggy bank for a very long time. Absolutely any container where you can add coins or paper bills is suitable. Most often, the following materials are chosen for the manufacture of a home -made piggy bank:
- shoe box;
- glass jar;
- can;
- carton;
- plastic bottle;
- toy;
- wooden box or box.
For the decor of the monetary piggy bank, you can use clippings from newspapers or magazines, satin ribbons, lace, fabric of various textures, colored paper, old wallpaper, beads, buttons, rhinestones, sequins, etc.
How to make a piggy bank at home correctly
So, you decided to make a money piggy bank with your own hands. In order for the result to be pleased with you, the work to create a piggy bank should be clearly built and planned. Adhere to the following work plan:
- the first thing you need to do is decide on the style of your future piggy bank. If the piggy bank will act as a gift for someone, then take into account the age of this person, the sphere of his activity, his interests and hobbies. Come up with what technique the piggy bank will be made in. At this stage, it is advisable to make a small sketch on paper, a sketch;
- if you have decided on the style of the piggy bank, then you need to start the selection of materials and the necessary tools. Find in advance and prepare what will be the basis of the piggy bank. If you use a plastic bottle, then carefully clean it, degrease the surfaces. Prepare all the materials for the decor of the piggy bank. There should also be scissors, a hammer, a stapler, a hole punch - all those tools that you need;
- the last stage is the process of making a cash piggy bank. For convenience, you can use various instructions or video management of the creation of a piggy bank that you can find on the Internet.
How to make a piggy bank with your own hands - step -by -step instructions
How to make a paper piggy bank
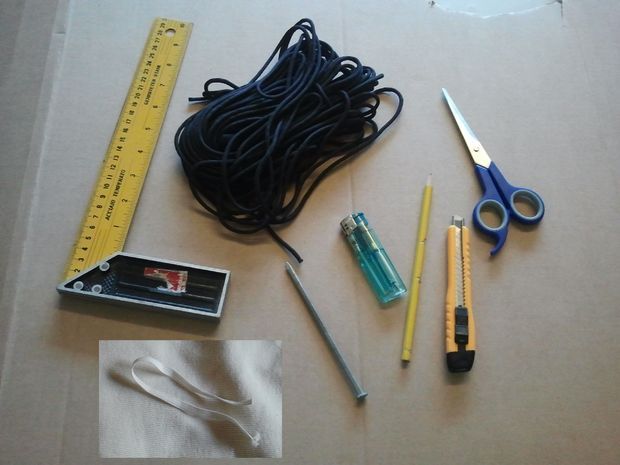
The fastest and most simple way to make a piggy bank is to make it from paper. In addition, this option is also very budgetary, since there is no need much materials to create such a piggy bank. You will need: thick paper of the color that you wish, a hole punch, a decorative thread or ribbon, glue or double -sided tape, a printed template.
- The paper piggy bank will be presented in the form of a small box with a slot at the top. First, print a template that will help you make a perfectly even box.

- If you printed a template on white paper, then transfer the pattern on colored paper, which should be a little denser.
- Using a hole punch on the 2 most protruding parts of the template. These holes will come in handy in order to then stretch a decorative thread or tape in them.
- Following the designations on the template, make a box. Depending on what is more convenient for you, use PVA glue or double -sided tape.
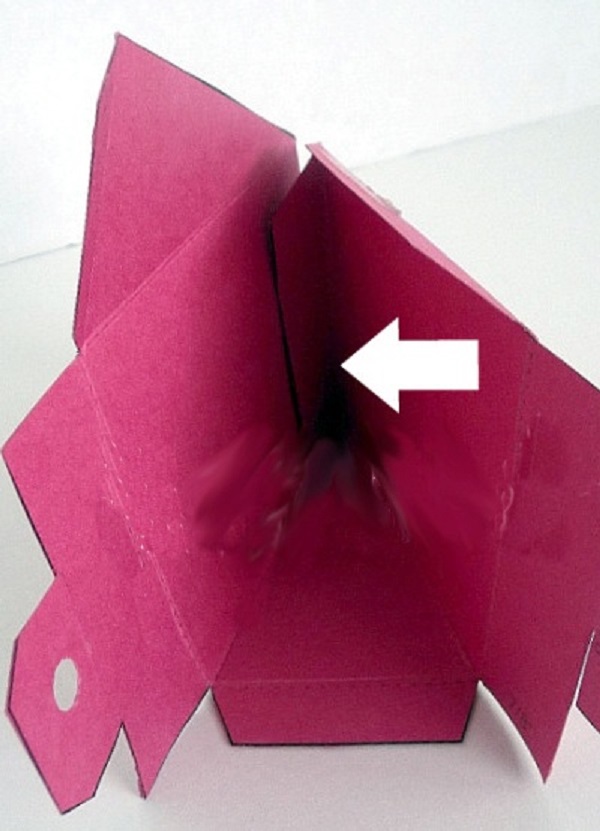
- You should get such a triangular box.
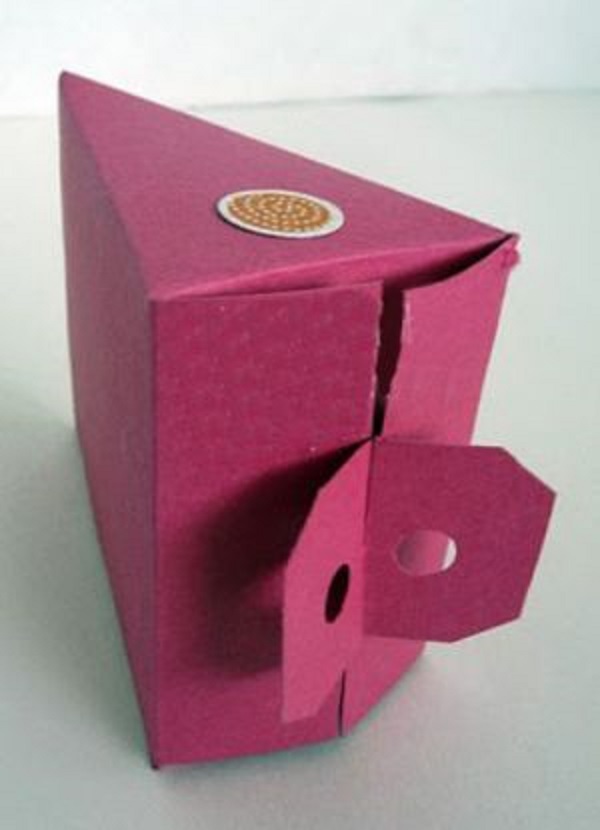
- Now you can start the decor of our paper piggy bank. Pull a beautiful ribbon or thick thread into one hole, wrap the entire box around and stretch it into the second hole. Tie a tape or thread on a bow.
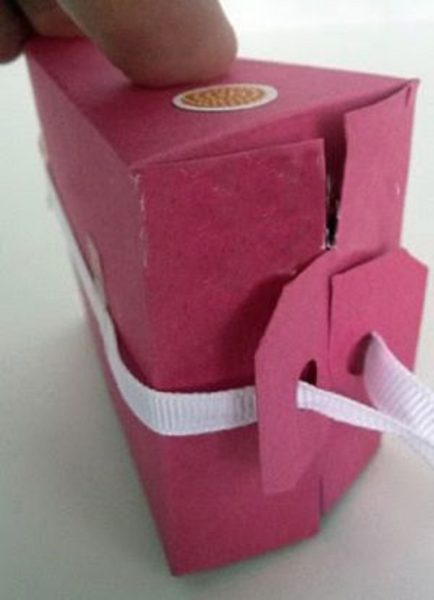
- Now the most important part is not enough, without which the piggy bank will not be a piggy bank - a slot for throwing coins. Make it at the top of the box with a sharp clerical knife. A cute money piggy bank is ready. As soon as you collect the amount you need, just tear the piggy bank. Now you know how to make a paper piggy bank.
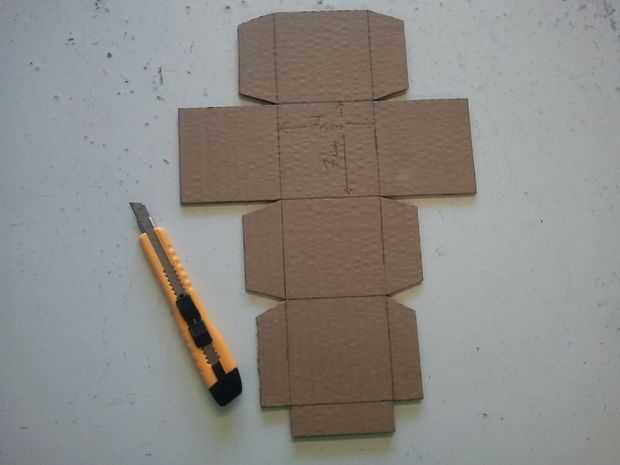
How to make a piggy bank from cardboard
A very spectacular piggy bank for coins can be made of dense cardboard, from which shoes, equipment, etc. are usually made. To create such a piggy bank at home, you will need the following materials and tools:
- a sheet of dense cardboard,
- chancellery knife,
- simple pencil,
- scissors,
- ruler,
- color lace;
- a thick nail, an awl or another tool in order to make holes in cardboard.
If all the materials are prepared, then proceed to the creation of a piggy bank. By the way, you can choose absolutely any size of such a piggy bank. If you take a large sheet of cardboard, you can use the piggy bank not only for coins, but also for banknotes.
- Place all the materials and tools in front of you. Check if there is only enough.
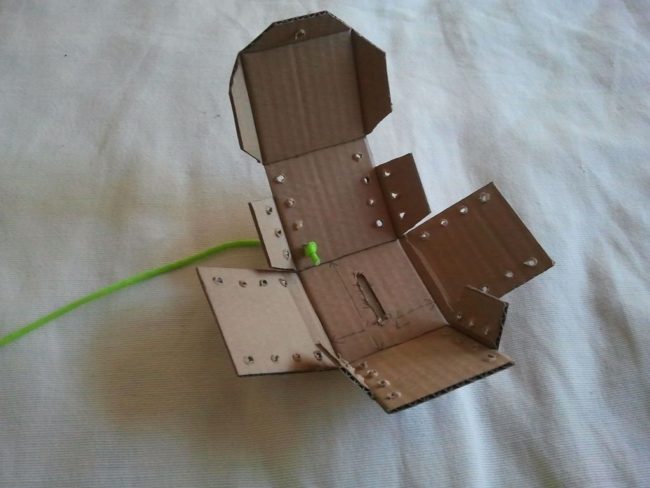
- Armed with a simple pencil, ruler, draw the next template on the cardboard. You can also print such a template, cut it and transfer the pattern to cardboard. You should get such a blank.
- Next, bend the cardboard workpiece in the indicated places for the bend. You should get such a cube.
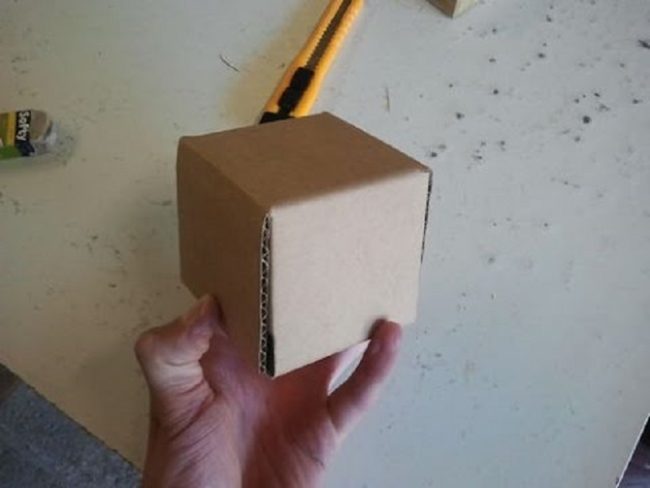
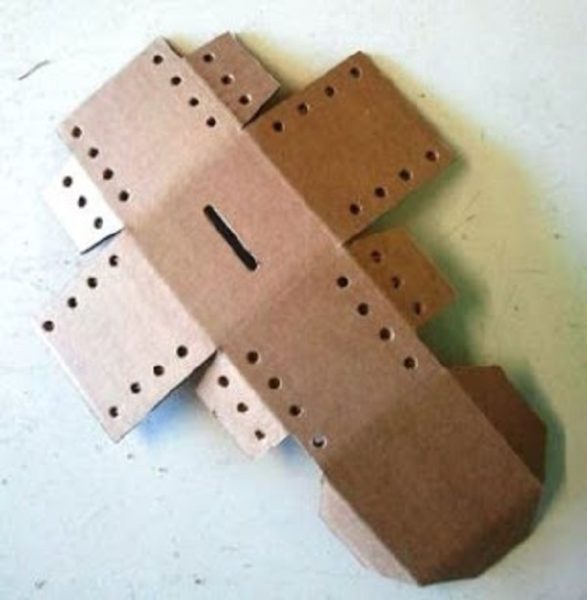
- To fasten all sides of the cube, we will not use glue or tape. With the help of a thick nail or an awl, make holes on the workpiece as shown in the photo.
At the same stage, make a slot into which you will later throw coins or bills. You can score the location of the slot, its shape, and then cut the hole with a clerical knife. 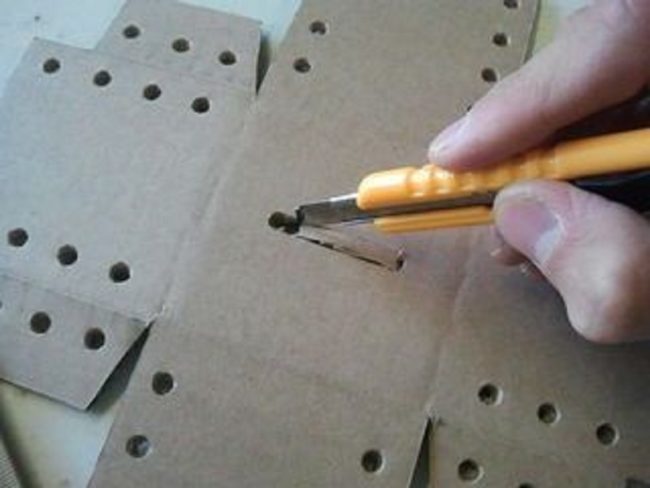
- It remains to fix parts of the cube with a colored lace. In order to firmly fix the cord, tie the knot at the end.
- Start "lace" the piggy bank in the method indicated in the photo.
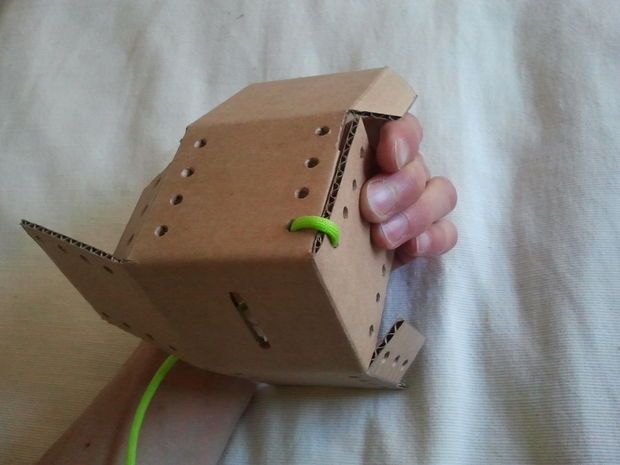
- The sides of the cube should firmly fix the cord. If you “lace” the piggy bank is not very convenient, then you can use thin elastic bands for temporary fixation of the cube.
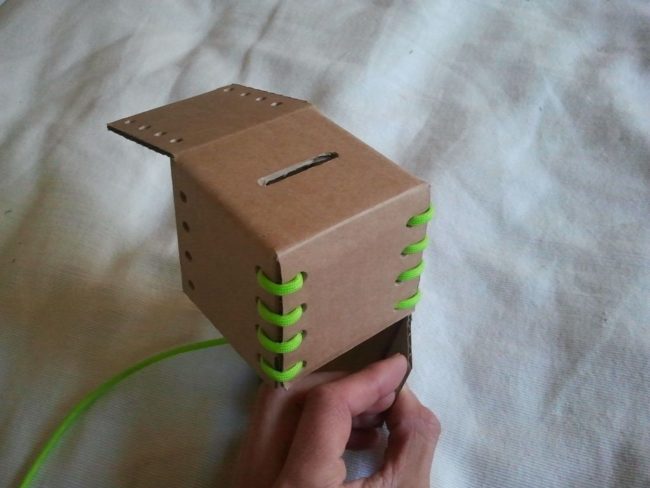
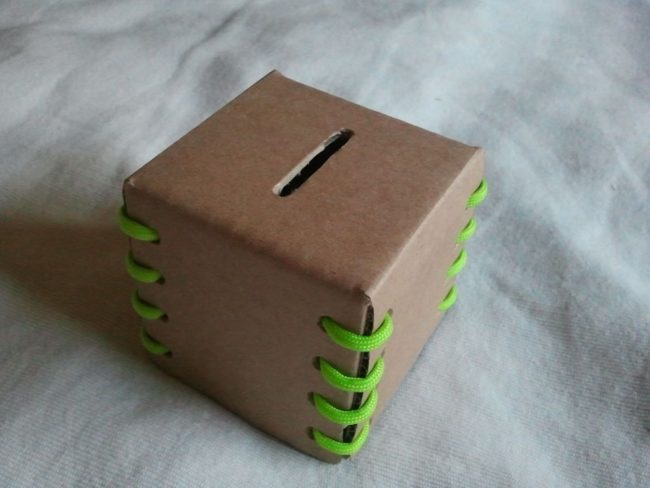
- When all sides of the cube are connected by a lace, a simple monetary piggy bank is ready. At your request, you can decorate the piggy bank with stickers, inscriptions.
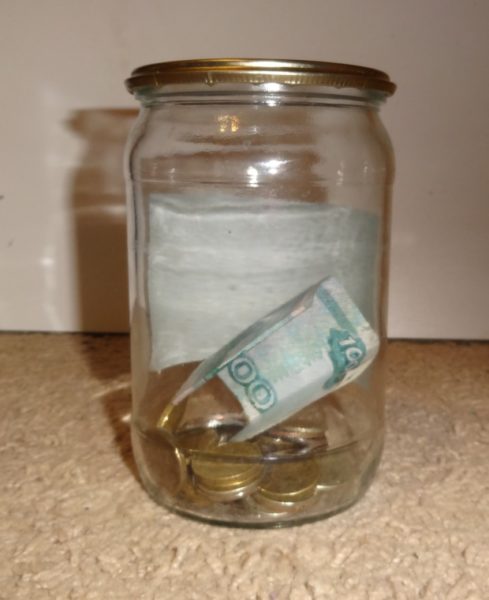
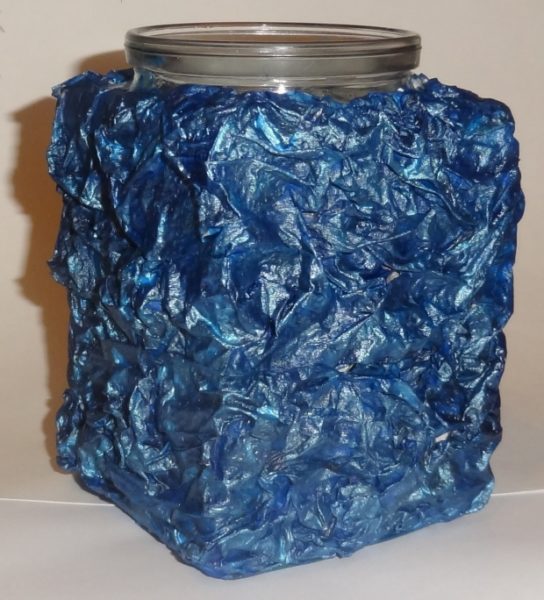
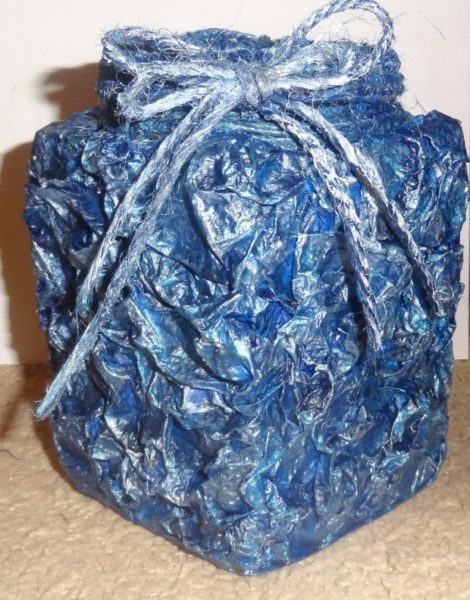
How to make a piggy bank from a glass jars
Consider step -by -step instructions for the manufacture of a piggy bank, the basis for which an ordinary glass jar will serve. You can choose a jar of any volume, but it is most convenient to take a liter jar.
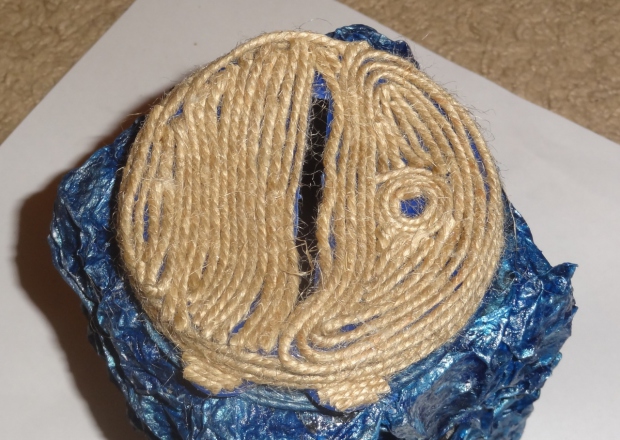
- In order to save money in a glass jar, just roll it up with a lid. A longitudinal slot for money is made in the lid. The process of creating a piggy bank could well have been completed on this. But to give a more unusual look we decorate the jar.
- From cardboard (color is not important) it is necessary to cut 2 strips. The length of the strip should be equal to the amount from the height of the jar multiplied by 2, and the diagonal of the bottom of the can. The width of the strip should be equal to the width of the jar.

- Next, place the cardboard strips perpendicular to each other. The place of their connection will be a place for the location of the bottom of the can. Fix the strips in this place with a stapler.
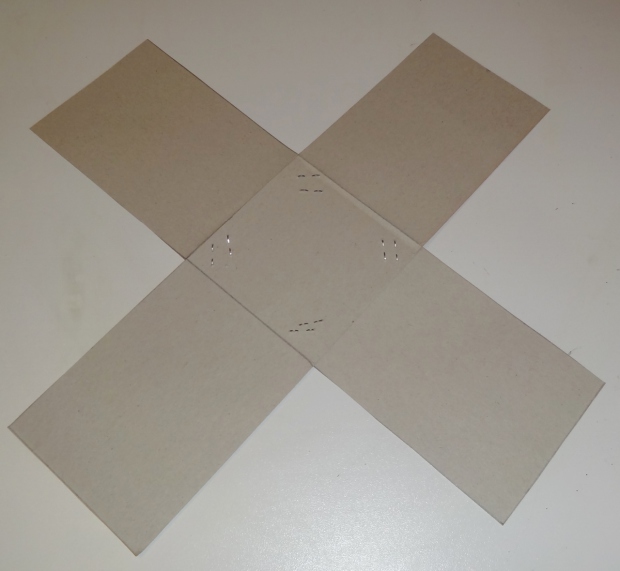
- One of the components of the piggy bank is ready. Now we take another sheet of cardboard on which we put our first workpiece. On each side of the first workpiece, you need to add 1 cm each. But we do not need long stripes, so we leave 3-4 cm on their part. You should get a figure of the following form.

- Cut the second workpiece. In its center, with a damn circle with a diagonal, which is equal to the diagonal of the cover on the bank. Cut the hole.
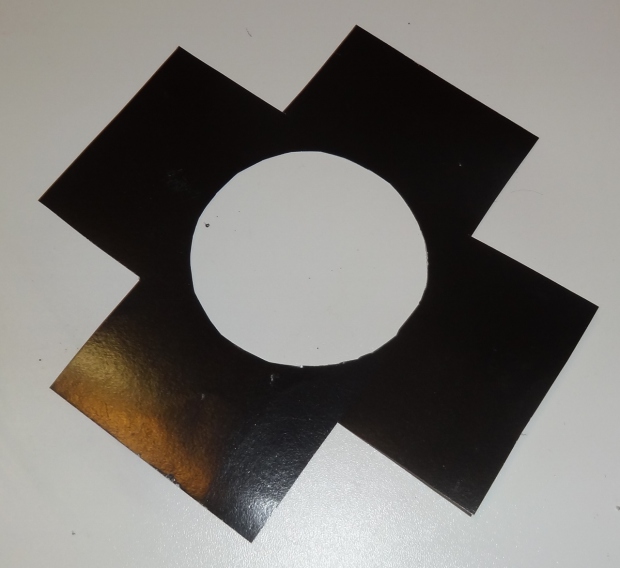
- Two cardboard blanks are ready. In the center of the first of them we put our bank. We bend the long strips up.
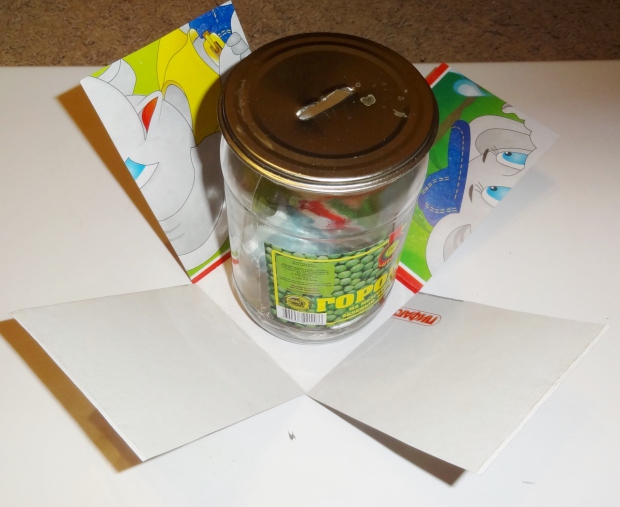
- We put the second blank of cardboard on a can on top and lower the edges down. Using a stapler, we connect two blanks in all available places, giving the bank a rectangular shape.
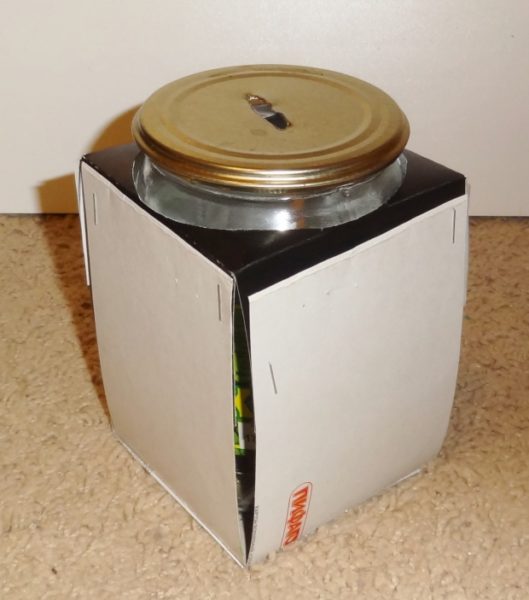
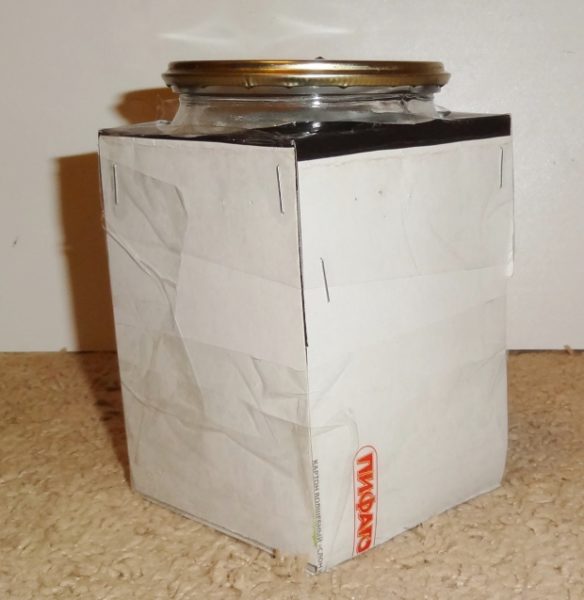
- To give the structure greater strength, we additionally wrap the jar from all sides with tape.
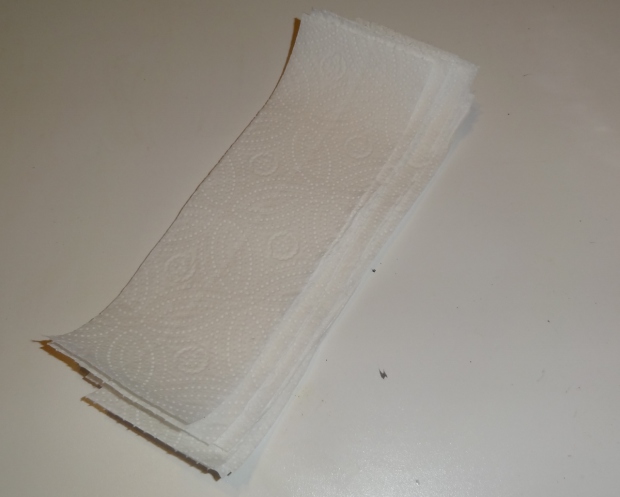
- Next, we will create a decorative surface for our piggy bank. To do this, prepare paper towels, which are cut into small strips about 2 cm wide.
- Dilute PVA glue with water in a ratio of 1: 1 in a small container. Move the chopped strips in the glue, crushing them a little to get the folds. Clock the whole jar with such stripes. After drying one layer, you can make the 2nd, 3rd layers. The more layers you stick, the more the surface will look textured.
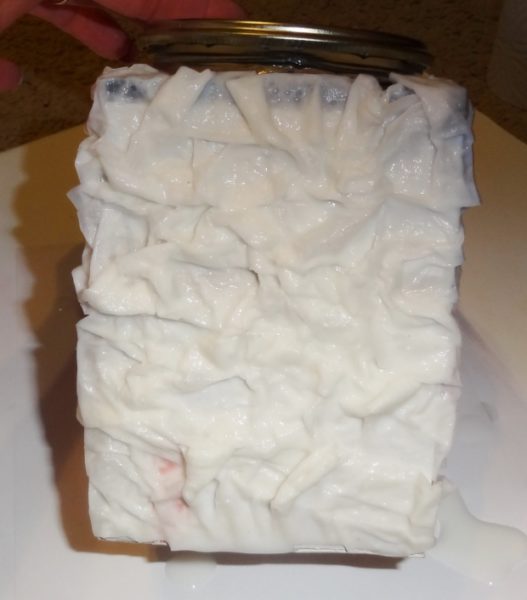
- After the glue dries completely (it is better to leave the jar overnight for complete drying), you can start staining. Choose an interesting color of paint, you can add a spark to paint. Color thoroughly, without leaving white proplesh on the surface.
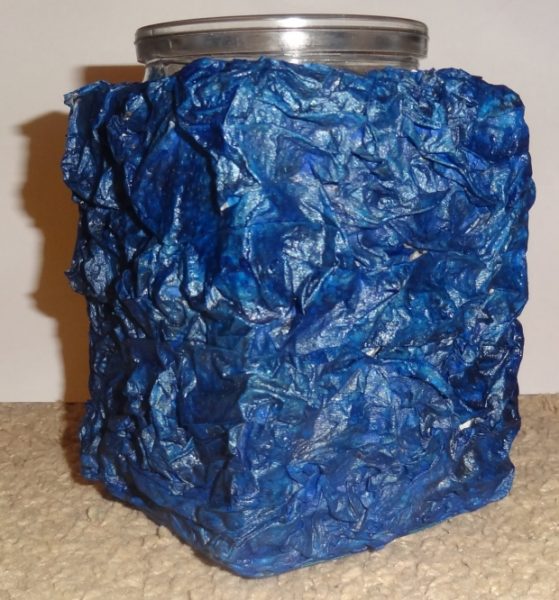
- To make the surface of the piggy bank even more beautiful, you can apply a layer of pearl paint.
- After drying the paint, we proceed to the disguise of not too attractive places of junction of cardboard workpieces and banks. Lubricate these places abundantly with glue and wrap with a packaging thread or wool.
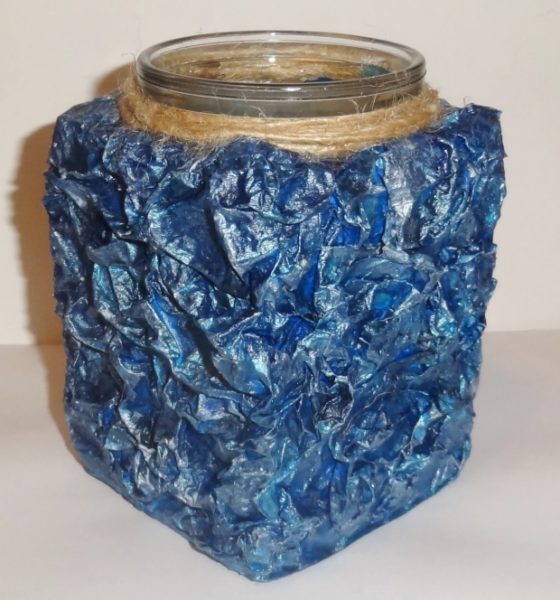
- Using the same thread, you can decorate the lid. Just lubricate it with glue and lay the thread on top, leaving free access to the slot.
- If the thread is decorative, then you can stop at the decoration of the piggy bank. But you can paint the thread in tone for the color of the piggy bank. Here is such a charming piggy bank.
How to make a piggy bank from Lego
It is no secret that from the famous designer of Lego you can collect many interesting things. The piggy bank for storing money can also be assembled from the designer. For example, such a charming pig consists completely of the details of the designer. 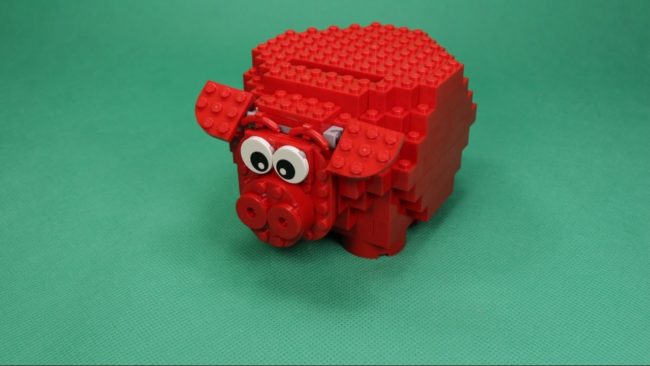
How to collect such a wonderful piggy bank? You can purchase a ready -made Lego set, which is designed to create a piggy bank in the shape of a pig. 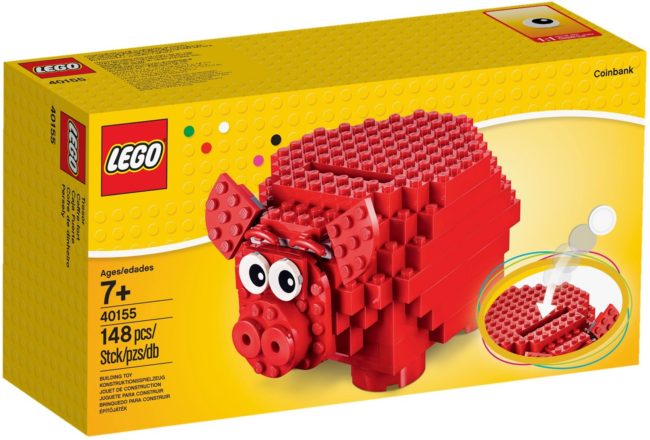
Inside this set, you can find a brochure with detailed instructions. You can also seek help from a video review to create such an unusual piggy bank.
How to make a piggy bank from a bottle
If you have long wanted to make a monetary piggy bank of simple materials, but try to make it from an ordinary plastic bottle from mineral water, drink or from under milk. Consider detailed instructions to create such a cash piggy bank:
- using a sharp knife or stationery knife, cut a plastic bottle into 3 parts, the middle of which should be the smallest;
- combine the upper and lower cut parts of the bottle;
- now you need to evenly paint the bottle in the desired color. Using ordinary paint and brushes, it will be problematic to do, but you can try. In our case, we chose a spray can with pink paint, which we covered the entire bottle with a cap;
- wait for the complete drying of the paint;
- using a stationery knife, make a rectangular slot in the middle of the bottle;
- now it remains to “revive” the piggy bank, turning it over the fervent pig. Eyes can be made of paper, painted with paint, or you can glue the eyes from the old doll or soft toy. The ears of the piglet can be made of triangles of corrugated pink paper. Draw 2 black stripes with a marker on a traffic jam to get a patch. A cheerful piggy bank that will really appeal to both the child and the adult.

How to make a piggy bank out of the box
Various boxes are ideal for creating a piggy bank at home. They can be of any size and shape. If you have an empty box from under the children's porridge, a milk mixture, from under the sweets or cookies, then feel free to use it to create a cash piggy bank.
- Before you start creating a piggy bank, prepare everything you need. You will need colored paper for gluing the box, paper for creating the eyes of the piglet, scissors, glue or double -sided tape, a black marker and the base for a piggy bank - not a very voluminous box.
- We glue the box from all sides with colored pink paper with stained paper. This can be done the fastest using double -sided tape.
- Now we proceed to the manufacture of the pigmentation muzzle. Cut the circle that should fit on one side of the piggy bank. Also cut the small triangles for the ears, a smaller circle for a patch, small circles for nostrils and eyes from black and white paper. Glue the mug of the piglet, with the help of a black marker, adding a smile to him.
- From pink paper it is also necessary to cut out 4 rectangles, which will be hoofs of the piglet. On the bottom of each rectangle, stick strips of gray paper.
- Stick the finished muzzle on the box. Also attach the boxes in front and behind the legs.
- In order for the piglet to become completely real, attach a playful tail made of a thin strip of pink paper from behind the box. Now the piggy bank is from a cardboard box is ready. You can throw coins there, and when you want to extract them, just tear the piggy bank.

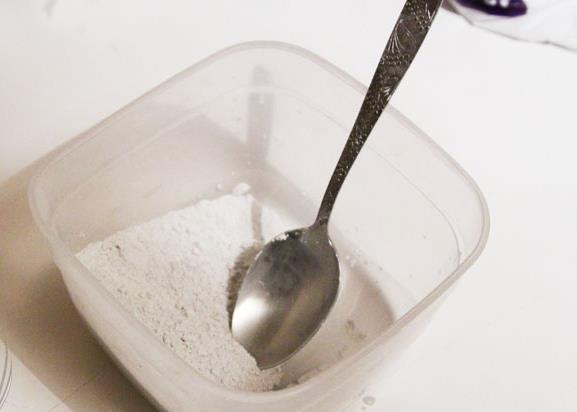
How to make a piggy bank from gypsum
If you want to make a more strong piggy bank, then consider the next master class on making a cash piggy bank from gypsum.
- We make a solution of gypsum and water in a ratio of 1: 1.
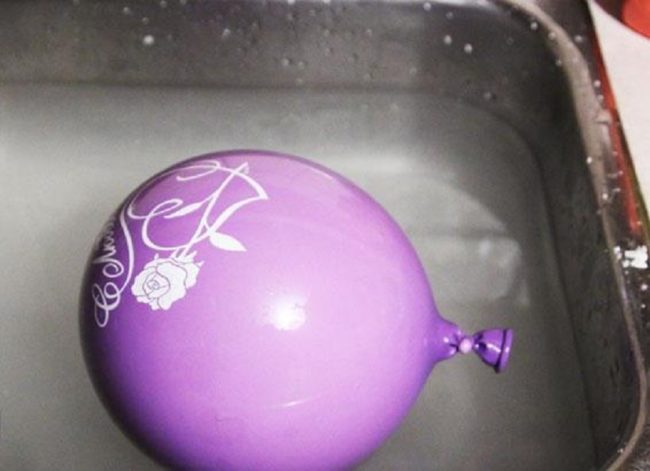
- Pour the resulting solution into the plastic bottle and put on the neck of the balloon.
- Firmly holding the ball on the neck of the bottle, we pour all its contents into the ball.
- Next, you need to gently inflate the ball, after washing its neck under water. Do not inflate too big a ball, as it can burst.
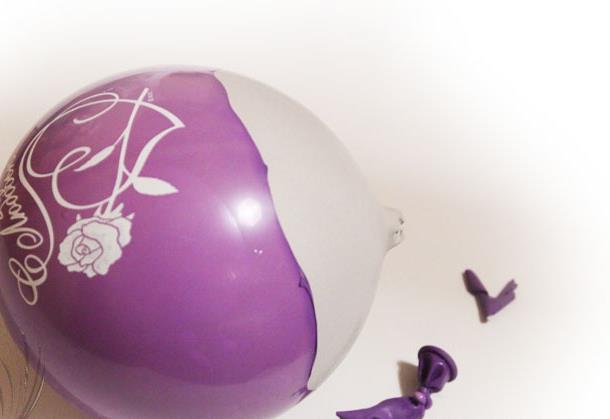
- Tie a ball and begin to turn it slowly in your hands so that the gypsum inside is evenly distributed over all the walls.
- Then lower the ball into a container of water and continue to rotate it in different planes.
- After gypsum is hardened inside the ball, the ball can be removed.
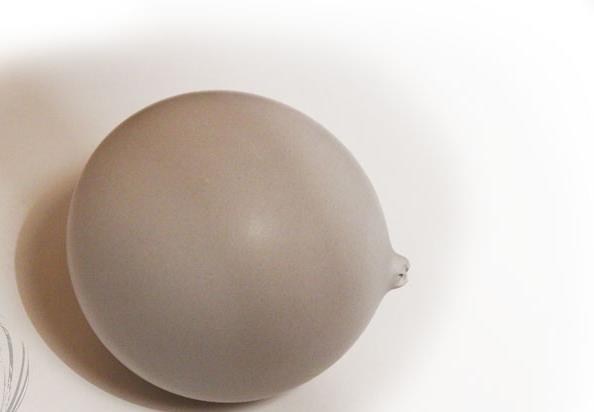
- You should get such a rounded figure from gypsum.
- The piggy bank-soreel must have legs, which also need to be made from gypsum. For this, ordinary plasticine is useful to us. Blind the molds for pouring gypsum and attach them on the future piggy bank. The bulge on the form will be a heel of our pig. Consider this when fixing molds for the legs in a piggy bank.
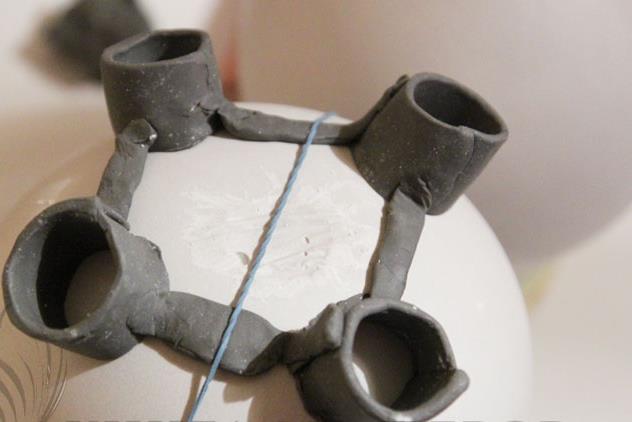
- Gently pour a solution of gypsum into the molds and wait for its hardening.
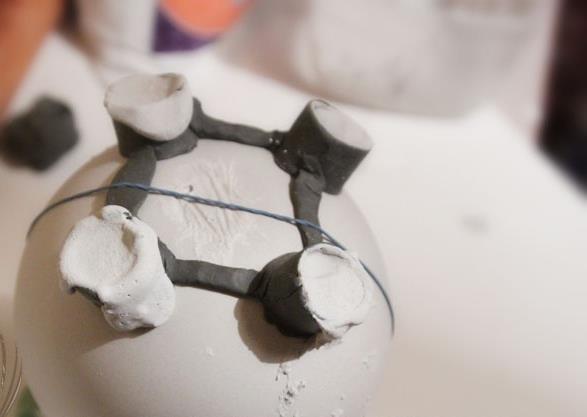
- Then the plasticine must be removed. Such legs of the piglet should turn out.
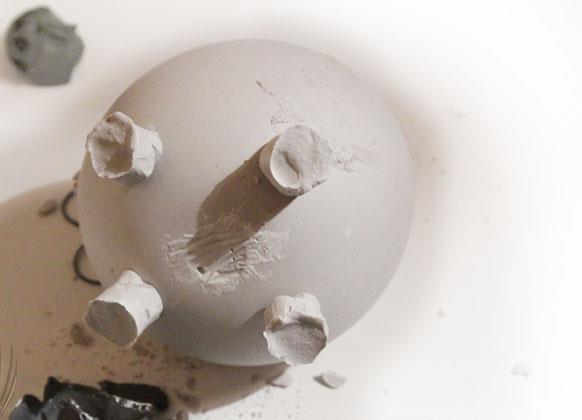
- On the opposite side of the piggy bank, you need to make a slot for throwing coins or bills. Gently drill the oblong hole.
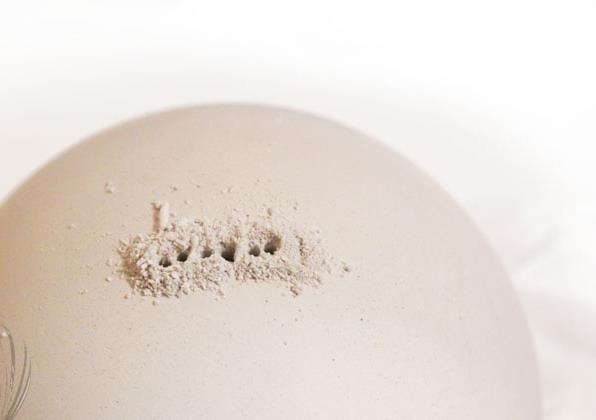
- Since gypsum after hardening may not be too flat, you need to work on the smoothness of the surface of the piggy bank. Pull the piggy bank from all sides with sandpaper.
- Now you can start staining the piggy bank. Since it is presented in the form of a pig, we chose a pale pink shade of paint.
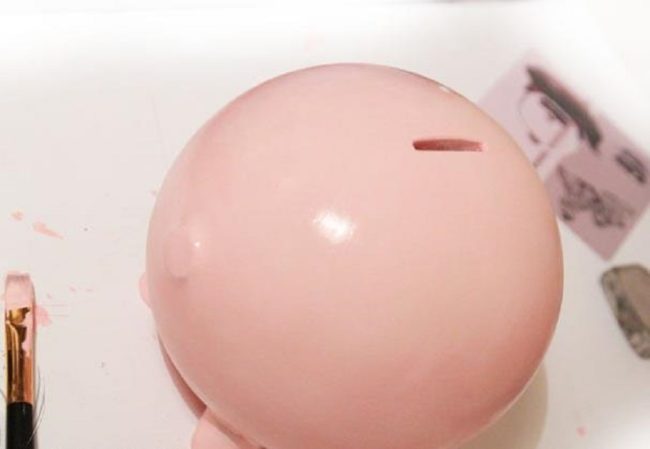
- After the paint dries, draw a funny muzzle to our piglet. The gypsum piggy bank is ready.
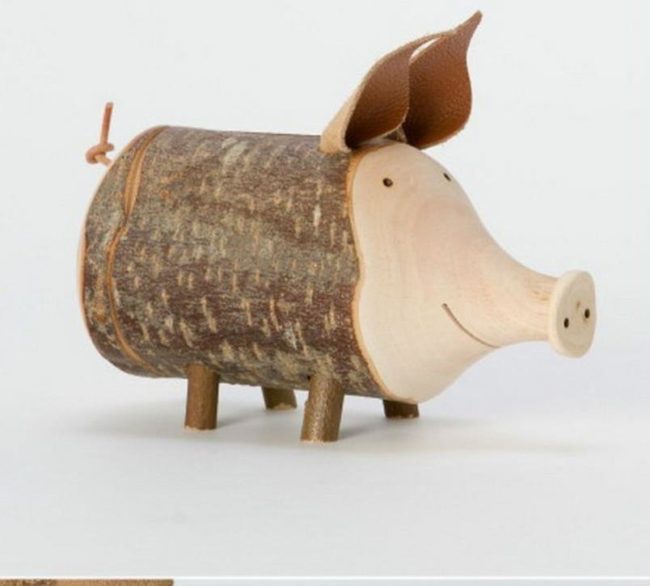
How to make a wood piggy bank
A tree is another durable material from which you can make a piggy bank. The wooden piggy bank cannot be broken, and therefore, it will last you for more than one year. A significant problem is that to create a wood piggy bank, special tools will be needed. If you have not been fond of creating crafts from wood at home before, then this option is not suitable for you.
- From a small log, you can make a piggy bank in the form of a pig. Using a special tool, cut the logs of the core, not reaching the edge.
- On the cut part of the log, it is necessary to cut the recess with the diameter, which is equal to the diameter of the hole inside the log. You need to insert a plug into the resulting niche, which will help to open and close our piggy bank.
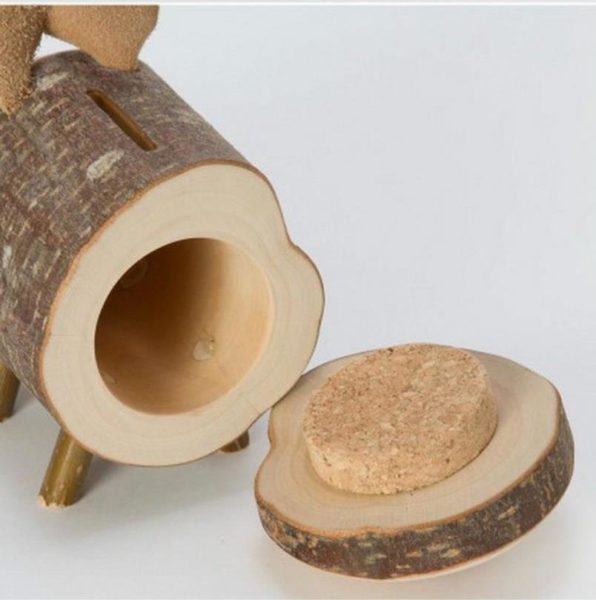
- From improvised materials, make a contired ears, a twisted tail and a funny muzzle of a pig.
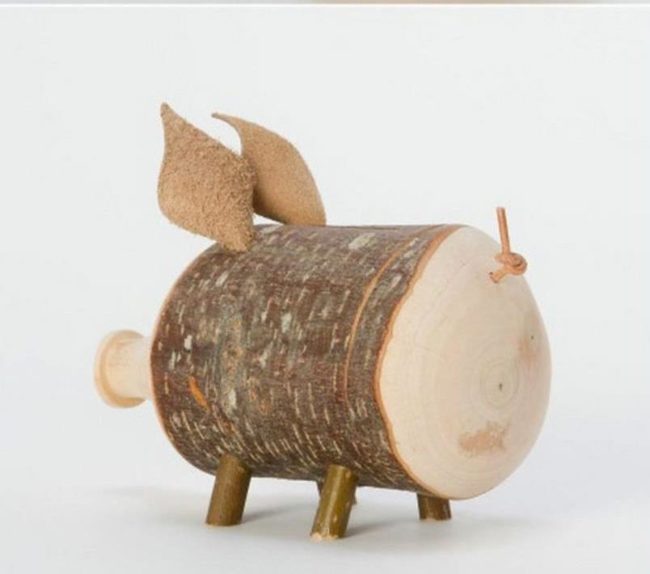
- Of course, a wooden piggy bank in the form of a pig cannot become a full -fledged piggy bank without the most important part - a slot for throwing coins. Drink it on the “back” of the piglet. A charming piggy bank made of environmentally friendly material is ready. Such a pig, moreover, will become a real decoration of any interior.
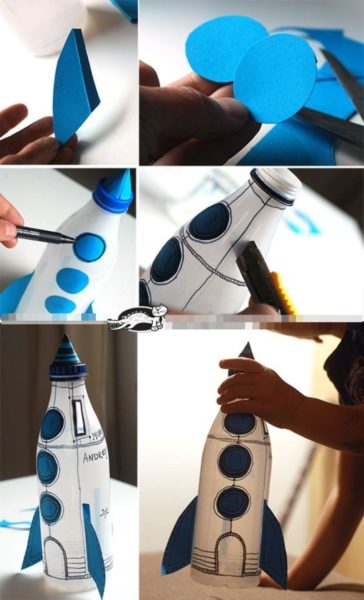
How to make a piggy bank from a plastic bottle
Plastic bottles of milk or kefir are found in any kitchen. From such an improvised material you can make a simple piggy bank. Even the child will cope with this task.
- We make a piggy bank from a plastic bottle in the form of a space rocket. We cut out of the colored paper portholes and other parts of the rocket.
- Attach all the blanks from the paper to the bottle with tape.
- Cover the boundaries of each window with a waterproof marker so that they become more clumsy. Also, using a marker, you can draw doors, make some kind of inscription.
- Using an office knife, cut the oblong slot in the upper part of the bottle.
- In order to give a finished look to our rocket, build a cone from paper, which must be attached to the top of the bottle using double-sided tape. A simple piggy bank is ready.
How to make a piggy bank from papier-mash
Papier-mash is a mass of paper and glue, which is very easy to mold. In this way, you can make a very spectacular piggy bank in the form of a space robot.
- For the manufacture of a piggy bank, you will need: paper napkins, PVA glue, brush, 2 balloons and paint.
- First you need to inflate balls. One of them should be a little less, as it will be the head of the robot.
- To make it more convenient to glue napkins, put some support under a smaller ball.
- Next, we begin to glue the ball with paper napkins. Take a napkin, moisten it in a solution of PVA glue and water and stick it on a ball. The more layers of napkins you make, the stronger the piggy bank will be.
- After the paper mass dries, cut the lower part from the ball of smaller diameter. From a large ball, you also need to cut off a piece of the top so that the abandoned coins fall to the very bottom. Balls made of paper blanks, of course, need to be removed. Fasten your head with glue.
- Now you can allow the flight of your imagination. Using an ordinary watercolor or gouache, apply a fantastic pattern on the robot.
- With a sharp clerical knife, carefully make a slot for coins at the very top of the piggy bank. Intergalactic robot coppie is ready.

How to make a piggy bank for paper money
If you prefer to save paper bills, then you can make a piggy bank with your own hands for such purposes. Such a piggy bank should not be too miniature, it should have a fairly large slot for bills. The simplest and fastest option would be to create such a piggy bank out of the shoe box.
- First you need to firmly fix the lid on the box so that you do not have a temptation to get accumulation ahead of time. This can be done using ordinary tape, which need to wrap the box in a circle.
- To create a piggy bank for paper money, you will need old newspapers or magazine pages. Glue them all sides of the box. The more chaotic inscriptions, drawings, separate pieces of newspapers are located, the better.
- To decorate the piggy bank, you can stick “fake” banknotes.
- On the box cover, make a rectangular outline using a stationery knife.
- In order to make the piggy bank more durable, gently paste all sides of the box with tape. A simple piece of paper for paper money is ready.
How to make a piggy bank - video
Now you know how to make a beautiful piggy bank, how to make a simple piggy bank than to decorate a home -made piggy bank. Making the piggy bank itself is very simple. Choose the method that you liked the most. Successful accumulation of money!


Comments
a couple of years ago, there was no side of metrogils from the same problem, there were no side effects ...
I’m not a fan of peeling at all, it saves from acne of metrogil, it also smoothes it ...
Great article! ...
I take the second course of the Capsules Climafite 911. The tides went very quickly. It became calmer, irritability went away and I sleep well ...
i also noticed - it is worth nervous, everything immediately affects the face. Therefore, I try to avoid conflicts and unpleasant people. Of the creams, I like Miaflow from wrinkles - smoothes not only small wrinkles ...