Candles help create comfort and a festive atmosphere in a home environment. Among their diversity, it is difficult to choose a present. If you want to make it cute and give a piece of the heat of your hands, then pour the candles yourself. For their manufacture, you do not need special skills. The main thing in this case is to adhere to several rules and recommendations that are indicated in this article.
Content
- How to make a candle at home - the necessary materials
- How to make a candle made of natural wax at home with your own hands - photo
- How to make a candle from a gel at home - photo
- How to make a candle from wax with your own hands with a photo
- How to make a candle based on wax pencils with your own hands with a photo
- How to make a decorative candle from citrus at home with a photo
- How to make candles for Halloween with your own hands - photo
- How to make a fragrant candle with coffee with your own hands - photo
- How to make a New Year's candle with your own hands - photo
- How to make a candle in a mug or glass with your own hands - photo
- How to make candles with an openwork pattern inside with your own hands - photo
- How to make candles in the form of Easter eggs with your own hands - photo
- How to make curly candles for the day of lovers at home - photo
- How to make a long candle at home - photo
- Another way to make a candle with a carved pattern watch the video:
How to make a candle at home - the necessary materials
Before you start filling candles, prepare the necessary materials. This is not only wax and molds. It is important to choose the right wick, various flavors and special dyes.
With your own hands. What is the basis for candles
As the main material for candles, bees and soy wax, wax, gel, as well as paraffin are used.
- Wax. This material is a natural component for the manufacture of candles. It can be determined by the characteristic cod during burning and smell. Wax candles are not only an expensive decor item, but also useful. There are no harmful additives in it, it is lit with viral diseases and for air purification.
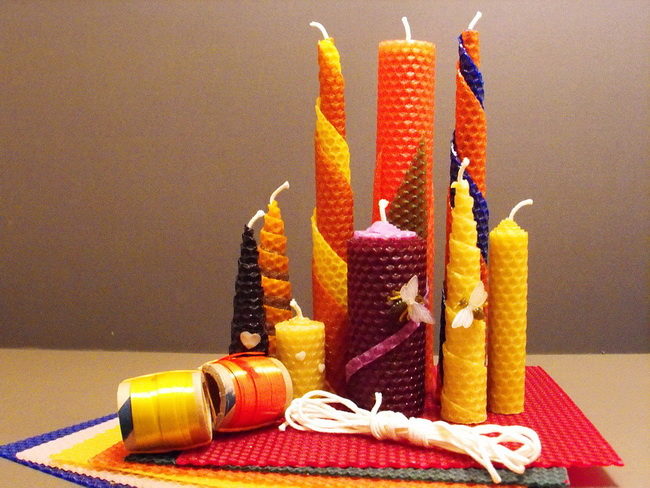
- Wax. Candles from wax are becoming increasingly popular. This is a pressed bee wax in the form of a drawing of honeycombs. Candles from it are stored for a very long time and have high quality. At the same time, waxing expensive material for the manufacture of candles.
- Soy wax. The most popular candle mass, which is made from soybeans. A natural and inexpensive base, burns longer than paraffin, safe during operation, is easily washed off with warm water.
- Paraffin. Paraffin candles are one of the inexpensive decors. As a basis, oil refining products are used. Candles have white color and do not have a smell. Paraffin is often used as the basis for flavoring candles.
- Gel. Transparent candles with decor inside are gel. They are safe when burning, do not form paces, burn for a long time, without a pungent odor and cheap. Working with gel mass is quite convenient and simple. It is important to take into account that the gel does not hold shape, so they fill the case.
How to make or prepare a form for casting a candle with your own hands
- The case for the filling of candles allows you to give a variety of shape. To cast candles, any shape of metal or silicone, even plastic cups, packaging from juice or yogurt are suitable. In general, any form from which you can get frozen wax.
- It is most practical to pour candles in glass forms or glasses. Through them you can see the pattern and color of wax. Some needlewomen use a tea service, small vases or bowls instead of shape. They can be re -applied for a flood of candles.
- For lovers of a romantic setting, you can pour hot paraffin into metal covers from bottles.
- Well, if there is no case at all at hand, then take a peel of citrus fruits or eggshells. Banks are also suitable as a shape for the manufacture of candles.

How to make a wick for a candle with your own hands - step -by -step photos
- In order for the candles to burn, there must be a wick in them. You can take ready from already molten candles or make it yourself.
- Most often, the wick is made of durable threads. Twist a few pieces together or weave a pigtail out of them. Instead, apply a thin cord for the wick. Melt a little wax, dip the threads into it. After a few minutes, take out the cord and leave the product to freeze.
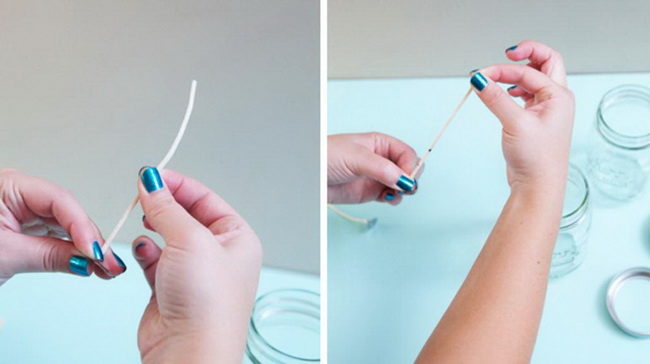
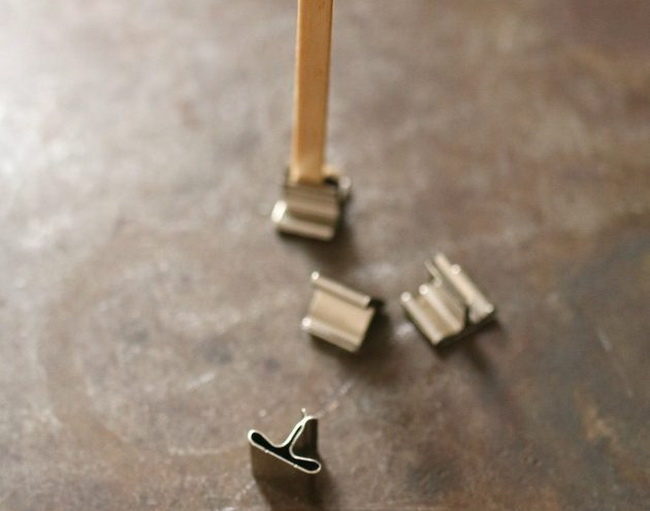
- The wick should be stable with a small weighting sensor below. To do this, purchase special metal blanks in stores for casting candles. Prepared wick in the basis and click.
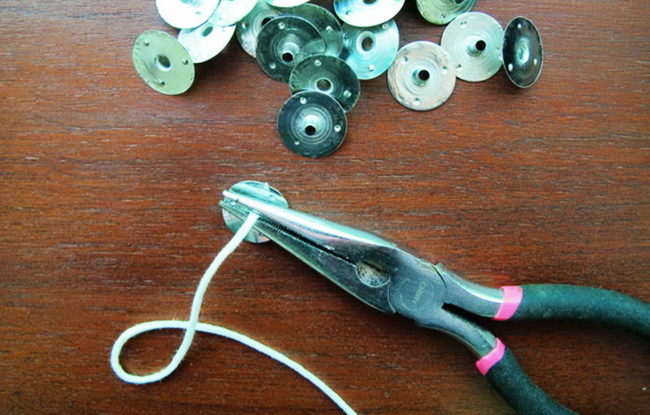
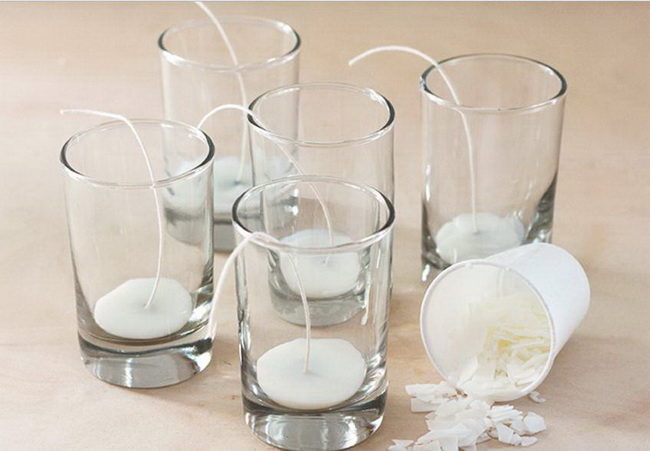
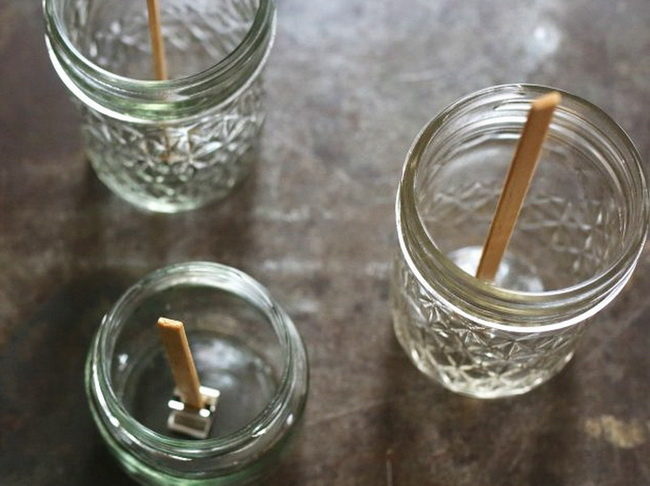
- Before installing it, put in shape and pour a little wax into it. Wait until it hardens. Only then proceed to fill the candle mass.
- An alternative to the threads will be a tree. Wood fitties are suitable for any candle base, have a longer burning period and complement the aroma of a candle with a wood smell. Prepare wooden rails. Be sure to measure its height depending on the size of the shape.

- Pour 50 ml into a separate bowl. Olive oil, lower the wooden blanks into it. Leave them to soak for half an hour. Then take out, get wet with paper towels.

- On each rail, click the metal paws of the wicks. Fasten the workpiece at the bottom of the form with wax glue or hot wax.
Selecting a candle flavor
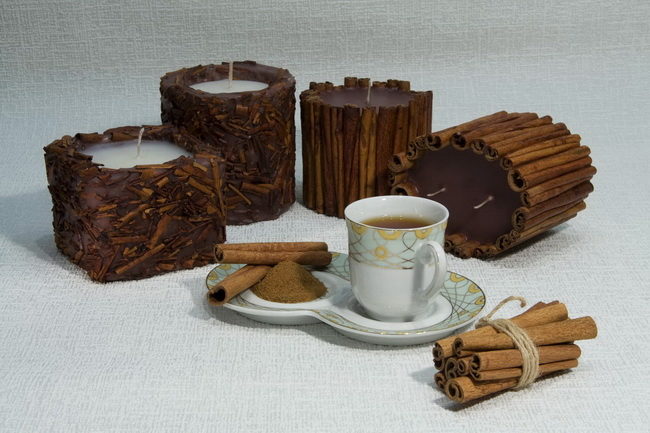
- To fill the room with various aromas, a flavor is added when filing candles. As a natural basis, use essential oils, both separately and in combination with each other. In addition to oils, coffee grains, dried slices of citrus fruits, spices are widely used.
- Adding an aromatic component to wax will allow you to achieve the desired emotional effect or disinfect the air.
Advice. If you want to achieve a more saturated aroma from a lighted candle, then drip more aromas in hot wax.
Adding dyes for a home candle
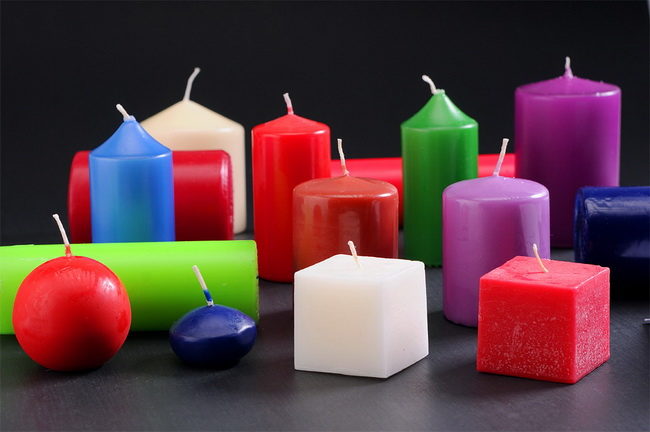
- Dyes give a candle a different shade. They do not affect the quality of combustion, only give the color of the wax. You can add one color or several by creating a pattern. Food dyes for filling candles cannot be used, since they are made on water -based.
Advice. Special wax dyes can be replaced with oil paints or wax pencils.
Additional candle tools at home
- It is necessary to melt any base for candles at low temperatures using a water bath. Therefore, you will need two containers. In addition, prepare the scales to accurately determine the number of the base, a knife with a grater for its grinding.
- You will also need a thermometer to measure a degree of heating the base for candles. To fix the wick at the edge of the shape, you will need a wooden skewer or a regular pencil.
- When you prepared all the materials and tools, the time to start filling the candles. The method of making candles will depend on what basis you use.

How to make a candle made of natural wax at home with your own hands - photo
The most popular material for the flood of candles at home can be considered bee wax. Its cheaper substitute is paraffin and soybeans.
- First prepare the working surface. Drops of hot wax will spoil any coating. Therefore, cover the table with paper. Additionally, take a towel or tack so as not to burn on a hot pot.
- Carefully inspect the forms in which you plan to fill in the candle mass. Since you will pour hot wax in them, any crack or chip can lead to burns.
- Clean the mold contaminants - rinse them under running water.

- Put glass blanks on a baking sheet and warm them in the oven with a small degree. Leave in this position until the temperature of the walls becomes above room temperature. Wax must be poured into warm and dry forms to avoid the formation of bubbles in the mixture.
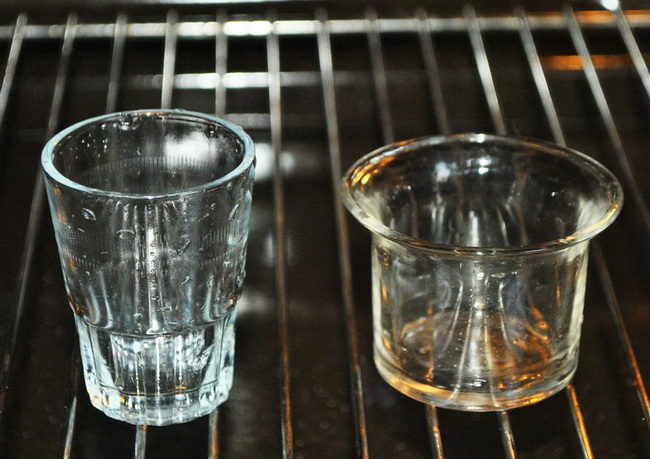
- Fasten the wicks at the bottom of the form in the center. To install them on the surface, lower each wick into hot wax, let it freeze slightly and press to the bottom.

- During the frozen wax, the thread may fall. Fix it at the level of the upper edge of the shape with wooden skewers or wrap it on the handle.

- Cut the base with small pieces or grate. So he will melt more evenly. Put the wax into a measured container.

- Make a steam bath. To do this, pick up water in a metal dish, put on the stove. Place a vessel with wax in it. Do not bring the liquid to a boil - the wax must be melted at low temperature. Constantly stir the candle mass of a wooden skewer, so all the pieces melt evenly.
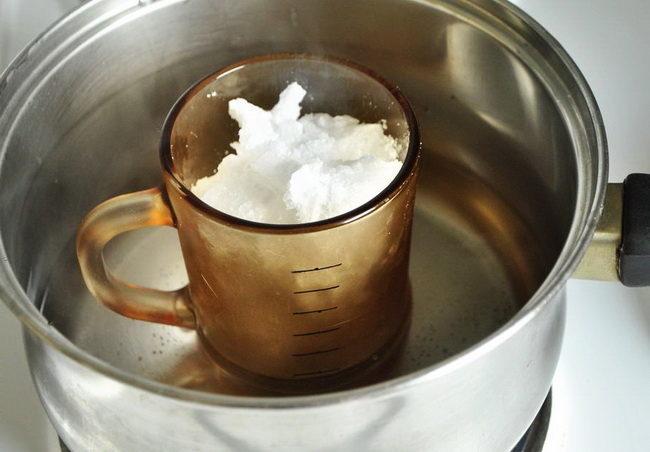
- Follow the temperature of hot wax. It should not exceed 80 degrees.

- To give the color of the wax mixture, add chopped dye. Check the color intensity by applying a drop of wax on paper. If necessary, add a coloring product for intensity or wax for a lighter shade.
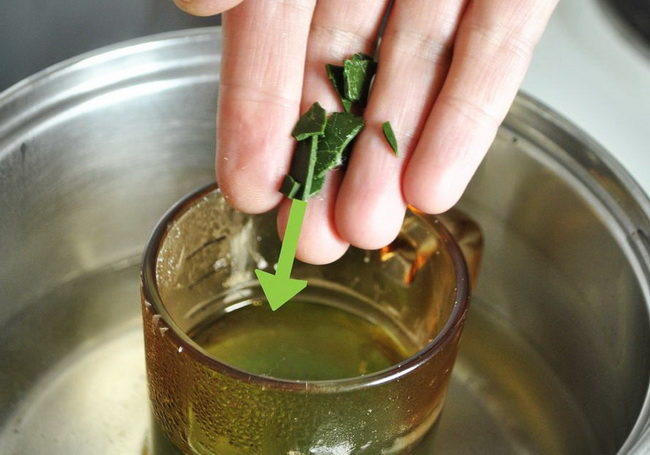
- If you decide to make a flavored decor, then it's time to add essential oils. For every 450 g of the candle mass, use no more than 10 drops of oil.

- Gently pour the hot mixture into the prepared container. At the same time, do not rush, otherwise, when solidifying inside, bubbles will form. Hold the wick in the center.
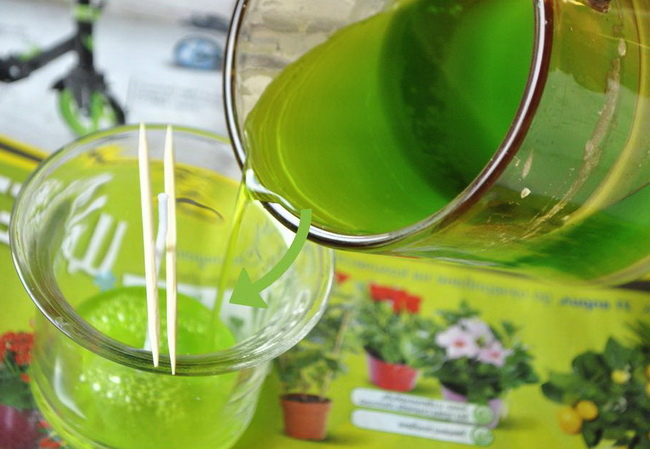
- Do not fill the wax to the very edge of the form. When you are fanning a candle, the melted wax floats over the edge.

- During solidification, cavities and voids can form. Melt a little mixture and pour it on top of the frozen mass.
- Leave the wax harden. The full hardening time depends on the quality of the material that you used to fill the candle. Then cut the wick.

How to make a candle from a gel at home - photo
One of the brightest decor options are gel candles. Making them with your own hands is much easier than from wax.
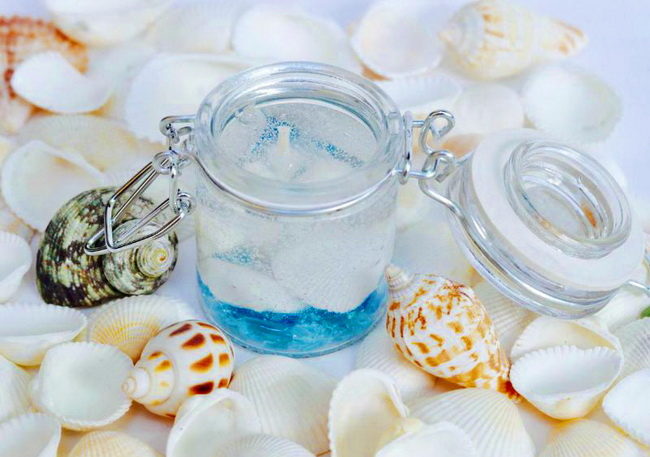
- At the bottom of the form, set the wick. Be sure to fix it on the surface so that it does not fall. Lay the decor on top: shells, colored sand, pebbles.

- Grind the gel, then melt it over low heat. Stir the mixture to obtain a homogeneous mass. Follow the gel temperature, otherwise it will become clouded when it freezes. To remove the bubbles from the mixture, leave it in the oven for 5 minutes. Or strongly interfere with a hot gel to form a large amount of them.

- Put the gel into the mold with a plastic spoon. Work quickly, as the gel mixture freezes very quickly. Fasten the wick with two skewers or handles.
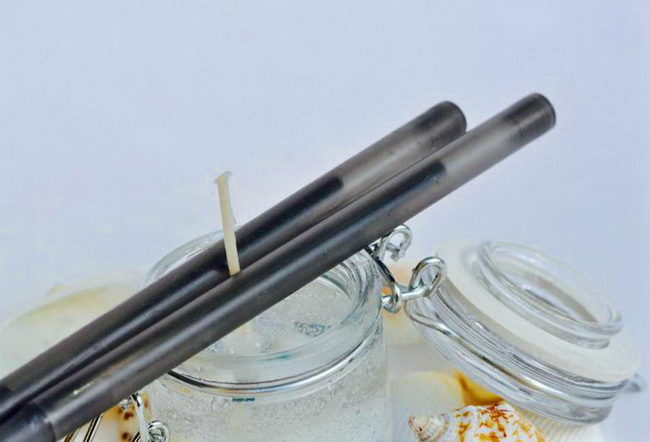
- After the gel is completely solidified, cut the thread. Its length above the candle should not exceed 1 cm. This is enough for the gel to begin to melt and there is a small light.
How to make a candle from wax with your own hands with a photo
The candles from wax look original. They can also be done at home, while warming the basis is not required. Such candles can be immediately set fire to after their manufacture.

- Determine the size of the decor. Depending on it, cut the wax. Usually this is a rectangle in which the length will be the thickness of the candle, and the height is equal to its size.

- Cut the wick in the height of the shape. Attach it on the edge of the wax, then slightly press over the entire length.
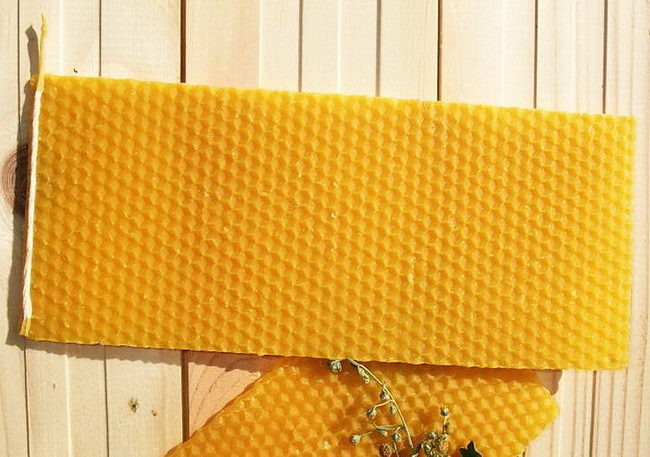
- Prepare aromatic additions. You can use wormwood or spices powder. Dyes and flavoring are not needed, since the wax is a natural component that has a rich smell. Apply the mixture with a brush to the inside of the wax plate.
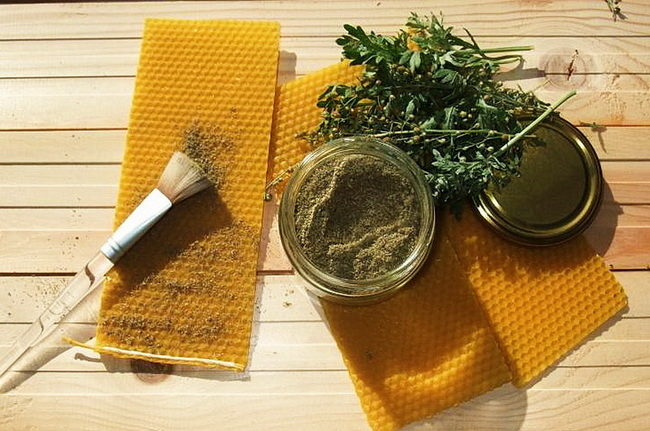
- Start twisting wax from the side where the thread is located. Try to level the edge as much as possible so that the candle has an even base.
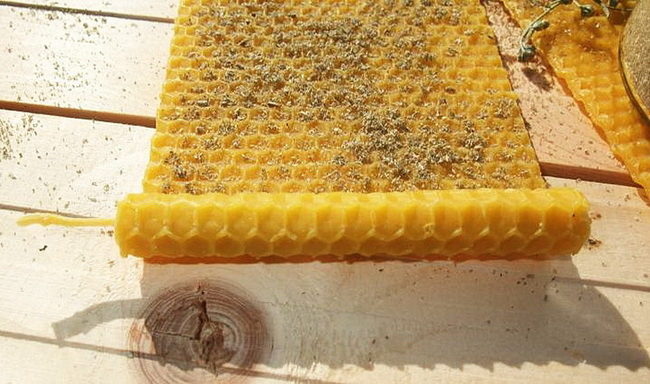
How to make a candle based on wax pencils with your own hands with a photo
One of the simple and funny ways of a lump of candles is the use of wax pencils. You can make them with the children.
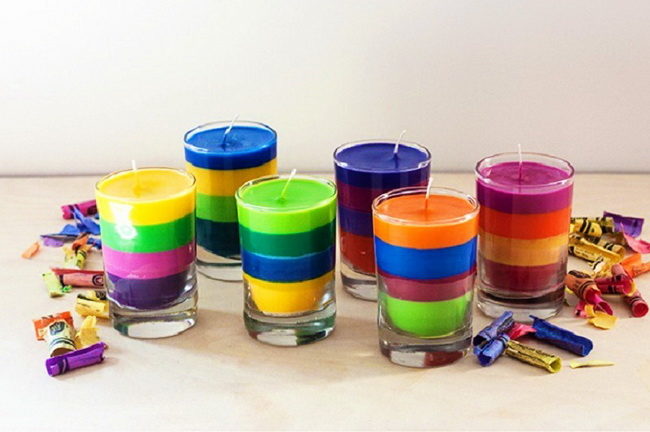
- Remove packaging from crayons, cut into small pieces.
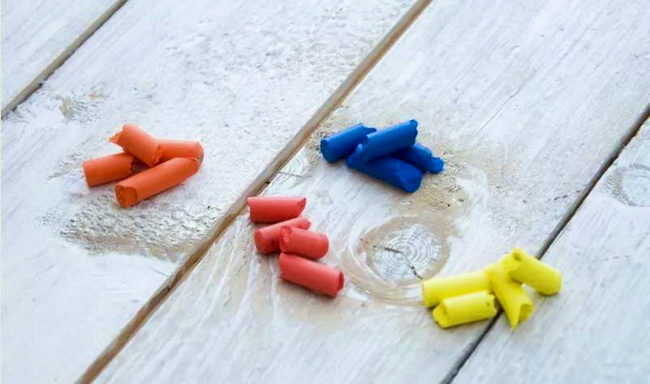
- Transfer them to plastic cups.
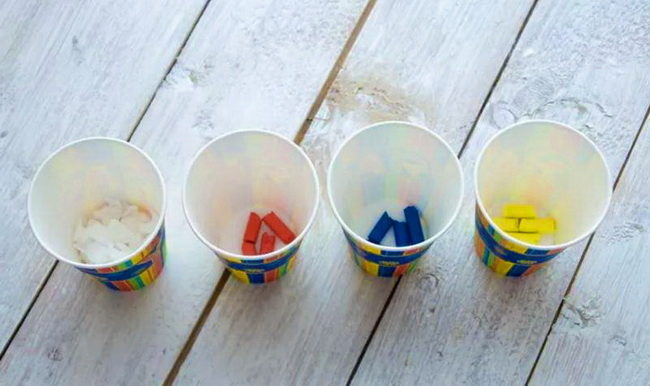
- Put in a microwave for 1 minute with medium power. Mix the mixture.

- Glue the wick to the bottom of the jar, fix it with a pencil.

- Pour hot color wax on the bottom of the jar. Leave the liquid harden.
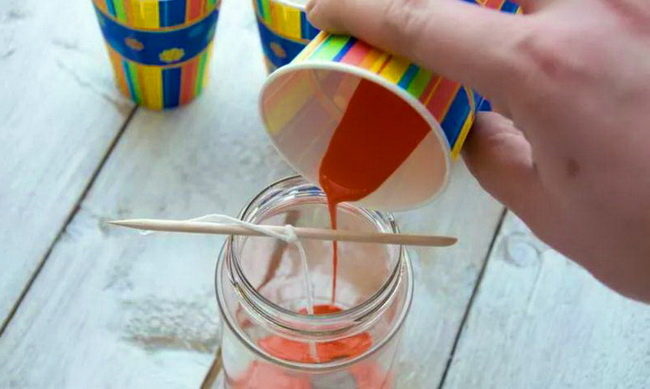
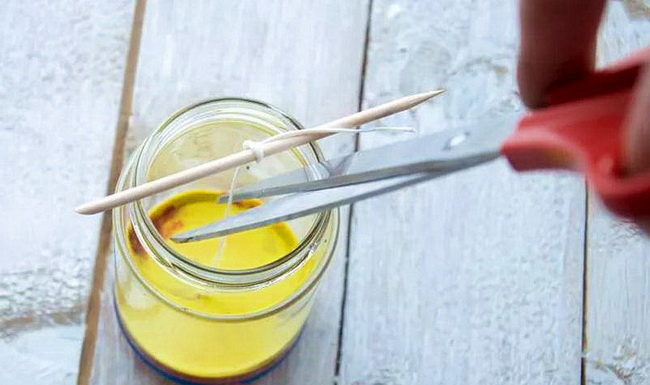
- Then heated each color of wax crayons in turn and pour it on top of the frozen mixture.

- When all the layers harden, shorten the wick. Now the candle can be used.
How to make a decorative candle from citrus at home with a photo
In the absence of a special base for casting candles and a case, use improvised materials. For example, tangerines and olive oil.
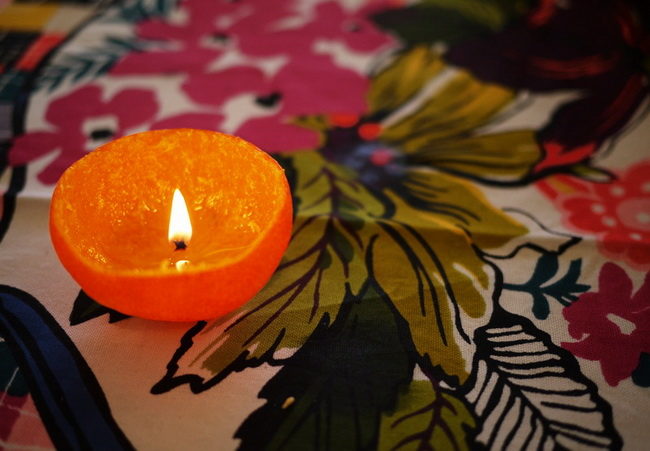
- Cut the circle of the peel at the base of the fruit. Gently separate it. If you can’t do it with your hands, then use a tablespoon.
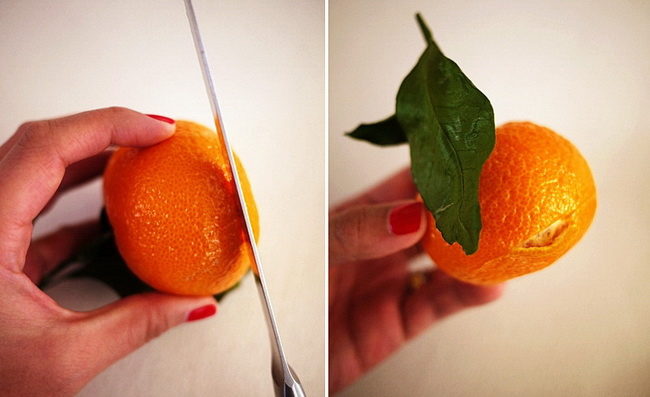
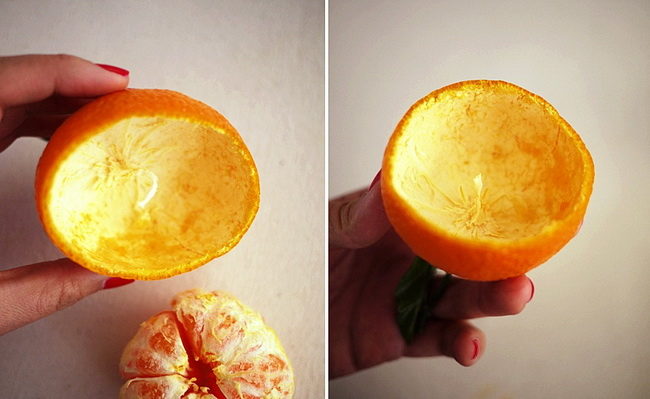
- Slowly immerse the spoon between the pulp of the tangerine and the shell. Scroll it around the circle, thereby freeing the peel.

- Do not remove the core, it will serve as a wick for a candle.
- Pour in the inside of the fruit shape olive oil. Dip the tip of the core for a few seconds in the oil, then set it on fire.
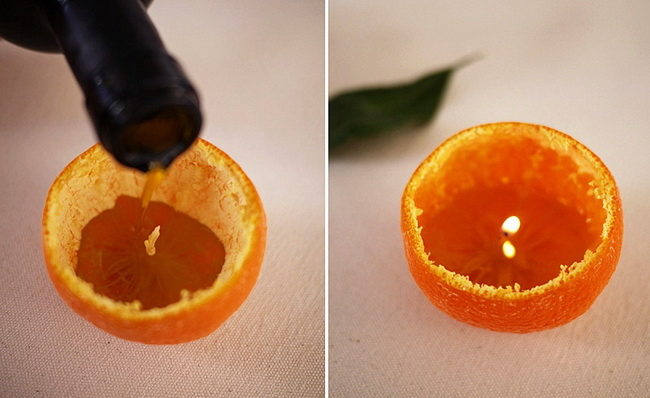
- An empty peel can also be filled with candle and add dyes. Do not use flavors, since the fruit shell has a bright smell.

How to make candles for Halloween with your own hands - photo
On the autumn holiday, Halloween is customary not only to do terrible makeup, but also to decorate the room with a terrible decor. The candles in unusual form will look original, for example, black or with red droplets. You can do them with your own hands.
How to make bloody candles at home
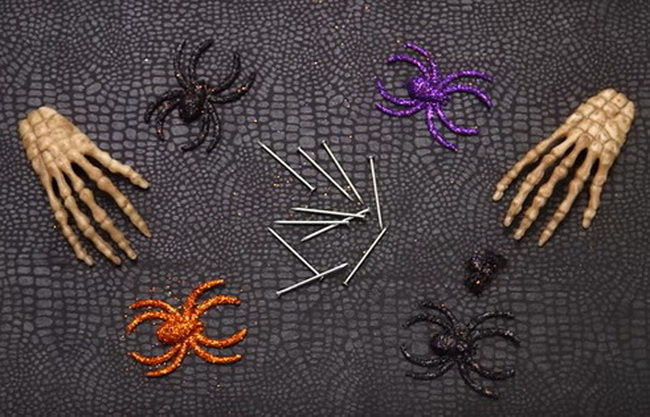
Candles with bruises will create a terrifying atmosphere at your house. How to make such candles at home? To do this, you need only a large candle of white and small with a red tint. To decorate candles, select the decor in the theme of the holiday.
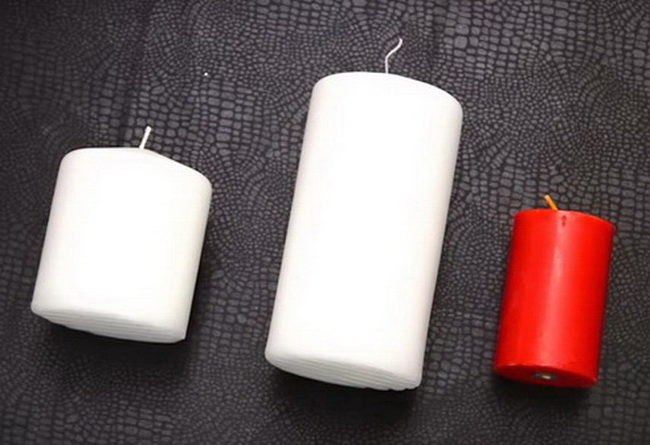
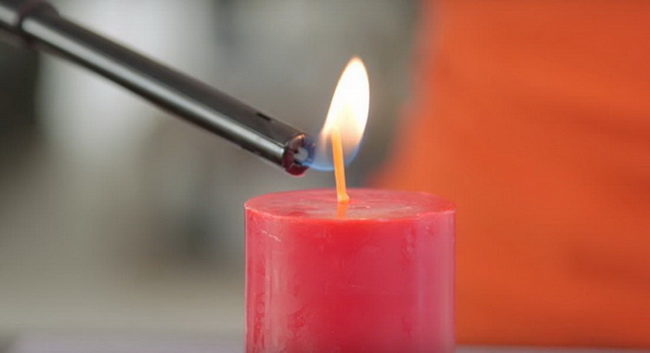
- Set large candles on the candlesticks. Check the red candle. Wait until the wax begins to melt. You will need a sufficient amount of candle weight, so let the candle burn out for about 10-15 minutes.
- Light a red candle place over white. Gently bent it so that red wax drips on a large candle.
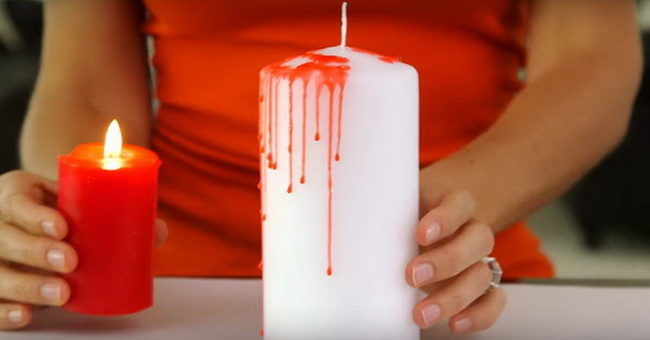
- Gradually turn it around the axis. So you decorate the surface of a white candle with red wax. Let the mass freeze.

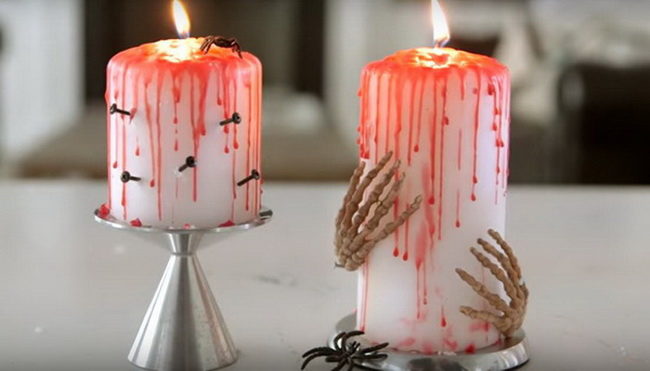
- Glue the terrible decor on the white candles. But do not use hot glue for this, since it will melt the wax and you will not be able to fix the jewelry.

- Make several terrifying candles in this way. Put them around the room in different places.
How to make a black candle at home - photo
In addition to bright red blood, black decor is often used on Halloween. The same color can be made with your own hands.

Prepare the following materials:
- soy wax - 900 g.;
- glass flasks of a transparent color;
- long wicks;
- dye for black wax;
- essential oils;
- bilateral adhesive tape;
- tank for melting wax;
- thematic decor.

How to make a black candle yourself:
- Grind wax mass on a grater or cut into small pieces. In any case, make sure that the pieces have the same size. So the mixture will melt simultaneously and will have the same temperature. Pour soy wax into a metal container, put on a slow fire for melting. At the same time, constantly stir the mass.

- When the wax acquires a transparent shade, add the dye. Pre -chop it for quick melting. If you want to make a rich black color, then use a large amount of dye. For a gray shade, add it smaller.

- Remove the wax from the stove, thoroughly stir the candle mass until smooth and add the flavor. Also, instead of it, you can pour essential oils. Their number will depend on what intensity you want to obtain. Stir the wax again.
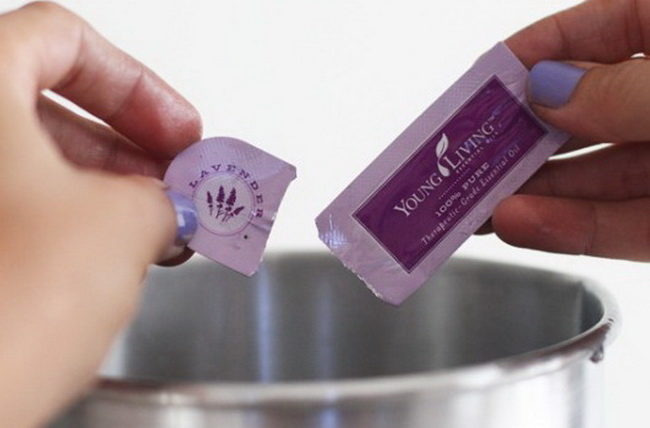
- Prepare forms for candles. To make the decor original, use transparent flasks. Wash them thoroughly in warm water, dry and grate with paper towels.
- Fasten the wick at the bottom of the container. Lubricate the reverse side of the metal base with wax glue and lower it into the flask. Press the wick to the glass with a knife or skewer.
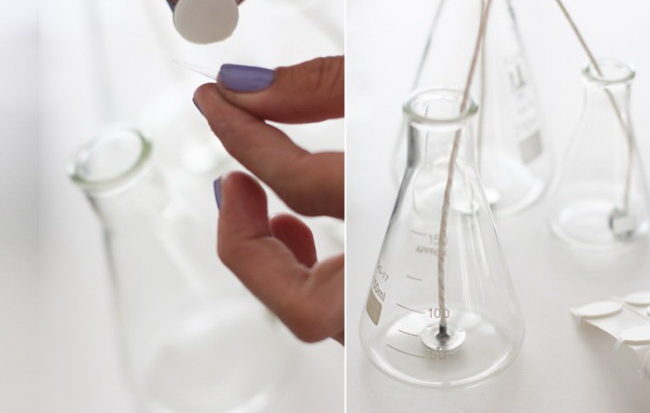
- While the wax is hot, pour it into shape. Pour the mixture with a thin stream, slowly. So you will avoid extra bubbles on the wax. Immediately fix the wick in the center of the neck of the dishes. Use toothpicks for this. Put the candles harden at room temperature.

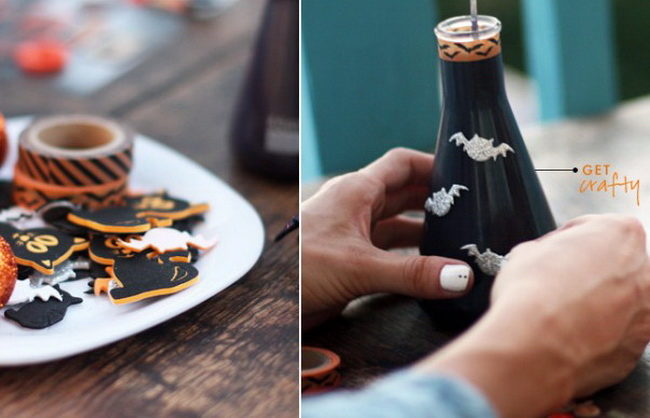
- After the black wax is completely hardened, decorate the outer side of the flask with a festive decor. Glue it or use double -sided tape.
How to make a candle from paper at home - photo
Candles can be not only from wax. To decorate the house on Halloween, you can make a decor of paper. As a basis, use a roll from paper towels.
For work, also take the following materials:
- maslar adhesive tape;
- decorative candles;
- transparent pebbles;
- scissors, brush;
- foam sponge;
- glue gun;
- black and white acrylic paints.
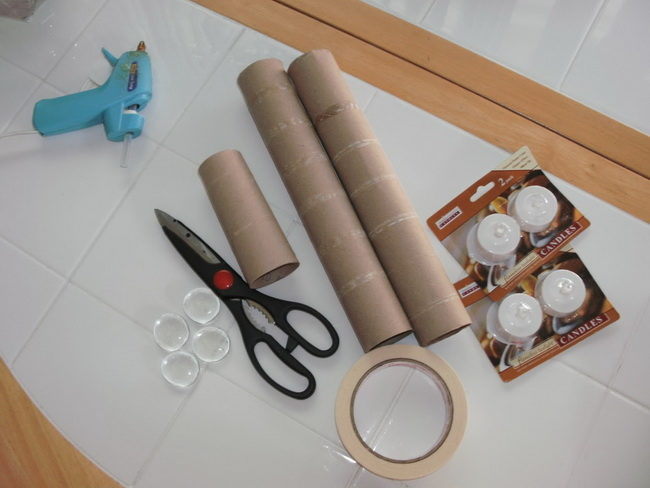
Master class on the manufacture of a candle:
- You can make a paper decor with your own hands for a terrifying composition only a few steps. Since the basis for the candle will be a cardboard roll, you can give it a weight with a transparent pebble. Instead of it, use small flat stone or metal nut.
- Cut 2 strips of painting tape and glue them in the form of a cross. Turn over the sticky side to yourself and secure pebbles on it.

- Put a vertically tube on top of the stone. Twist the edges of the tape and glue on the cardboard. With your hands, fix the paper as tightly as possible.
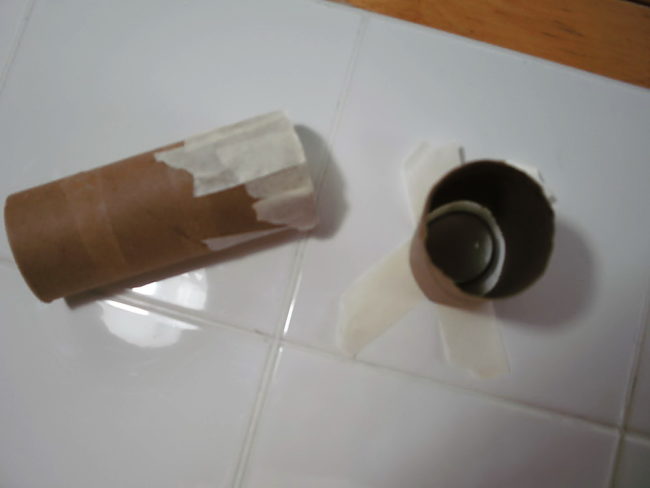
- A decorative candle will be located on the upper part of the workpiece. To fix it, use painting tape. Cut a small strip, place it on a roll. Put a candle on top. So you will learn the depth for fastening.
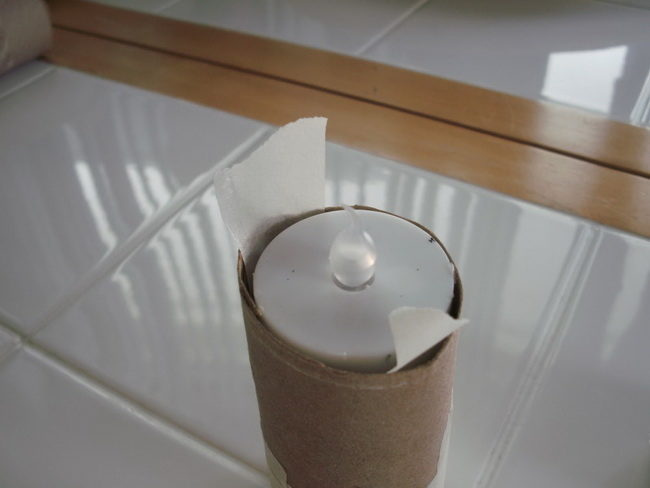
- Then glue the hollow with tape, wrap the edges on the outside. You should get a figure, as shown in the photo. The candle should not be deep inside the sleeve, but to be along with the level of cutting of cardboard.
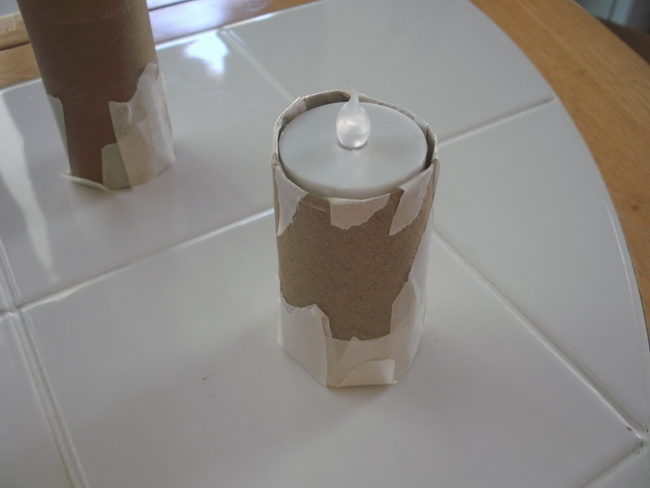
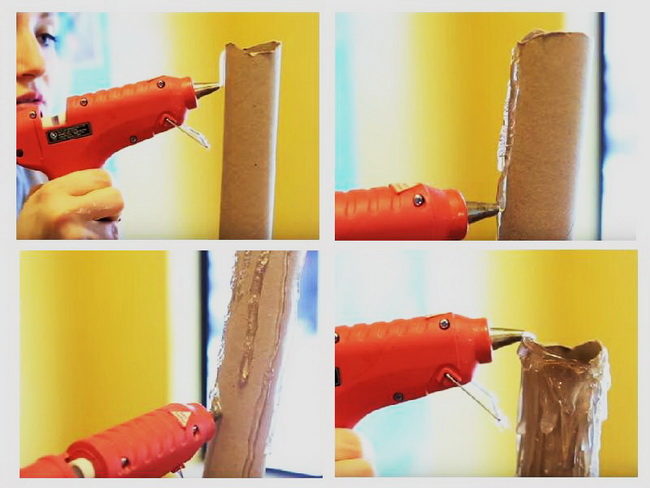
- Cut the extra edges of the tape or press to the cardboard. With the help of hot glue, make the smudges. Before applying the next layer of glue, wait until the previous one freezes.
- Apply black paint to the cardboard. Instead of acrylic paint, you can use the tool in the aerosol, this is at your discretion. Let the paint dry well.

- To create an aging effect, apply white paint on top of black. Pour the paint on the saucer, dip the sponge into it and paint the convex parts on the candle with light movements. So you get a light drawing, as if plaque.

- When the paint dries, place the candles upstairs. Set the decor in the room or on the composition.

How to make a fragrant candle with coffee with your own hands - photo
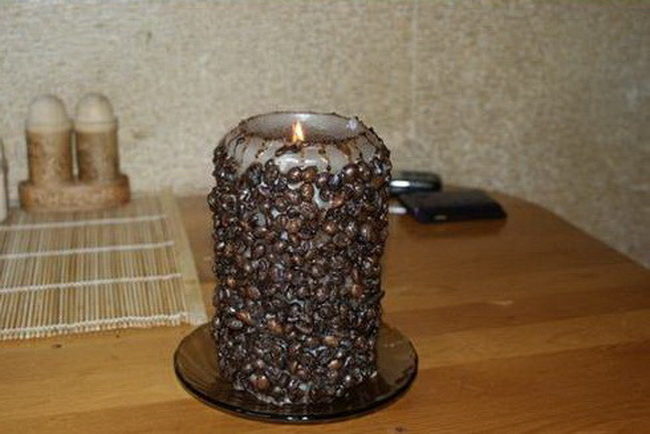
If you do not have essential oils at hand, then use ordinary coffee as a flavor. It can be added to the candle mass, both in a hammer and in grains. Also, in general, you can decorate a candle on top of wax as a decor.

Take such materials and tools:
- any wax;
- paper disposable cup;
- coffee thick;
- wick, scissors;
- paper towels;
- tank for melting wax;
- skewer or spoon.
The course of work:
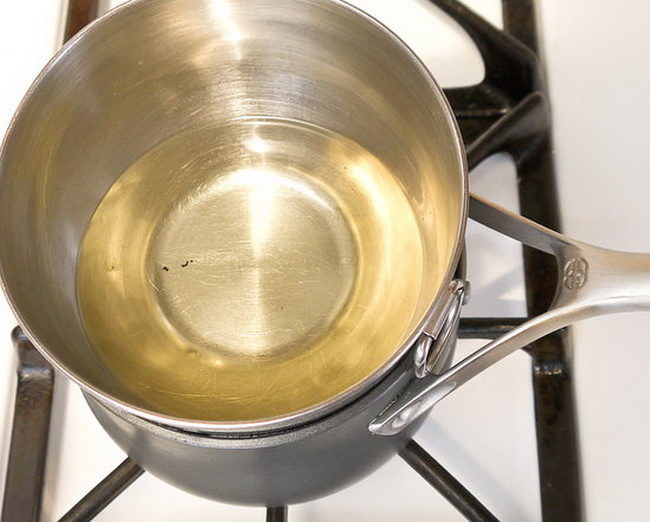
- Cut the basis for candles in small parts or grate. Transfer to a metal container. Fill a large pan with water to half of its volume, put on the stove. During boiling water, reduce the fire and place the dishes with wax on top.
- When the candle mass begins to melt, begin to interfere with it. Do this until the wax acquires a transparent color. But do not allow its boiling, otherwise the structure of the base is disturbed. The whole process will take about 5 minutes.
- A disposable cup can be a shape for a glow of candles. But choose it on a paper basis, so that later it is easy to break. Wipe the dishes thoroughly with paper towels. Inside the glass should be absolutely dry.
- Prepare the wick. You can do it with your own hands or buy it already ready. Fasten it at the bottom of the form. If you want to add used coffee thick as a flavor, then pour it onto a napkin and get wet well. So you will remove excess moisture from the mass. For freshly chopped coffee, such an action is not necessary. At the bottom of the glass, pour a tablespoon of coffee.
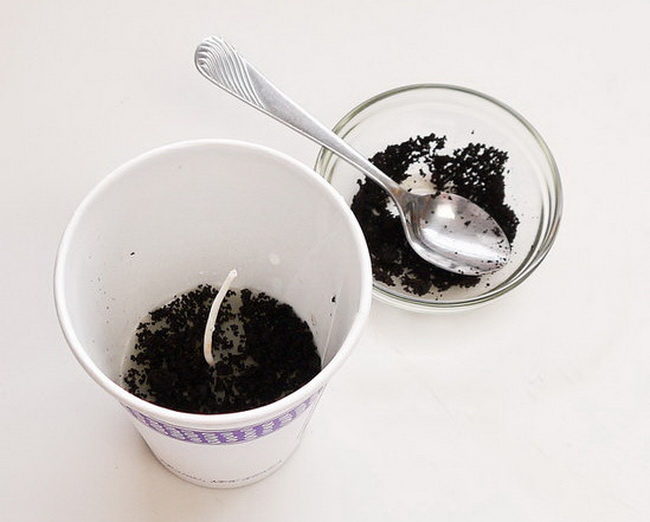
- Gently pour hot wax. Fill in the form half. Do not mix the basis with coffee, it should stay at the bottom. Let the mass freeze.
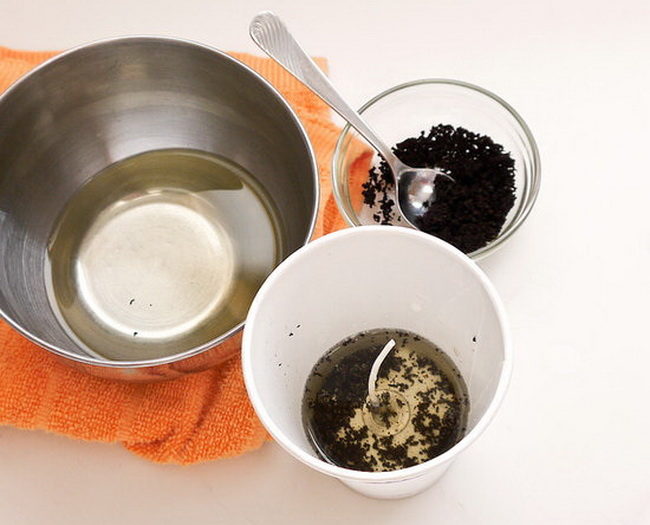
- Then pour into the mold fine coffee again. Distribute it evenly on the surface of frozen wax.

- Heat the remaining wax base and pour on top. Let the candle freeze. You will need about 2 hours for this.

- To remove the candle from the mold, carefully cut the paper cup and tear it with your hands. If necessary, cut the wick.

- The aromatic candle can also be decorated with whole grains. To do this, cover the table with a cling film or bag, tilt the candle. Pour melted wax on her and attach the grains to it. As the decor adds, wrap the candle in the bag.
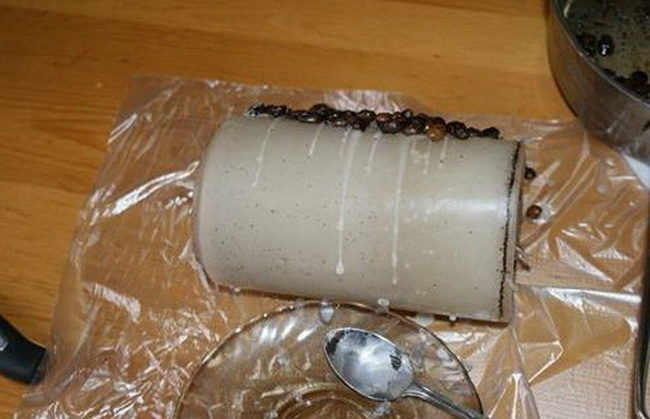
- When the candle is completely covered with coffee beans, leave the wax freeze. After that, remove the package. During the burning of the candle, you can enjoy the smell of coffee.
How to make a New Year's candle with your own hands - photo
New Year's miracles are looking forward to everyone. For this holiday, you need unusual candles that can be made of ice. Such a New Year's decor will become a decoration of not only the street, but also the festive table.
Materials for work:
- two glass forms of different sizes;
- spruce or fir branches;
- orange, blueberries and cranberries;
- maslar adhesive tape;
- boiled water;
- decorative candles.
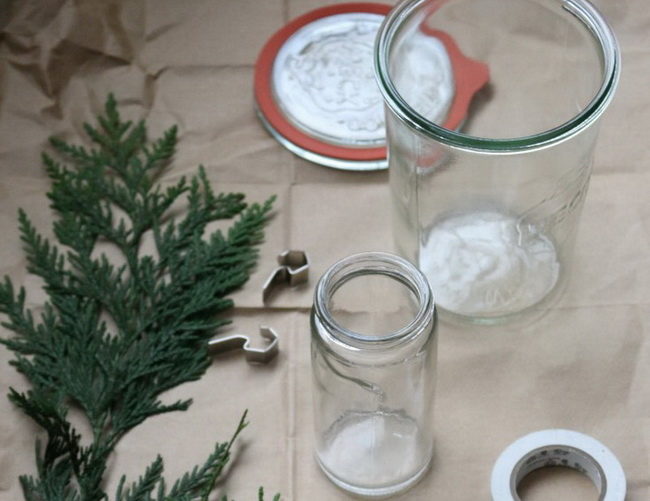
How to make Christmas candles with your own hands:
- Cleaned water must be boiled, cool. Gently drain the water so that the precipitate does not get into the liquid. This must be done if you want to get transparent ice candles. If you pour ordinary water from the water supply, then the walls of ice will turn out to be muddy.
- According to this technology, you can make several candles with different decor. First try to make a simple candle. Take two containers of different sizes, but such that smaller dishes are placed inside a large bowl.
- Fill the large dishes half with water. Place a smaller diameter capacity on top. Fasten the edges with masking tape. So your base will be placed in the center.
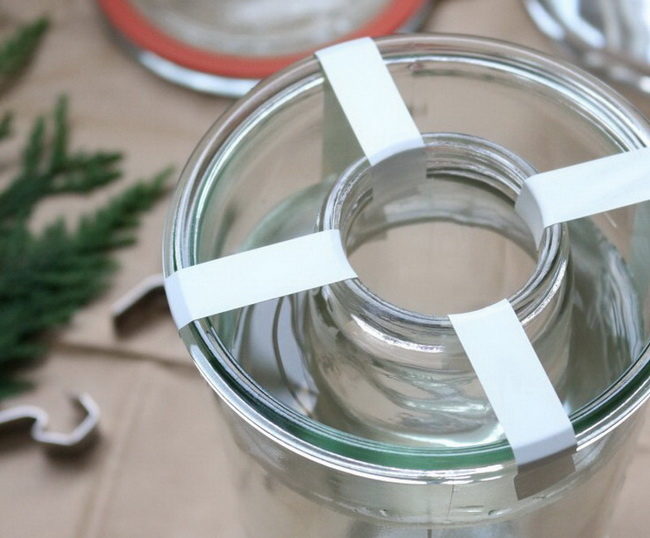
- The twigs of fir, juniper or eating chop into small parts. Gently place them in the water between the walls of the containers.

- Cut the orange into circles, each of which also lower it into the water. Expand it along the surface of the dishes.

- For the next version of the ice, first fill the bottom of the large dishes with branches and berries, then gently pour water. Also put a small container on top, fix it with tape.
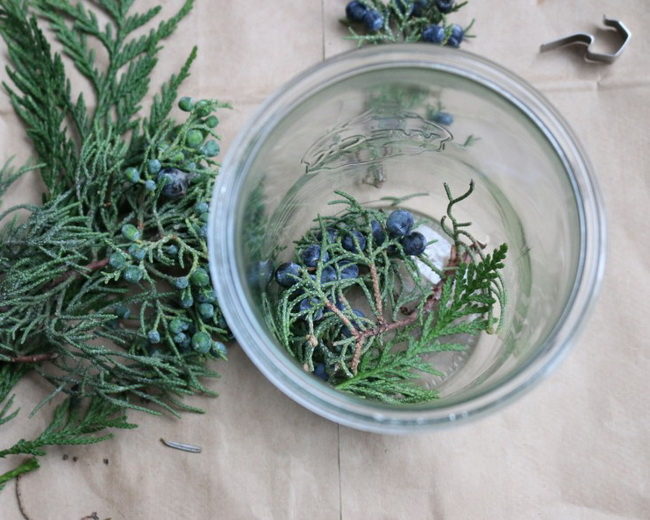
- Put branches with the rest of the berries on the sides. Blueberries will sink to the bottom, and cranberries, on the contrary, come up. To exclude this, glue them onto the branches. Then immerse it in the water.

- Now it is necessary to cool the liquid. Put the blanks in the snow or place them in the freezer.
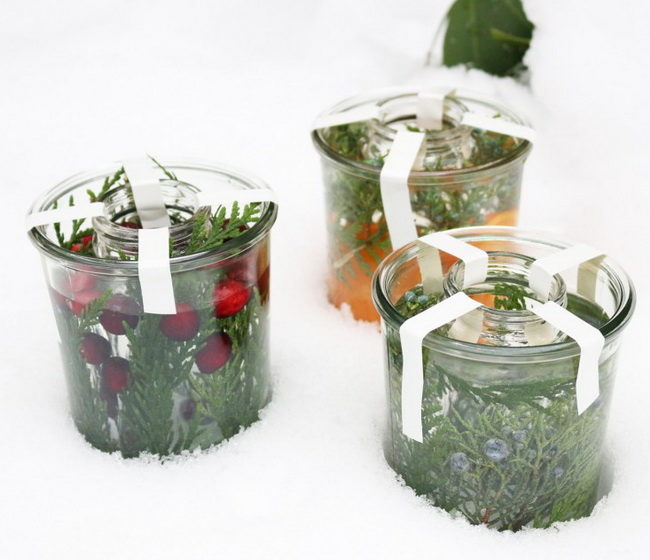
- After the water turns into ice, take out the forms. To easily extract candles from the dishes, let the ice melt a little. Arrange the ice decor on the street, decorate it with branches and put in the inside of the decorative candle.
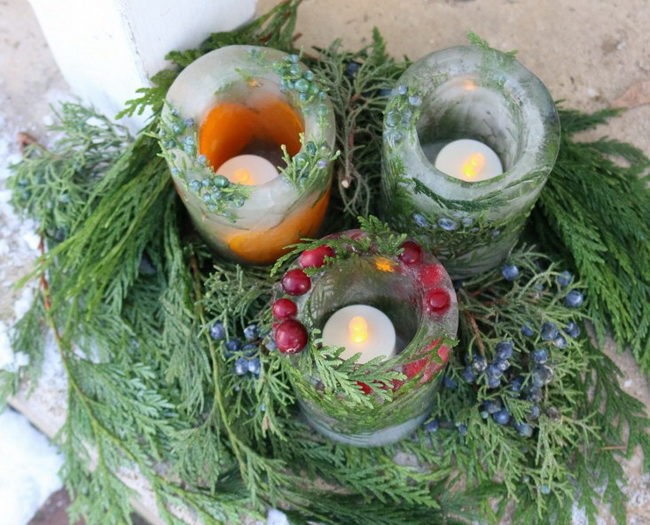
How to make a candle in a mug or glass with your own hands - photo
If you like to light candles at home, then you have a lot of cores left from them. Do not rush to throw away the remains. The wax can be melted and make a new candle, for which you can choose an old mug or even a glass.
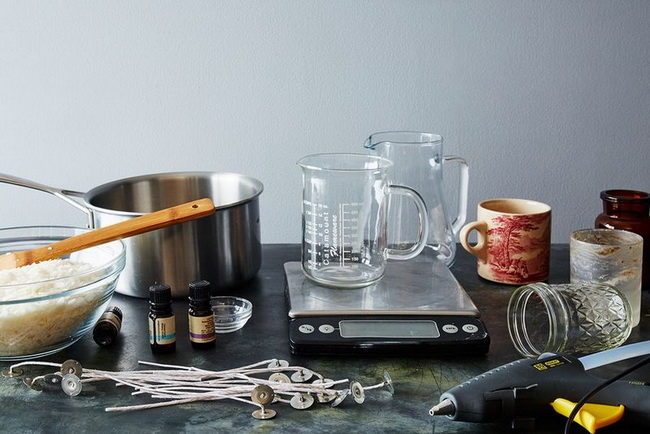
For work, you will need:
- heat -resistant forms: mugs, glasses or jars;
- soy wax;
- finished wick;
- glue gun;
- scales, measured glass;
- big pan, bowl;
- a bowl for the preparation of wax;
- spoon, confectionery thermometer;
- paper towels;
- island, scissors;
- flavors.
Work instructions:
- If you use the forms from old candles, then before work they must be cleaned. To quickly remove wax, lower the container into hot water for a few seconds. Then wipe dry towers dry.

- For ordinary dishes, it will be enough to rinse it with a detergent. But the remaining fluids should be thoroughly wiped, since moisture will contribute to the formation of voids on a candle.
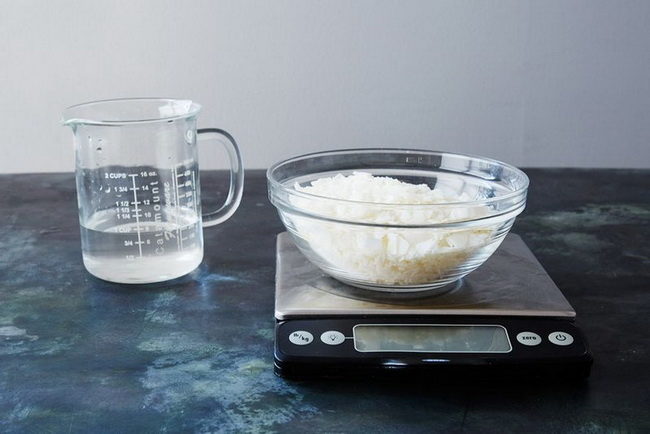
- To determine the amount of wax for one candle, use water. Pour it into the shape, then pour it into a measured glass. So you will avoid excess wax.

- Soy wax by weight is the same with water. Therefore, calculating the required amount of candle mass is very simple. Weigh the water without a container. Put an empty container on the scales, dive them and saturate the grated wax.
- Fill the pan with water, bring to a boil, then reduce the fire. Pour the basis for candles into a jug or other dishes with a thick bottom. Gently lower the container with wax in boiling water. After 5-7 seconds, raise and mix.

- Then lower it again for a short time, raise and stir. When the mass begins to purchase a transparent color, you should start measuring the temperature so as not to overheat the wax mixture. Heat it to 85 degrees.

- Before adding flavorings, the mass should cool up to 60 degrees. So the aroma will be distributed evenly and not evaporate ahead of time. Pour the required amount of essential oil. You can add a combination of oils if you are sure of the final mixture of smells.
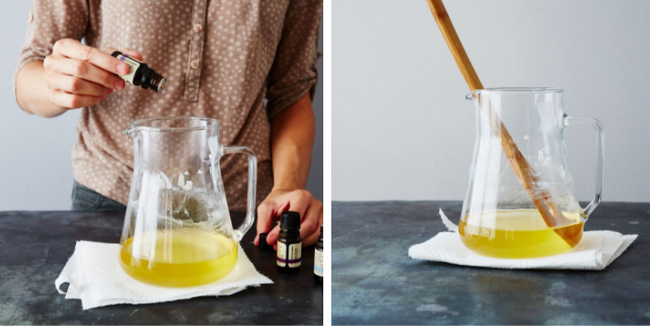
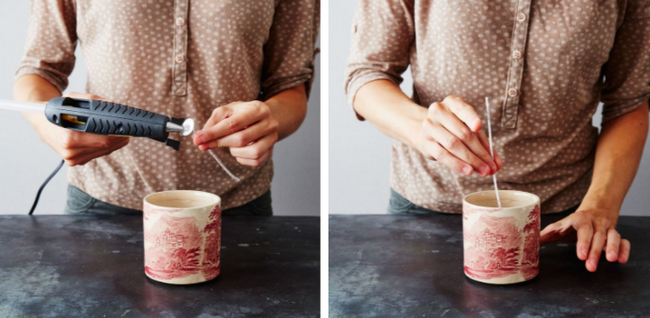
- While the wax mass cools, fix the wick in the center of the bottom of the shape. Use a super-cell or adhesive gun for this. Choose a wick elastic with a thick base, since there will be a lot of wax in the circle and it should slowly burn.
- In order for the wick to hold in in the middle of the case for the candle, secure it with electrical tape. Cut a small strip, roll in half and cut a small hole. Pass the wick through it, glue the edges of the island on the sides of the container.
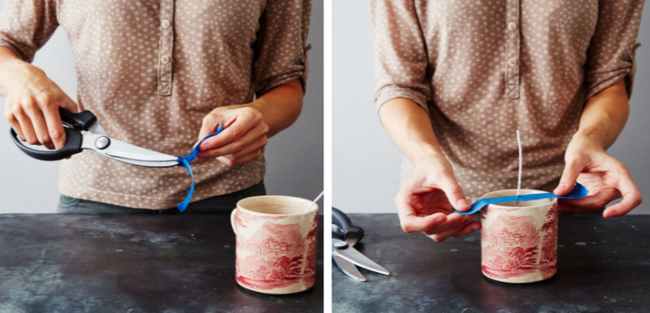
- Slowly fill the molten wax into the mug. So you will not form bubbles on a candle. Put the dishes with the mass to cool, then cut the excess part of the wick.

- It is necessary to set fire to candles only when the wax completely hardens. As a form for decor, you can use any container.

How to make candles with an openwork pattern inside with your own hands - photo
An unusual openwork pattern is obtained inside the candle when using ice cubes. Such a decor, although beautiful, is burning quickly. You can make an unusual candle at home.
Necessary materials:
- paraffin candles;
- wax pencils;
- ice, knife;
- terry towel;
- spoon for stirring wax;
- melting capacity;
- disposable dishes;
- paper towels.
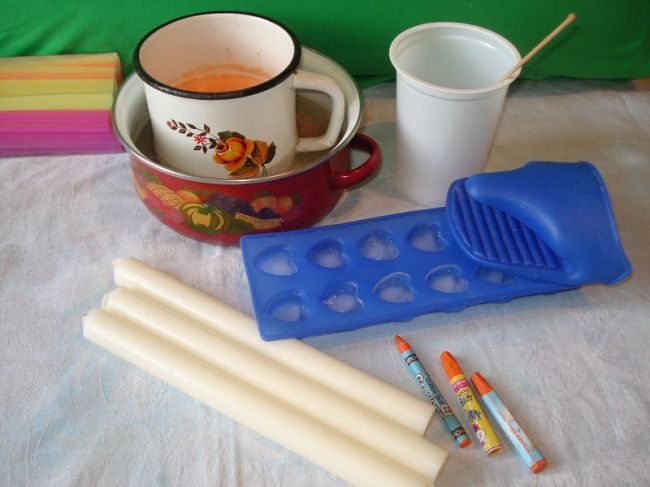
Work description:
- The candle form in this master class is a disposable cup. But you can use any case, even an empty juice box. Wipe it with paper towels. From one candle, cut the figure equal to the height of the glass and put to the side.

- Cover the working surface with newspapers or an unnecessary oilcloth so that the hot mixture does not spoil it. Cut the remaining candles into pieces. At the same time, try to get the wick.

- Prepare a water bath. Pour water into a large pan, warm it up. Inwardly put the metal container of smaller diameter. Pour the chopped paraffin into it.

Important! Paraffin lightly lights up, so observe the technique of personal and overall safety during work. It should also be taken into account that this material cannot be melted in a microwave. If you have a fire, then fill the fire with baking soda, and do not pour water.
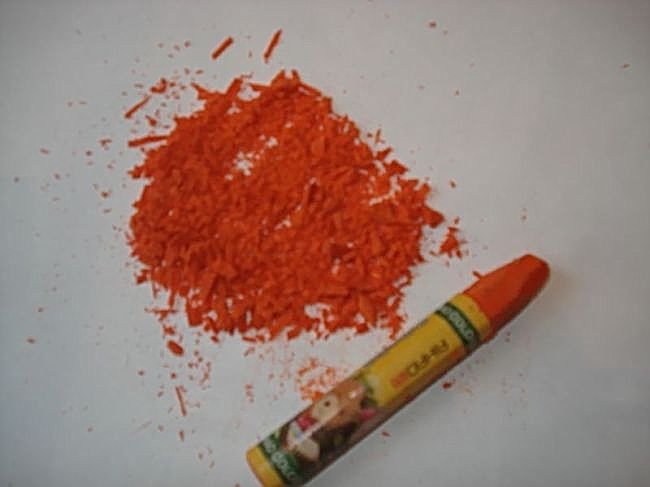
- Finely grate the wax pencil. To obtain a more saturated candle color, add a large amount of colored small cup.
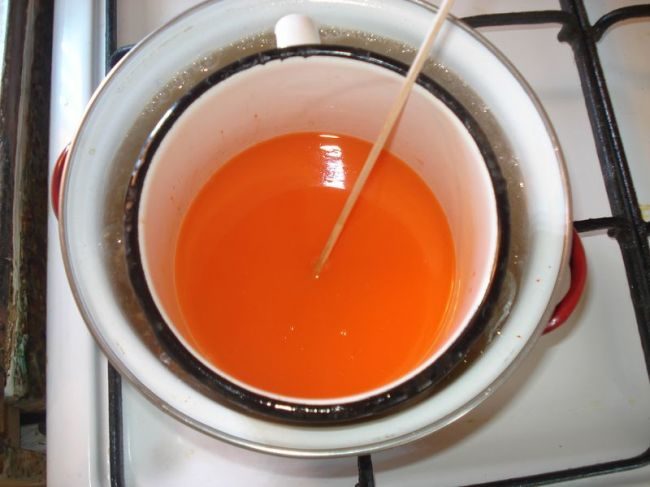
- When the paraffin melts, pour the dye and stir the mass until a homogeneous consistency is obtained. But you can’t overheat the mixture, only heated. If desired, you can add a flavor.
- Lay a towel on the table and pour pieces of ice on it. It must be split into small parts. To do this, cover the ice with the back of the towel and burn with a rolling pin. The smaller the ice, the more lacquet the candle will turn out.

- Glue the candle to the bottom of the glass that you previously cut. Around it, pour the ice. Try to distribute it evenly.
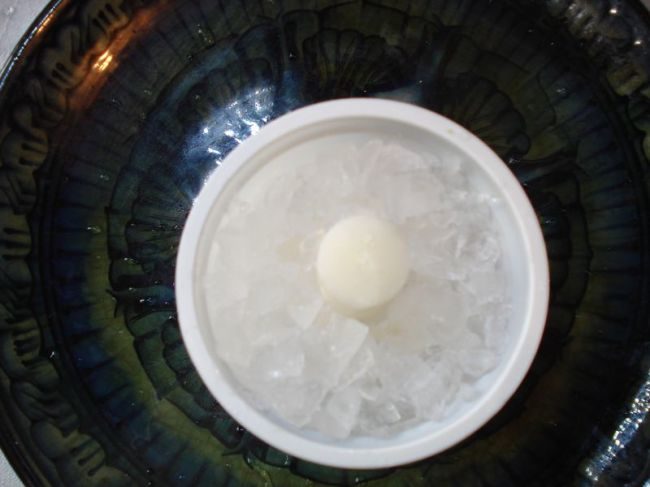
- With a warm paraffin, fill the shape for a candle. Leyite carefully so that the mass has time to spread between the ice. The glass must be filled to the edges with a mixture.
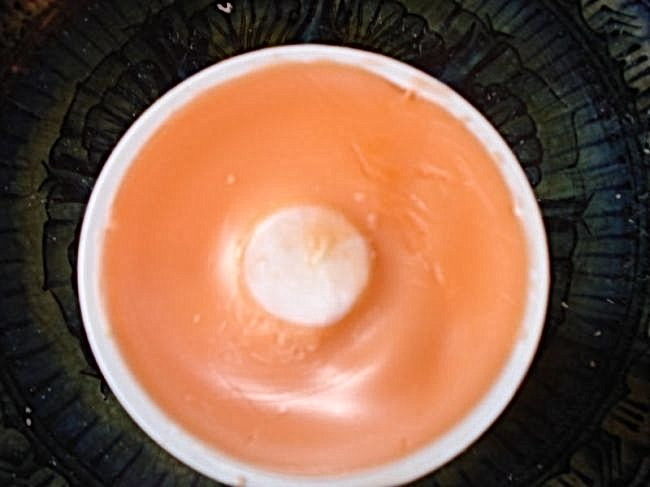
- Leave the candle to harden. This will take you less time, since the ice will contribute to the rapid cooling of the mass. If you have formed on top of the hollows, then melt a small amount of paraffin and pour it on top of the shape.
- To get an openwork candle from a glass, carefully cut it from one edge and remove it. But do this over the container or sink, since water will remain in the cavities of the candle. After that, put the product dry from moisture.
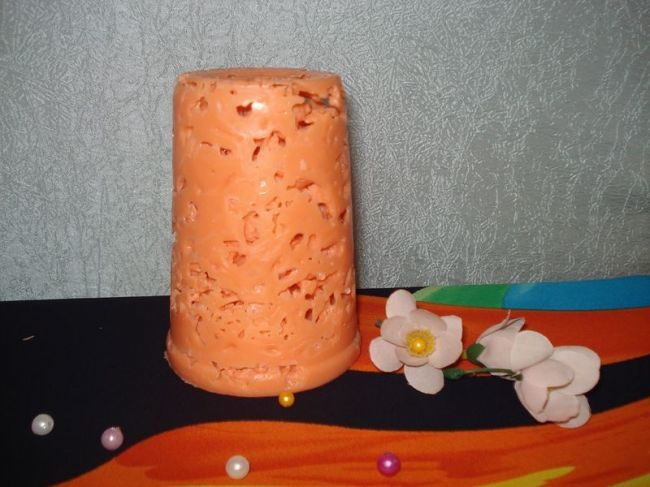
- It is necessary to use a candle with an openwork pattern inside after completely drying out. If you have a uneven bottom, then align it in a hot pan.
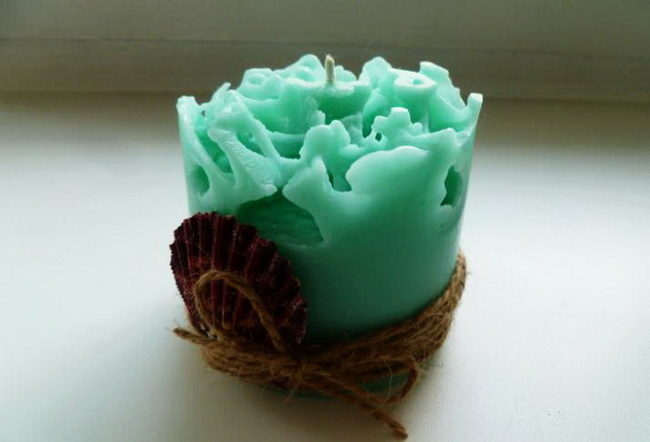
Important! The dishes that you will use to pour candles cannot be used for cooking.

How to make candles in the form of Easter eggs with your own hands - photo
Candles are an integral attribute of any holiday. They help quickly decorate the interior of the room without special costs. The original decor on Easter days can be candles in the form of dyes, which you can make yourself.
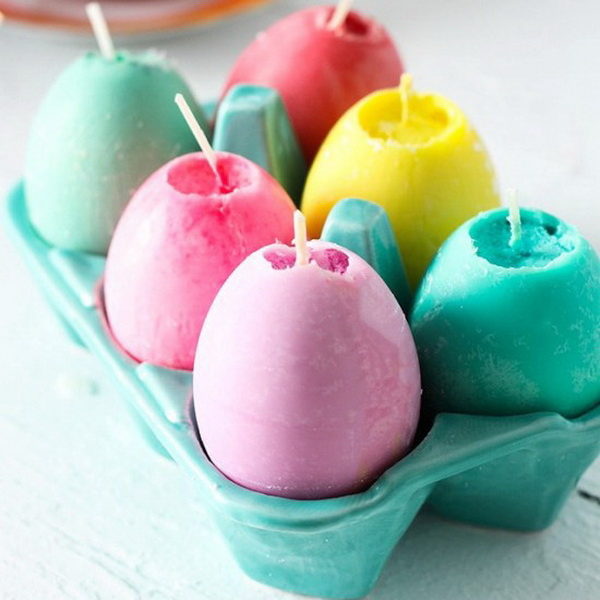
Prepare the following materials:
- large chicken eggs;
- wax mass;
- awl or needle;
- filyl in the finished form;
- wax crayons;
- flavored oils.
Step -by -step manufacturing instructions:
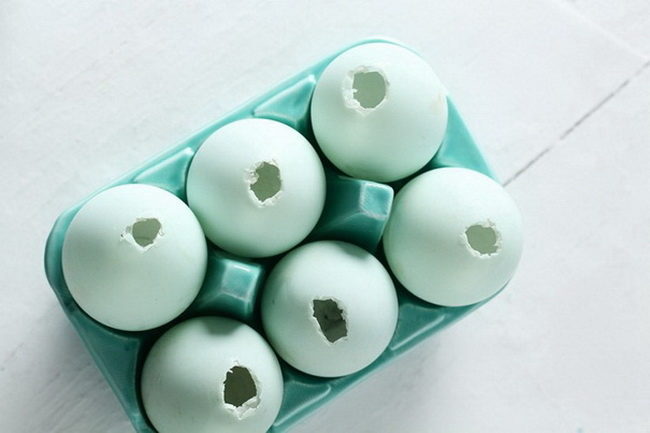
- You can give the candles the appearance of the dyes if the egg shell is used as a form for their bay. It must be prepared in this way. From one edge, make a hole with an awl, from the other a small hole. Blow the contents of the egg and rinse it thoroughly in warm water. Leave the shell to dry well, since you cannot wipe it.
- Grate the wax or grind with a knife. Try to make pieces of the same size. Put it into a disposable cup and put it in a microwave for 1 minute. Then take out, mix and heat again for another 1 minute. Make sure that the mass does not overheat.
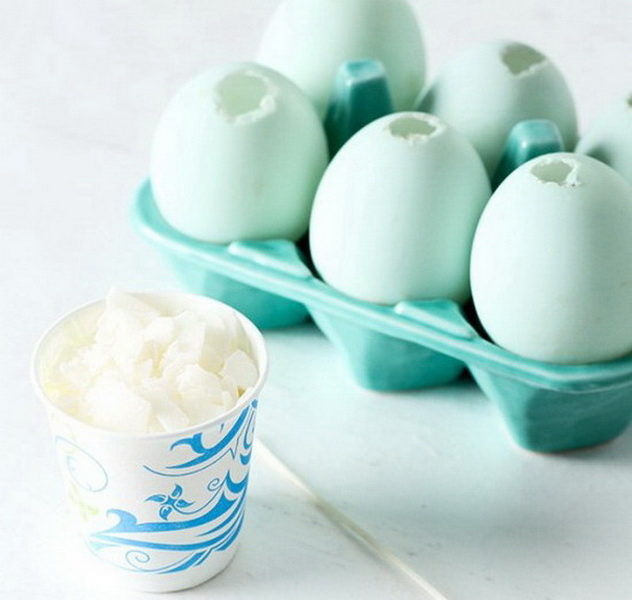
- From wax pencils, remove the packaging and cut with colored wax as smaller as possible. Pour it into a hot mixture, mix thoroughly. If the crayons do not completely dissolve, then put the container with wax in the microwave for another 30 seconds.
- You should get a uniform color. To give intensity to the shade, add more wax from colored pencils. When the mass cools slightly, you can add flavorings or essential oils.
- When the shell is completely dried inside, fix the wick at the bottom. Pour a little wax on the bottom of the shape and lower the wick. Hold it so that the mass is frozen, and the wick sticks to the shell.
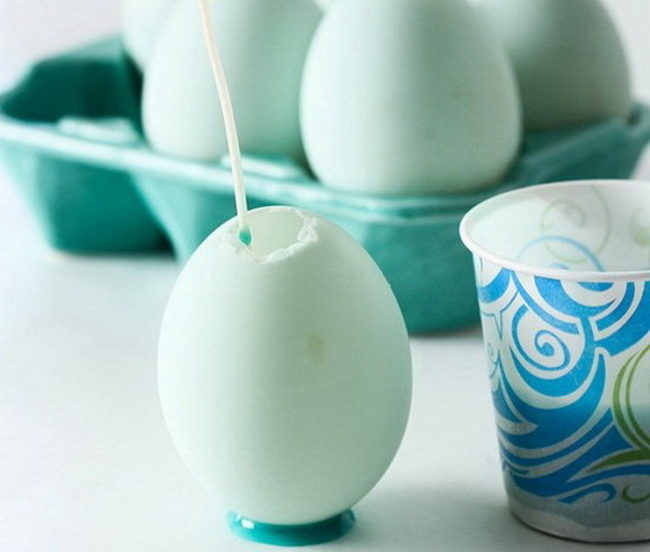
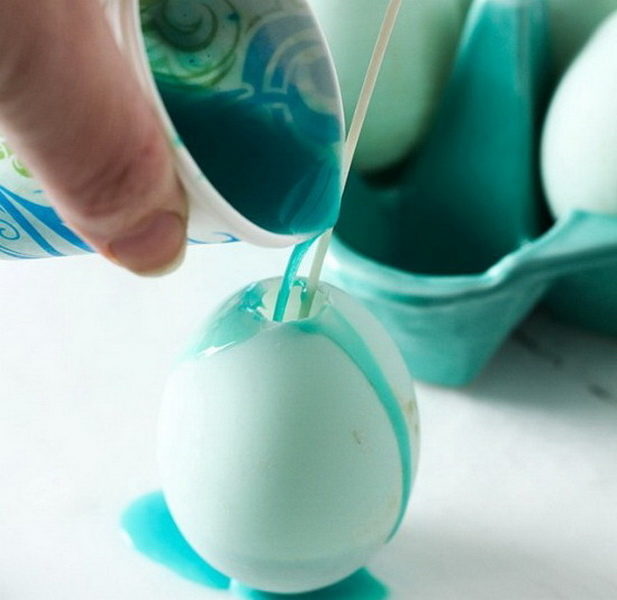
- Put the blanks in containers so that they take a vertical position. Then carefully fill the case with warm wax. Lie it with a thin stream, since the hole on the shell is very narrow. Leave the candle base harden.
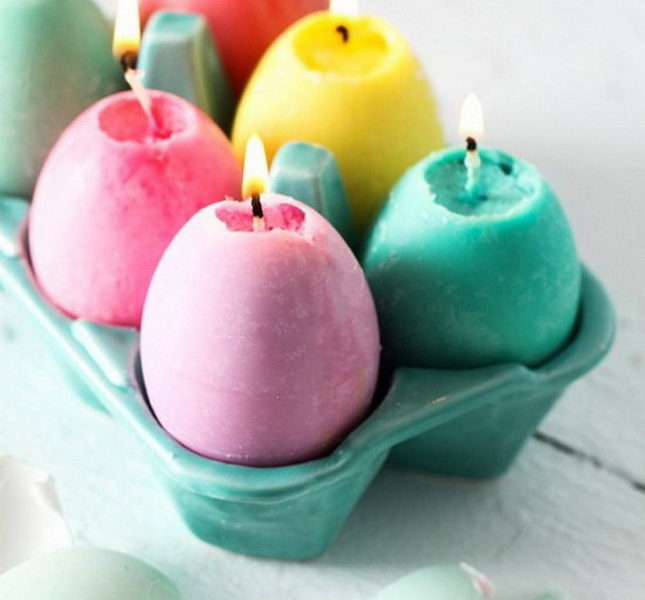
- After the wax hardens, first cut the wick to the required height, then carefully hit the shell and clean it.

- Such candles can be put on egg stands and decorate them with a festive table. They can also be an original gift.
- If you leave the shell, then you do not need to add dyes or wax pencils.

How to make curly candles for the day of lovers at home - photo
To decorate a romantic evening, make candles of an unusual shape. The case for them will not be a glass or mug, but ordinary cookies for cookies.
Materials for work:
- soy wax;
- any flavor;
- red dye for wax;
- baking sheet;
- culinary parchment;
- wick with a rigid base;
- a knife, a spoon and a tank for melting.
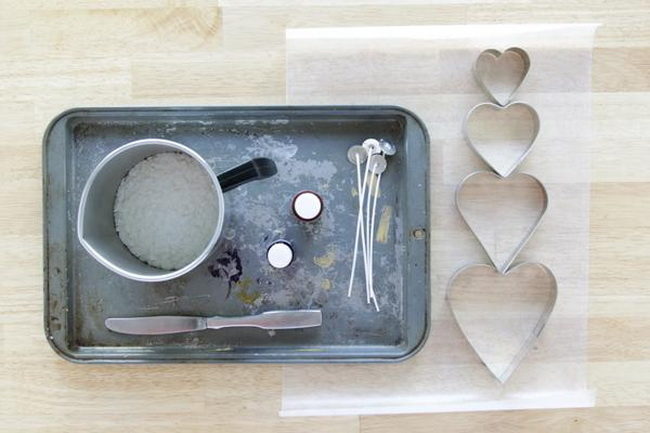
Squeare of actions:
- For this master class, you will need a baking sheet with high sides. Cover it with parchment. You must also have walls of dishes, so as not to stain them with wax.
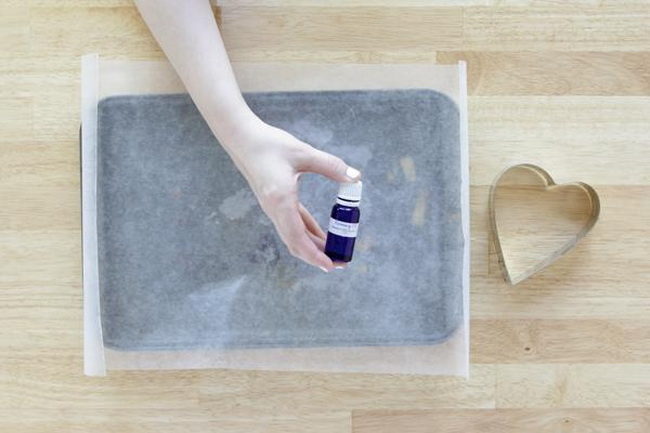
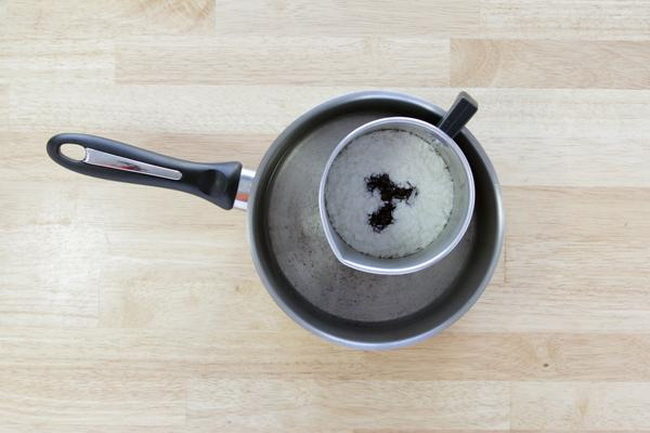
- Grind the candle base in any convenient way. If you work with paraffin, then cut the blanks in small pieces and remove the wick. Melt the mass in a water bath. When it becomes soft, pour in the dye. From this moment it is necessary to constantly stir the mixture.
- Cool the wax slightly, add your favorite essential oils. Stir thoroughly so that the aroma spread evenly on the wax. Slowly pour it into a baking sheet, which is installed on a flat surface. So the layer will turn out the same throughout the workpiece. Leave the mixture to harden.
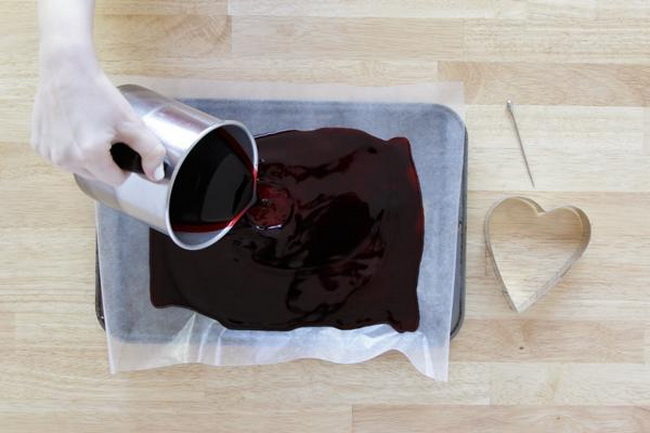
- When the mass begins to thicken, but has not yet accepted a firm state, make the blanks in the form of hearts in the form of hearts. In the central part, squeeze a hole for the wick. Leave the wax further to harden.

- Then remove the extra trimming. You can melt them again and use them for the manufacture of other candles.
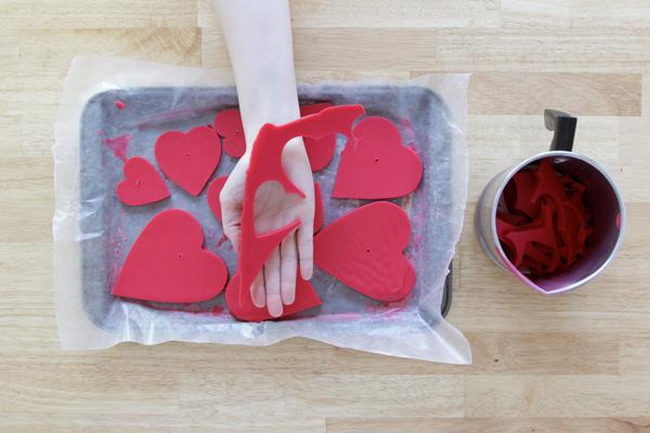
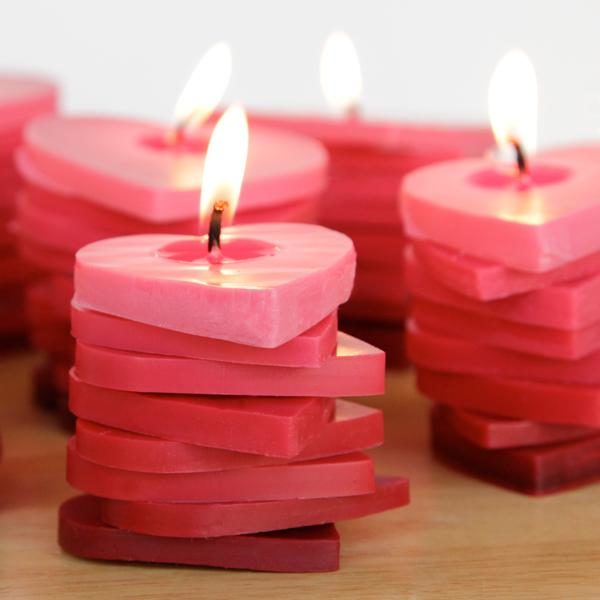
- Now it is necessary to assemble the product. To do this, take one workpiece, pull it through the wick. On the back, glue it to the wax. Then string the rest of the hearts on top.

- You can use the same shapes or different sizes for the manufacture of candles. Also add different dye or do "play" with a shade intensity.
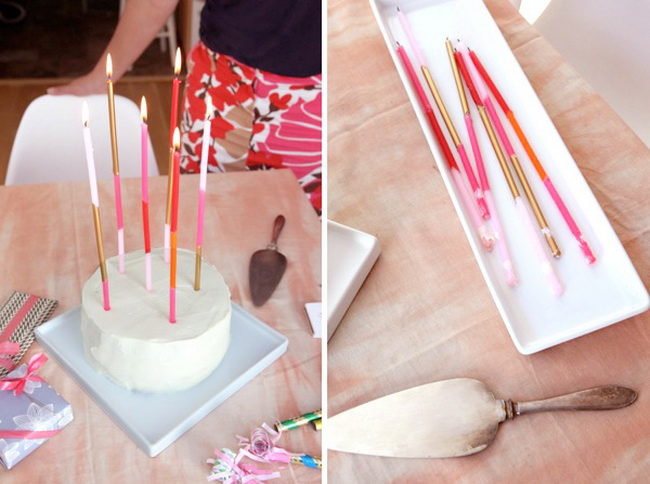
How to make a long candle at home - photo
You can surprise guests at the bottom of birth with long candles. If you are interested in the question: how to make such beautiful candles, then carefully study the following instructions with step -by -step photos.
List of materials for the manufacture of candles:
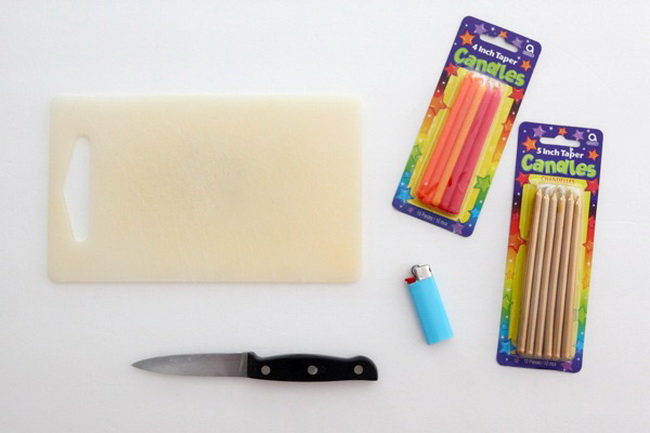
- festive candles;
- lighter;
- cutting board;
- sharp knife.
How to make candles with your own hands:
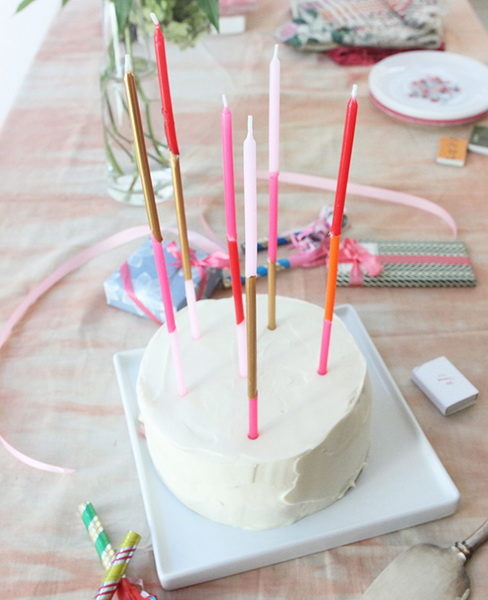
- Candles for the birthday are thin and small. While you are going to take photos, they have already burned out. Therefore, make long candles that will burn for a long time. To do this, take out two candles from the package, put them on a cutting board.
- Connect them together. Make sure that the wick of one candle is located above the thread of another. With a knife, make the same horizontal incision. With a lighter, melt one of the ends of the candle. Carefully glue two diagonal cuts, scroll the candles between the fingers and put them harden. Glue the third candle in this way.

- At the time of removal of the cake, place the candles on top of it and set it on fire. Do this carefully, since such an unusual decor is very fragile.
Making candles with your own hands at home is very simple. To do this, carefully follow these recommendations for the choice of materials and tools, as well as clearly follow step -by -step instructions.


Comments
a couple of years ago, there was no side of metrogils from the same problem, there were no side effects ...
I’m not a fan of peeling at all, it saves from acne of metrogil, it also smoothes it ...
Great article! ...
I take the second course of the Capsules Climafite 911. The tides went very quickly. It became calmer, irritability went away and I sleep well ...
i also noticed - it is worth nervous, everything immediately affects the face. Therefore, I try to avoid conflicts and unpleasant people. Of the creams, I like Miaflow from wrinkles - smoothes not only small wrinkles ...