Nature has unsurpassed beauty, which artists of all time are trying to convey on their canvases. It is worth noting that although the nature surrounding us is the same for all, true artists capture barely noticeable accents and details that make their works irresistible. The landscape or drawing of nature is rather complex paintings, since here the realism of the picture and compliance with all proportions, as well as special attention to details, should be clearly observed here.
Content
- How to draw a landscape and what is a landscape
- Features of phased drawing of the landscape with a pencil for beginners
- How to draw a landscape with a pencil in stages for beginners
- How to draw a summer landscape with a pencil - instruction
- How to draw an autumn landscape with a pencil for beginners - instruction
- How to draw a winter landscape for children with a pencil in stages - instruction
- How to draw a spring landscape with a pencil - instruction
- How to draw a sea landscape with a pencil - instruction
- How to draw a landscape in stages for beginners
- How to draw a landscape - video
It is not so easy to learn how to draw a landscape, but with proper zeal you and your child can master the process of how to draw a beautiful landscape and get a lot of pleasure from this. Draw a Russian landscape, depict the types of urban streets or types of spring forest - all this will become available to you, and with the help of several descriptions, even your child can draw a simple landscape.
In this article, we consider the value of the landscape and the features of drawing the landscape with a pencil for beginners. We also give a description of several options for how to draw a landscape in stages.
How to draw a landscape and what is a landscape
A landscape is a picture or a drawing that depicts nature or absolutely any area. A beautiful summer forest, a sea surf, a sunset, an enchanting waterfall or city vanity - this can all be a landscape. In the paintings using the landscape technique, any plants, flowers, animals, as well as the most different terrain - forest, field, meadow, river, lake, sea, jungle, rustic or city streets with their objects can be depicted. Translated from French, the “landscape” denotes the area, the country, which quite accurately describes the essence of such paintings.
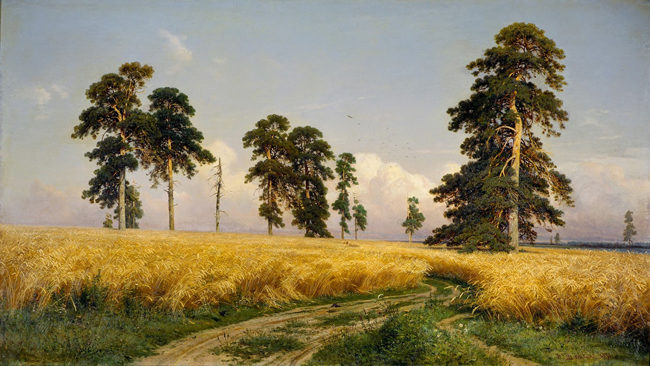
At all times, the landscapes were given a special place in art, in some years such paintings were placed on a secondary plan, but today the connection of man and nature is becoming more relevant. That is why paintings with the depicted nature become more significant and popular. In a new way, the paintings of great landscape artists who masterfully conveyed the beauty and greatness of nature are overestimated. This is the picture of Aivazovsky “Ninth Val”, and the painting by Levitan “Spring-Bolly Water” and Shishkin’s painting “Morning in a pine forest”. All these artists, like no one, conveyed all the brightness of the colors of nature, all its unique shades and details. Thanks to such works and artists, interest in the depiction of various manifestations of nature does not weaken. A huge number of master classes are presented on the Internet, how to draw a landscape beginners.
Features of phased drawing of the landscape with a pencil for beginners
Before choosing which landscape to draw, it is important to know all the subtleties and features of this art genre. There are a huge number of features of how to draw a landscape or nature so that your drawing looks realistic and beautiful.
- First of all, in order for your drawing to be beautiful and harmonious, it is important to correctly place all the objects on a sheet of paper. They should be ideal proportions in relation to each other.
- Before you start drawing the landscape with a pencil, it is important to thoroughly study the hatching technique. After all, it is with the help of it that the volume in the picture with a pencil is created. Choosing the desired shade of the stroke and the softness of the pencil, you can highlight lighter and dark parts of the picture, create a shadow or reflect.

- It is important to choose good and high -quality simple pencils if you begin to learn to draw landscapes with them. It is recommended to take several simple pencils of different hardness. At the same time, each pencil is important to sharpen very well.
- If you draw a landscape with paints, take a good set of gouache or watercolors, buy brushes with a natural pile.
- It is also important to choose the right paper for drawing. It should not be too hard, as the pencil will be poorly drawn on it. But soft paper is not suitable - a simple pencil can slide.
- Any landscape should start with the designation of the horizon. Thus, you will mark the picture and know where to place which objects. By correctly determining the horizon line, you can create a good prospect of the picture.
- At the next stage of drawing the landscape, it is necessary to place the main objects on a sheet of paper, i.e. Buildings, mountains, a river or a lake, a tree or a group of trees, large animals, transport, roads. With a simple pencil, it is necessary to give clear contours of each object, starting to make more general lines and gradually finishing detailed strokes.
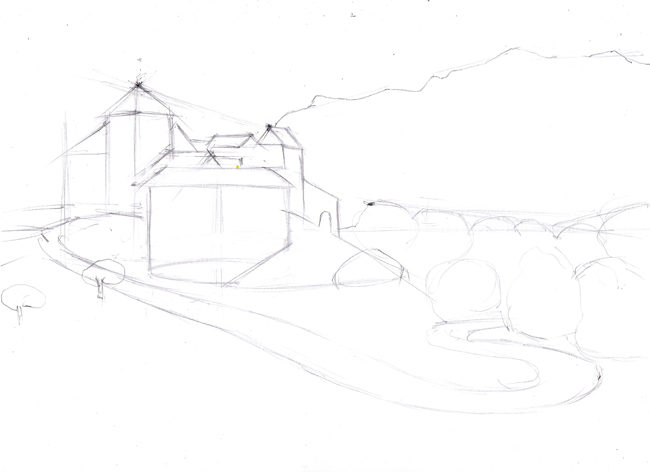
- Next, you can engage in drawing small, but significant details of the picture. At this stage, small trees, flowers around, grass, leaves and twigs are finished, possibly a fence or lantern.
- After the image of all the main elements of our landscape, it is necessary to proceed to the application of lighteners, which will make the picture more voluminous and realistic. To do this, you need to take a solid and well -sharpened pencil and apply strokes near each object.
- Next, with the help of a simple pencil, we give the landscape the final and volume. For this, it is necessary to apply the shadows that are shaded. Typically, darkening must be done under trees, buildings, in door and window openings, in shady places.
- If you are just learning to draw a landscape, choose lighter plots without a large number of small objects. To understand how to draw a landscape for children, look at a little material on this topic and choose the simplest topic with elementary forms and plot.
How to draw a landscape - photo
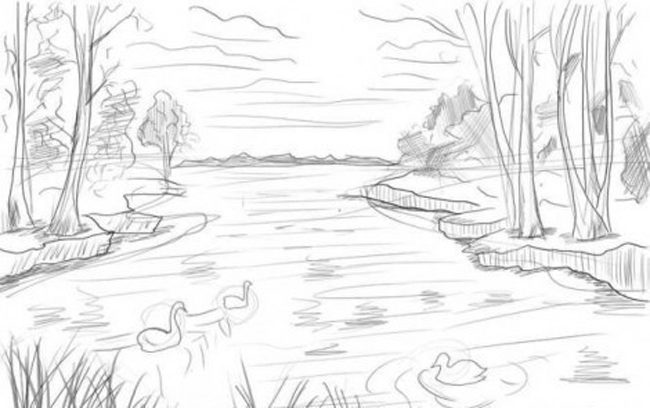
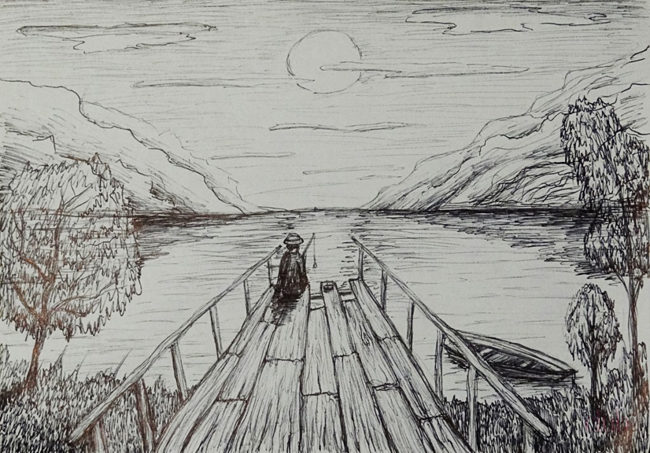
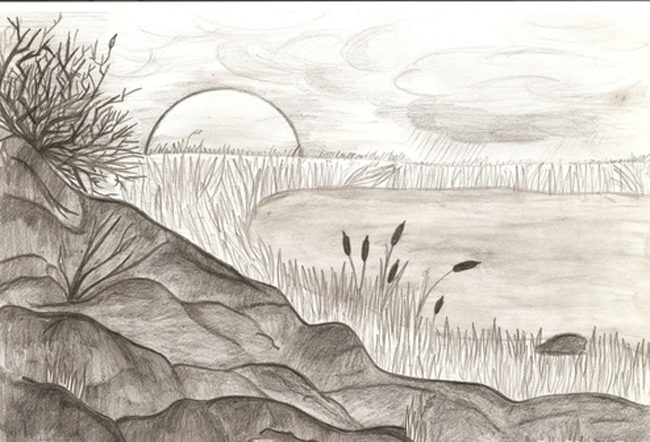
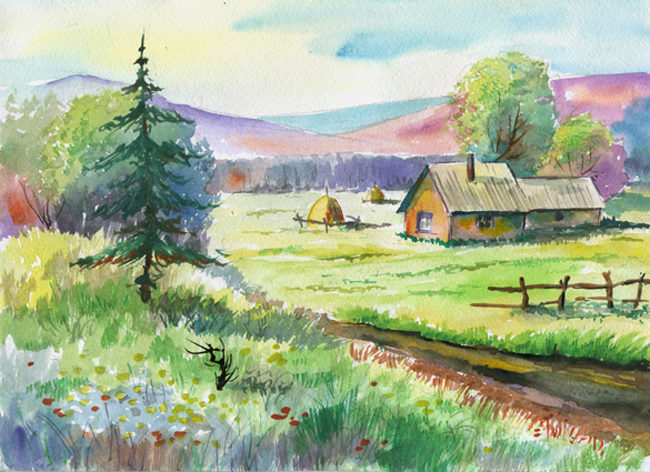
How to draw a landscape with a pencil in stages for beginners
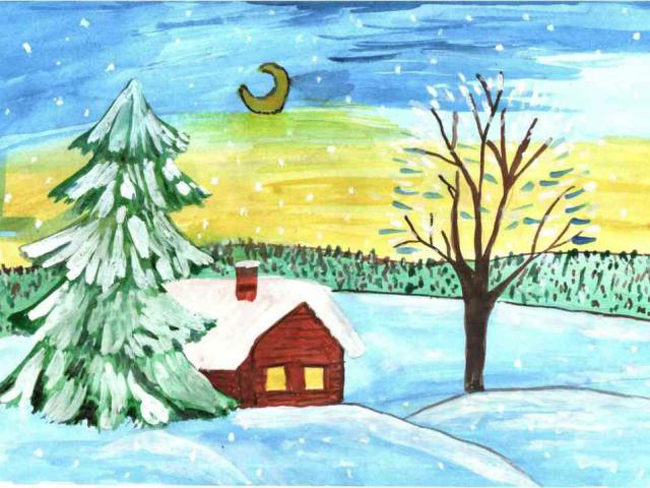
Before starting drawing, decide on the theme of the landscape and a specific plot, if you want to teach your child to draw a landscape, choose, for example, a winter landscape with a large number of snowdrifts and Christmas trees that are easy to draw. If you want to try to draw a landscape yourself, you can choose a more difficult example. Here is a detailed description of several options for drawing the landscape with a pencil for beginners.
How to draw a summer landscape with a pencil - instruction
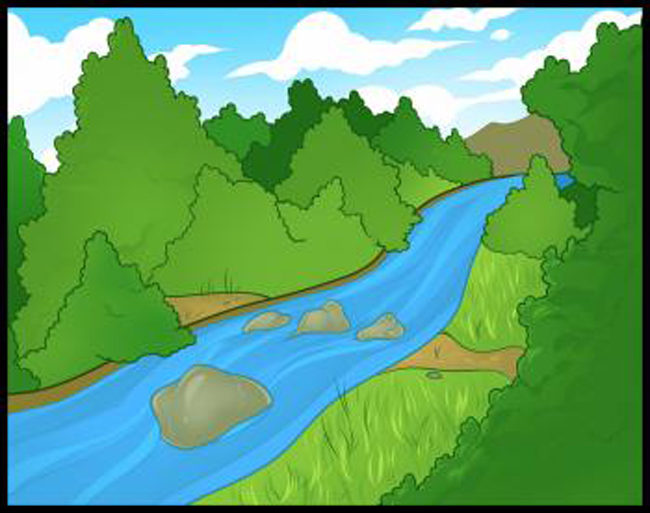
- Take a blank sheet of medium stiff paper, as well as several simple pencils of varying degrees of softness. Previously, the pencils need to be sharpened well. Also prepare an eraser, since in the process you always need to erase and fix something. This should not be afraid, as even experienced artists are mistaken and make incorrect strokes. After preparation, you can start drawing.
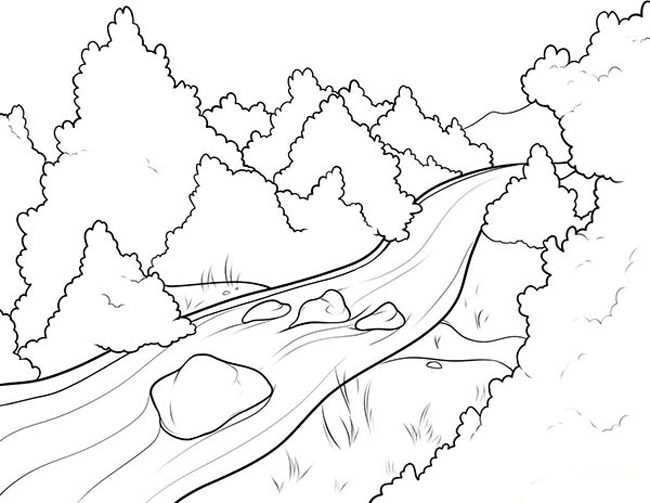
- Let us give an example of drawing a beautiful summer landscape with a forest and a river. At the first stage, it is necessary to indicate the contours of the river. To do this, outline the shape of the river with two winding lines, in the upper part they must form a narrow strip, which will expand to the lower part of the sheet. Thus, we will create proportions and visible remoteness of objects.

- At the next stage, you need to detail the river. To do this, add winding lines that show the flow of water. The lines can be drawn both long and short. In the center of the river, draw several stones that are enveloped in the waters of the river. Draw irregular shapes. At the junction of the stone and water, draw a smooth wavy line that will create the effect that the stones are immersed in water.
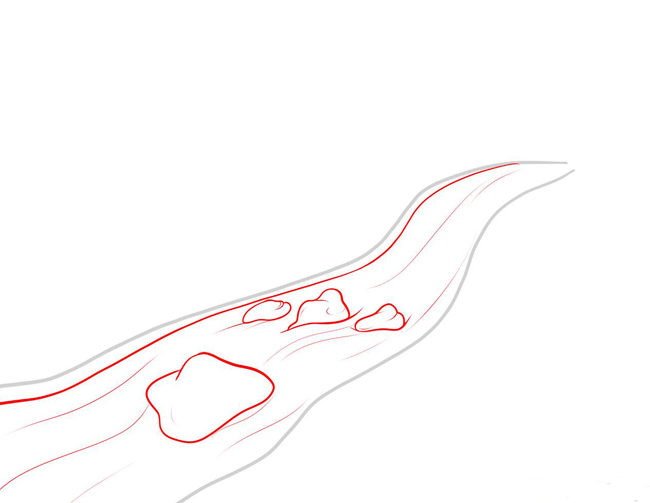
- Next, let's start drawing trees and a path that walks through the stones. We will not detail trees and shrubs, to draw them, you just need to give the shape of shrubs with a wavy line. From the center of the river where the stones were drawn, draw a forest path from two sides with two winding lines.
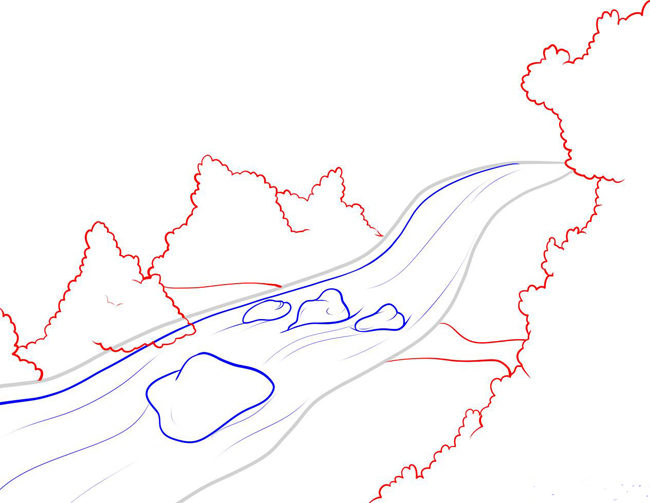
- Continue to draw more distant bushes that are more tightly. We also give the form to the bushes using a wavy line in the form of a pyramid.
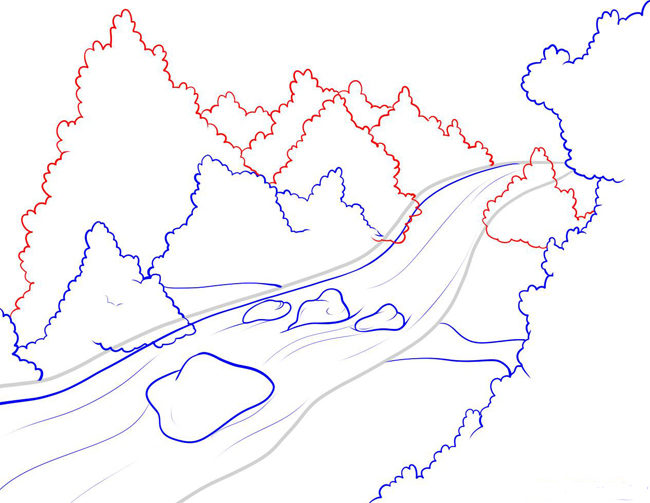
- At the final stage of drawing, add small details. Draw grass on the shore, small pebbles. Draw a hill in the background. Also, if desired, you can paint your landscape with paints or colored pencils.
How to draw an autumn landscape with a pencil for beginners - instruction
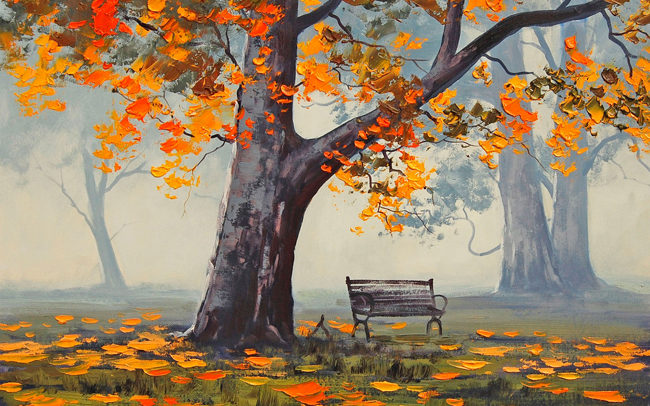
Each person has a favorite time of the year, which he admires and admires every day. Autumn is a wonderful time of the year, which is characterized by bright colors, a rich crop and leaf fall. We give an example of the phased drawing of the autumn landscape with a pencil for beginners.
- Take a blank sheet of paper and well -sharpened pencils of varying degrees of stiffness. Also put a good eraser in front of you, since you will have to wash unnecessary and wrong lines. After that, you can start drawing an autumn landscape.
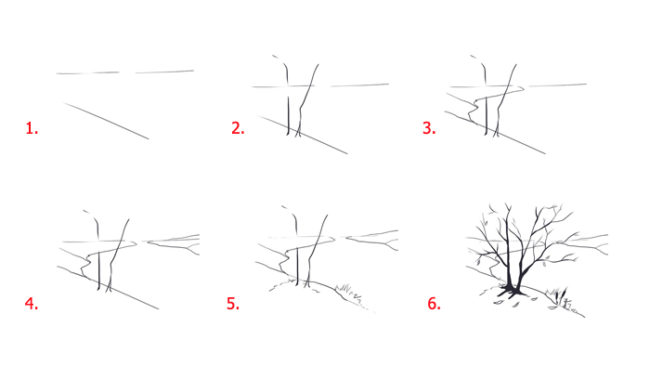
- At the first stage, draw the horizon and the line of prospects. It is with the help of such markings that you can draw the most basic elements of the correct size and in the right place.
- Next, proceed to drawing the most important elements of the autumn landscape - trees. They will be in the foreground, so they must be drawn with special care. In the fall, there are no leaves on the trees, so they will have to be drawn with a large number of branches and with an open root system. Two slightly winding lines draw a schematic location of two trees that grow nearby, but their tops are slightly rejected from each other.
- At the next stage, draw the left bank of the river. To do this, with a simple pencil, draw a wavy line from the line of the perspective to the horizon. With winding sections you will emphasize the contour of the uneven shore.
- Then draw the second bank of the river on the right side. To do this, draw a small line that connects the horizon and the edge of the sheet of paper and forms a kind of triangle. It is important that the two shores are not connected. Thus, it seems that the river flows very far.
- Lastoma remove the horizon line and the line of prospects. In the place where the trees grow, draw a small hill, outlining it with a curved line. On the banks of the river near the trees, draw thickets of autumn grass, without a pencil.
- The sixth picture shows how to detail the tree. To do this, draw the root system of each tree and add a large number of branches. The branches must be drawn with winding uneven lines that are connected at the top. The upper branches need to be drawn more thin. Add a couple of leaves on the branches that have not yet had time to fall. The leaves can also be drawn on the ground. Draw the leaves with an oblong shape with a pointed tip. In the thicket of grass, add a couple of reeds. Draw the stem with a straight line, and on its top, draw a cylindrical rectal shape.
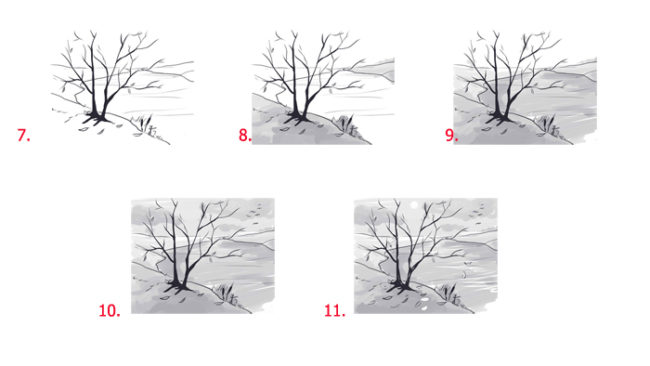
- At the next stage, draw with small strokes the waves on the water and add the grass on the shore in the foreground.
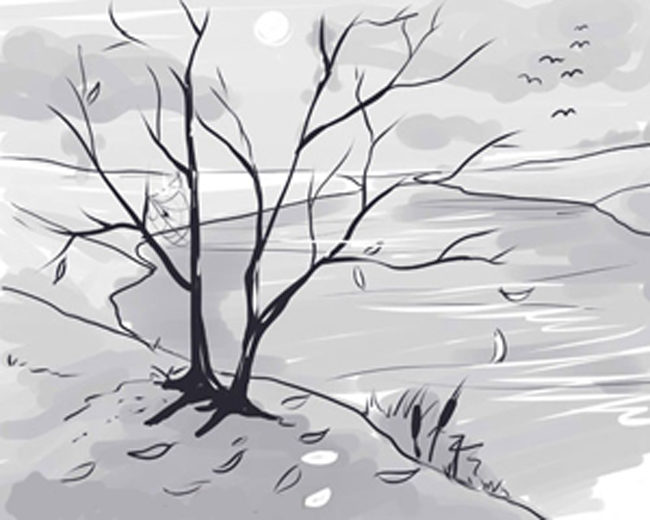
- After the image of all basic objects and details, you can begin to create shadows and give a specific tone. To do this, take a sharp pencil and darken the right bank of the river with short strokes, thereby creating a shadow of a long forest. The forefront also needs to be shaved.
- In the autumn sky, draw a flock of birds that fly south. You can draw birds in the form of a habitable for us only in a detailed form. Continue to shake the drawing. Self -stroked sky, remember that it has clouds that need to be made a little darker.
- In conclusion, give the shadow of the river, also highlighting certain sections of water. Our autumn landscape is ready.
How to draw a winter landscape for children with a pencil in stages - instruction
You can try to draw with your child a beautiful and very easy landscape of the winter forest. Here you do not have to own some special skills, it is enough to have a clean sheet of paper and a well-sharpened pencil at hand.
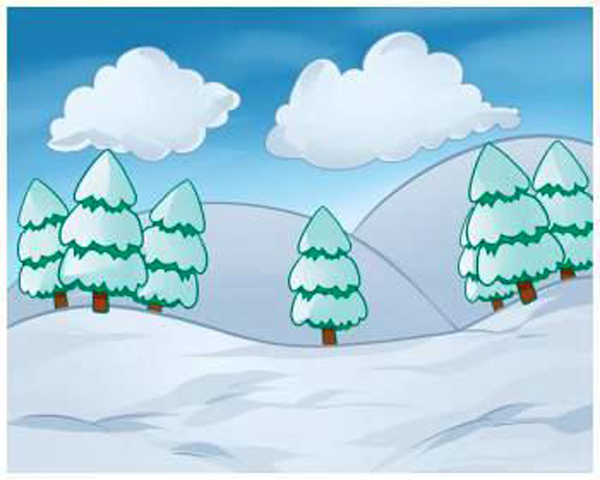
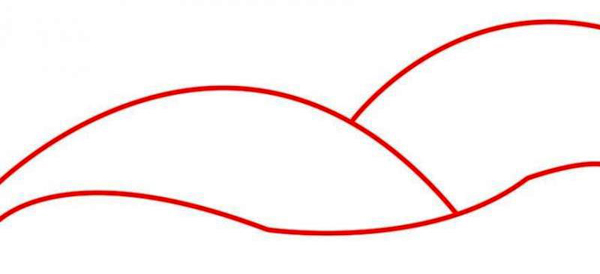
- You can start drawing a winter landscape with your child with large snowdrifts and gentle slopes. Snow snowdrifts are very simple. It’s just that you need to draw one low semicircle and the second larger with a pencil, which partially enters the first. In the foreground, draw a small gentle slope in a wavy line. Draw the lines schematically.
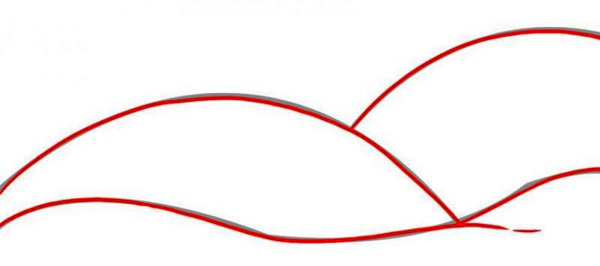
- Next, we begin to refine our snow mounds, give them greater naturalness and airiness. To do this, you can draw small strokes in the place of the hill connection.
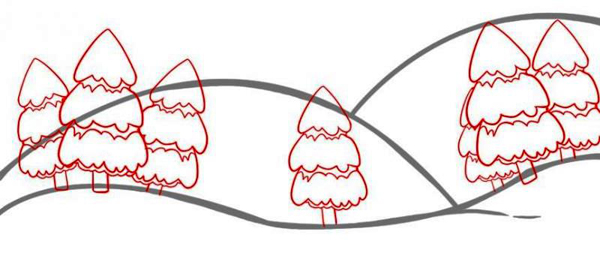
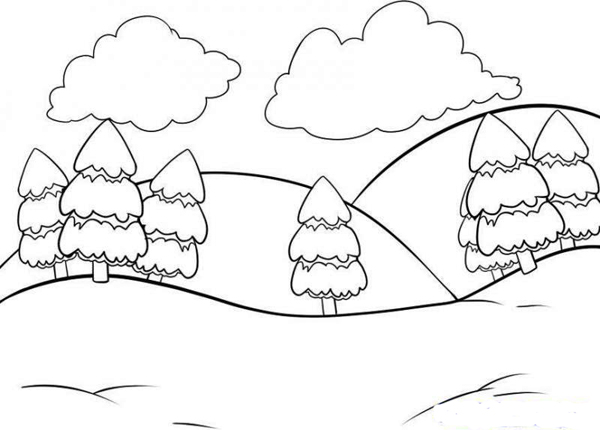
- Next, proceed to drawing snowy Christmas trees. For the perfect symmetry of the picture, draw 7 Christmas trees. On each side there will be three Christmas trees and one beauty in the center. Start drawing a Christmas tree from the top. To do this, draw a triangle with a rounded peak and wavy base, which resembles flowing ice cream. Thus, you show that snow is on the spruce paws. Next, draw the snow with a wavy line on the next tier of spruce branches, ending it, like the first. After that, draw the third tier exactly in the same way. At the very end, draw a trunk to each tree. Where the Christmas trees grow in a group, make the trees a little step by each other. To do this, just draw a small part of the tree.
- Be sure to add beautiful snow clouds above the winter forest. Clouds are drawn with a wavy line in the form of an uneven circle. Also in the foreground, add a little hills that will make the pattern more voluminous. They can be drawn using ordinary curved lines that cross each other.
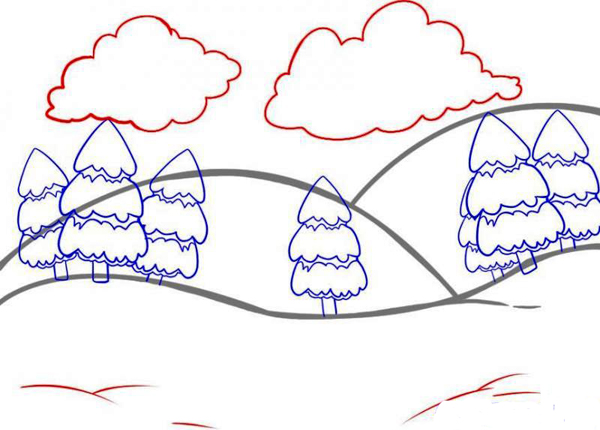
- At the last stage, delete all unnecessary lines with an eraser. If desired, your child can paint his drawing with paints or colored pencils. To get a brighter and more unusual drawing, ask the child to draw animals that he live in the forest.
How to draw a spring landscape with a pencil - instruction
Choose a corner of nature that you like most in your garden or can be in the park and imagine it in the spring appearance. So you will understand how to draw a landscape of spring, make it alive. Spring landscape requires a lot of return, since this is the time of revival and new life for nature, so special attention should be paid to the little things when drawing a spring landscape.
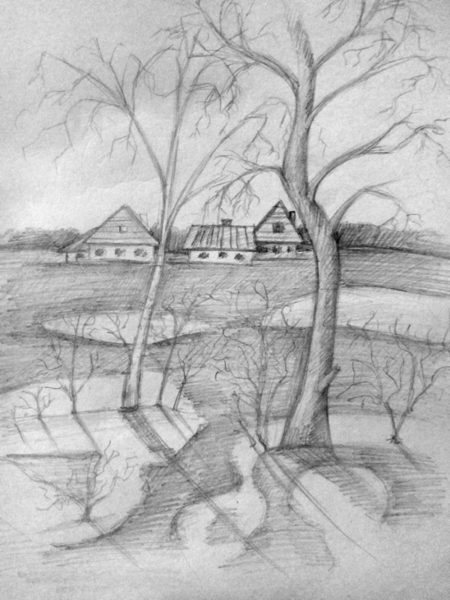
- In order to depict a spring landscape on a sheet of paper, draw the schematic contours of houses and other buildings in the background. Draw the building itself in the form of a rectangle, and depict triangular roofs on top. Some buildings will close others. Draw the horizon line there. Trees will be in the foreground. Since this is early spring, there will be no leaves on them. First draw one tree with a thin barrel. The branches must also be made thin, for this we lead two lines close to each other and connect at the top.
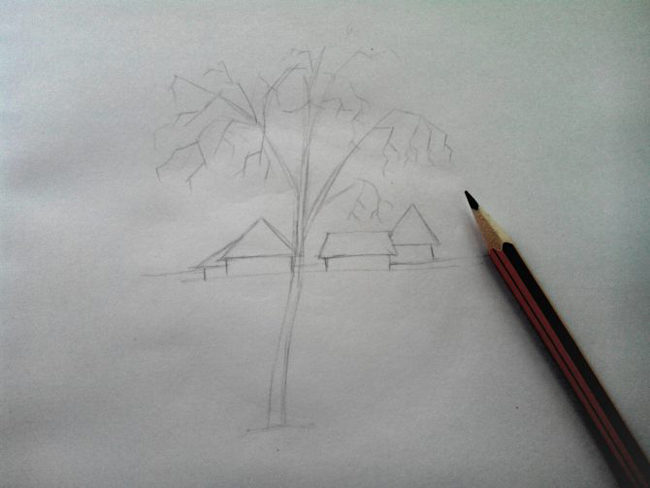
- A little in front of the first tree we draw the second larger. The trunk of this tree can be drawn with curved lines. Also depict smaller branches without foliage from it. In the place where the barrel ends, draw a small line. This will be the place of connection of wood and earth.
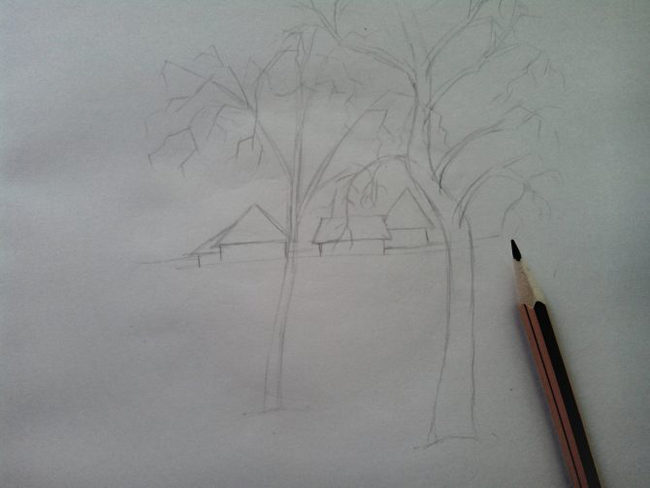
- At the next stage, proceed to the detail of the spring landscape. Give the buildings in the background a realistic appearance. To do this, draw the windows and shake the roofs. On the ground, wavy circles must be drawn by islands of snow, which has not yet had time to melt. Draw more snow near the trees. To give the pattern, depict snow in small hips with curved lines.
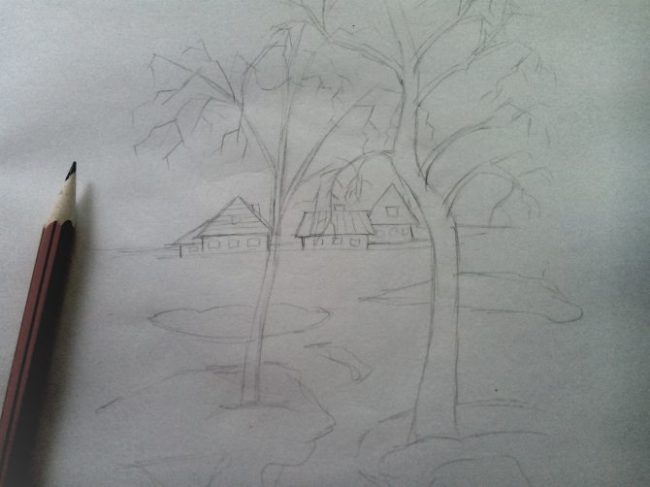
- In the foreground, add a little low bushes near the trees. Make branches thin and low. At the base of the bushes, draw small lines. Start shake the background, namely the far forest and at home. Contract the contours of the buildings with a simple pencil and slightly shade. Picture the forest with strokes, and then also rub the pencil on the sheet.
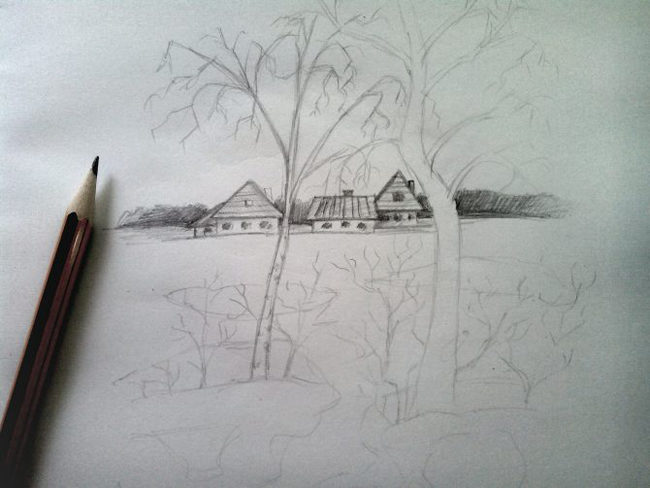
- Next, make the shadows on the trees and shake the surface of the earth, while the islands of snow must be made much lighter than black earth. Make the strokes in different directions, after which slightly blend the pattern.
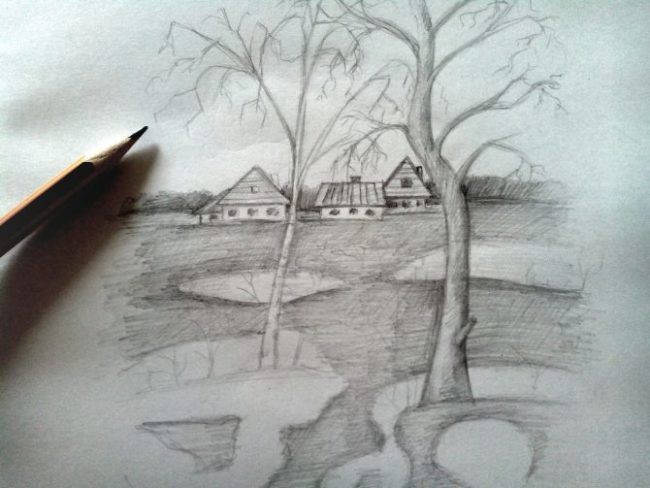
- At the last stage, it is necessary to circle all the elements with a sharp pencil to make their contour more clear. Also, do not forget to draw shadows from trees and bushes. Your spring landscape is ready.
How to draw a sea landscape with a pencil - instruction
Nature can be drawn not only in a specific time of the year, you can try to portray a sea landscape or draw a jungle. This is very unusual, besides, if you were on vacation, this will help convey your impressions.

- First of all, it is necessary to draw the horizon and the lines of the prospects that will represent the main elements and parts of the marine landscape. This must be done with light and smooth lines, without a strong press on a pencil. Draw a small section of land in the foreground with a wavy line, and on it with a winding line, mark the shape of the palm tree. In the background, draw the mountains with a long wavy line, also mark the outlines of the neighboring mountains.
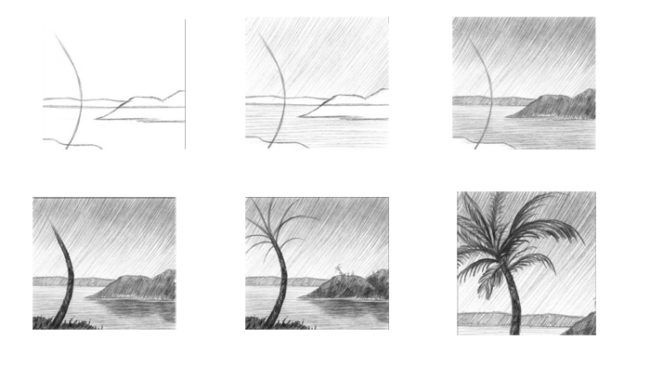
- At the next stage, begin to shake individual sections of the picture. First of all, draw strokes on the water, it is better to make them horizontal to secrete water from the overall picture. The sky can be drawn with long oblique strokes with a hard pencil.
- Next, make the hatching of water and the sky darker and clear, at the same time, shaken the mountain ridge in the background with vertical strokes. Circle the mountains in the foreground with a dark pencil and also shake with vertical lines, while pressing a pencil well to highlight them against the background of water.
- To make the landscape more realistic, make a reflection of the mountain on the water. To do this, outline the same contour on the water and shake it, making it a little darker. In short dark lines on the land plot, draw vegetation and give the palm a clearer outline. To do this, draw one more along the schematic curved line and shake the barrel. On the distant mountains, you can also draw barely noticeable outlines of palm trees.
- After you need to draw the foliage of the palm tree, and for this, draw curved lines that move away from the center in different directions and create palm leaves with short strokes.
- At the last stage, remove all the extra lines and give some details clear contours. The sea landscape is ready for you.
How to draw a landscape in stages for beginners
Drawing a landscape with paints is a more complex process than a pencil. A brush must be done the same thing that is drawn with a pencil. In order to draw a landscape with gouache or watercolor, it is important to choose high -quality paints and purchase brushes of different sizes. Better dwell on a simple drawing version, where there are no complex color transitions.
How to draw a city landscape with watercolors - instruction
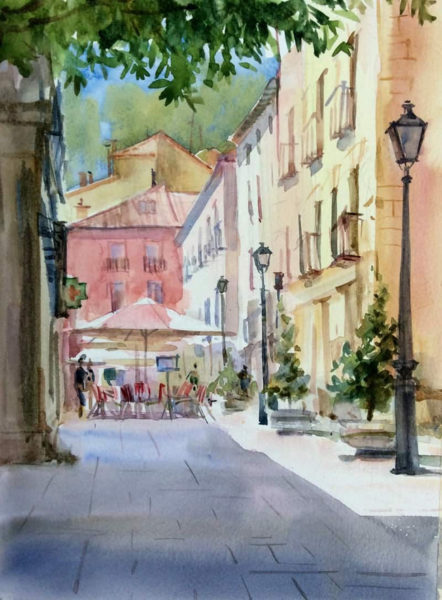
- When drawing a watercolor, you can make a small sketch with a simple pencil. Only this must be done easily and smoothly, without pressing a pencil.
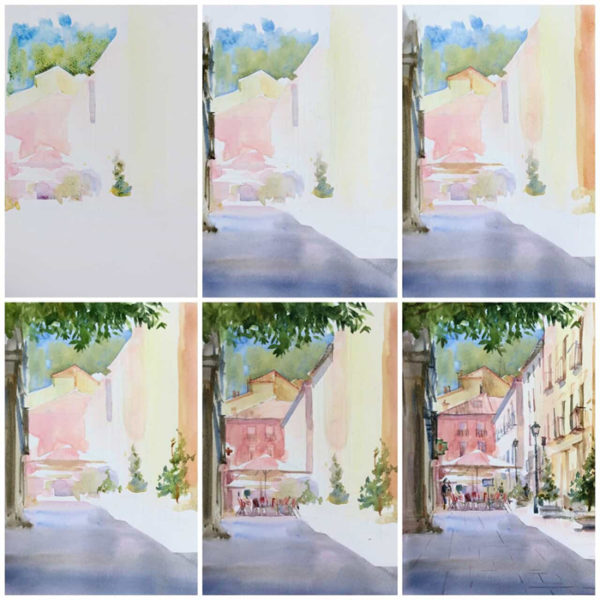
- If you want to draw a beautiful watercolor landscape of the city street, remember that first you need to paint over the brightest sections of the objects, and the last one already dark.
- Also, watercolors must begin to draw larger silhouettes.
- The stages of work below clearly show how to draw a landscape with a watercolor.
How to draw a landscape - video
Below is a selection of video tanks of master classes on how to draw a landscape.
The landscape is an amazing pattern that conveys all the beauty of nature, emphasizes all the smallest shades and details of the area. Using the materials proposed in the article, you can easily take your first steps in drawing landscapes with pencils and paints.


Comments
a couple of years ago, there was no side of metrogils from the same problem, there were no side effects ...
I’m not a fan of peeling at all, it saves from acne of metrogil, it also smoothes it ...
Great article! ...
I take the second course of the Capsules Climafite 911. The tides went very quickly. It became calmer, irritability went away and I sleep well ...
i also noticed - it is worth nervous, everything immediately affects the face. Therefore, I try to avoid conflicts and unpleasant people. Of the creams, I like Miaflow from wrinkles - smoothes not only small wrinkles ...