Glossy metallic shine is a popular trend of the new season. Silver, gold and bronze texture is increasingly found not only in clothes and accessories, but also in manicure. This trend is not only relevant, but also practical, because metal shine is suitable for almost any image and any combination of colors in clothes. Also, the mirror manicure of the color of metallic looks very unusual - in the light it plays with all the colors of the rainbow, because it reflects all surrounding objects.
Content
To make such a manicure, it is not necessary to go to the salon. The technology is quite simple: if you are used to making a manicure yourself, it will not be difficult to create a mirror surface on your nails. Mirror manicure is also suitable for beginners. Even if you have never done a manicure at home, with proper accuracy, you can learn everything in the process of creating the color of metallic on nails and get a beautiful fashion manicure as a result.
Choosing a mirror manicure design
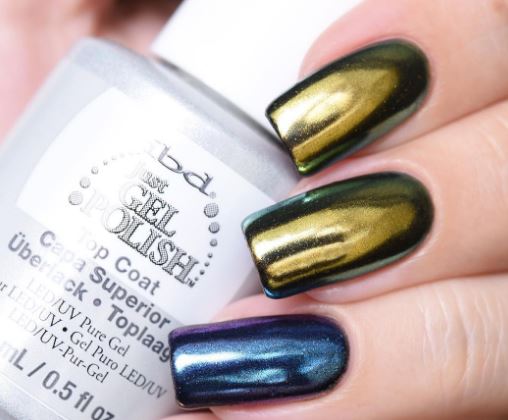
The basic principle of mirror manicure is a reflective glossy surface that gives the effect of a real mirror on the nails. Most often, metal shades are used to create such nail design: bronze, silver and gold. However, you can find other options - mother -of -pearl shades, rainbow effect or colored plain nails. The fastest and most simple mirror manicure is made using foil, and the shade will depend on which foil you buy. Note also that it is extremely desirable to choose a tone tone to your foil. Also, with step -by -step instructions in the article, you can try to make a manicure with a mirror rub - this method leaves a lot of freedom for imagination and experiments.
Shade of mirror manicure in the photo
So, the shade can be almost any - you are limited only by your imagination and assortment of the store. Mirror manicure in different colors can look completely different.
- Silver. This is perhaps the most popular color for such a manicure with the effect of a mirror. This color itself is almost invisible, but it creates the most shiny neutral surface on which any reflected shades will play. This cold, bright and unusual manicure will give the image free and independence and fit perfectly into the city image.
- Golden manicure is more demanding and looks more extravagant. It is good for going out, but in the framework of the casual style, it can not always look appropriate. However, if you like brightness in clothes and accessories, golden nails will perfectly complement your image.
- The bronze version of the mirror manicure refers to the boho style and looks quite neutral, but at the same time, less familiar than gold or silver. You can choose different colors with shades of pink or yellow - the more complicated and sophisticated the color, the more interesting your manicure will look.
- The mirror manicure with the effect of mother of pearl refers to the style-ethro style. For a long time, the mother of pearl was considered outdated, and now he is just starting to come into fashion again, so be careful with the choice of this color. If you choose a mother of pearl, it should not be too intense, only slightly noticeable. It is also worth refraining from catchy screaming colors in favor of more restrained options.
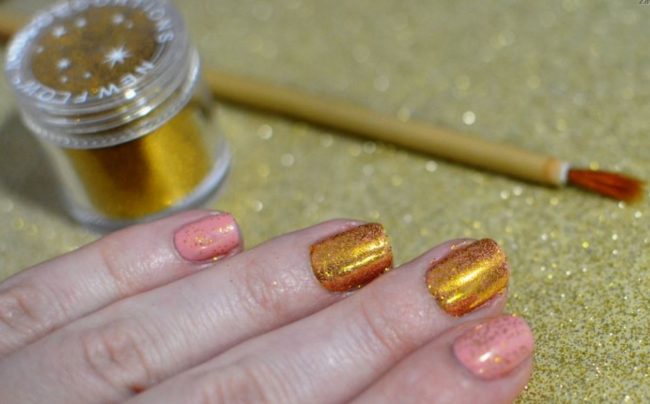
- Rainbow manicure is a bright and positive solution for the coming spring. If you want to look truly original and attract the attention of passers-by, using the technique of mirror manicure, you can paint your nails in all the colors of the rainbow at the same time. It is worth noting that such a manicure will particularly require you to be accurate, since any gaps will noticeably break the rainbow pattern on the nail plate. Also, choosing such a manicure, it is worth considering the image - so that it is harmonious, clothes and accessories should be no less bright than your manicure.
- Plain colors. For manicure, you can use colored foil and create a glossy surface of blue, red, green and any other colors. It is better to choose dark shades - in this case, the shadow on the nails will create a beautiful contrast and emphasize the mirror areas shimmering in the light.
- Colors with additional shine. With the help of foil, you can make not only a simple plain manicure. You can add to the nails of radiance, combining the mirror surface and sparkles. Such a manicure, in most cases, is too extravagant for casual style, but it can be a great option for a party or a solemn occasion.
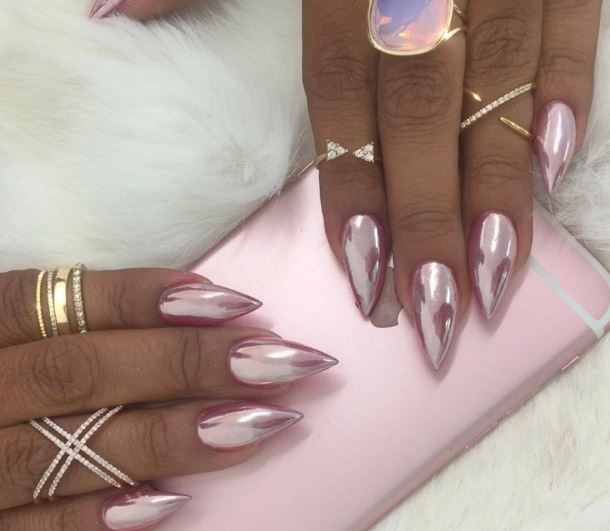
Mirror manicure on short nails
In fact, mirror manicure looks good on nails of any length. It is suitable for you, even if you have short nails. Such a beautiful and practical solution will fit well into modern fashion - a small length will exclude even the slightest possibility that your manicure will look vulgar. This stylish and unusual solution is suitable for both day and evening.
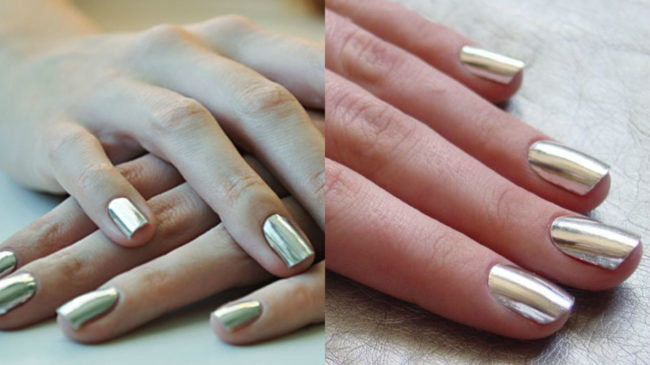
If you make a mirror manicure on short nails, you should make it as simple as possible. So that the design is not too saturated, but embodied simplicity and elegance, it is best to choose one of the metal shades. If you want to add colors, not too catchy colors, such as dark blue or dark green, you are also perfect. If you make a manicure for the spring season, you can revive it and make it more informal, adding another or two to the main color and making nails of different colors. With short nails, you can afford bold combinations, they will still look simple and exquisite.
Mirror manicure on long nails
Mirror manicure on long nails can be risky - this option certainly attracts attention and looks no less defiant than long red nails. Such manicure is possible, most often, as a festive one. It will be perfectly combined with any dress and probably will not go unnoticed by friends.
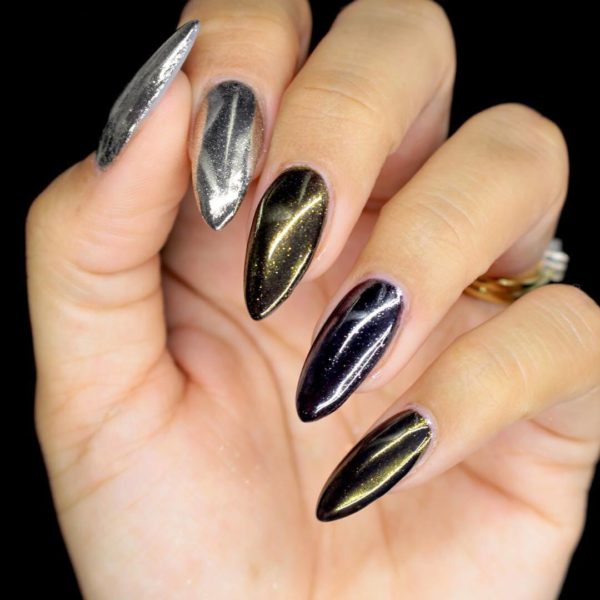
If you want to wear such a manicure as part of a casual style, you will need to thoroughly think over the image. Long nails with a mirror manicure look appropriate if they are an organic part of your usual everyday style, bright, daring and sexy. At the same time, fashion now proclaims elegance and grace in the opposite of outright sexuality. In order for such a bright manicure to look aristocratic, the rest of the image should be as simple as possible. A classic city casual or not too strict business suit is ideal.
Mirror manicure on medium nails
On nails of medium length, you can afford any option of mirror manicure - all this will look appropriate. The average length is unlikely to seem to someone vulgar, but at the same time, rainbow, mother-of-pearl and brilliant options will look better and more appropriate on such nails than short ones.
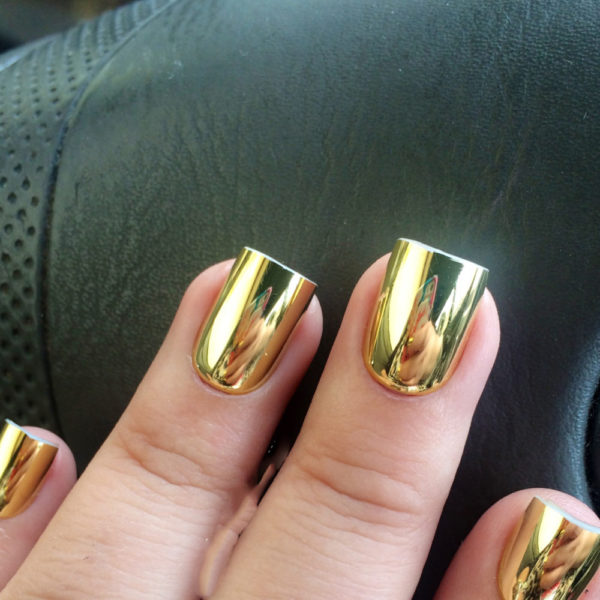
Mirror manicure on medium -length nails will equally well fit into the atmosphere of a noisy party and in a simple everyday style.
Options for mirror manicure
Mirror manicure can be created in different ways. Choose what is suitable for you, depending on your skills in an independent manicure and the effect that you want to get as a result.
- Mirror manicure using foil is the most common option that will give the most noticeable effect of the mirror surface. Such a manicure is made using a special foil for nail design, which is used to print a brilliant layer on the nail.
The performance of such a manicure requires accuracy, however, if you do everything right, you will get the effect of the real mirror. At the same time, such a manicure has a significant drawback - it does not hold as well as we would like, due to the lack of a fixing layer. The top is not specially applied, so as not to spoil the mirror surface of the foil, therefore, in order to save the manicure for the time you need, you will have to protect your hands.
- The mirror manicure gel polish does not give such a plausible effect as foil, but it is often used, since this coating is strong and will last more than one week. If you choose a mirror manicure made with gel polish, you need to look for a glossy gel-fluid of metallic color in stores. At the same time, you should be prepared for the fact that you will not get a full-fledged effect of the mirror, although the metal tint will still look beautiful and relevant in the new season.
- Mirror manicure with ordinary varnish is completely easy to perform. However, like gel polish, you will not get the full effect of the mirror. In addition, unlike the gel, a manicure made by ordinary varnish often lasts no longer than a week.
- Mirror manicure gel polish with a mirror rub is a good option that will give a plausible mirror effect and a dense surface, which will last several weeks. This method may seem long and not too simple for beginners, but it is a good alternative to foil manicure. It is the mirror manicure with a rub allows you to create a glossy surface on the varnish of any shade, so that nothing will limit you in creativity.
In the future, we will consider a mirror manicure with foil and manicure with a mirror rub - it is they who give the best glossy effect.
How to create a mirror manicure with foil at home
So, if you want to get the very effect of the mirror and the perfect glossy surface, but do not want to work with gel polish, manicure using foil is best for you. To make it, it will take a little more effort and time than for a regular manicure, but if you act in stages and slowly, even beginners will be able to achieve an excellent result. The unusual and fashionable effect of the mirror definitely costs all the efforts spent.
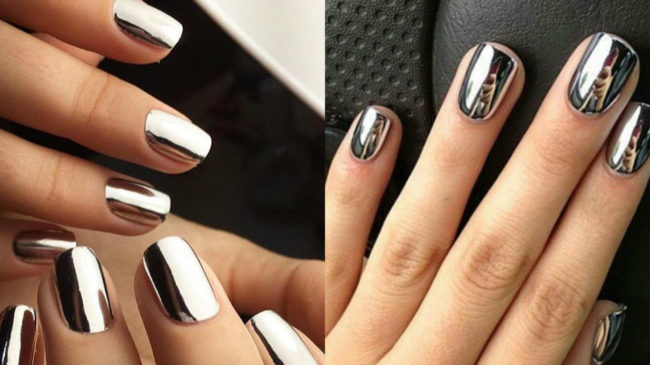
Partly, a mirror manicure is easier to make with your own hands efficiently than any ordinary manicure. We are all faced with a problem when we cannot evenly paint the nail with your left hand. When creating a mirror manicure, the last layer is created by imprinting the foil surface, and it is not necessary to have a firm arm here - it is enough to carefully smooth the surface of the foil on the nail.
What needs to be purchased
- Basic varnish. There is no particular specificity here, it can be any varnish that will smooth out the surface of the nail plate and prepare it for applying the following layers.
- Orange wand. If you do not have it, any similar tool is suitable - thin and round, with which you could smooth out the foil on the nail.
- Translated foil. The shade will depend on which option of manicure you choose. It is worth taking a plain foil - drawings that look good on foil may not be so beautiful on the semicircular surface of the nail. In addition, even reproduction of the picture will require certain skills from you.
- Nail polish. It needs to be selected under the color of foil in case, when you print foil, you do not smooth the surface well enough, and the gaps form. It is better to choose varnish and foil in one store.
- Glue for foil. It can be purchased in almost all specialized stores. If you do not have it, you can try to use a quick -drying transparent varnish.
What to pay attention to
- On the day before the manicure, you should not use the hand cream - it softens the nail plate, and the varnish lies worse. This recommendation is especially relevant for a mirror manicure, which is not too persistent in itself.
- Prepare the foil in advance, before the manicure starts - after you apply glue on your nails and it will clash with varnish, you will need to quickly glue a piece of foil on the nail.
- Do not try to process several nails at the same time. As a result, the time for smoothing and drying will be distributed unevenly, and the result will be careless.
- Do not apply any varnish on the printed foil - so you break the glossy texture.
Preparation of nails for mirror manicure foil
Before proceeding with the coating, you need to make a manicure: cut the cuticle, give the base of the nail a neat shape and align all the nails along the length of the shortest.
- For a glossy manicure, it is important to treat a nail plate with a soft file - put the file and make some soft movements. Do not overdo it, otherwise the nail plate will remain too thin, and the nails will break more often.
- If you want to make a manicure as relevant as possible, you should choose a short or medium length - this is how your manicure will look stylish, practical and elegant. If you doubt about the shape, it is better to stop on the soft oval - the square and sharp nails look slightly old -fashioned. In addition, the oval can be easily made even on short or broken nails.
- Before applying the base coating, do not forget to degrease the nail plate - so the coating will last longer.
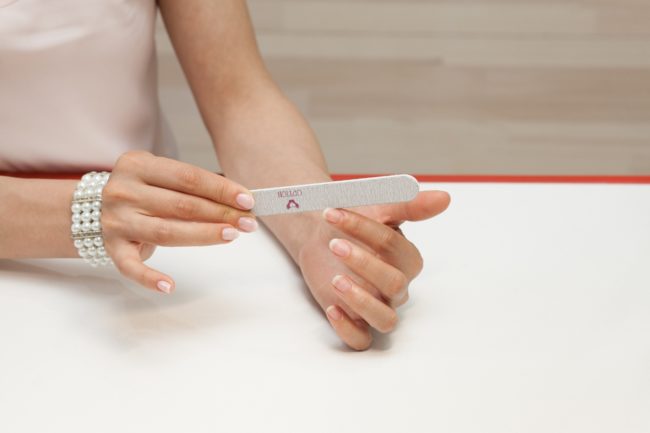
When you finished the classic manicure, you can proceed to the creative process. Make sure that all the necessary materials are at your hand, and start.
Mirror manicure. Creating a glossy mirror surface
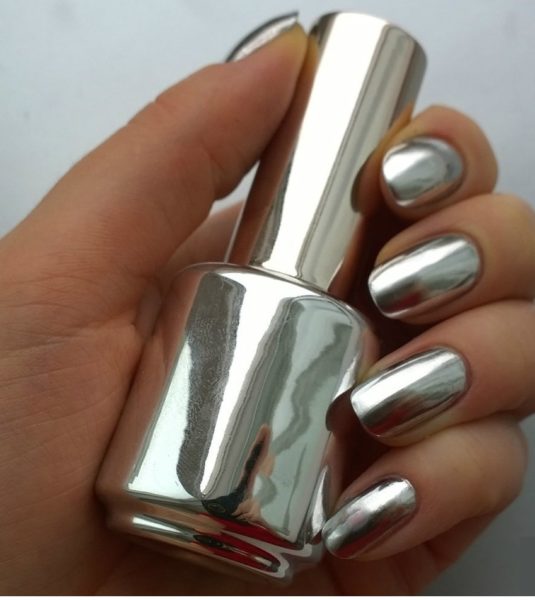
- Cover the surface of the nails with the base coating. Wait until it dries completely.
- Apply colored varnish to the nails. Try to choose a shade that will correspond to the shade of foil as much as possible that you are going to use. This varnish is needed in order to hide possible imperfections and eliminate the gaps, if suddenly the foil does not print on the nails completely. This layer of varnish also needs to be thoroughly dried.
Apply glue to one of the nails. It should not be too much so that it does not flow beyond the edges of the nail plate, but enough that the nail to the touch resembles a sticky tape. After applying the glue, you need to wait a couple of minutes so that it grows better with varnish and dried a little.- When the glue on the nail ceased to spread and its consistency became more viscous, you can proceed to the most responsible step. Gently glue a piece of pre -prepared foil on the nail.
- Using an orange stick or any other improvised tool, begin to quickly smooth the foil over the surface of the entire nail plate. This must be done promptly, while the glossy layer of foil had time to clarify tightly with glue. Also, smoothing will require increased attention: it is very important not to leave folds or areas on the foil that do not fit tightly to the nail. Although we apply varnish to hide such inaccuracies, a large number of unsuccessfully printed fragments will be noticeable, and the manicure will be careless.
- When you all thoroughly smoothed out, you can tear the upper film from foil. If the result suits you, you can start the next nail. So, acting in series, you will get a mirror manicure created by yourself. Applying the top is not required - a transparent varnish would level the mirror effect. Due to the lack of top, such a manicure can be less persistent than usual-wear it with caution.
If you want to consider all the nuances of working with foil, you can see how to make a mirror manicure on the video:
How to create a manicure gel polish with a mirror rubber
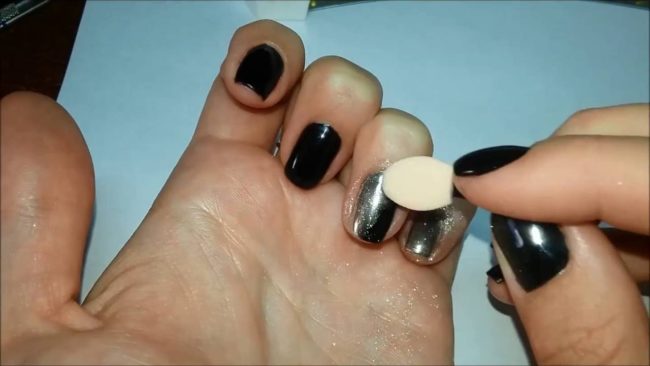
To begin with, you need to prepare the nails in the same way as for working with foil. Then make sure that you have everything you need for your idea, and you can start. Please note that this method requires experience with gel polish. If you are a beginner, try to make a mirror manicure with foil or get ready to make a lot of effort to obtain a mirror manicure with gel polish.
What needs to be purchased
- Basic coating for gel polish.
- Gel polish of the shade you need.
- Glitter is small transparent sparkles that are used for vitka and creating a glossy mirror effect.
- Top coating to consolidate the result.
- Ultraviolet lamp for drying.
- Pusher or fan brush for applying glitter to varnish and getting rid of its excess.
- Orange stick to remove excess glitter in the cuticle.
How to make a manicure with a mirror rubbing
- After you prepared your nails, apply the base coating and dry it under the lamp for two minutes.
- Apply the first layer of colored gel polish and dry it. Then apply the second layer and also dry.
- Seal the ends of the nails.
- Using a fan brush or a fur, distribute the glitter along the sticky layer. The sparkles must completely cover the nail, so make sure that there are no spaces.
- Slowly and gently rub the sparkles with your fingers into the surface of the varnish, until they are evenly distributed with a thin layer.
- Remove the rest of the glitter. To do this, you may require a fur to remove sparkles from the surface of the nail or orange stick to clean the cuticle area.
- Apply the top. Dry your nails under the lamp.
- Remove the sticky layer. Your mirror manicure with gel varnish and rub is ready.
You can also see how to make a mirror rub, on the video:


Comments
a couple of years ago, there was no side of metrogils from the same problem, there were no side effects ...
I’m not a fan of peeling at all, it saves from acne of metrogil, it also smoothes it ...
Great article! ...
I take the second course of the Capsules Climafite 911. The tides went very quickly. It became calmer, irritability went away and I sleep well ...
i also noticed - it is worth nervous, everything immediately affects the face. Therefore, I try to avoid conflicts and unpleasant people. Of the creams, I like Miaflow from wrinkles - smoothes not only small wrinkles ...