The day of the defender of the Fatherland is a holiday of courage, courage and heroism. On February 23, it is customary to congratulate their family men and give them symbolic gifts. On the eve of the holiday, in kindergartens and schools, children are happy to prepare and make crafts for their dads and grandfathers. After all, a craft made by a child with your own hands, with love, is the best gift to your beloved dad. We tried to collect all the most original ideas of children's crafts, which any preschooler can do.
Content
Crafts by February 23 of paper
The easiest gift option is to perform crafts from colored paper or cardboard. All that is needed is: glue, scissors, colored paper and creative inspiration. We offer you as simple options for crafts for young children, so original ideas that require skill and a little patience.
Beautiful tie for dad on February 23
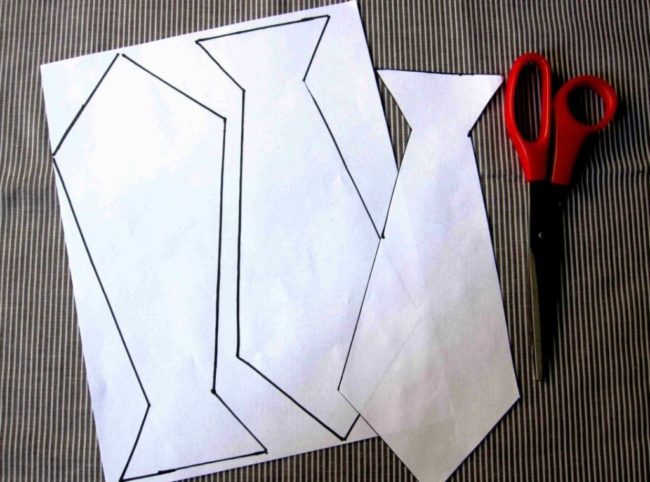
You can surprise and please your beloved dad with a beautiful original tie, no one else will have this! For work, you will need a tie, colored cardboard, scissors, glue and a rope.
- Prepare a tie template, circle the outline on color cardboard and cut off the billet of the tie.
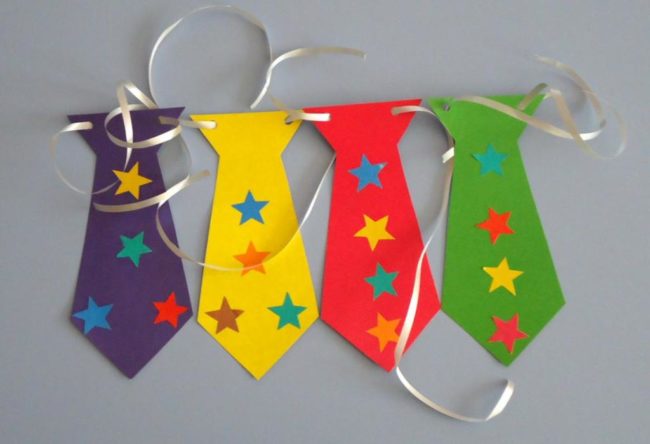
- Cut out patterns for a dad's tie from colored paper. It can be mugs, stars or strips. The color and shape of the patterns can be any - depends on imagination. You can also cut out thematic drawings: planes, tanks and stick them on a tie.
- On the back of the tie, glue the rope to the top of the tie. You can use the hole punch and pass the rope in the holes.


Thematic applications for February 23
The manufacture of simple applications on the topic on February 23 will not take much time and will not cause difficulties in the child. Help the baby carefully cut out all the necessary details and stick them onto the cardboard. We offer you several options for colorful applications for the Day of the Defender of the Fatherland.
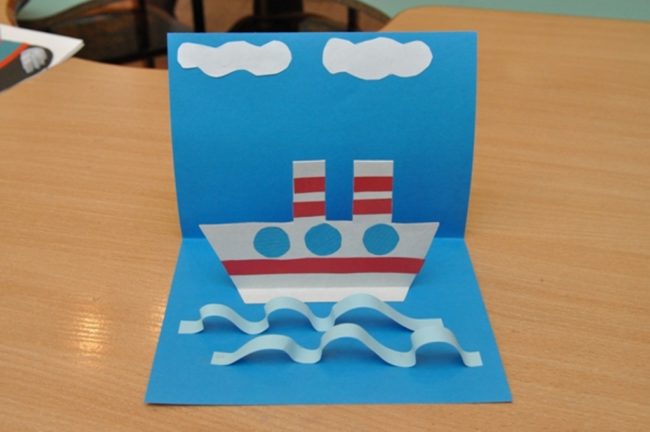
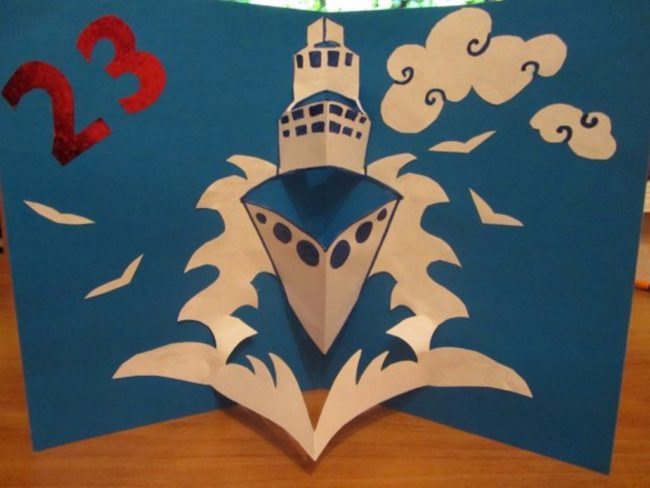
Application "Ship" on February 23
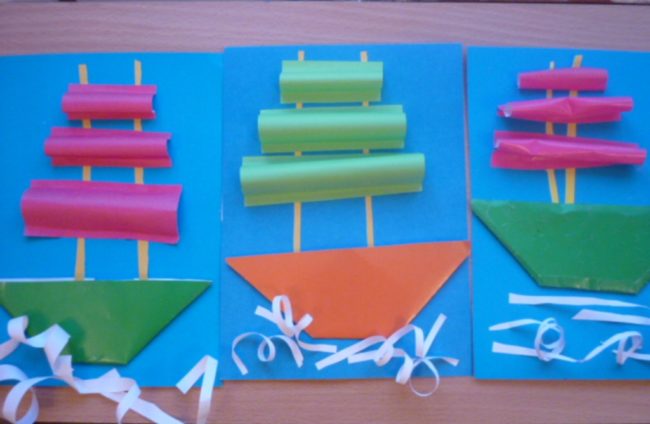
- Prepare a sheet of cardboard blue or blue, it will be the basis of the work.
- From colored paper, cut a trapezoid similar to a boat, two strips-masts of the ship and strips-carus, choosing the color of the blanks to their liking.
- Stick on blue cardboard all the details, lubricating them with glue. Small the strips of a carus with glue not completely, but only along the edges, at a distance of 1-1.5 cm. It is necessary to stick them so that they form a small bulge, resembling the sails filled with the wind.
- To decorate the composition, use thin white strips, they can be arbitrary length. Make them wavy with a pencil or pen. Lubricate the strips pointily with glue and in random order stick on the cardboard, under the boat. These will be the waves on which our boat rushes.
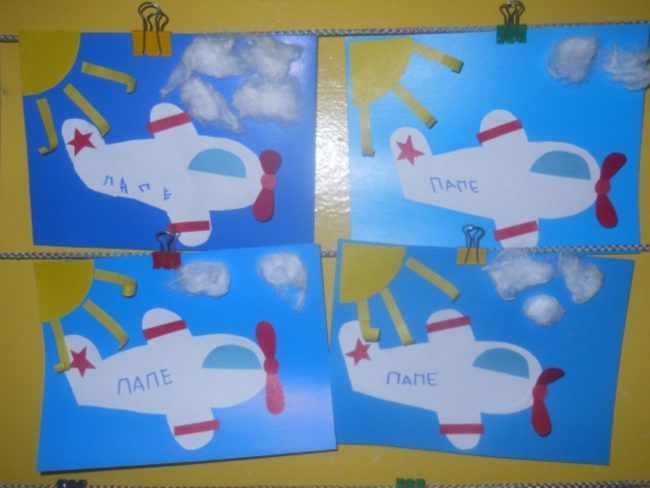
Using colored paper and turning on fantasy, you can create beautiful compositions, where planes or tanks will be in the main role. We offer you some interesting ideas of colorful and positive applications that every baby will cope with.
Kindergarten, crafts on February 23
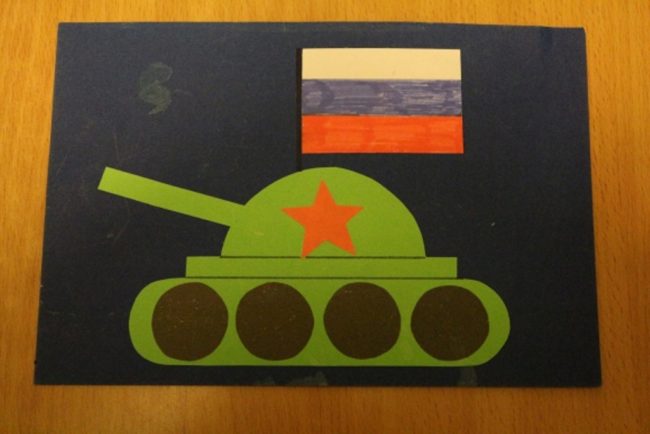
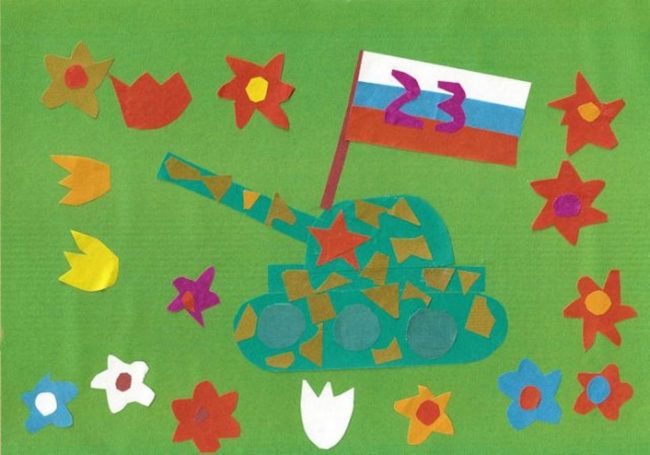
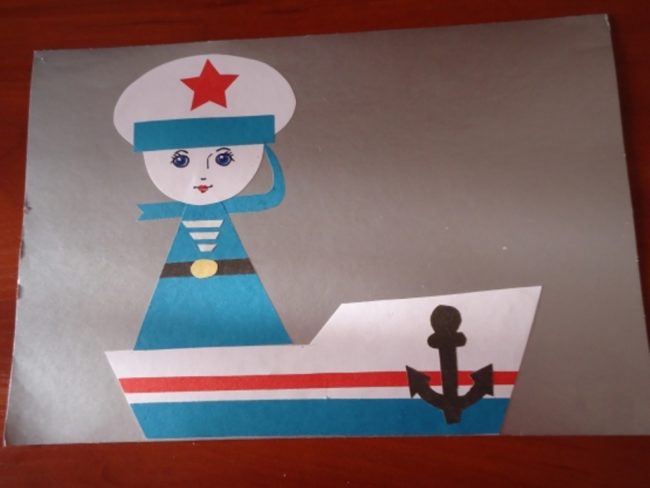
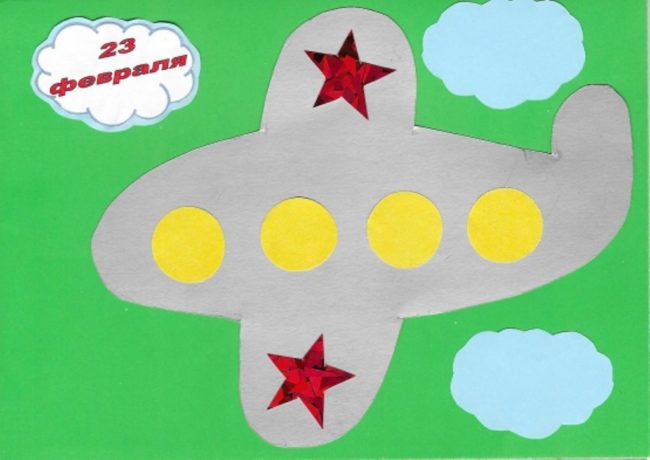
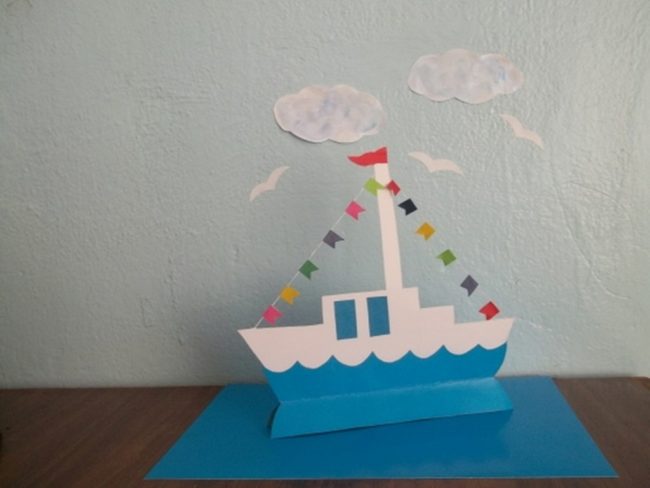
From cardboard you can make a voluminous boat and decorate it with flags.
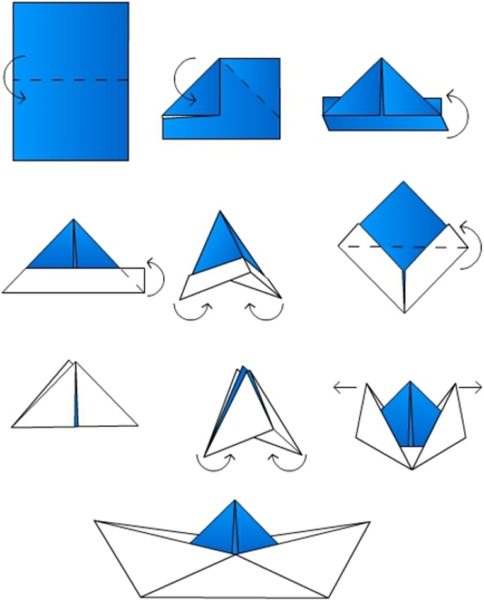
Paper boat for 23 February
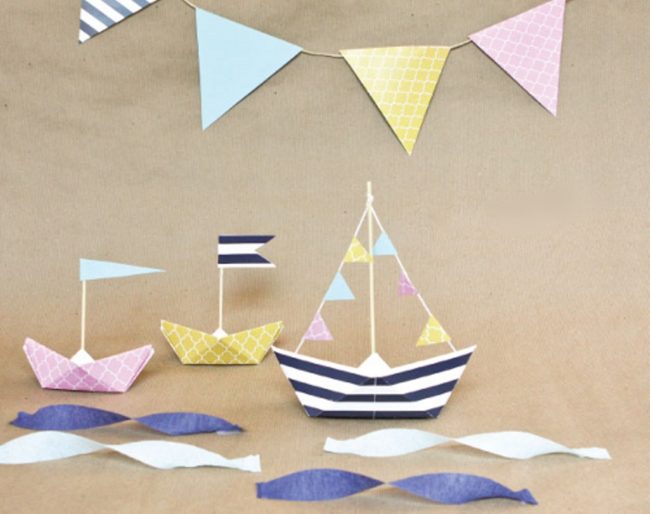
A boat made of paper is the simplest craft, originally from childhood. Using the instructions, help your child make a paper boat. Decorate it with flags made of colored paper or small sweets.
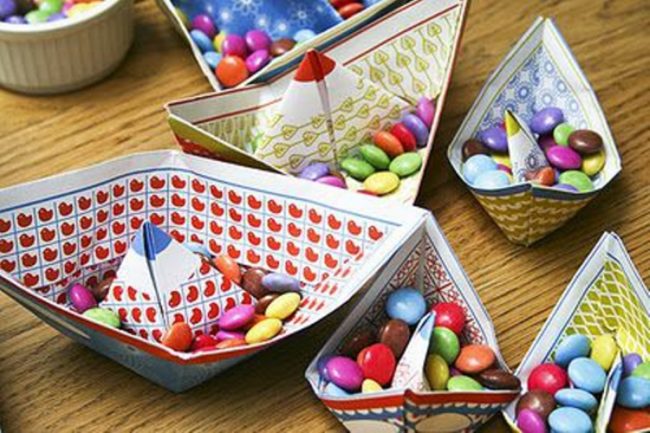
Craft dad on February 23 in the form of an original postcard
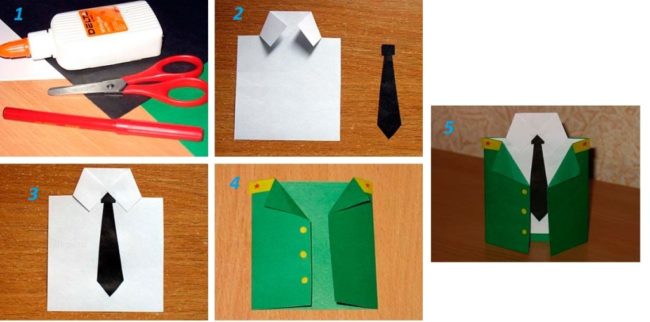
Postcard "Uniform" - craft for February 23
Such an original postcard is an interesting and unusual option for crafts on February 23 to dad.
The color of the uniform, the baby can choose himself or choose depending on where his father was the service. If in the sea troops - blue, in border - choose the green color of the tunic.
- We start working with the manufacture of a white shirt. Take a white sheet of paper in size 12x15. Return from above and on the sides of the sheet 3 cm and make cuts. Now the incisions must be bent in the form of a collar.
- Cut the tie from black paper, you can use the finished template or draw it yourself. Glue the finished tie for the collar.
- We proceed to the manufacture of the tunic. Take colored paper and bend it on the sides so that the shelves of the uniform are 7 cm wide.
- Glue a white shirt with a tie into the inside of a colored tunic, bent lapels.
- The uniform is ready, but it needs to be beautifully designed: glue the shoulder straps with stars, buttons.

Postcard "Shirt with a tie" in the style of origami - craft for February 23
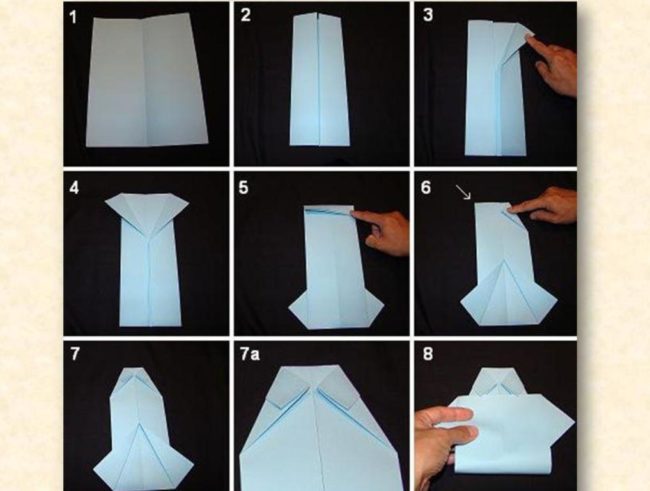
A more difficult option for making a gift for February 23 is a postcard in the style of origami. For work, you will need a leaf of colored paper. The size of the shirt directly depends on the size of the sheet. First, we recommend that we practice on a standard A4 sheet.
- Fold the rectangle in half along the sheet, like a book. Bend these same halves again.
- Bend the lower corners of the rectangle and turn the side sides into the inside of the rectangle.
- We proceed to the manufacture of sleeves. To begin with, bend the lower part of the rectangle and bend the triangle slightly higher, as shown in the figure. Repeat the same step on the other side of the work and turn away the edge.
- Bend the upper part of the work by approximately 1.5 cm. Then bend the upper corner to form a triangle, repeat from the opposite side.
- Turn in half a sheet, tucking a square under the corners of the collar - the shirt is ready. Complete it with a tie or butterfly. You can decorate the shirt buttons or glue a handkerchief. Do not forget to write sincere wishes and congratulations on the postcard.
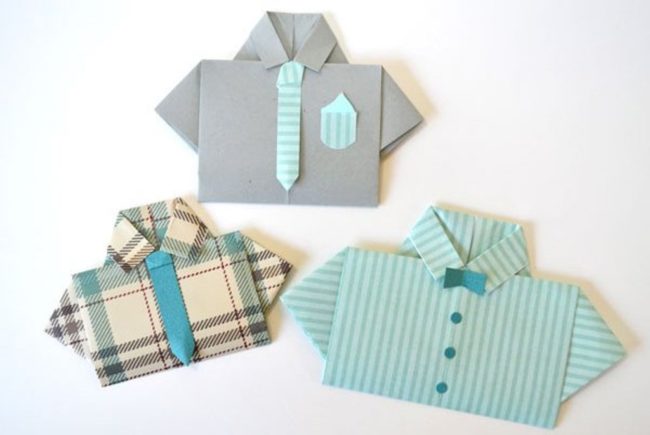

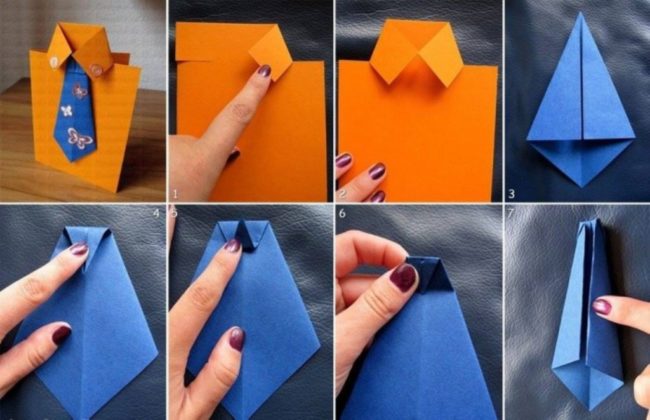
Crafts on February 23 "Shirt with a tie" in Origami style No. 2
Using origami technique, you can make another congratulatory card with a tie. How to perform a tie, see below:
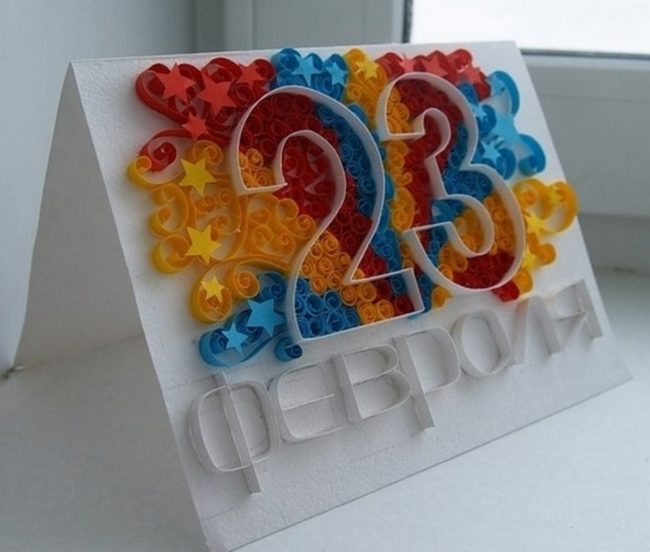
Crafts for dad on February 23 - Quilling postcard
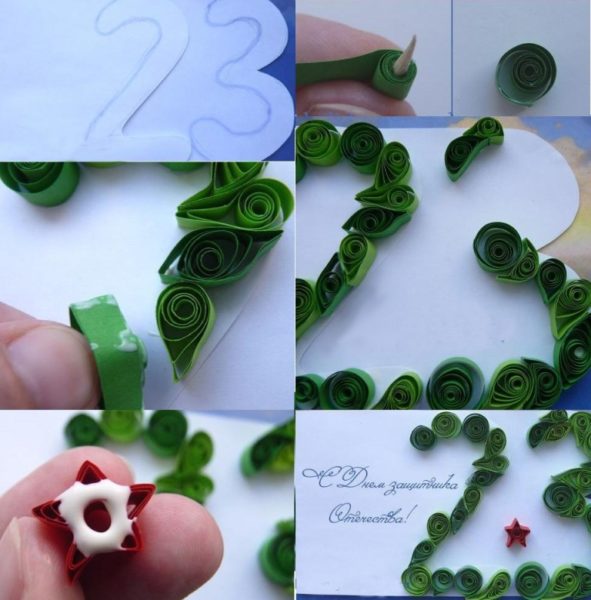
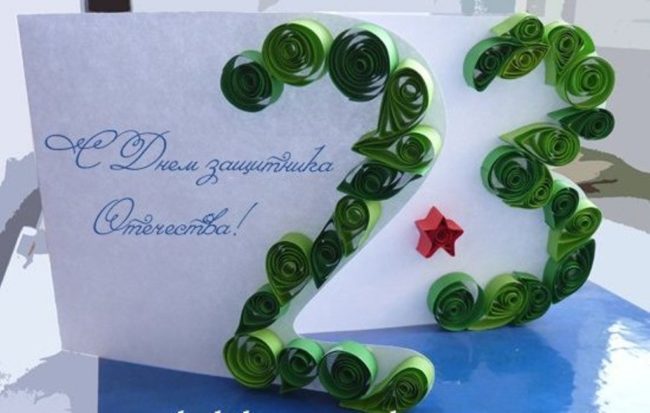
Production of a postcard in an interesting technique of quilling requires patience and perseverance. The composition consists of quilling elements of various shapes: circle, oval (drop), “eye”, “curved triangle”. The spirals are made of paper tapes, which are sold specifically for needlework in Quilling style or you can independently cut thin strips of paper.
For work you will need:
- Cardboard.
- A set of paper tapes for quilling.
- Toothpick for winding spirals, tweezers, PVA glue.
- Cut the foundation of Quilling from cardboard - the numbers "2" and "3". The size of the numbers can be any.
- Twist the necessary quilling elements of paper tapes using a toothpick with a slot into which the end of the tape is inserted. Twist the spiral from the tape. Lubricate the free end with glue and fix it. Thus twist all the elements.
- Start glue the spirals from the upper part of the number "2". On the bends, the “drop” element and the elongated “eye” will look better. You can experiment yourself with the sequence of applications, so that the whole composition looks harmonious.
- In the same way, we fix the elements based on the number “3”. In the lower part, large spirals look spectacular.
- Make a large spiral from the red paper tape, fix it, and until the glue has dried, give it the shape of a five -pointed star.
- When the whole composition is ready, put a small load on the application so that it is evenly dried. In the free part of the postcard, write congratulations and warm words for the dad.
Crafts by February 23 with your own hands from improvised materials
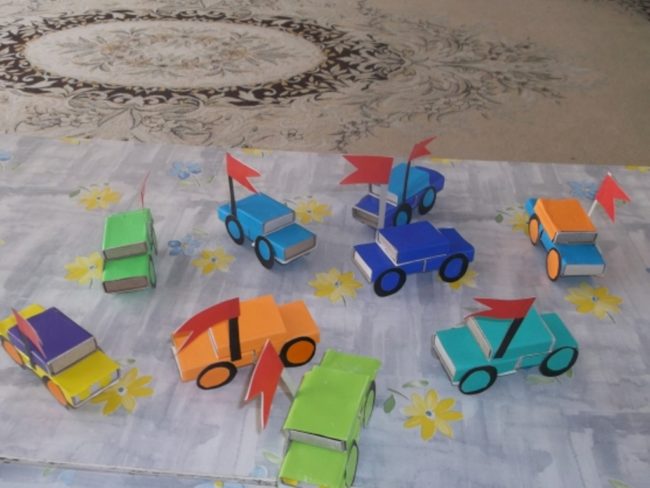
Using the most ordinary items for the manufacture of crafts: matchboxes, a cardboard sleeve from a roll of toilet paper, a chocolate egg capsule, you can make interesting crafts with children.
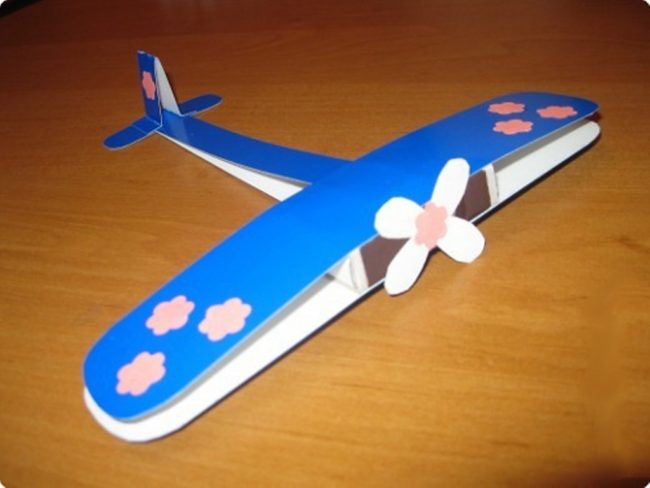
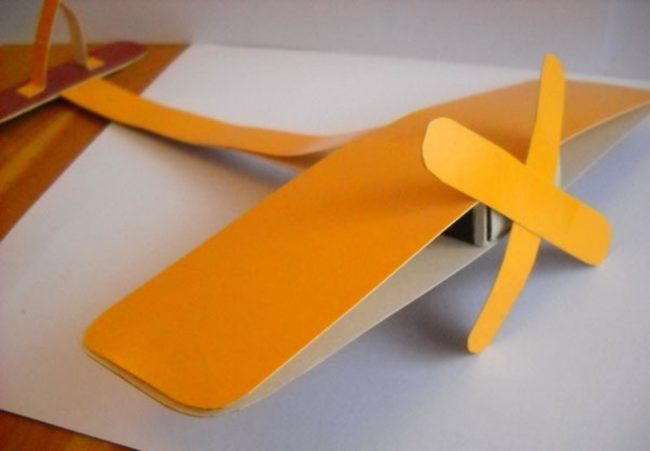
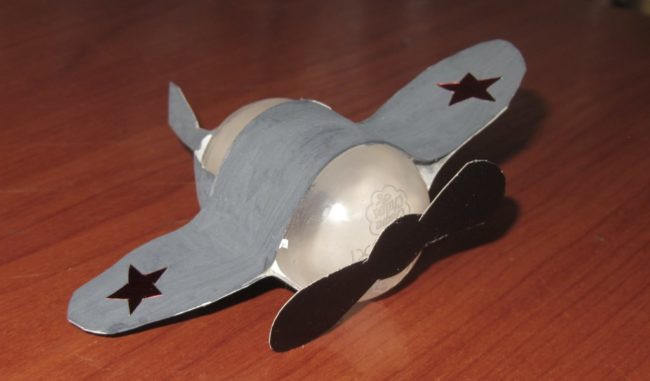
Crafts by February 23 - a plane from a matchbox and cardboard
Necessary materials:
- Matchbox.
- Cardboard, velvet paper for propeller.
- PVA glue.
- Scissors, a simple pencil.
- Draw and cut two strips about 2 cm wide on the cardboard, the length of the strips will be equal to the length of the cardboard sheet. You also need to draw two stripes, the width of which will be equal to the width of the matchbox - these will be the wings of the aircraft. For the tail, cut two narrow and short stripes.
- Bend the longest strip and glue it perpendicular to the matchbox, which plays the role of the aircraft body.
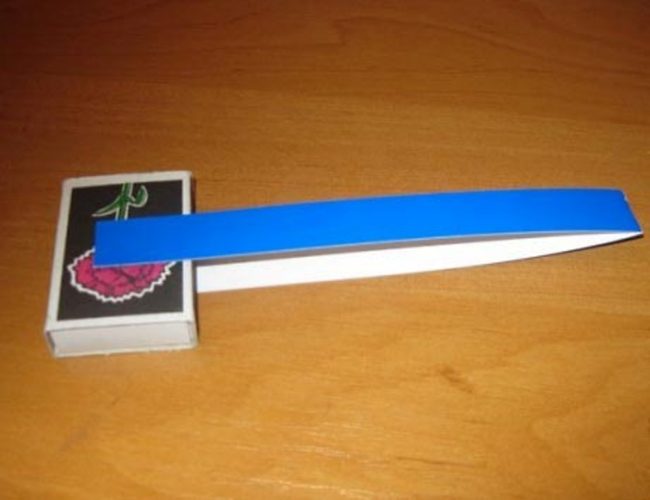
- Prepare wide strips for the wings of the aircraft - round the edges using scissors. Glue them on the box in width.
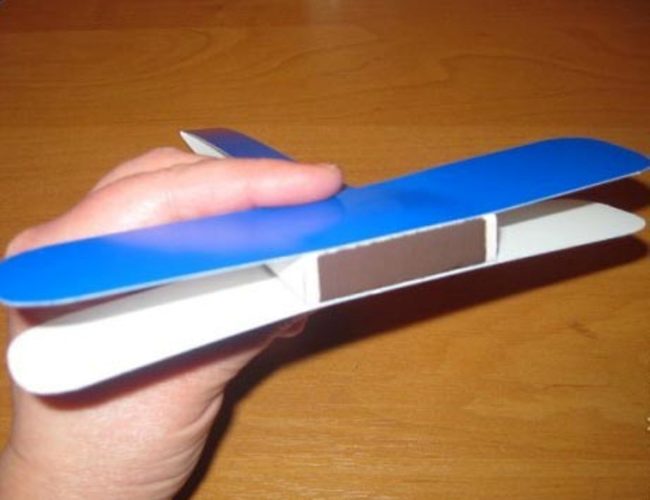
- To make the tail of the aircraft, take narrow short strips, round their ends and glue it to a long strip, bending them in half.
- Cut the propeller from velvet paper, use a template, as well as red stars. Attach the propeller on the front of the aircraft and decorate the craft with stars.
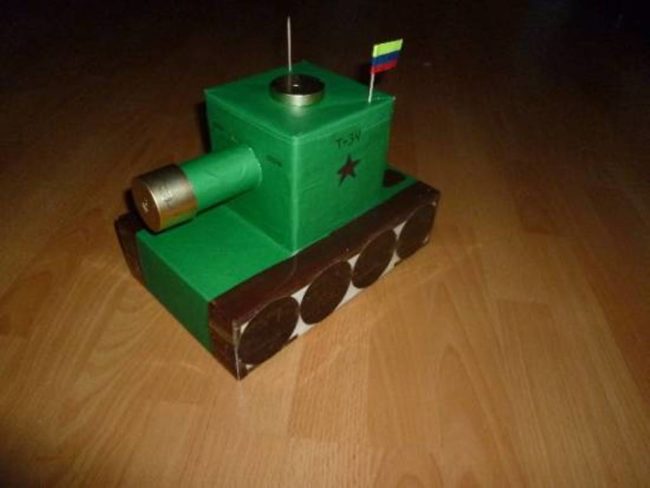
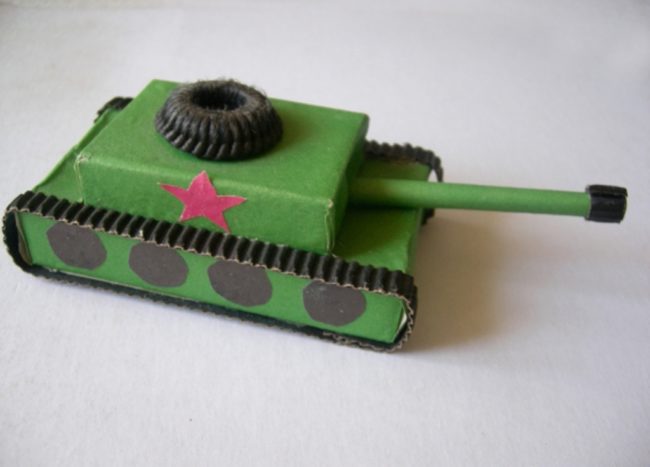
Crafts by February 23 - Tank from matchboxes
Necessary materials:
- Matchboxes - 6 pcs.
- Colored paper is green.
- Black cardboard strip.
- Pencil, glue, tape.
- First of all, you need to make a tank housing. Take 4 matchboxes and fasten them with tape. Fix the remaining two boxes separately for the tank tower.
- Pour the body of their four boxes with green paper, as well as a separately prepared harvesting of the tank tower.
- Pour the edges of the case from the black cardboard strip, depicting the tank's caterpillar. Glue the mugs of black cardboard on the side.
- Fix the tank body with a tower with glue.
- We proceed to the manufacture of a gun. It is necessary to twist a cardboard tube. To do this, it is convenient to use a pencil. On one of the edges of the pipe, make cuts, bent them and glue them to the tank body.
- Decorate the muzzle of guns with foil paper, stick the stars on the tank body.
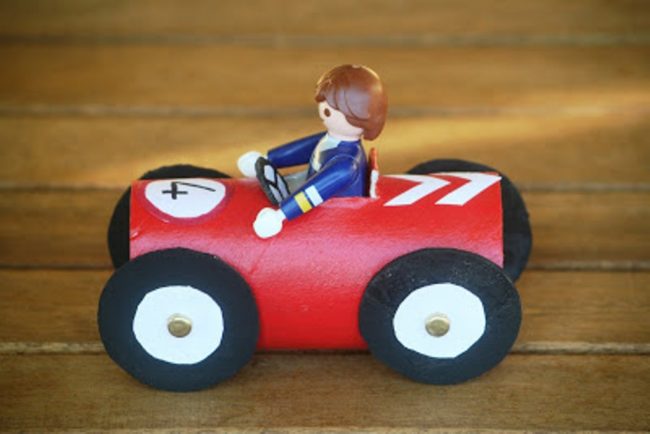
Racing car - original children's craft on February 23
Necessary materials:
- A sleeve from a roll of toilet paper.
- Self -adhesive paper, colored cardboard.
- Gouache.
- Glue.
- Paint the cardboard cylinder with gouache in red.
- Using a template, cut a 4 mug from a dark -colored cardboard - a racing car.
- Make a steering wheel, you can draw it on a circle of cardboard with a black felt -tip pen.
- Cut the hole in the upper part of the cylinder using a stationery knife. At this stage of work, the child will need the help of an adult. Bend the cut part - you get the back of the driver's seat.
- Decorate the racing car with a self -adhesive film, bright stickers or images. Glue the steering wheel, wheels and put the figure of a man from the Lego designer in the driver's cab.
DIY crafts on February 23 - photo frames
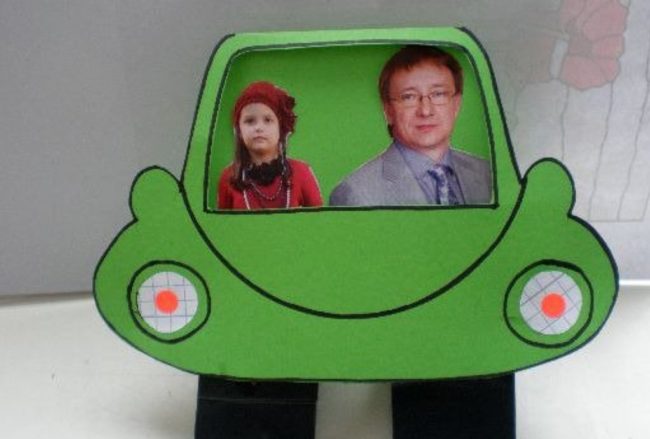
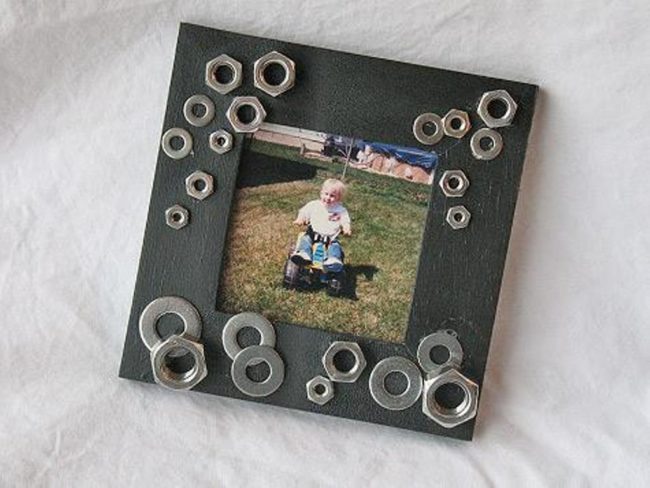
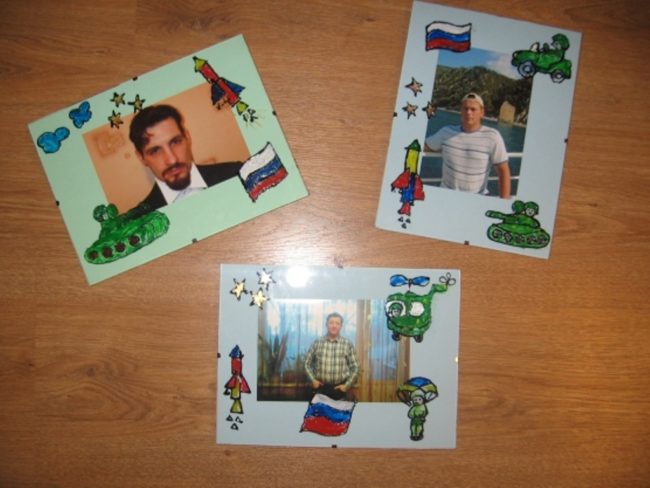
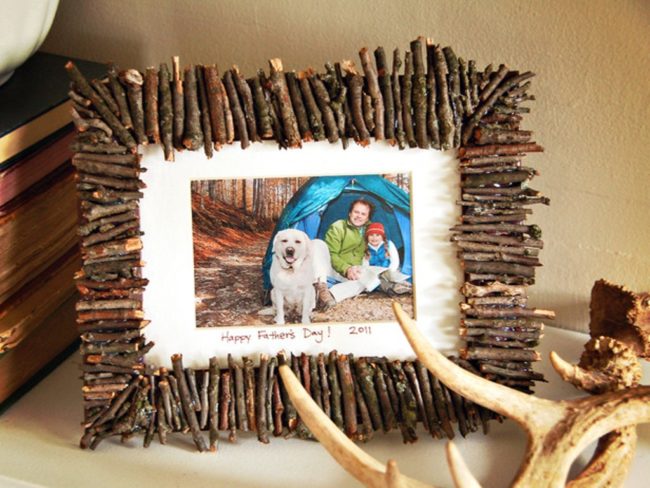
Photo frames for memorable photos is a wonderful idea of \u200b\u200ba gift for the holiday. Come up with a child with a child, based on their daddy hobby or kind of activity. For a car-car, photo frames in the form of a car are suitable, for enthusiastic repairs-stick a nut and a screw onto the frame. Nature lovers will like a photo frame, decorated with dry twigs of the same size.
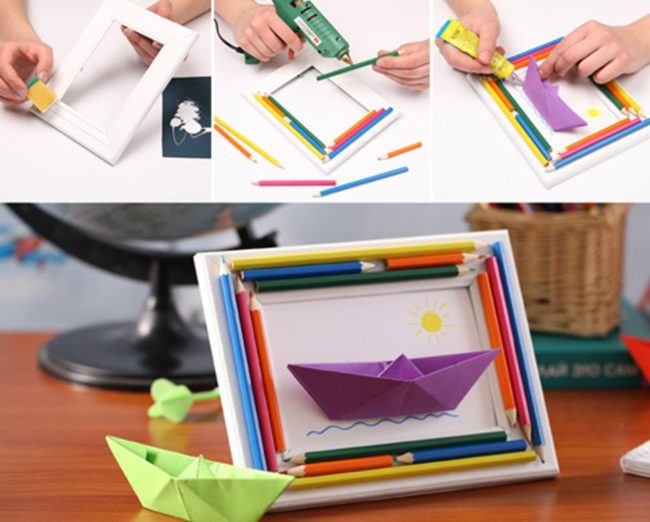
Crafts by February 23 - Pencil photo frames
To create a colorful photo frame, you will need:
- A wooden or cardboard frame for photos of 10x15. The frame should be light or white.
- If you do not have a white frame, paint it with white acrylic paint using a sponge.
- Color pencils.
- Transparent glue of strong fixation or thermal pistol.
- Glue the pencils onto the white frame, picking them up by color and size.
- Insert a picture with a sea landscape into a photo frame. You can choose a photo related to the sea.
- Make a paper boat and glue it to the image.
Sweet gift for February 23
Tasty and delicious crafts on February 23 to dad are a great idea of \u200b\u200ban unusual gift. Prepare sand cookies or cupcakes with your child, let him participate in the preparation process: mix the ingredients, cut the figures with cookies for cookies. Choose thematic molds: stars, tanks, planes, ships or medals for courage. 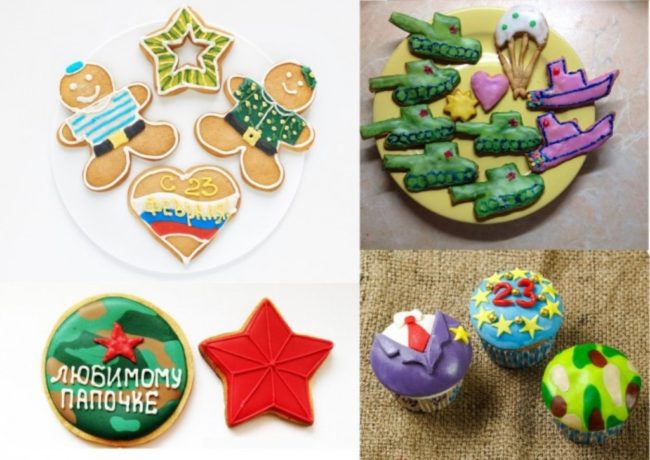
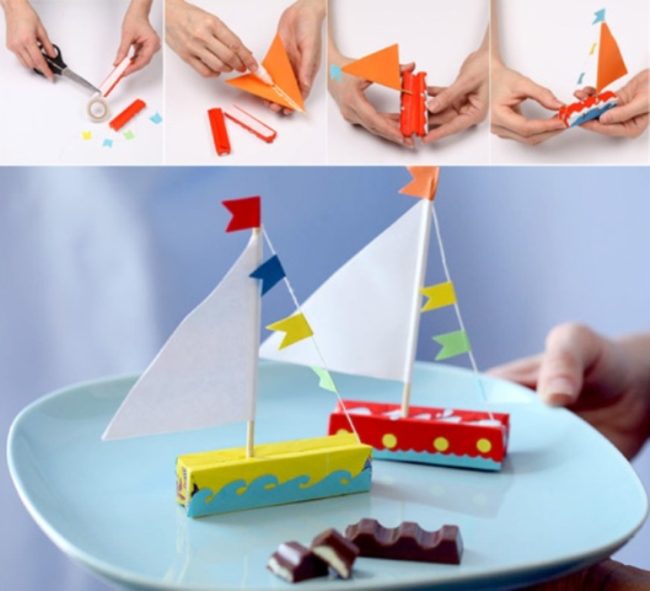
Men who like sweets can give an original craft of chocolate sweets, decorated in a marine style.
Crafts by February 23, photo
The original ideas of gifts for the day of the defender are many. Inspire the proposed options for crafts, turn on your imagination and make up with children, investing in gifts on February 23 for dad or grandfather love, attention and care.


Comments
a couple of years ago, there was no side of metrogils from the same problem, there were no side effects ...
I’m not a fan of peeling at all, it saves from acne of metrogil, it also smoothes it ...
Great article! ...
I take the second course of the Capsules Climafite 911. The tides went very quickly. It became calmer, irritability went away and I sleep well ...
i also noticed - it is worth nervous, everything immediately affects the face. Therefore, I try to avoid conflicts and unpleasant people. Of the creams, I like Miaflow from wrinkles - smoothes not only small wrinkles ...