To assemble children to school is a very responsible and at the same time troublesome lesson, which requires parents a lot of time and effort. In addition, among the huge variety of stationery in stores, it is sometimes difficult to find practical and beautiful things that would be ideally suited to schoolchildren of a particular age. Parents pay special attention to pencils and pens to the pencils and pens, because quite often all the data of the stationery are in a mess lying in a backpack or bag. In order not to run around the shops in search of a suitable pencil case and not spend a lot of money on it, you can make a pencil case at home, using improvised materials for this. Thus, you can get a unique and very creative thing, which no one else will have.
In this article, we will consider the features of the manufacture of the pencil case to the school with your own hands, as well as give detailed master classes on how to make a pencil case itself from the most diverse materials.
Content
- How to make a pencil case for a school with your own hands - features of the manufacture of a pencil case at home
- Make a pencil case with your own hands - step -by -step instructions
- How to make a paper pencil case
- How to make a cardboard pencil case
- How to make a pencil penalty - detailed instructions
- How to make a pencil case out of a box
- How to make a light penetrator from a plastic bottle
- How to make a penny pencil case
- How to make a felt pen
- How to make a pencil of felt pencils - a description
- How to make a fabric penis - a simple option
- How to make a lightning pencil case
- How to make a pencil case for a girl
- Video: how to make a pencil case for a girl
- How to make a doll pen
How to make a pencil case for a school with your own hands - features of the manufacture of a pencil case at home
The end of August for each parent is considered a complex and tiring period, since it is connected with the collections of children to school. In the last month of summer, while children rest on the holidays, parents try to purchase a school uniform and all kinds of stationery in advance. To date, shops are simply full of various accessories for school, among which you need to find what is suitable and like the child. This is quite difficult, especially when choosing a pencil and pens, as there are rather same examples on sale: pink or red with bows for girls, blue with cars for boys.
Problems arise with the fact that every child wants to stand out, especially in adolescence, which is achieved by the acquisition of unique and dissimilar to other accessories. To truly stand out, you can help your child make a beautiful pencil case for a school, in which you can fold all the pencils, pens, ruler and eraser. In the process of making a pencil case, it is enough to include your imagination and creativity of children, as well as find unnecessary things and a variety of improvised materials at home. The school penalty can be made unique, bright and very practical, spending a minimum of strength and materials.
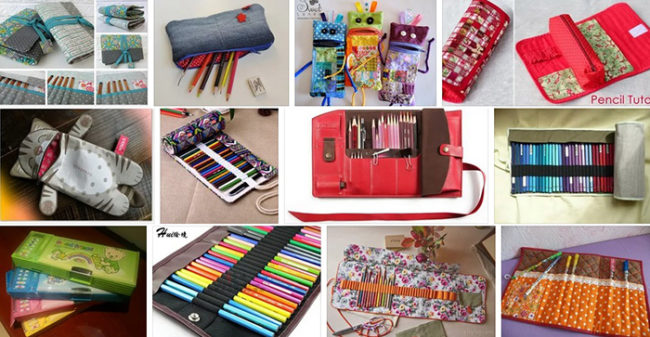
Features of the manufacture of the pencil case with your own hands:
- Everyone can make a practical and beautiful pencil case at home. This applies to both parents and grandparents, as well as children.
- The manufacture of a pencil case takes a minimum of time, since there is no need to go shopping in search of a penalty that suits you.
- You can make a wide variety of penalties yourself, for this you just need to use detailed master classes and instructions, which are a huge number on the Internet. It can be lightning penalties, pencil case cylinders, foam from heat -mock or empty plastic cans.
- To make a penny at home at home, it’s enough to look around and find things that have unnecessary and already serving their eyelids: cuts of fabric and felt, old jeans, lying around with lightning and plastic cans of liquid soap or shampoo, ordinary paper or empty boxes . All these are materials from which you can make a pencil case with your own hands. And at the same time, spending your money is not necessary.
- The appearance and shape of the pencil case can be selected, based on your capabilities and skills. If you do not have a sewing machine at home and you don’t know how to work on it, then it is better to make a simpler penetrate using glue or apply a regular needle with a thread and do everything with your hands.
- The manufacture of a penny house is a real flight of fantasy, because you can come up with the most incredible jewelry and decor elements. Ready -made stationery can be decorated with beads or beads, applique or embroidery. You can start this creativity with the children, thereby having fun with time.
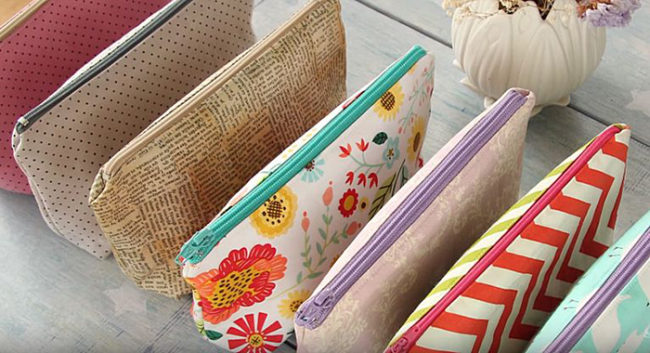
What can you make a pencil case with your own hands:
- Ordinary and colored paper.
- Cardboard and cardboard boxes.
- Unnecessary plastic bottles and banks.
- Siles of cotton fabric, felt, velor, fleece.
- Old jeans or jeans jackets.
- Short lightning of different colors.
- From the wrapper of sweets and a dense plastic bag.
- From wood and plywood.
A do -it -yourself penetration is a great gift to your child or a great opportunity to make your stationery with special and not like everyone else.
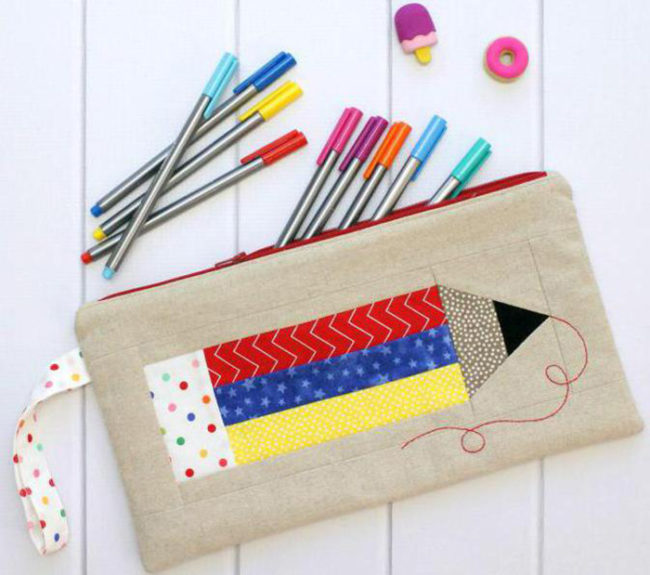
Make a pencil case with your own hands - step -by -step instructions
You can make a beautiful and original pencil pencil and pencils literally from nothing, the main thing is to have a desire and a little free time. Consider detailed master classes on the manufacture of a wide variety of penalties for the school using improvised materials.
How to make a paper pencil case
Paper is the simplest and most affordable material that is perfect for making a pencil case for the school. Such a useful craft will protect bags and backpacks from ink and felt -tip pens and will put things in order in all stationery. Consider the process of creating a very unusual pencil case 2 in 1, in which you can not only store your favorite handles and pencils, but also use a similar thing as a bookmark. The manufacture of this option of the pencil case is possible even for a small child.

Necessary materials:
- white paper A4 format, it is advisable to take thick paper, since the pencil case made of thin paper quickly loses its shape;
- glue;
- fleeters or other decor elements.
Production process:
- First of all, it is necessary to take a white sheet of A4 paper. You can use colored paper, which will allow you to get a bright and beautiful pencil case.
- From this paper format, cut a square sheet of paper with a size of 17 cm by 17 cm.

- Next, carefully bent the square sheet of paper in half and press the fold place well. After that, expand the sheet of paper and bend each side of the square to the central line of the fold.

- Next, bend the upper corner to one side to the first vertical line of the bend, and then the upper corner on the other side to the opposite line of the fold.
- On the left side, bend the upper corner to the central line of the fold, and then relieve the bend well. It is not necessary to bend on the right side.
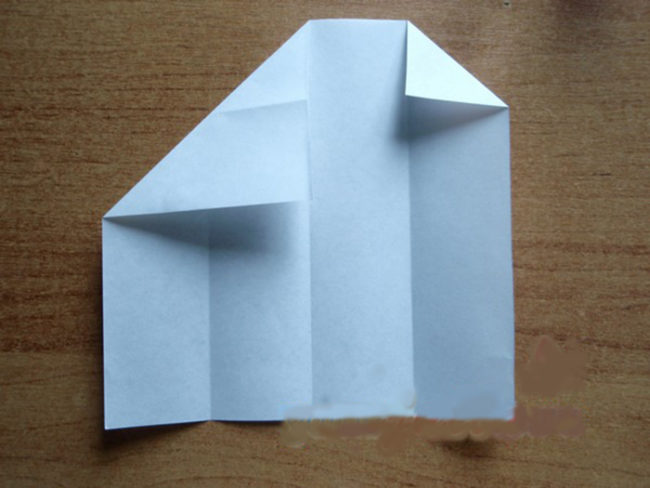
- At the next stage, it is necessary to glue the corner on the right side so that the foam does not open in the future.
- Turn our future pencil case along the fold lines so that from the front side in the upper part of the pencil is a cut in the form of a corner for convenient extraction of handles.
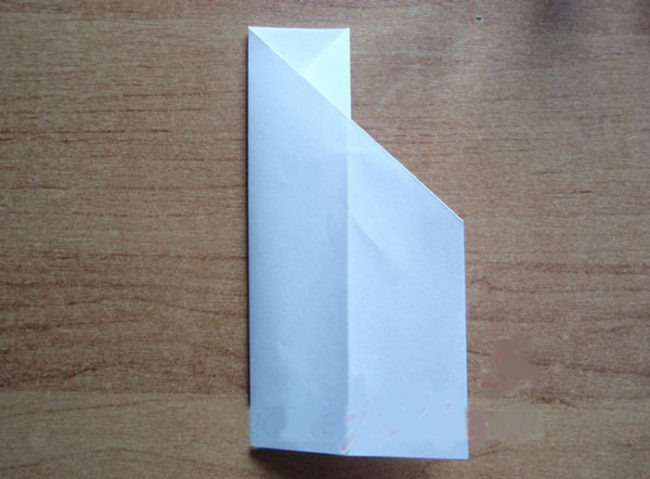
- Gently turn the pencil case with the back. Take the adhesive pencil or PVA glue, slightly bother the lower edge of the pencil case so that you can put handles or pencils in it, and spread it with glue, then glue it and press it well with your hands.
- Next, smear the tail that remained not fixed, and glue it to the pencil case. Thus, you received a ready -made original pencil case.

- To make it brighter and more attractive, you can draw various drawings or patterns on its front and back, stick stickers or rhinestones.
How to make a cardboard pencil case
Another material that can be found in almost every house is cardboard. Compared to paper, it is more dense and durable, therefore, the penalty made of it will last much longer. Consider the master class of the penalty to the school of cardboard in the form of a large pencil.

Necessary materials:
- Dense cardboard of white color.
- Colored paper.
- Glue and ruler.
- Scissors.
- Fleeters and stickers.
Penal manufacturing process:
- First of all, it is necessary to print a template. It can be found on the Internet or measured on your own on a white sheet of paper using a ruler.
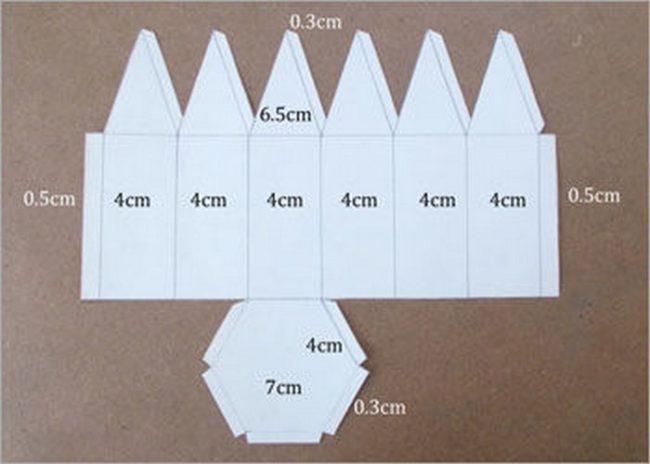
- At the next stage, it is necessary to bend all the details marked with dotted lines - they are designed to glue the pencil case. Make all the edges with glue, in this case it is best to use the adhesive pencil, and glue the basis of our future pencil case.
- Next, take colored paper and cut out the details from it, which in size will fit all parts of the future penalty. You can add a little realistic moments, for example, mark the sharpened core of a pencil with colored paper.
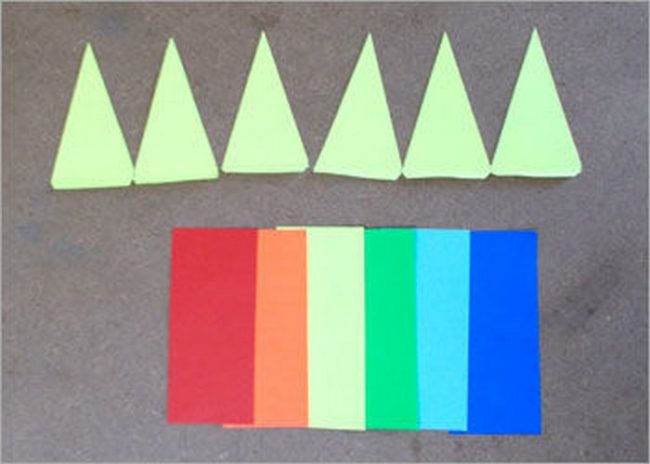
- Color details must be cut a little larger in size so that they perfectly close all sides.
- Next, you can start decorating the pencil case. For this, felt -tip pens, stickers with favorite characters, rhinestones, etc. are used.
- So that the lower cover does not open all the time, you can come up with some kind of fastener in the form of Velcro. To do this, take a piece of fabric, glue one end to the lid, and sew the Velcro to the other end. Exactly the same Velcro can be glued to one of the sides of the pencil case. Thus, the cover will not only close tightly inside the pencil case, but also fixed with Velcro.

How to make a pencil penalty - detailed instructions
Usually, each student in a portfolio or in a bag is just lying a huge number of hands of different colors and different shapes. And very often it is simply impossible to find any of them. In this case, a do -it -yourself penetration of a cardboard sleeve and decor will be a great solution and will help at any time to find a pen and other stationery.
Option 1.

Necessary materials:
- A sleeve of toilet paper or from paper towels. It is better to use the second option, since the sleeve is longer there, for the lower part of the pencil case, and for toilet paper - for the top cover.
- Colored paper or scrapbooking paper.
- PVA glue.
- Foam.
- Scissors, ruler and stationery knife.
Production process:
- First of all, it is necessary to cut off the base of the pencil case. To do this, take a sleeve of paper towels and attach a pencil to it. Measure the length slightly larger than the length of the pencil and cut the workpiece using a stationery knife.
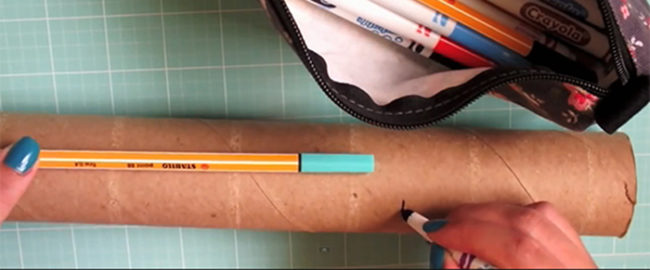
- Next, take a scrap-paper and measure a piece of the desired length and width, while we make a slightly larger paper length. Apply glue on paper and glue it to the base of the pencil case, carefully ironing over the entire surface.

- In the same way, from the sleeve from paper towels, it is necessary to make a pen for a pencil case. We make it not high, the main thing is that all the handles are fit in height. Get the lid with a scrap-paper that is different from the base of the color.
- At the next stage, it is necessary to make a fastening mechanism so that the cover is tightly adjacent to the base and fixed. To do this, you can use a sleeve from toilet paper, which has a slightly smaller diameter than a sleeve from paper towels.
- It is necessary to cut off a small piece of the sleeve and glue it with paper of the same color as the lid. After that, carefully apply glue to one half of the fastening part and glue it inside the base so that part of the part protrudes.
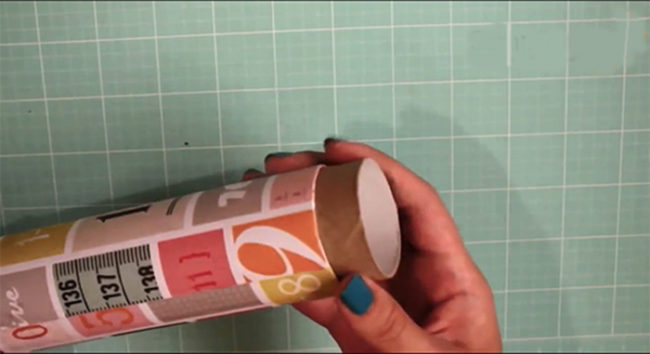
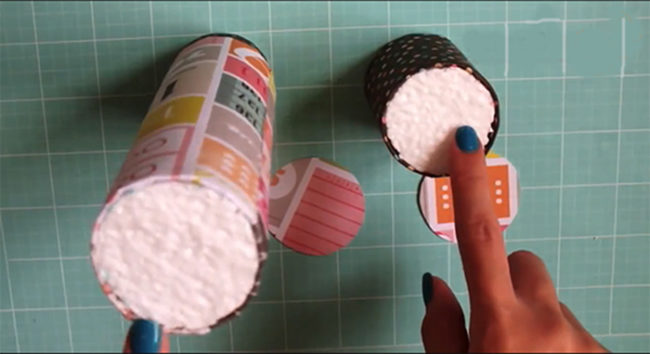
- After that, circles, the diameter of which will be equal to the inner diameter of the base and lid, should be cut out of the foam. With the help of glue, glue them inside. On top of the foam can be decorated with the same paper as the pencil case itself.
- Fold all your handles in the finished pencil case and you can use a convenient and practical thing.
Option 2.
Necessary materials:
- Cardboard sleeve from paper towels.
- Fetr, cardboard.
- Lightning.
- Scissors, ruler, stationery knife.
- Threads and needle.
- Glue and painting tape.
Production process:
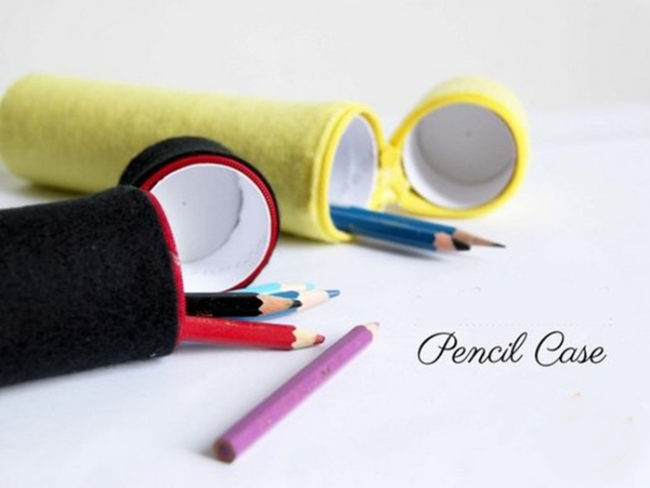
- First of all, it is necessary to make the basis of the future pencil case. To do this, take a sleeve of towels and cut it into two parts so that the main part is slightly larger than the length of the pencil. If you use bushings from toilet paper, then you will need 2 pieces, one of which needs to be cut into two parts. One part with tape is glued to the whole, through which a long base is obtained.

- Next, take a piece of felt of the color you need and measure two pieces in size and pencil size of the pencil case. After that, with the help of a sewing machine or with your hands, sew the lightning of the same color to two pieces of felt.
- At the next stage, it is necessary to sew two pieces of felt so that this cover in the future perfectly approaches the diameter of the bushings. Mark the necessary sizes with sewing needles and sew the parts with a machine or needle.
- Gently insert the bushings into the covers.
- Next, you need to cut the template along the diameter of the sleeve, on the basis of which two identical circles of felt are cut out. Using a needle and thread, sew them into the upper and lower part of the pencil case.
- An unusual and practical pencil case is ready.

How to make a pencil case out of a box
Penals can be very different, so if you wish, you can easily make a pencil case without a lightning with a different method of fixing and fastening. Consider the process of making a pencil case out of the box.
Necessary materials:
- The box of the design and color you like.
- Chancellery knife and scissors.
- Scotch tape and glue.
- Velcro.
Production process:
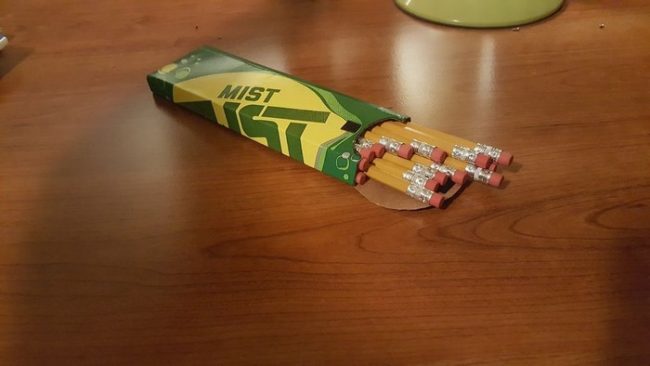
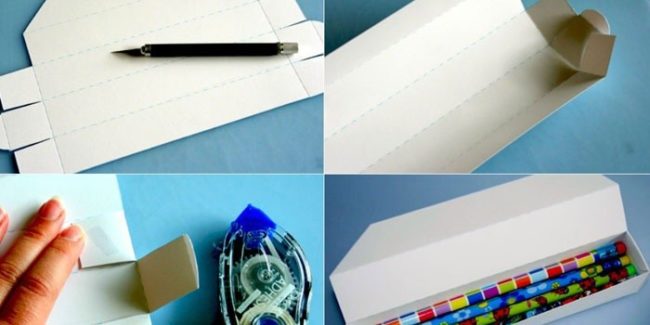
- To create this pencil case, you will need any box of dense cardboard, which will use bends to make your own pencil case.
- First of all, you need to prepare a stencil of the future pencil case. It can be printed from the Internet or painted independently using a ruler. Having cut the stencil, attach it to a fully open box and outline the contour with a pencil.
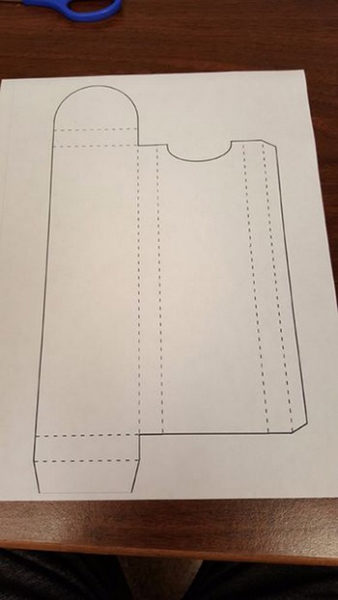
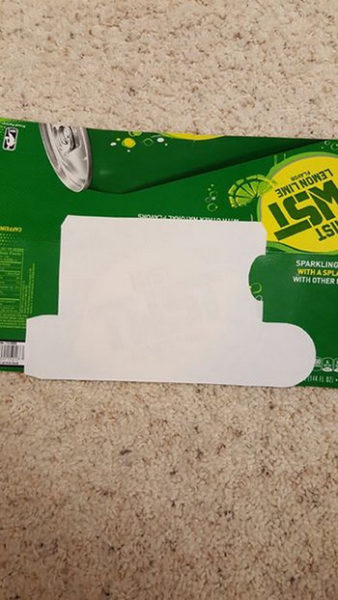
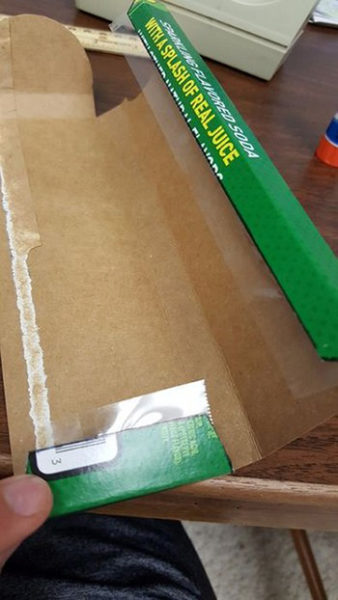
- Cut the basis of the future pencil case and, with the help of glue and tape, fasten all the edges of the craft. In this way, collect the finished pencil case.
- Next, take the eyelet fastener and cut a small square out of it, after which glue the glue onto the box.
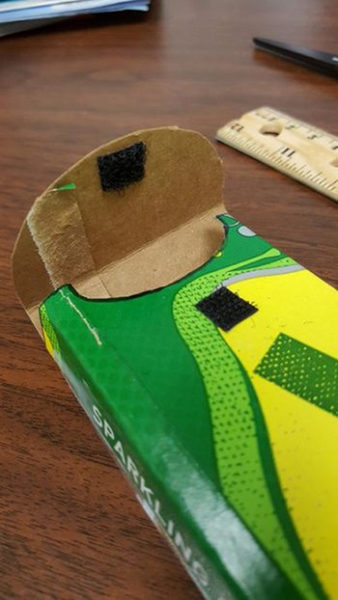
- Convenient pencil case is ready.
- If at hand you did not find the right box, with the help of dense cardboard you can make your box in the technique of origami.
How to make a light penetrator from a plastic bottle
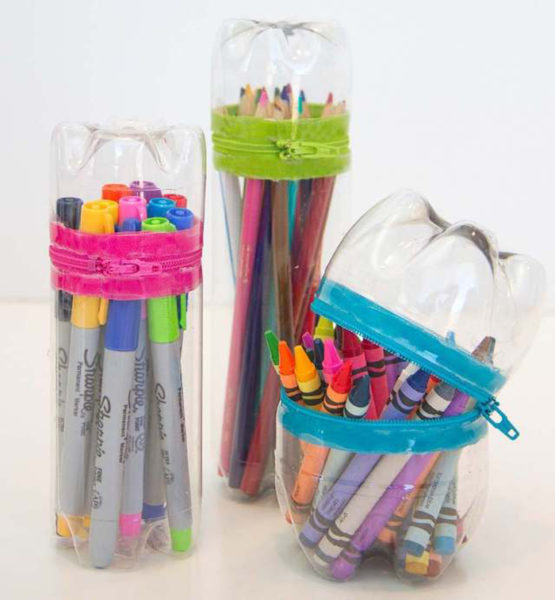
The pencil case can be made from a wide variety of materials, including from empty jars and plastic bottles.
Production process:
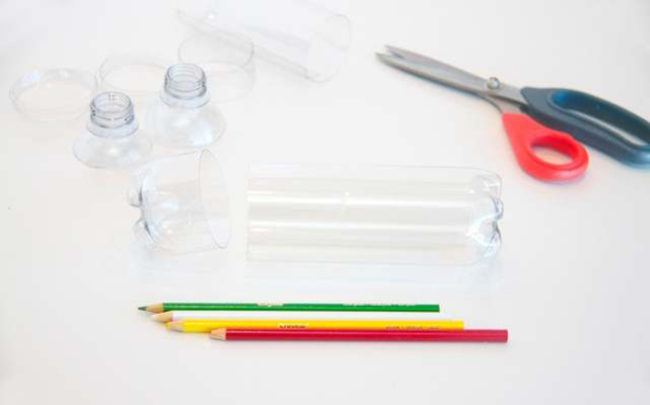
- First of all, it is necessary to choose two bottles of the same size of dense plastic. From them you need to cut off the lower parts. For storage of pencils and pens, the lower part of the pencil will be long, and the upper lid is short.
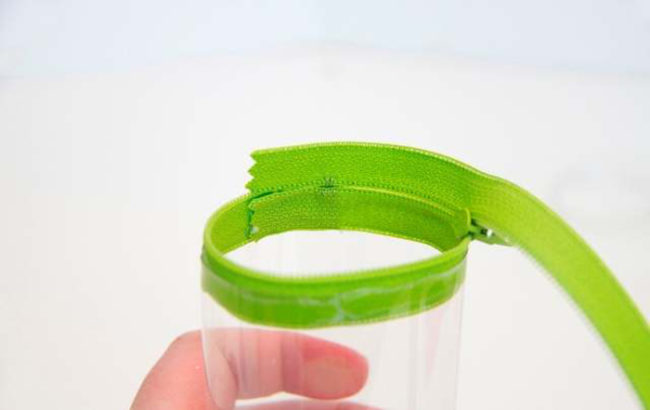
- Next, measure the zipper along the diameter of the bottle, adding 1-2 cm.
- Unflap the zipper and begin to glue each part to a separate bottle with hot glue. Glue it freely so that the dog can open freely.
- Thus, in just a couple of minutes, you can make an original penalty using a minimum amount of materials. To make it brighter, you can stick stickers or rhinestones, paint it.
How to make a penny pencil case
Today it is very fashionable to wear not only denim clothes, but also have a large number of denim accessories. With the help of improvised materials, you can easily make a jeans pencil case.
How to make a felt pen
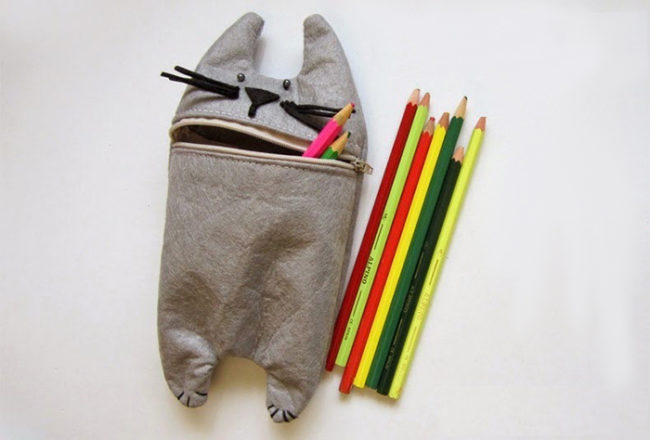
Fetr is a universal material that is used for a variety of purposes. From it you can make a very beautiful and bright penalty for a school in the form of a cute cat.
Necessary materials:
- The felt is gray and black.
- Needle and thread.
- Scissors.
- Beads.
- Lightning to the color of felt.
Production process:
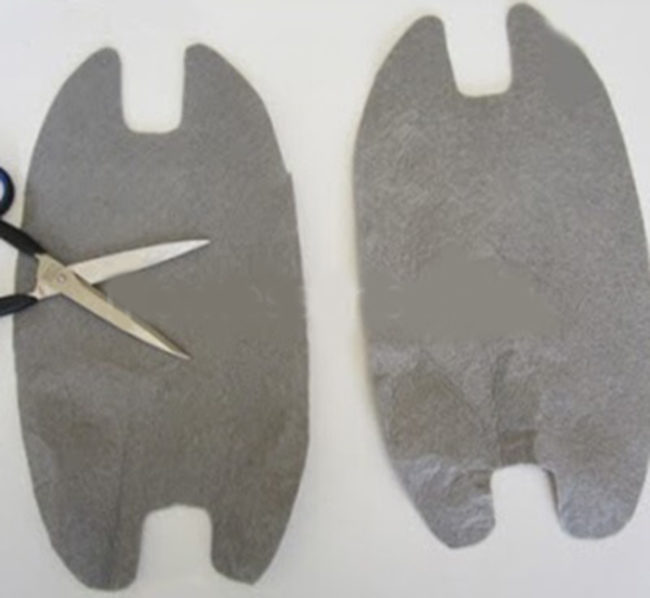
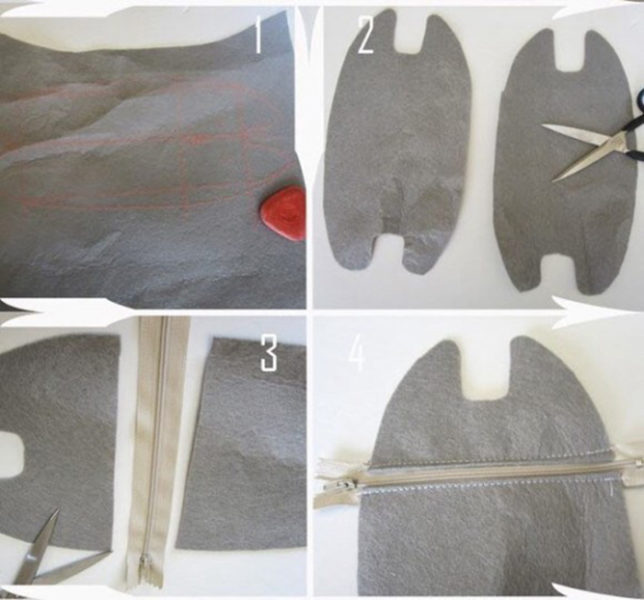
- First of all, it is necessary to prepare the templates by which we will cut the details for the future penitentiary penalty. The templates can be printed or drawn by hand, and then attach them to the cutting of felt and outline with a pencil. Cut the two parts of the cat.
- Next, take one part and cut it in the middle in order to then sew a zipper.
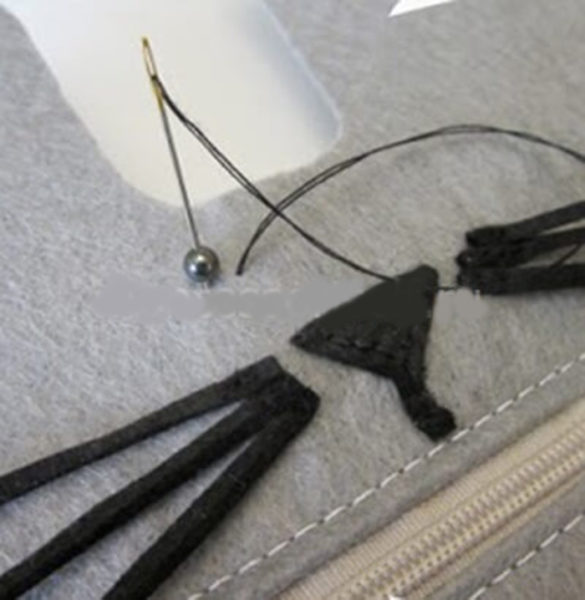
- After that, cut the nose and mustache out of black felt, sew them on the front of the cat. You can use beads as an eye.
- We attach two blanks with the front side to each other, and then with the help of a needle and thread we sew. You can use a sewing machine.
- Next, we turn our cat on the front side.
- On the paws with a thick black thread we embroider a claw.
- A beautiful and unique pencil case is ready.
How to make a pencil of felt pencils - a description
Sometimes students accumulate just a huge number of pencils, especially those who are fond of drawing. To store all your colored pencils and crayons are in order, you can make a practical and very convenient foam from felt, which can accommodate a large number of office.

Necessary materials:
- A cut of felt of any color.
- Scissors or a clerical knife.
- Ruler, pen.
- Lace or tape.
Production process:
- First of all, it is necessary to measure the desired size of the future peel-rulon. The length of the pencil case should be slightly larger on both sides of the length of the pencil.
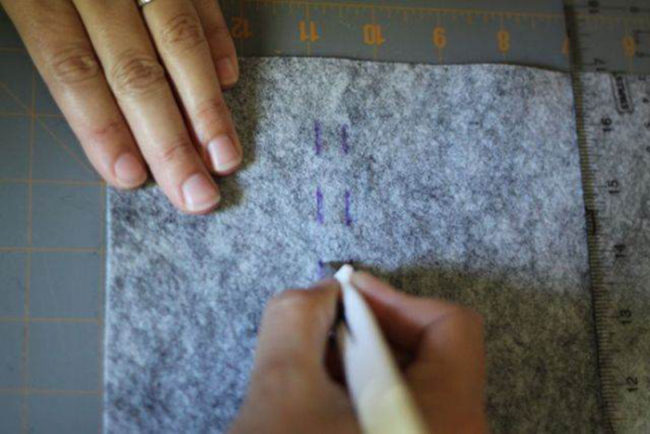
- Further, using the ruler, it should be measured in two places in the center of the pencil fixing point. To do this, draw for each pencil two dashes at the top and bottom, as shown in the figure. On the one hand, leave a little space without fixation for pencils.
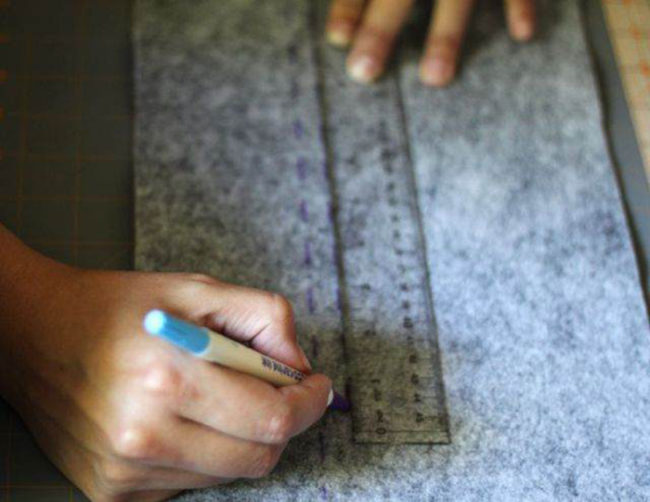
- After that, with the help of a clerical knife, make cuts in place of the dashes. At the same time, be careful to make slots carefully.
- At the next stage, at the free end from the edge, make a small hole and extend the leather lace into it, tied a knot from the inside.
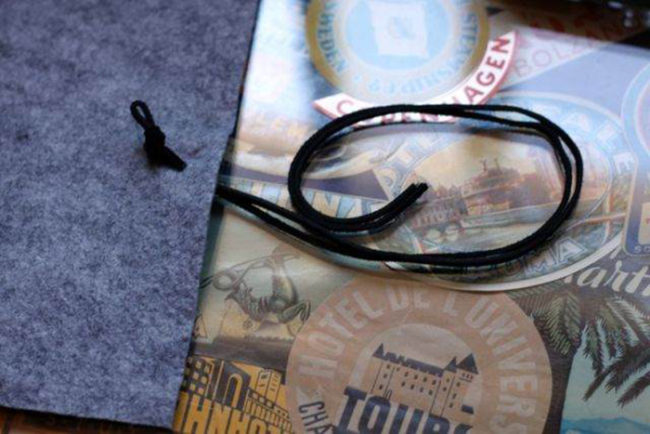
- Put colored pencils into the obtained holes, gently turn the pencil into a roll and tie it with a lace. As a result, you will receive a very practical and convenient pencil case that contains a large number of pencils. Moreover, this type of school pencil case takes a minimum of space in a backpack.

How to make a fabric penis - a simple option
If you have a sewing machine at home, you can easily make a convenient and beautiful school pencil case from ordinary color fabric with a zipper. As a result, you can get a rather spacious pencil case using a minimum of materials. Consider step -by -step instructions for making such a craft.

Necessary materials:
- A cut of any color fabric and white for lining.
- Lightning with a castle to the color of the fabric.
- Needles and threads, sewing machine.
- Scissors, English pins.
Production process:
- Measure the desired dimensions of the future pencil case and cut out two rectangular pieces of fabric from the cut of white and colored.
- Next, take one piece of white fabric and one piece of colored, fold them together with the front side and fix them with English pins. Next, insert one half of the lightning between the two cuts and sew it. After that, turn this half of the future pencil case.
- Do the same with other cuts of fabric and lightning.
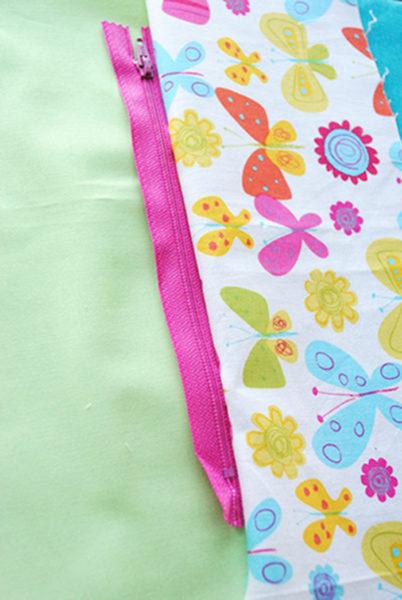
- Next, open the lock and start the stitching of our halves along the edge. This must be done using a sewing machine inside out. At the same time, do not forget to leave a small hole in the corner, then turn the foam with the front side.
- Close the zipper and your pencil case is ready.

How to make a lightning pencil case
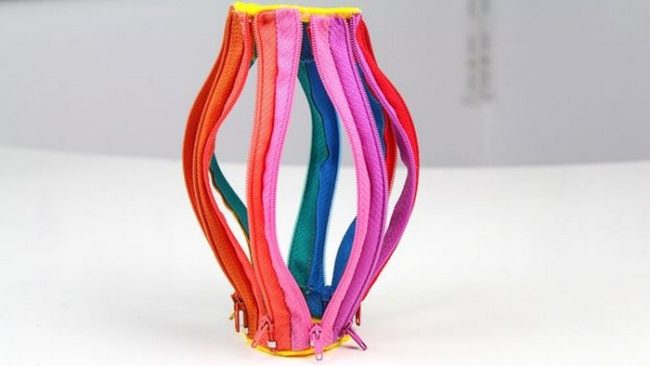
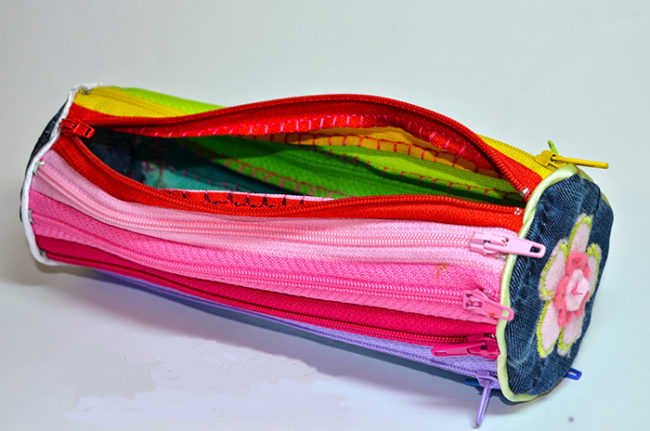
The most creative needlewomen can try to make a very original pencil case from one lightning with your own hands. In this case, you do not need to use any type of fabric or skin, just purchase lightning-are the lights of various colors in order to eventually get a rainbow pencil case.
Necessary materials:
- 8 or more lightning fasteners of different colors. The amount of lightning can be different, it all depends on the width of the fastener itself and the desired volume of the future pencil case.
- Threads and needle.
- Felt or jeans fabric.
- Scissors.
Production process:
- First of all, decide on the volume of the future pencil case and the amount of lightning.
- Then take two fasteners and carefully sew the lightning together, retreating an equal distance from the castle.

- Next, carefully sew in turn all the available lightning fasteners in turn, trying to make neat and even stitches.

- After that, take a felt or denim and cut out two identical circles from it, the diameter of which should be equal to the resulting peculiar “tube” from lightning. These circles can be decorated using an application or various stickers.
- Glue the resulting circles on both sides, having previously removed all the tails of lightning clasps inside.

- Put the handles and pencils in the pencil case and you can use a comfortable and useful craft.

How to make a pencil case for a girl
Most of all, they like to engage in needlework and the creation of bright and unusual accessories of the girl. Most often, it is for them that mothers create unusual penalties using various materials and techniques. Consider how to make an original pencil case in the form of colorful sweets at home.

Necessary materials:
- A bright section of the fabric and a piece of lining dense fabric.
- Lightning fastener of the desired length and color.
- Hot glue or glue-mop.
- Rubber bands.
- Decor elements.
Production process:
- Measure the color fabric you need for the front side of the pencil case. Put it in front of you face down.
- Next, measure the smaller piece of lining fabric of this size that ponytails remain on the colored piece on both sides of it.
- Put the lining section of the fabric in the center of the color, smear the edges of a larger piece with glue and wrap them inside, thereby fixing the lining fabric. Do the same on the other side.
- After that, take the zipper and attach it to the lining fabric. On the one hand, smear the fastener with glue and attach one side of the fabric to it. Do the same on the other side. You will get a kind of “pipe” with lightning in the center.
- The edges of the fabric also glue, then take multi -colored rubber bands and collect the ends of the fabric without lining in the tail. Beautifully straighten them from the inside.
- A cute candy pencil case for a girl is ready.
- A more detailed master class can be seen on the video.
Video: how to make a pencil case for a girl
How to make a doll pen
To make a mini pencil case for his dolls can do any girl, besides, this will help the child get used to school through the game with his toys. For the manufacture of such a craft, you will need a minimum of materials, since its dimensions are very small. Consider detailed instructions on how to make a simple pencil case.

Necessary materials:
- Felt.
- Needles and threads.
- Scissors and decoration.
Production process:
- Cut the rectangular strip of the length you need from the cutter of the felt. Penal width also determine depending on the size of your doll.
- On the one hand, make rounding - there in the future the pencil case will open.
- Turn the strip of felt in half and sweep it with a needle and thread. You can use a sewing machine.

- Close the pencil case and make a fastener in the form of a flower, go of another decor.
A do -it -yourself penetration is a beautiful and original accessory that will help your child stand out at school. In addition, the process of manufacturing such a craft can be carried out together with the child, developing it and having fun at the same time.


Comments
a couple of years ago, there was no side of metrogils from the same problem, there were no side effects ...
I’m not a fan of peeling at all, it saves from acne of metrogil, it also smoothes it ...
Great article! ...
I take the second course of the Capsules Climafite 911. The tides went very quickly. It became calmer, irritability went away and I sleep well ...
i also noticed - it is worth nervous, everything immediately affects the face. Therefore, I try to avoid conflicts and unpleasant people. Of the creams, I like Miaflow from wrinkles - smoothes not only small wrinkles ...