It is not difficult to make a pot for indoor plants with your own hands from improvised materials. Having engaged in such a creativity, you can not only create a stylish designer pot for your interior, but also enjoy the process. In addition, the independent creation of a pot will save you, because beautiful options in stores are often expensive. With your own hands, you can make a pot of any improvised materials that will be found in the apartment. In this article you will find several master classes that will help you easily make a pot on your own.
Content
How to make a floor pot for flowers?
Kashpo, designed for placement on the floor, on the windowsill or on the shelf, is the easiest to make. Such a design should only have a stable bottom so that the flower does not fall on one side. There are many different options for creating such a pot: look around you and you will find a lot of useful things in your apartment, from which you can make a simple and beautiful pot.
Wooden boards, old kettles and other dishes, plastic containers, wire, parts of old furniture can come up. Also now in the trend is the decoration of casop with natural materials: cones, branches, shells or stones. Consider some of the most interesting ways to create a beautiful pot at home.
DIY Kashpo master class: Kashpo decorated with branches
Such a pot will look very interesting and stylish in almost any interior. If you value natural materials and aesthetics of country style, you will probably like a similar option. In addition, making a similar pot is very easy. Make sure you have all the necessary materials:
- For creativity, you will need any container: a plastic bucket, a deep children's mold for sand, a trimmed plastic bottle or an unnecessary deep dish.
- It is necessary to dial in the nearest forest or park of branches, approximately the same in size, and wait a few days while they dry. For additional decor, you can take other, thinner branches of trees, stalks of flowers, rosehip berries, cones or other interesting material, which is useful for decoration.
- You can take textile materials - for example, ribbons or threads of muline.
- For work, you should also prepare glue and alcohol.
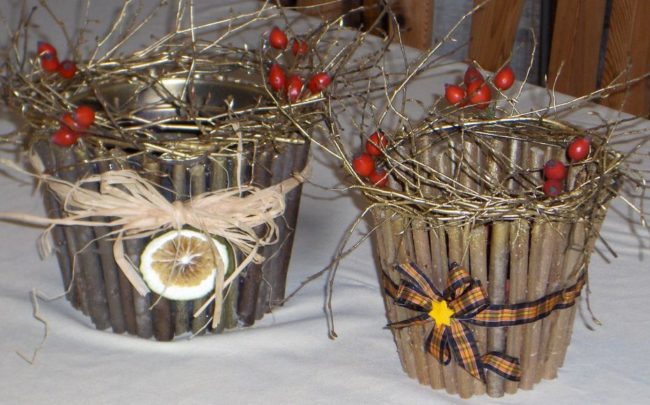
To make a beautiful, stylish and practical pot, use the next step -by -step instructions:
- Take your prepared container. Degrease it with alcohol so that the glue lies better and the design is more durable.
- Take prepared fairly thick branches, break them to equal parts in height of the pot. Then, using a little glue, place these branches around the entire perimeter of your pot.
- Make sure the branches are firmly glued to the base of the pot. For maximum reliability, they can be bandaged on top with a beautiful ribbon or threads.
- For additional design, you should use the stems you have prepared cones and berries. They can be glued at the base or along the edge of the pot - think about how you want to place them. It is not recommended to place volumetric elements over the entire side surface of the pot, since in this case it will be inconvenient for you to pick it up.
Master class: with your own hands with stones for a summer residence or balcony
If you are going to build a pot for plants in the country or for growing flowers on the balcony, options decorated with stones may look very organically. To make such a pot is quite easy. You will also need any form that will become the basis for the pot, and also beautiful stones of about the same size, alcohol and reliable glue.
Please note that this time the plastic shape is unlikely to fit: the stones are too heavy and can just break it. It is best to choose unnecessary metal or ceramic dishes. If you don’t have one at home, try to build a wire frame. This material in household stores is quite inexpensive.
- You will need a rather strong and hard wire that can be bent with your hands, but which will keep the given shape and not sag.
- For the frame, just take the 6-8 bars of the wire, put their crossrest and fasten them in the middle with a small piece of wire or glue.
- Then bend the bars at a certain distance up. So you get the bottom and side walls of the kashpo.
- After that, you will only need to cut off the bars at the edge, as well as make a transverse weaving at the base, in the middle and from above. The smaller stones you have, the more bars you need to use when weaving. As a result, you will get a form suitable for further decoration.
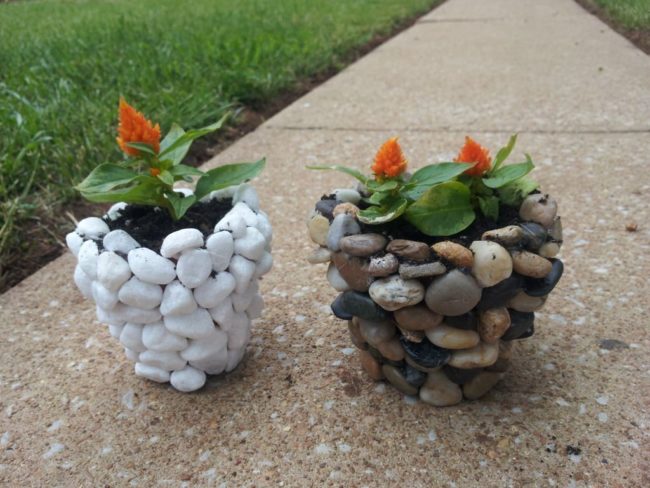
To glue the pots, adhere to the following instructions with stones:
- First you need to degrease the surface of the pot with alcohol. Then begin to glue the pots with stones from top to bottom. The direction is important that in the end you get an even edge. Choose stones about the same size.
- It will take more glue to place stones than for branches. If you have wide flat stones, make sure that drops of glue occur not only to the middle, but also to the edges: so the stone will be more firmly attached to the surface of the Kashpo.
- If you get significant gaps between stones that do not look too aesthetically pleasing, they can be further hidden with pebbles. To do this, simply apply glue to the surface in the gap and pour small stones there.
Workshop: with your own polymer clay pots
Now for interior design at home, such a material as polymer clay is actively used. This is a soft plastic substance with which it is easy to work, even in the absence of art education. After baking in an ordinary oven, the products acquire strength - the material resembles plastic. Polymer clay is relatively inexpensive, it is easy to decorate with beads, rhinestones, ribbons, draw with paints or varnish. If you like to engage in creativity, you will surely like this material. In particular, it is great for creating a pot.
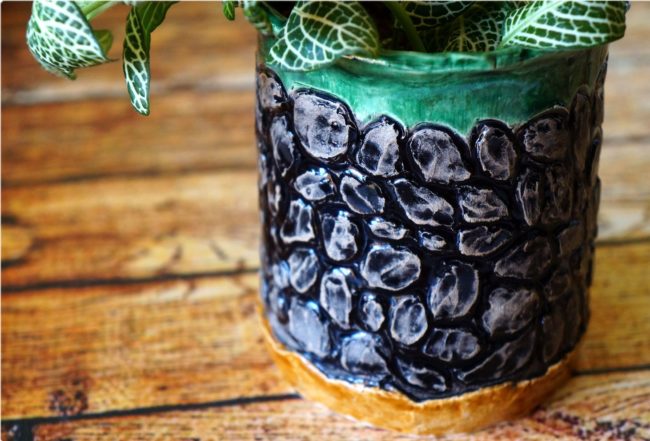
What do you need for manufacture? Only polymer clay, the amount of which will depend on the size of your pot. You can choose plain clay and paint it after or immediately choose the clay of several colors and mix it in the process. For additional decor, you can take beads, rhinestones, ribbons or wire. When working with clay, you follow the step -by -step instructions:
- At first, clay may seem quite stiff, but it is easy to soften in your hands: you just need to actively crush it, like sculptural plasticine. First take a small piece, gradually add others to it and knead them all together. For the base of the pot, you can take one color or mix several by receiving beautiful natural overflows.
- Get out the shape of your pot. If you are engaged in such a sculpture for the first time, it is better for you to try to make a small pot. He should have a stable bottom and smooth side walls. If you want, the walls can be given an additional texture. For example, you can print on them dry leaves of plants, beads or any interesting forms that will be found at home. So the Kashpo will acquire a unique design form.
- For additional elements, you can take a different color of clay. So you can decorate the pot with impromptu flowers, stones or other images. You can make them from clay of the same color, and after firing, paint.
- As soon as you gave a pot of the desired shape, send the products to the oven preheated to 130 degrees for half an hour.
- Wait for the product to cool. Now you can cover it with varnish, paint individual elements, glue beads, rhinestones or ribbons on top.
How to make a suspended pot for flowers with your own hands?
Suspended pots are characteristic of many fashionable interiors: from the style of country and colonial design to the Provencal style. It is not difficult to create such kashpo. It is especially important to think over the design so that the pot is easy to hang on the ceiling, cornice or beam.
For these purposes, many floor pots are suitable - you just need to figure out how to hang them. Sometimes they are braided with threads or wire, and sometimes they attach special rings to the base. Hanging woods made of wood look very beautiful: you can use thin bars or flexible branches. Consider the most interesting options.
Master class: a suspended pot from the boards with your own hands
Often after the repair there are unnecessary wooden bars. These can be parts of window frames, parquet or furniture. If you have many small and approximately the same in size of the boards, from them you can make excellent pots. Even if there is no such material in your apartment, in many household stores you can buy small wooden bars very cheaply.
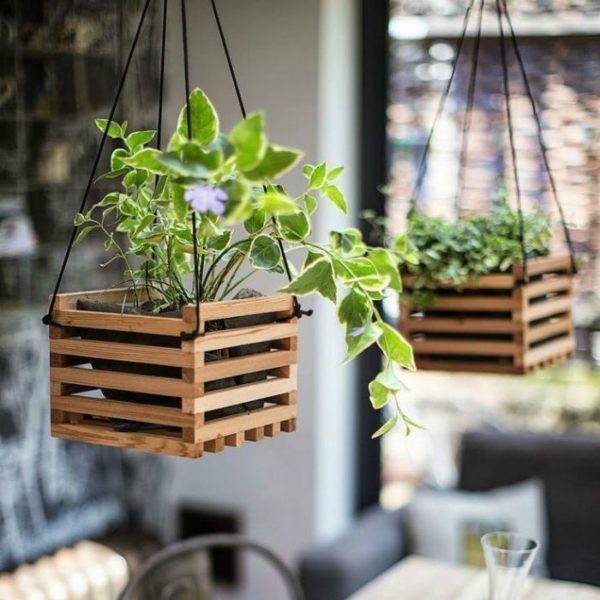
To work, you will need the required amount of wood, varnish and, possibly, paint, if you want to give your pot of vivid color. You can fasten the bars together with glue or nails. Nails are, of course, a more reliable option, but with them the work will be more laborious. If the boards are thin and light, and the flower is miniature, with the help of glue it is quite possible to create a durable pot. To do this, just follow the step -by -step instructions:
- First select the required number of bars. You can make a square pot, elongated horizontally or vertically: it all depends on your imagination and needs. The distance between the bars should be slightly smaller than the width of the boards themselves. From this calculation, first, lay out the bottom. For a square pot, 5 boards with a width of 3 cm should be enough.
- The paved boards need to be stuck together on the sides of two more bars. This is done using thin small nails or glue.
- Now you should start making a frame for your pot. Select four bars of the same height and fix them in the corners.
- After that, place the frame to put the boards across exactly. Select 20 more identical bars for a square pot and place them on the sides. If you make an elongated or wide pot, calculate how many and what boards you need.
- Wait until the glue dries and make sure that the design is strong enough. If you used nails, make sure that they do not stick out anywhere.
- Now the finished pot can be varnished or painted with a paint suitable for your interior. You can easily attach tapes or wire to the boards, for which you can hang a pot anywhere.
Master class: Wicker pot for flowers with your own hands
A very simple and beautiful flower pot can be made in the form of an ordinary wicker basket. This option can be suitable for both the interior of the room, and for decorating the balcony or summer cottage. It is very easy to weave the basket: you only need flexible willow rods and a little patience. Such kashpo is sold in almost all in house goods stores and are quite expensive. Self -manufacture of a wicker basket is a great way to save and spend time with pleasure.
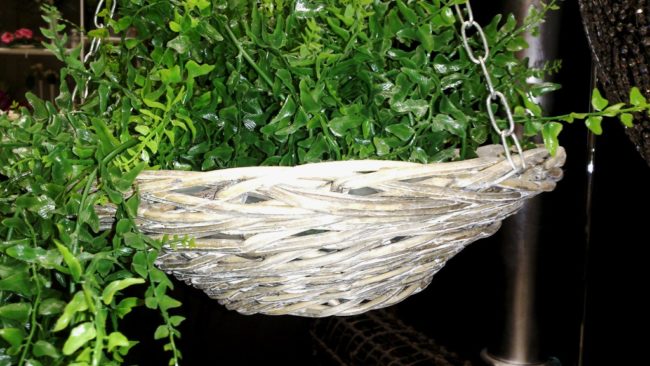
To create such a pot, gain flexible willow rods. You will also need thicker branches for the base and frame of your future pot. To more reliably fix the structure, also take out a thin wire, glue or fishing line. If you have all this at hand, you can start work:
- First make the frame of your pot. Bend several thick branches with a semicircle-it will be enough to take 4-6 pieces for medium-sized pots. Fix them in the middle with wire or glue.
- Cut the ends of the branches so that the edge of the future pot is flat.
- Now you can start weaving kashpo. Start doing this with the bottom, gradually moving to the walls. Weaving is very simple: get the branch in one vertical bar, then remove it from the outside of the next bar and bent again under the third bar. Continue so until the end of the branch becomes very short. Then fix it under one of the bars and take the next branch.
- When you finish brass the entire basket, you can make a pen for it to hang it even more convenient. To do this, bend another wide block on top. It can be fixed between intertwined willow rods on both sides, add glue or bandage with wire for reliability. Then just wrap this bar with a thin branch in a spiral and fix the tip and willow Prut.
- The basket needs to be left for a couple of days so that the rods are dried. You can cover such a flower on varnish or paint.
How to make a wall pots for flowers with your own hands?
The location of the pot on the walls is a very successful option for small apartments. If you do not want to take an excess place on the shelves, on the windowsill and on the floor with flowers, you can always attach a beautiful pot to the wall. You can easily make it with your own hands. The wall-mounted pot is not different from the suspended or floor-the main difference is that it should have any hook or ring on the side, for which it can be hung on the wall.
Master class: knitted wall pots with your own hands
One of the simple options for a wall pot is a pot with a knitted cover. To do this, you can take any plastic container: a bucket, a container or a simple pot in which the flowers were sold in the store. You will decorate this container with a knitted pattern. Thanks to colored threads, ribbons or ropes, the pot will acquire a stylish and original appearance, and it can also be easily hung on a hook in the wall.
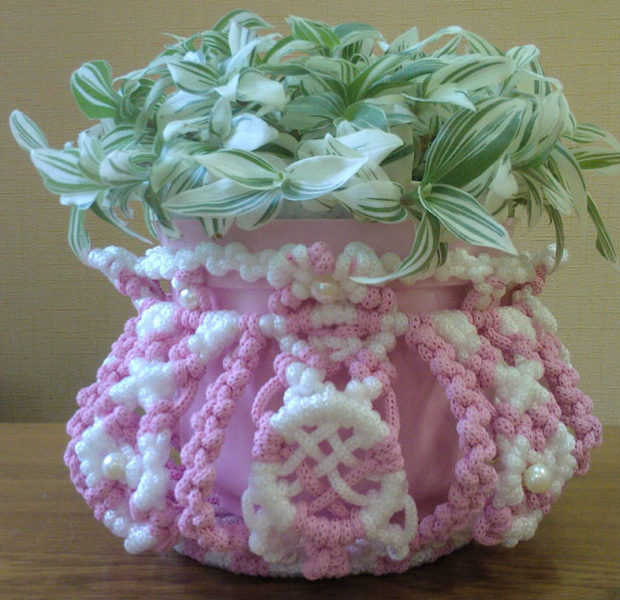
This option is suitable mainly to those who can knit. Nevertheless, even if you do not own knitting needles or crocheted, you can manually weave a beautiful cover from wide ribbons. Consider what options for a knitted pots exist:
- The first option is to tie a crochet and on the knitting needles. If you have basic knitting skills, this will not be difficult for you. The main thing is to properly measure the dimensions of the pot and make the pot slightly wider so that it is easily placed in it. It is also important to make a particularly wide and dense loop from behind, so that the pot is easy to hang on the wall. This loop should be durable and reliable so that the pot does not fall.
- If you do not own knitting, you can buy a wide satin ribbon and braid the casop with its help. The technology in this case will be very simple: such weaving is made on the principle of weaving from willow branches. First, you need to make a peculiar frame, connecting a few long tapes in the middle. Then connect them along the edges with a shorter tape corresponding to the size of the pot at the edge. After that, put on the frame onto the pot and just braid it with ribbons around the perimeter.
- An interesting design can be done with ropes. The ropes for a small pot should be thin enough so that the design does not look rude. The simplest weaving scheme corresponds to weaving from willow branches or ribbons. If you own knitting, you can try to make more complex patterns from thin ropes.
Master class: Wall pots from unusual things with your own hands
The location of the Kashpo on the wall is a rather original design solution. Unusual pots on the wall will look very stylish and organic. In your apartment there will probably be a lot of unnecessary things that are quite suitable for placing flowers in them. The impromptu original pots will fit into any interior.
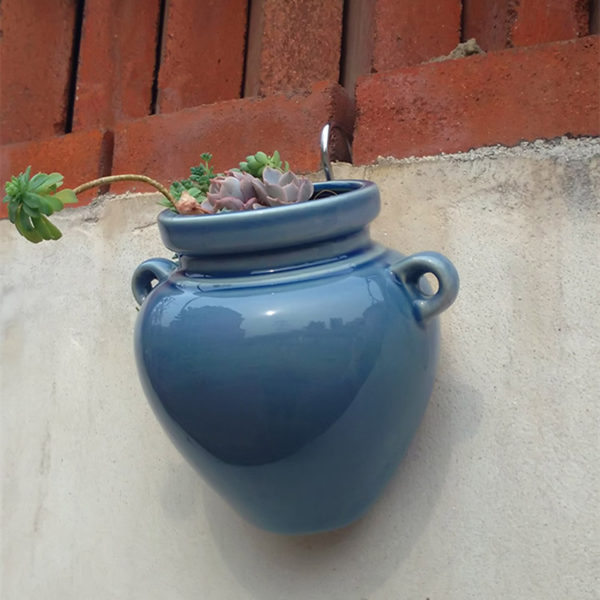
To place colors on the wall, you can consider the following items:
- The kettle will look very interesting as a pot. On the wall, it will be easily fixed with a wire or simply hang on a hook by the handle.
- If you have a ceramic pot, a high dish or a krynka, they can also be successfully used as a pot. For suspension, you need to drill a small hole behind or braid the whole product with a beautiful dense wire.
- Old shoes or shoes can look interesting as a pot. They can easily be hung on the wall on the laces or sew on a loop to them.


Comments
a couple of years ago, there was no side of metrogils from the same problem, there were no side effects ...
I’m not a fan of peeling at all, it saves from acne of metrogil, it also smoothes it ...
Great article! ...
I take the second course of the Capsules Climafite 911. The tides went very quickly. It became calmer, irritability went away and I sleep well ...
i also noticed - it is worth nervous, everything immediately affects the face. Therefore, I try to avoid conflicts and unpleasant people. Of the creams, I like Miaflow from wrinkles - smoothes not only small wrinkles ...