Knitted or sewn -in -law products have long firmly entered the wardrobe of any family. And these are by no means boring and the same type, today needlewomen come up with a huge number of ways to decorate their creations. In addition to embroidery with threads and beads, the use of fringe and pompons, you can increasingly find brushes of threads as a bright decorative element of a needlework.
Content
- Basic rules and features of making brushes from threads with your own hands
- How to make a thread of threads-step-by-step master classes
- How to make thread brushes - simple instructions
- How to make a brush of muline threads
- How to make a brush of threads on a hat - a description
- Silk thread brush-master class
- How to make earrings of thread brushes
- Video: how to make earrings brushes from threads-master class
- How to make brushes from threads to decorate curtains
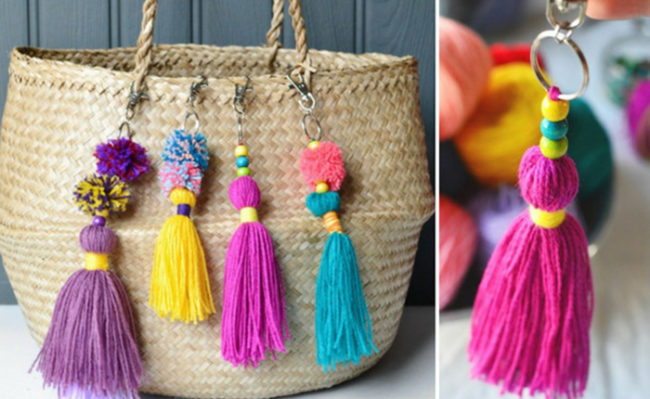
Do-it-yourself brushes with your own hands will help decorate a blanket or scarf-bactus, become an excellent decorative decoration of a bag or key fob, decorate a baby hat or women's clothes. In addition, in recent years, earrings of threads from threads are especially popular and love among fashionistas, for the manufacture of which you will need a minimum of materials and your time. But as a result, you can get a beautiful and stylish decoration that is perfect for any image.
In this article, we will consider the basic rules and features of the manufacture of brushes from threads with your own hands. We give detailed step -by -step master classes of creating various decorative brushes from threads to decorate needlework.
Basic rules and features of making brushes from threads with your own hands
Threads are the simplest and most often used material for various types of needlework. They can be used not only for knitting things or weaving, but also for the manufacture of rather simple products. Thread brushes are a decorative element that can be used to decorate the edge of a knitted blanket or shawl, for example, bactus, as well as for other handmade products. The process of creating different brushes from threads is quite understandable and simple. The newcomer will cope with all stages in about 10-15 minutes, if we are talking about a regular thread of threads without the use of other decorative elements, such as beads or beads. However, for all its elementaryness, the procedure for making such a decor has its own rules, observing which you can create very original jewelry with your own hands.
- First of all, it is worth considering what exactly a brush of thread is created. Many factors will depend on this. Such as the choice of threads, the length of the brush, the use of other jewelry. Thread brushes are often made for children's hats. In this case, the same threads are used as when knitting a cap. For the manufacture of patch for curtains in the form of brushes, cut the threads more authentic, since they will smoothly descend along the curtains.
- If you decide to make brushes from threads to decorate the edge of a knitted blanket or bedspread, then you can use contrasting colors. In this case, the brushes will be more voluminous and thick.
- As already noted above, from ordinary threads you can make earrings in the form of brushes. To do this, use various techniques, for example, also beadwork as an element of a thread of threads. If you decide to make an original decoration with your own hands, then you should definitely think about suitable threads and special components for earrings. Threads for brushes earrings are best used to use thin and smooth, which will easily flow along the face that will not be confused and fluffed. Most often, craftswomen opt for silk threads or threads of muline.
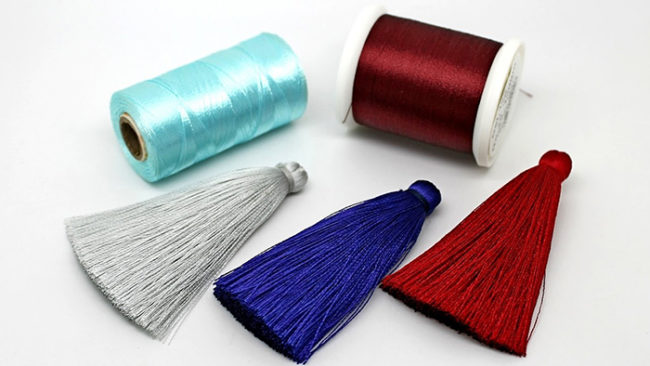
- Before deciding from which threads to make brushes, it is important to decide on the purpose of this decorative element.
- For the manufacture of brushes from threads, it is necessary to prepare all materials in advance. In addition to the threads themselves and scissors themselves, the basis on which the threads will be wound for the formation of brushes will be useful. As a basis, you can use various improvised material. In this case, a regular piece of cardboard of the size you need is useful. At the same time, it is worth remembering, the longer you need a brush of threads, the more select the base. As such a basis, you can try to use a plastic card or a bobbin from ordinary tape. The main thing is that it does not bother, since in the end the ends of the brush will be of different lengths. If the cardboard you have chosen is a little bend, just reduce the tension of the thread itself.
- It is also recommended to choose the basis for winding the thread with a flat and smooth surface, since the slightest zabustins and roughness will make it difficult to remove the brush from the base.
- For the manufacture of small threads from threads, many needlewomen use a regular fork.
How to make a thread of threads-step-by-step master classes
On the Internet, you can find a large number of detailed instructions on how to make brushes from threads for various needlework products. They are mainly quite similar, with the exception of the materials used and additional decorative elements, as well as their purpose. Next, we consider several master classes of creating brushes from threads with your own hands.
How to make thread brushes - simple instructions
In this master class, we will consider how to make a neat and rather magnificent brush of threads, which is suitable for a variety of knitted and sewn products with your own hands.

Necessary materials:
- Threads of any color and thickness. You can use ordinary soft yarn, artificial or natural.
- Scissors.
- A dense base, the size of which will depend on you need the length of the hand from the threads.
Production process:
- First of all, it is necessary to prepare the basis for winding threads. For this purpose, a rectangular piece of dense cardboard of the size you need is suitable. The longer you want to get brushes, the more you need to cut the base.
- Next, take the ball of the thread you have chosen and shake off a little. After that, carefully begin to wrap the threads on a dense base. This must be done tight enough, but not too much so that the cardboard does not bent. It is also not recommended to cut off the thread until the end of winding, since you can’t immediately understand how much a lush brush you want to do.

- When a sufficient amount is wound, on the one hand it is necessary to fix it. To do this, take a small piece of the thread of the same color, pull it from one end through the entire bundle of the thread and tie a strong knot. You need to tie very tightly so that in the future your brush does not bloom.

- When one sides of the threads are firmly fixed, on the other hand it is necessary to cut them. To make the cut as even as possible, you need to take sharp scissors.
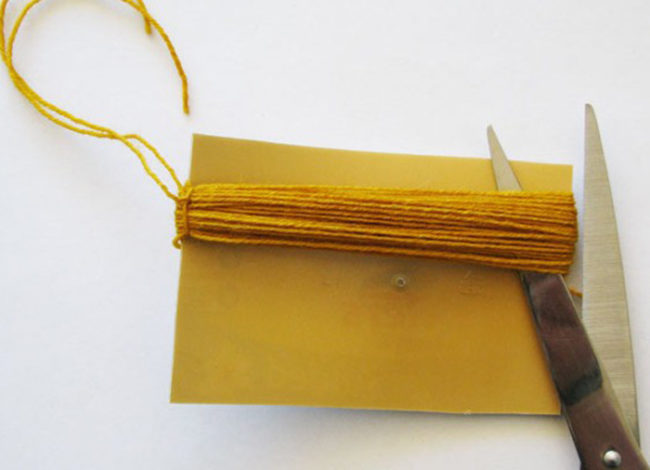
- To finally decorate the brush, you must once again tightly wrap the upper node with a thread. In addition to threads for this purpose, you can use tapes or braid. When finish wrapping, fix well and hide the free end. Next, take the scissors and put the edges of the threads on the brush. This is the easiest option for making a thread of threads without the use of other decorative elements.

How to make a brush of muline threads
In this master class, we will consider how to make beautiful miniature brushes of muline threads, which can be used instead of fringe on a scarf, to decorate a bag or a keychain, as well as for original laying or as earrings of brushes.
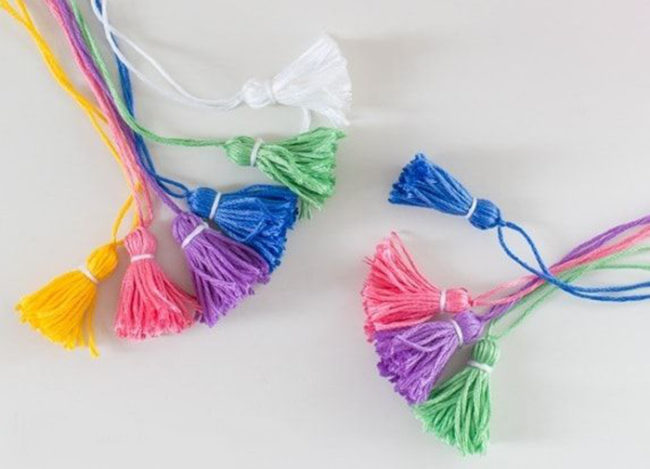
Necessary materials:
- Flows of muline are of different colors.
- Scissors.
- An ordinary fork as a basis for winding threads.

Description of the manufacturing process:
- First of all, select the colors of the threads you need. If you have no such type of thread at hand, you can use iris, woolen yarn or acrylic threads.
- Next, take the fork and begin to wrap the threads of the muline along the width of the base. Having made a couple of revolutions, pass on one side a piece of thread, which will later need to be tied with a knot for attaching a brush.

- Continue to wind the thread until the brush becomes lush and neat enough.
- From the side. Where the thread was stretched, tie a dense knot that will not allow the brush to bloom.
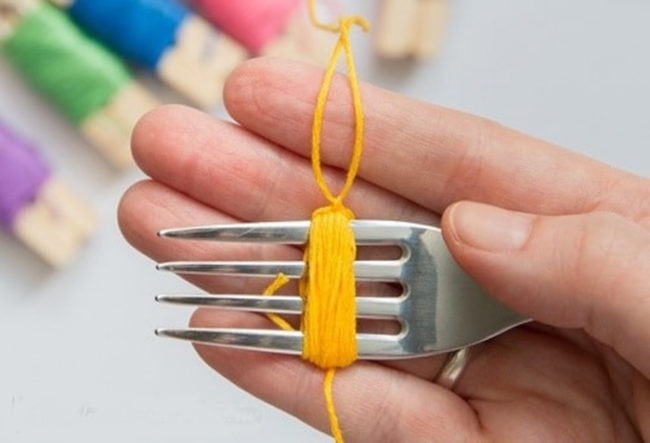
- Next, between the highest tooth of the fork and the following is the thread of the same color as the brush itself, or a completely different thread or tape. Wrap it several times and fix it. Gently remove the brush from the threads from the fork. You can attach a long thread or a lace for fastening to the upper nodule. A beautiful and universal brush of threads is ready, it can be used to decorate needlework.

How to make a brush of threads on a hat - a description
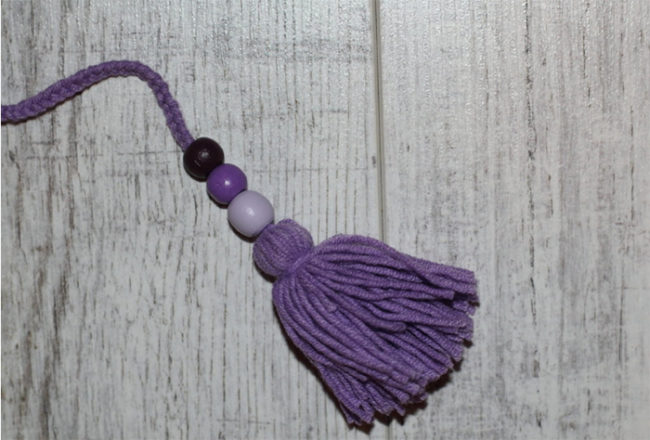
Small neat brushes of threads can be decorated with a hat for your child. Very often, needlewomen knit a hat with small ears, at the ends of which flagella with thread brushes are sewn. The same fluffy brushes can be sewn on the very top of the hat instead of a pompon, especially if you can’t do it. It is much easier to make a brush of thread with your own hands.
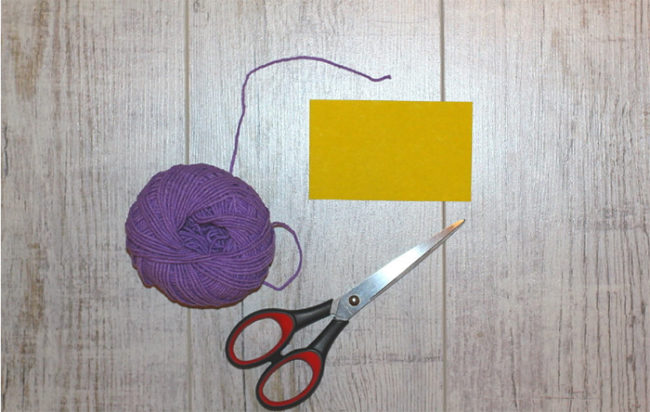
You will need the following material:
- Suitable threads. Most often use the same yarn as when knitting the cap itself.
- Scissors.
- The basis for winding.
- Decorative elements for decoration, for example, beads or balls of a suitable color scheme.
Description:
- Choose a strong and dense basis for winding. It can be a small box or plastic card. The size of the base should correspond to the size of the future brush you need.
- Next, start winding your chosen thread on the base. This must be done evenly and tight enough so that in the future the ends of the brush are even.
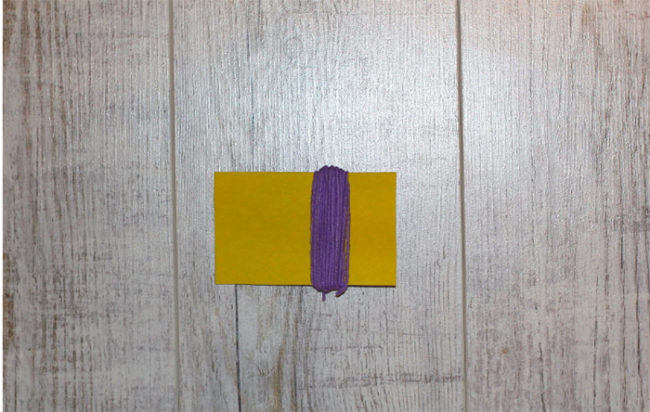
- Pay attention to the thickness of the resulting thread of the thread, since this will depend on how fluffy you will have a brush. When the required volume is achieved, you need to carefully cut off the thread.
- Next, take three threads of the same color and textures and fold them together. They should be long enough, since in the future you need to weave a pigtail. Pass them under all threads exactly in the center on one side of the base, then tie a strong knot so that the brush does not blossom.

- At the next stage, you need to turn the base and also cut the threads with sharp scissors in the center so that all the edges are as smooth as possible.
- Carefully spread the brush. Take a small piece of thread and wrap it around the central part, thereby forming a beautiful node. Fix the end of the thread and hide it.

- Next, we proceed to the formation of a flagella, which will be attached to the ears of the cap. Three threads left at the very top of the brush must be used and weave a beautiful and neat pigtail.
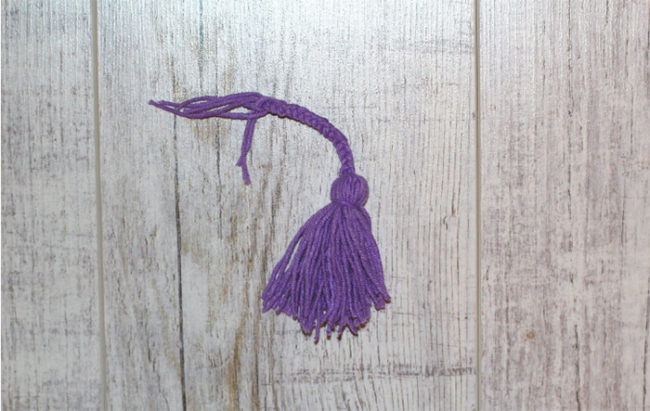
- To make this element of the decor brighter and more original, you can use beads. Select three beads with holes in the center and put them on the resulting pigtail. After that, you can sew on a knitted children's hat.
Silk thread brush-master class
Brushes made of silk threads that shimmer and neatly fall into even stripes look especially beautiful and spectacular. Very often, this type of needlewoman is used to create earrings of brushes, since they take shape well and do not confuse. Consider a detailed master class of manufacturing such a decorative element.
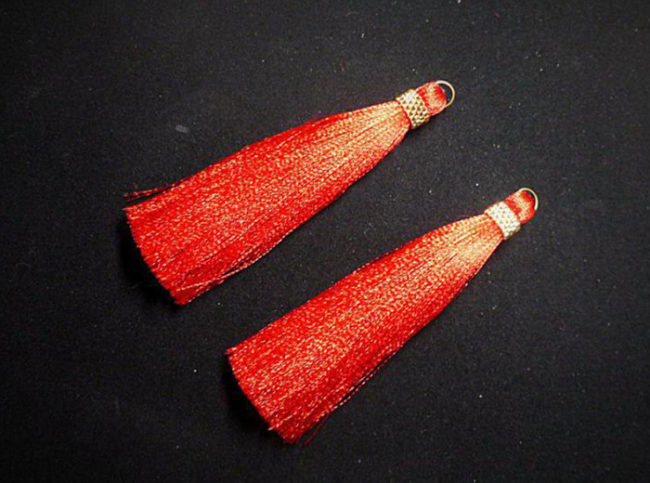
Necessary materials:
- Silk threads of the color you need. You can take Gazzal yarn.
- Scissors.
- The usual thread for fastening.
- Glue moment.
- The basis for winding.
- Decor elements.

Description of the manufacturing process:
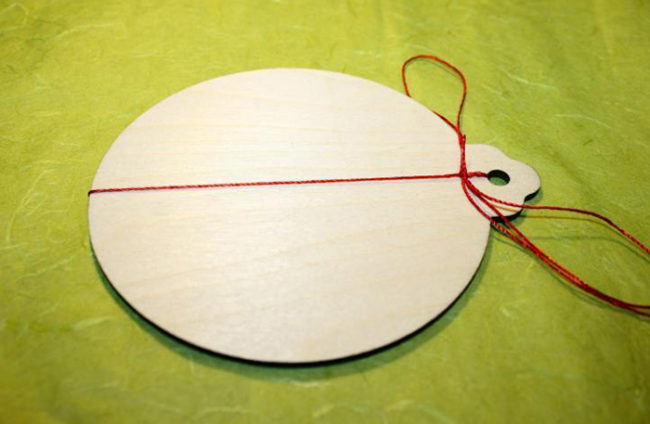
- For convenience, you can cut out of cardboard such basics as in a photo with a hole in which you can pass a thread so that it does not move.
- Cut a small piece of silk thread and wrap it with it once, tie a knot and tighten it tightly. After that, you can begin to wind the threads.
- It is quite difficult to wind a thread from silk, since it is very smooth and slippery, constantly shifting.
- Since such threads are very thin, there will be a lot of layers.
- After you got the right volume of threads, remove the thread that is located across the bundle and tie it with a dense double knot exactly in the center. Since silk threads are very slippery so that the brush does not bloom in the future, it is recommended to smear the knot of the knot with glue. Let him dry.
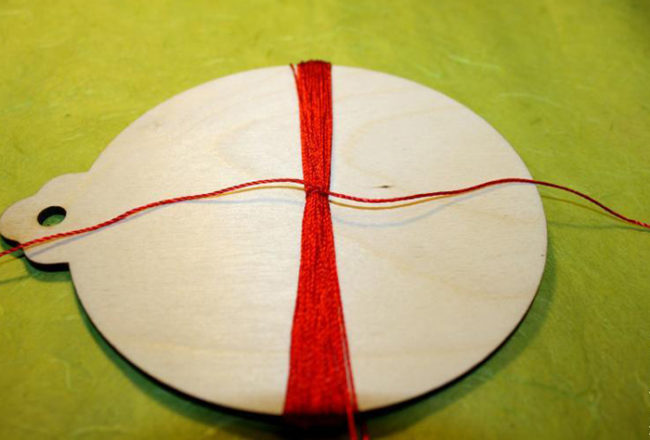
- At the next stage, cut a small piece of thread, form a loop from it and tie a knot. Make it with glue and cut the unnecessary tail.
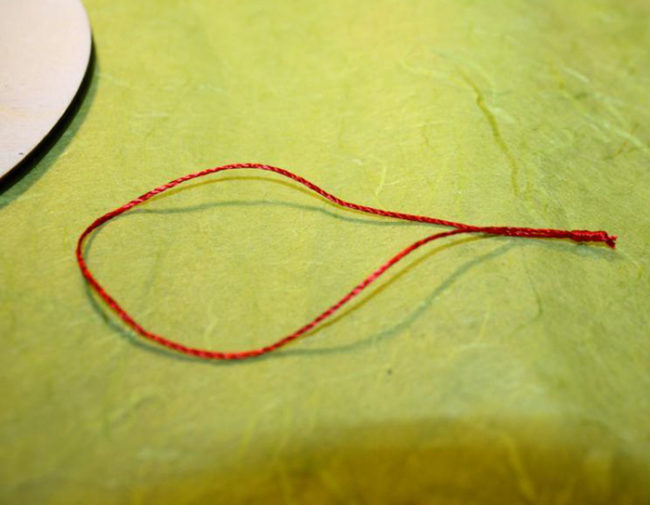
- Take the resulting loop and draw under the winding under the very knot. Make a real loop, tighten it tightly.
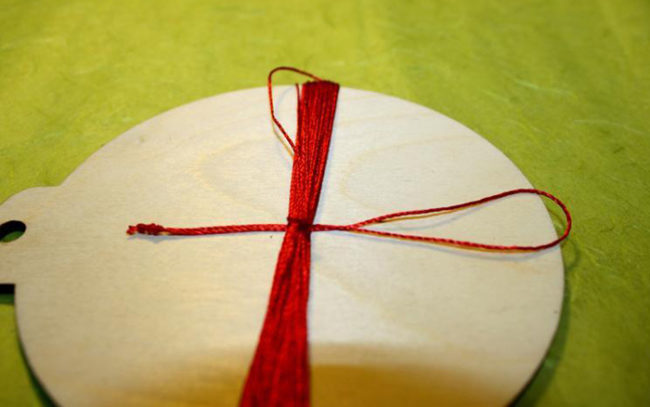
- Next, turn the base with the other side and cut the threads with a sharp knife or scissors in the center. In the end, you should get a bunch of silk uneven threads, as shown in the photo.
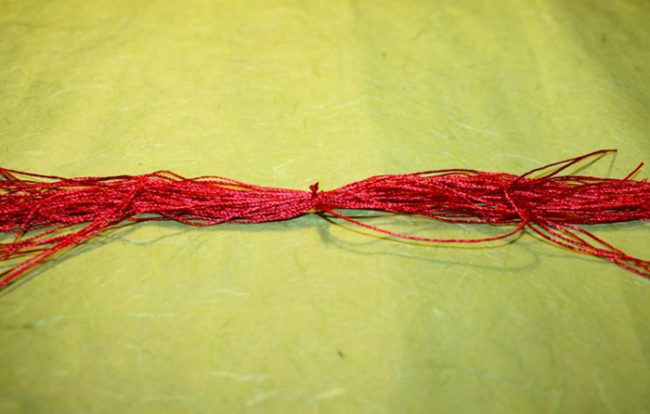
- First of all, the threads need to be leveled. To do this, boil the water in an electric teapot or other container and hold a couple of seconds a bunch above the hot steam. Threads are quickly redeveloped.

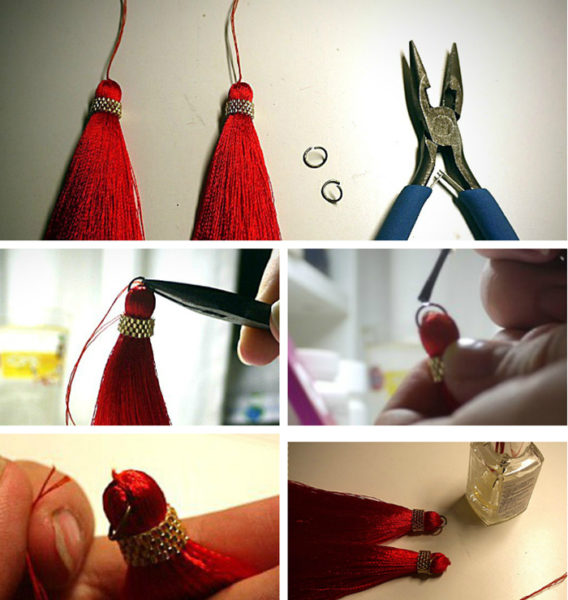
- Next, we begin to form a knot. This can be done in various ways. As an option, take a hat for beads and carefully lift it with scissors or pliers. Put it on the branch of the brush and click it.

- You can form a regular knot. To do this, take a simple coil thread and wrap several layers at the very top, then tie the knot and hide the tip.

- Do not forget to catch the ends of the threads of threads. This can be done by several options. Some needlewomen prefer to open with scissors by eye, but it does not always turn out really even. There is another option: take a small leaf of ordinary white paper in a square shape. Put a brush of threads on one edge and twist it in paper with a roll. Next, using the thread at the top, adjust the sticking ends on the other side that needs to be cut off. Cut with scissors.

- You can decorate the resulting brush of thread with beads, beads, a ringing rings for fastening.
How to make earrings of thread brushes
Decorative brushes from threads can be made to create various jewelry, including for earrings, which is very popular in recent years, when Handmade products have come into fashion. Earrings of thread brushes are a very bright and unusual accessory, which is made quite simply. And if you use other decorative elements, then any needlewoman and not only can create for themselves a masterpiece of the world of jewelry. Next, we consider a detailed master class of creating earrings from thread brushes with your own hands.
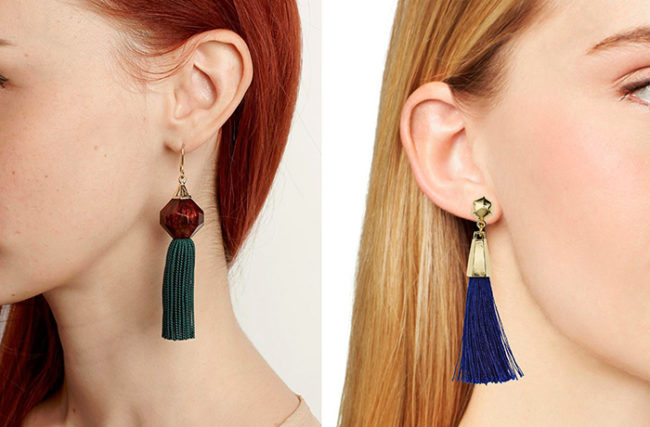
Necessary materials:
- Threads of any density and texture. It is better to purchase heavy and slightly thick so that they can hang freely.
- Scissors.
- Decorative elements: beads, rhinestones, beads.
- Schwenzes for earrings: hooks, cloves, loops, clips. This is a special accessories for attaching brushes from threads.
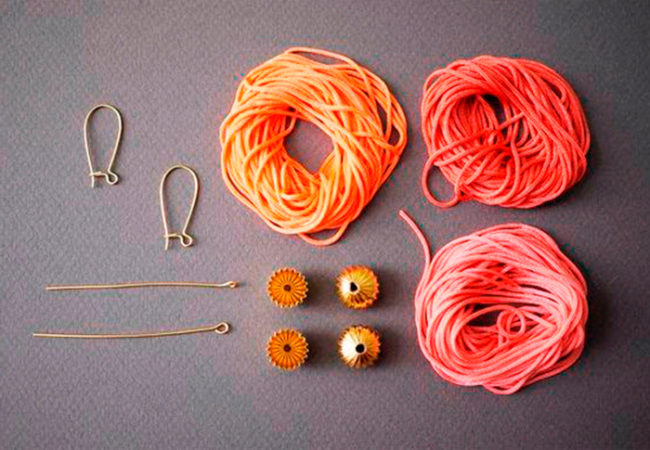
Production description:
- First of all, it is necessary to prepare all tools and materials. Pick up threads or yarn suitable for earrings in advance, as well as all kinds of decorative elements for decorating future jewelry.
- Take the threads you have chosen. To obtain bright and beautiful earrings of brushes, you can take threads of several shades. Cut them into segments 20 cm long and fold together.
- Next, fold the resulting bunch in half.
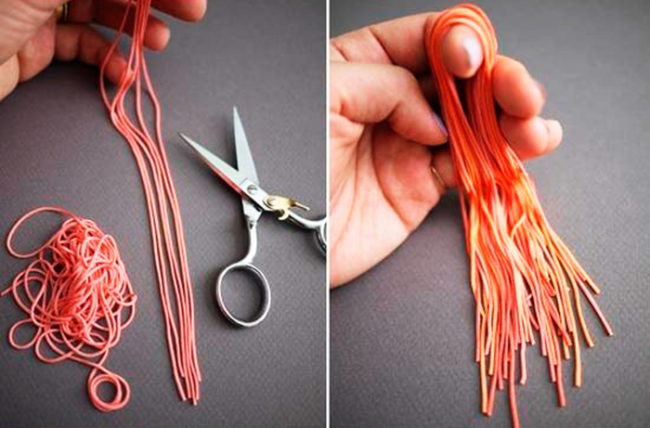
- Take a small section of the thread of that color and bandage this bundle in the center. Tie a dense node and cut the extra ends with scissors.

- At the next stage, take a decorative hat, as shown in the photo, and deliver a wire with a hook into it. Apply a little glue to the inner surface of the hat. After that, place the hat on the upper part of the bundle of the threads and press well, and string the bead on the hook. It remains only with the help of pliers to make a hook on the wire and remove the excess part of it.
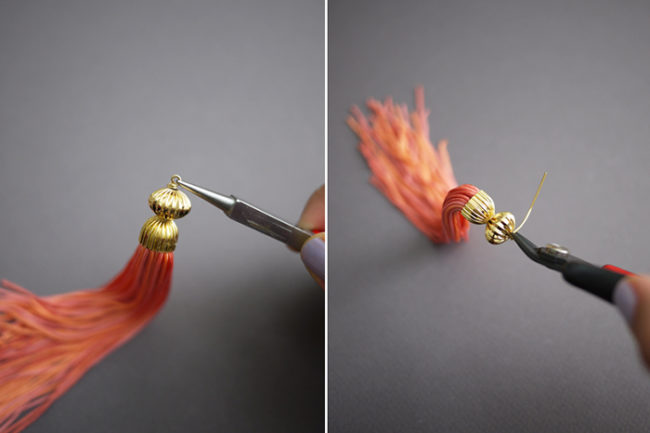
- Next, it is necessary to attach the mount for earrings on the resulting wire hook. It remains only to carefully cut the tips of the threads so that you get even brushes.
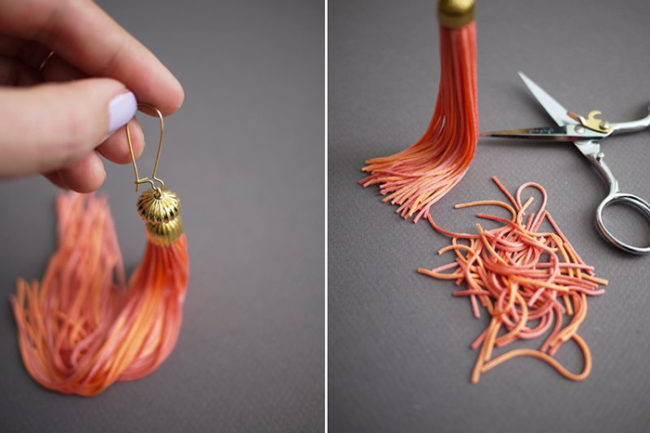
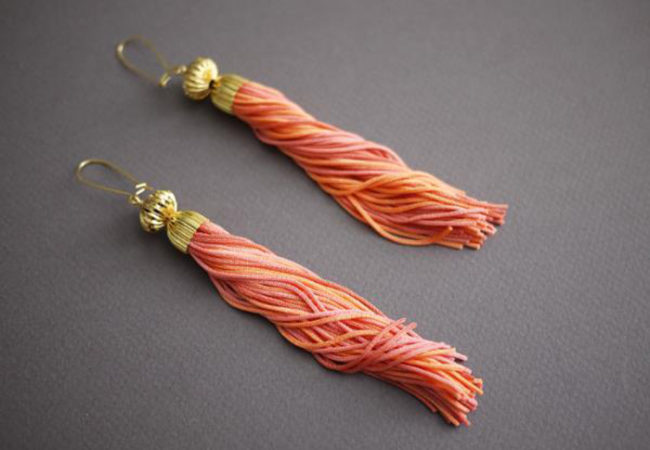
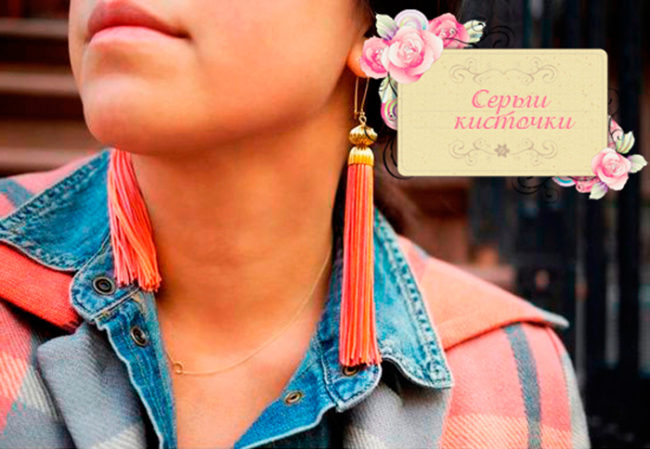
- As a result, with the help of a minimum set of materials, you get very beautiful and spectacular earrings of thread brushes, which are ideal for any outfit.
Video: how to make earrings brushes from threads-master class
You can see more clearly the detailed instructions for making earrings with your own hands in the video offered below.
How to make brushes from threads to decorate curtains
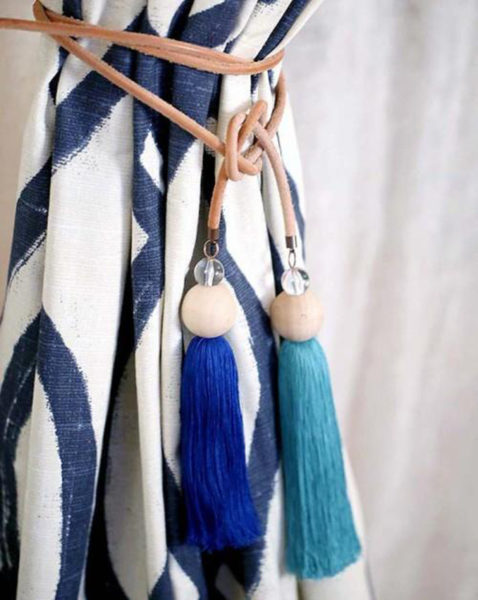
Thread brushes are also a great solution for picked curtains and curtains. They not only carry a useful function, but also serve as an additional element of the decoration of the room. Consider detailed instructions for making brushes from threads for curtains.
Necessary materials:
- 6 silk thread coils.
- Elastic cord.
- 2 screw hooks and leather cord.
- 8 medium rings and 4 large closed rings.
- 4 beads, transparent acrylic beads.
- Universal glue.
- Scissors.
- Cardboard base for winding threads.

Production description:
- First of all, cut the basis of the size you need from a dense cardboard. Remember that the length of this base will correspond to the length of future brushes for curtains.
- Next, take a coil of silk threads and begin to wrap on the base. This must be done carefully. One brush will need 3 slices of silk threads. When one coil ends, without stopping, start wrapping the next one.
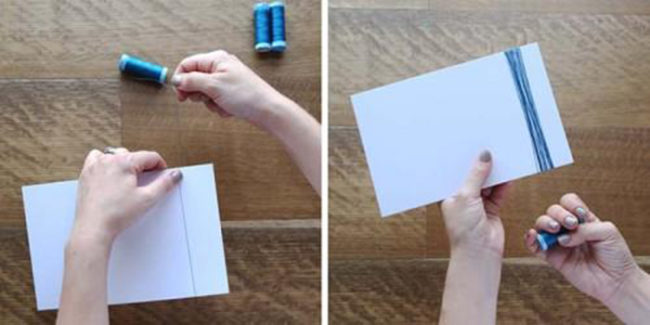
- When all the threads are wound, take a thin elastic cord and pass it under the whole beam of silk threads at the very top. Tie a dense knot and remove the beam from the base.
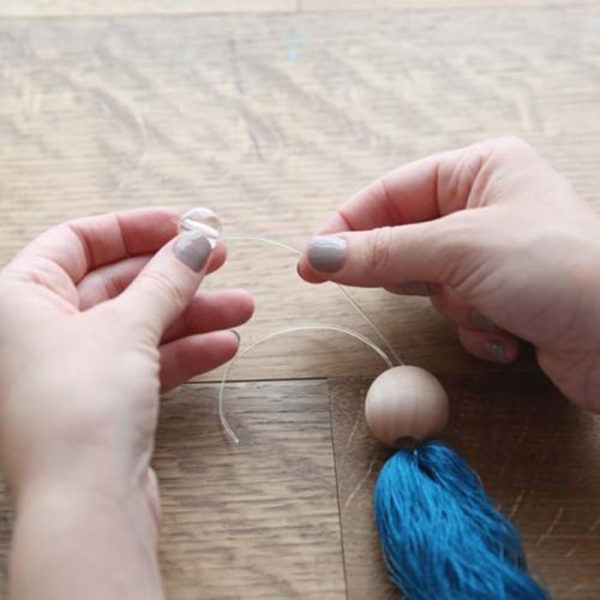
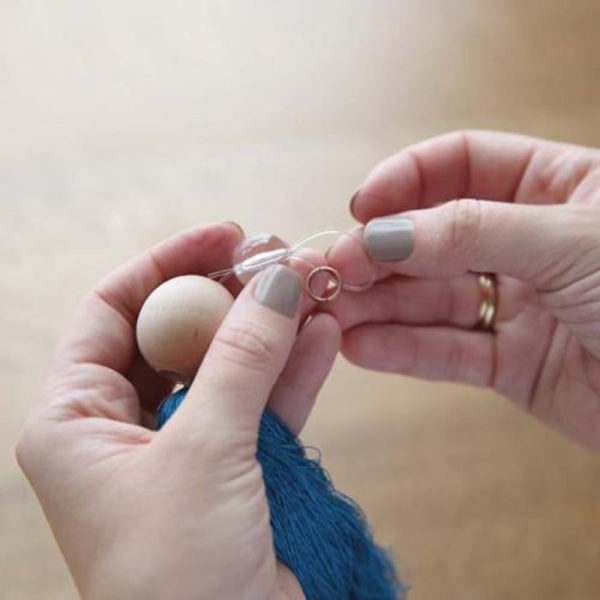
- At the next stage, take the two ends of the elastic cord into a wooden bead. Next, take the middle ring and pull the elastic cord into it, the end of which must then be drawn into the hole of the acrylic beads. Tie a strong knot under the ball, as shown in the figure, then cut the extra ends and hide them in a wooden bead.
- Using scissors, carefully cut the ends of the threads so that you get even brushes.
- Next, take one large ring and light it slightly, insert a plug for a leather cord and squeeze the ring tightly again. After that, apply silent glue into the plug and insert one end of the leather cord into it.

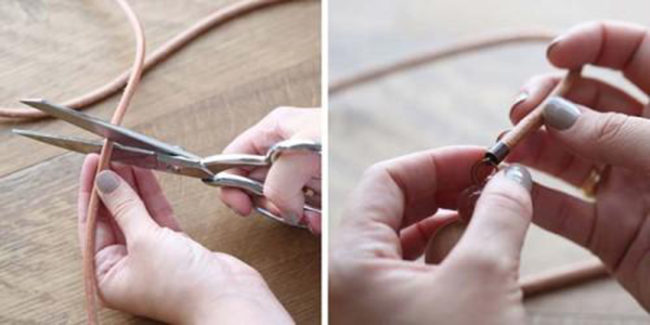
- Make another brush in the same way and tie two leather cords together, as shown in the next photo.

- Next, take two large closed rings, lift them and insert one plug into each, then squeeze them tightly. Apply a little glue to the plugs and fix the free ends of the leather cord in them. More details can be seen in the photo.

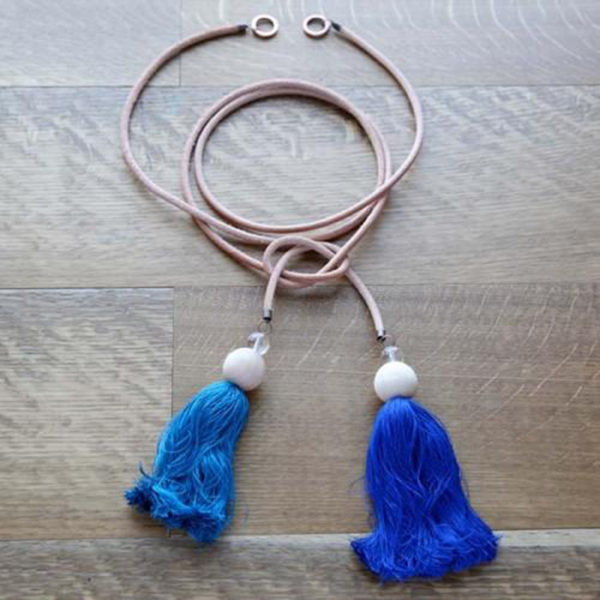
- It remains only to hang beautiful curtains and attach hooks for the rings on the tables on the wall behind them. A beautiful product of brushes is ready.
Thread brushes are a unique decorative element that can be used to decorate a wide variety of needlework. With the help of simple threads, you can not only create a unique decoration, but also make things sparkle with new colors.


Comments
a couple of years ago, there was no side of metrogils from the same problem, there were no side effects ...
I’m not a fan of peeling at all, it saves from acne of metrogil, it also smoothes it ...
Great article! ...
I take the second course of the Capsules Climafite 911. The tides went very quickly. It became calmer, irritability went away and I sleep well ...
i also noticed - it is worth nervous, everything immediately affects the face. Therefore, I try to avoid conflicts and unpleasant people. Of the creams, I like Miaflow from wrinkles - smoothes not only small wrinkles ...