The art of photography is a way to divide the memory of the iconic moments of life with others. Of course, for commemorative photos you need worthy frames. About how to make beautiful frames on paper of various densities, textures and textures are described in published below seven master classes.
Content
- Double -sided frame of colored paper in the technique of origami
- Frame from cardboard and colored paper for photo or drawing
- Volume frame made of paper napkins and cardboard
- Volume frame in the shape of a heart from corrugated paper
- Basic volumetric paper frame
- Volume frame made of paper from paper
- Paper frame
- Conclusion
Double -sided frame of colored paper in the technique of origami
It will be required:
- 4 square sheets of beautiful paper in size 15 × 15 cm;
- glue.
Making a frame for photographs of paper using the origami technique:
When creating a frame in this technique, accuracy, symmetry and thoroughness of the processing of bends are important.
- Bend a sheet of paper diagonally.
- Bend one of the edges of the sheet to the diagonal fold. You will get a rectangular triangle.
- Turn the workpiece. Understand the angle of the part so that the bend is on the same line with the base of the rectangular triangle. It will turn out an isosceles triangle.
- Turn the workpiece. Bend her on the diagonal bend. The resulting part will consist of the same -layer and multilayer rectangular triangles of the same size.
- Turn the part. Bend it so that a single -layer and multi -layer rectangular triangles overlap each other. Expand.
- Rejoice the right angle of a single -layer triangle in the pocket on a multilayer triangle.
- Do similar manipulations with three other sheets of paper.
- In turn, put the tops of the triangles in the pockets of the second so that the square is obtained. Fix with glue.
- Insert the photo frame on both sides of the photo.
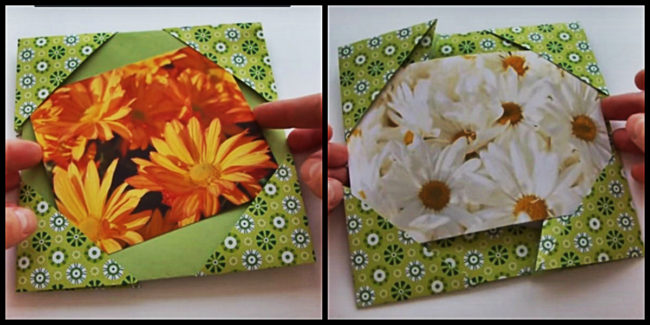
Frame from cardboard and colored paper for photo or drawing
It will be required:
- cardboard;
- scissors;
- ruler;
- simple pencil;
- glue;
- color paper;
- pencils;
- decor - at will.
Making a paper frame for a picture or photo:
- On a sheet of cardboard, draw two rectangles with sides of 10 and 14 centimeters. At a distance of 5 mm from the lower edge of both figures, draw a line. On one of the rectangles, also draw lines at a distance of 2 cm from the upper edge, side edges and the line drawn below.
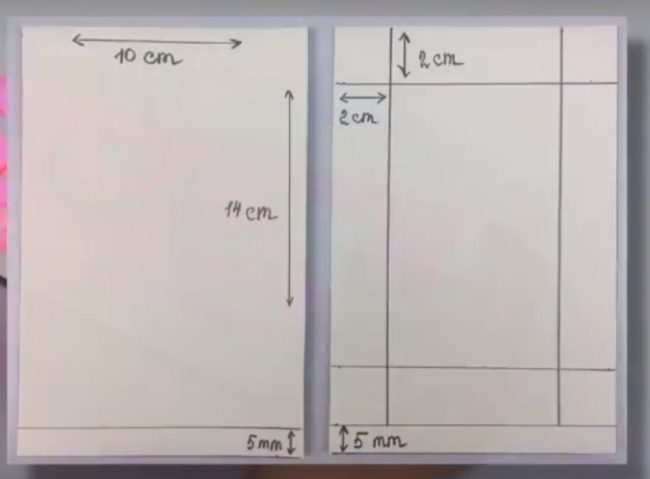
- Cut rectangles.
- At a rectangle with marked edges, cut the central part.
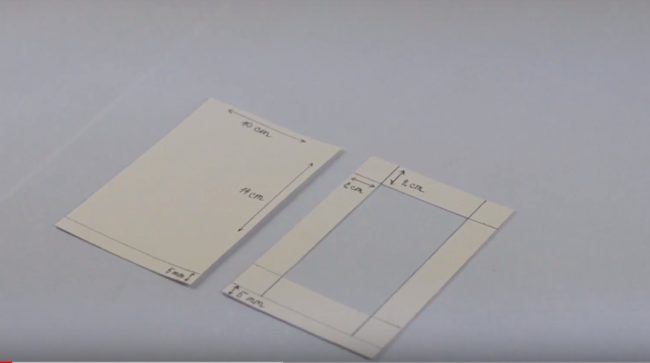
- Bend the lower edges of the rectangles along the lines drawn below.
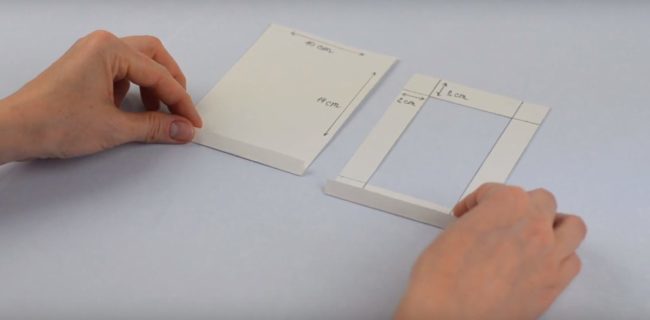
- Close rectangles among themselves. To do this, apply glue to the bent edges, turn the rectangle with a cut center upside down, apply it to the second rectangular part. It turns out the basis of the frame, the photo into which can be inserted on the left or right side.
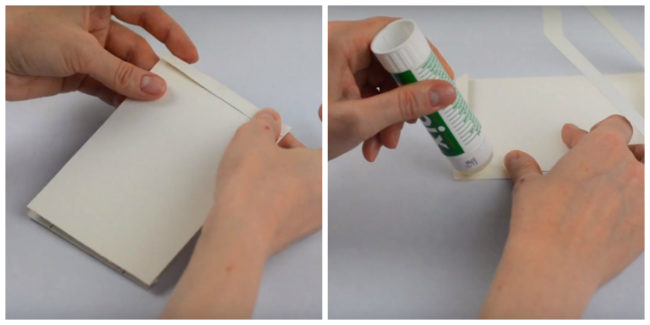
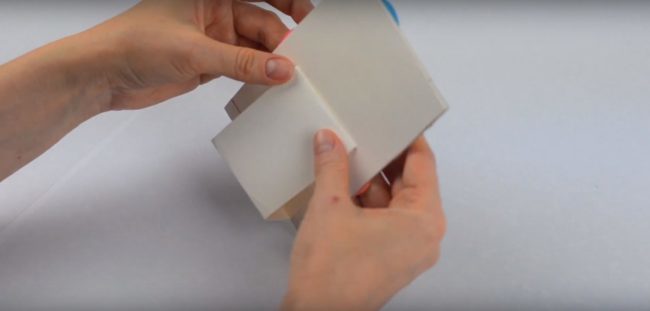
- Glue a loop to suspend a photo frame or make a leg. To create the latter, you need to take a cardboard rectangle with sides of 6 and 14 cm. From one narrower side of the rectangle, make a bend to the center at a distance of about a centimeter from the edge, from the opposite side to make the bends to the center at a distance of about 6 and 3 cm from the edge. Apply the glue to the rectangles formed by folds 3 × 6 cm and 1 × 6 cm, glue a larger rectangle to the frame so that the fold is on the same line with the lower edge of the frame. A smaller rectangle is glued so that part of the leg is perpendicular to the lower edge of the frame.
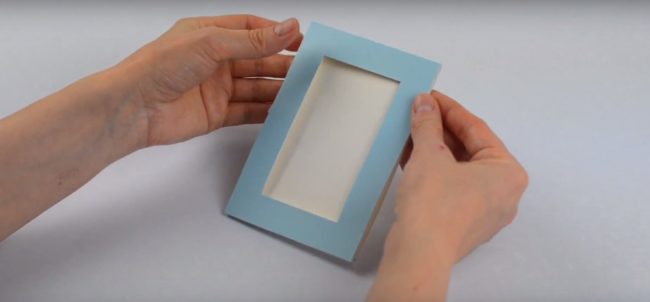
- Cut out a rectangle with sides of 13.5 and 10 cm from colored paper on the back of the sheet, retreating 2 cm from the edges, draw 4 lines. Cut the rectangle obtained by the intersection of the rectangle, glue it to the frame.
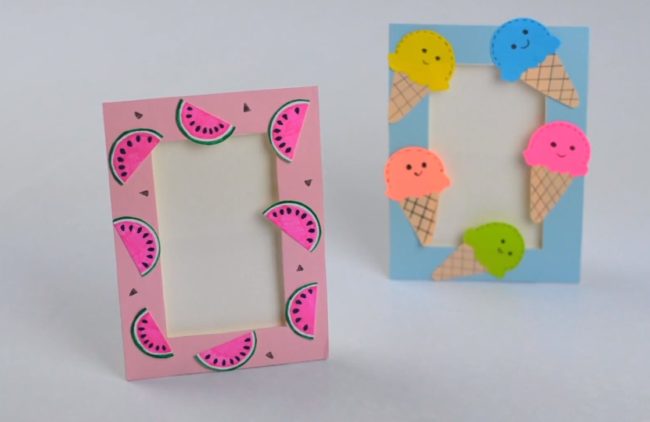
- Decorate the frame with patterns and an application made of colored paper.
- Insert a photo or drawing into the frame.
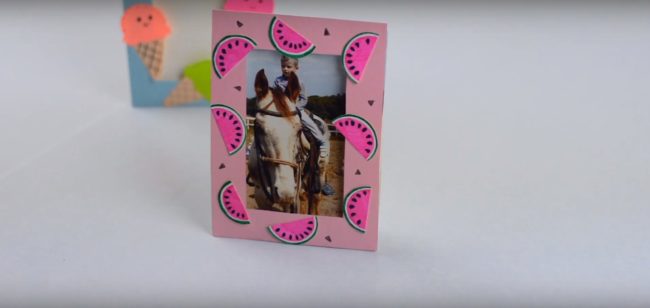
Volume frame made of paper napkins and cardboard
It will be required:
- table paper napkins;
- cardboard;
- scissors;
- simple pencil;
- ruler;
- compass;
- stapler and brackets;
- glue;
- the ribbon is optional.
Making a frame with a decor of paper with your own hands:
- Make the basis of the frame, following paragraphs 1-6 of the previous master class.
- Make flowers from napkins. Twice fold the table paper napkin in half. Apply a circle of a circle with a diameter of 5 cm to the obtained multilayer square, cut a circle, fasten in the center of a bracket.
- Separate layers of napkins alternately, crush them to the center and straighten them, giving the outlines of the clove flower.
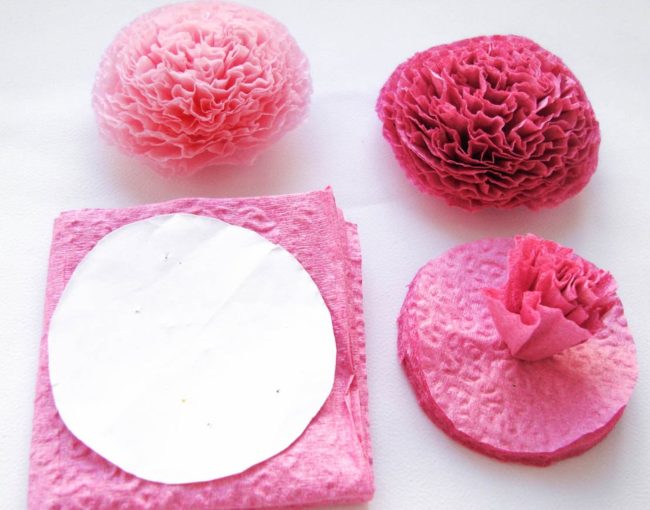
- Make the required number of colors, glue them to the frame. Insert a photo.
According to this principle, you can also make frames made of corrugated paper.
Volume frame in the shape of a heart from corrugated paper
It will be required:
- thick paper or cardboard;
- corrugated paper;
- heart template;
- simple pencil;
- scissors;
- ruler;
- glue gun, rods;
- ribbon.
Production of a frame-heart:
- Using the template, draw a frame on paper in duplicate. Cut the parts.
- On one of the parts, cut a hole for the photo.
- Close the details with each other, leaving a place for photography.
- Cut corrugated paper into many rectangles with sizes of about 1.5 × 3 cm.
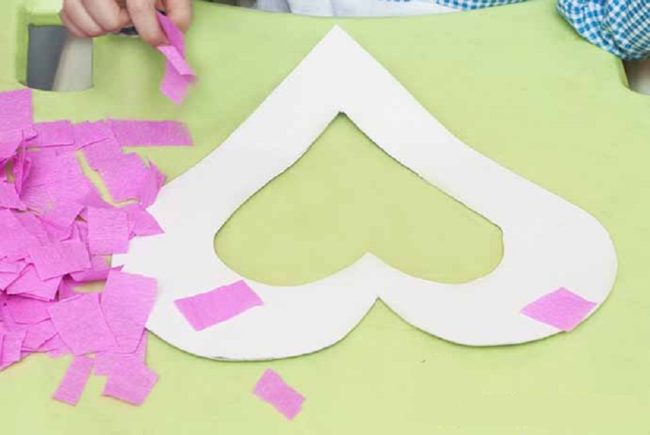
- Put a pencil in the center of the rectangle and mix the paper up so that it wraps it from all sides.
- Apply glue to the lower part of the workpiece without removing the paper from the pencil to glue the workpiece to the base.
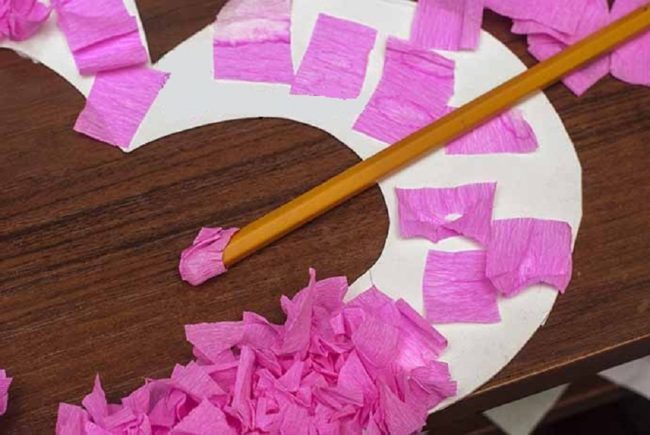
- Fill the frame densely with such elements.
- Glue a loop from a ribbon.
- Insert a photo.
Basic volumetric paper frame
It will be required:
- a sheet of thick paper;
- ruler;
- simple pencil;
- scissors;
- glue;
- stupid awl/knife/knitting needle.
Production of a volume frame of paper:
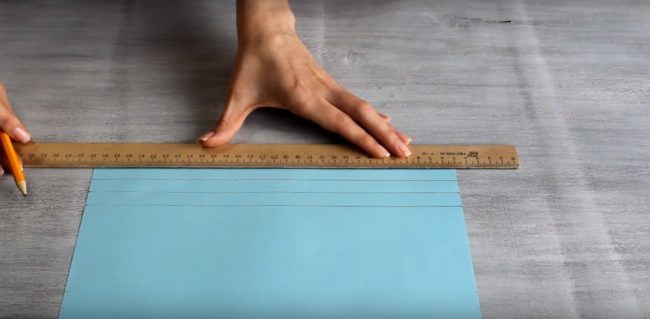
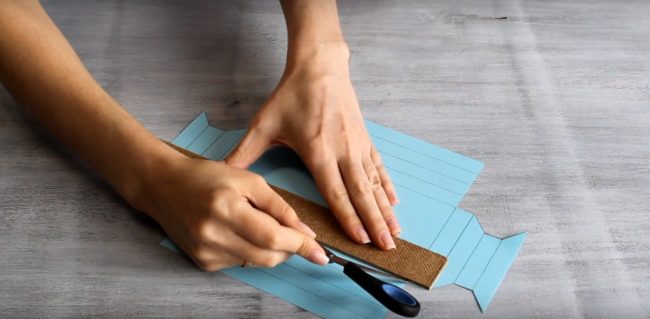
- Apply 4 lines from each edge of the sheet. The distance between the edge of the sheet and the line closest to it and between neighboring lines should be one and a half centimeters. The work will look more accurate if the lines do not draw with a pencil, but to be closed with the stupid side of the knife blade, a knitting needle dull with an awl.
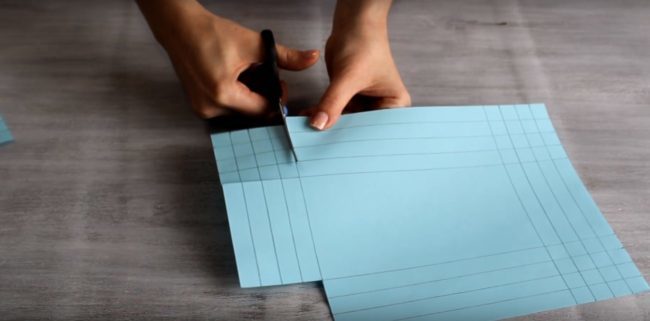
- Cut the squares formed by crossing lines in the corners of the sheet.
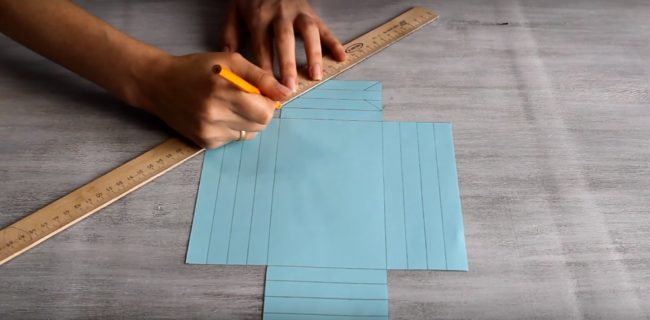
- On two opposite edges, draw 2 isosceles trapezes. Trapezed height: one and a half centimeters, the upper foundations of the figures should connect the first and second folding line with a perpendicular segment. The side sides of the trapezoids must connect the edges of the upper base with points in the corners on the edge of the sheet and points at the ends of the third line from the edge.
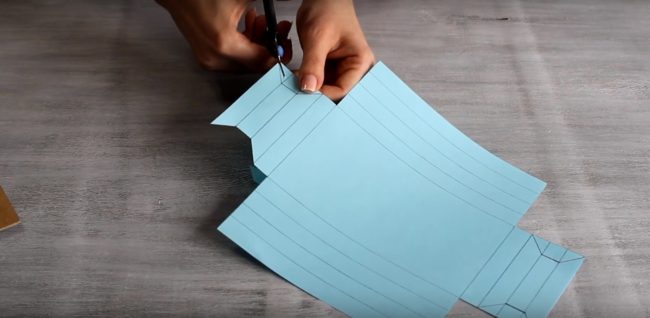
- Cut the resulting trapezes.
- Instead of manual marking of the sheet, you can use the finished scheme of the paper frame.

- Make a biogue if it was not implemented earlier.
- Place a photo in the center of the workpiece.
- On the planned fold lines, fold the edges of the frame in the direction from the edge to the center.
- Insert the side sides of the framework one into one. If desired, you can additionally fix the craft with glue.

- Make a leg for a framework for a frame. To do this, you need a long strip of paper, which must be folded in half and bend a rectangle with a width of about a centimeter from the fold line. After that, the workpiece is laid out, abundantly smeared with glue and folded again.
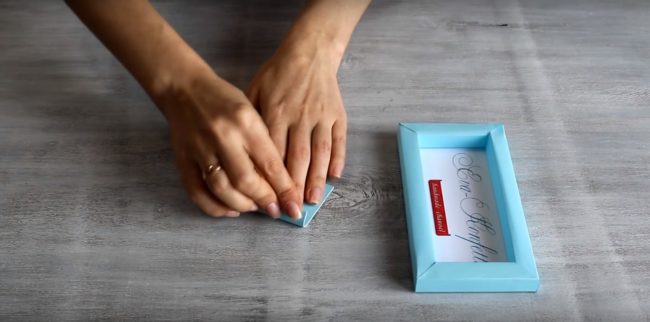
- Apply glue to a bent rectangular part of the legs, glue the leg to the frame.
Volume frame made of paper from paper
It will be required:
- thick paper for the base and flowers;
- ruler;
- template of flowers of different sizes with 6 petals/Figurine hole punch "Rose";
- scissors;
- ink/paint/pastel for tinting;
- glue;
- spoke/brush/wooden skewer;
- additional decor - optional.
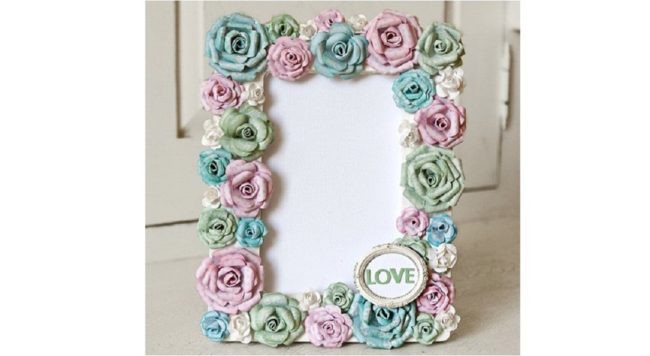
How to make a paper frame decorated with volumetric roses:
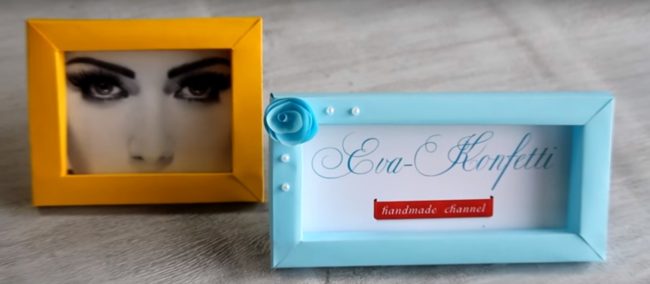
- Make a volume frame of paper using the previous master class.
- The creation of each rose requires 3 identical parts, they can be quickly and conveniently prepared with a curly hole hole. If the necessary hole punch is not available, then a template is required to decorate the paper frame.
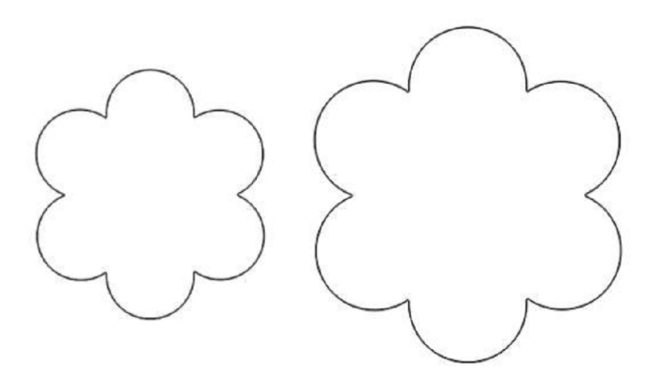
- On one part, make the incision of the cutter between the petals. In the second part, cut one petal, the third has 2 petals. There are no cut petals - they will be needed to create the middle of the rose.
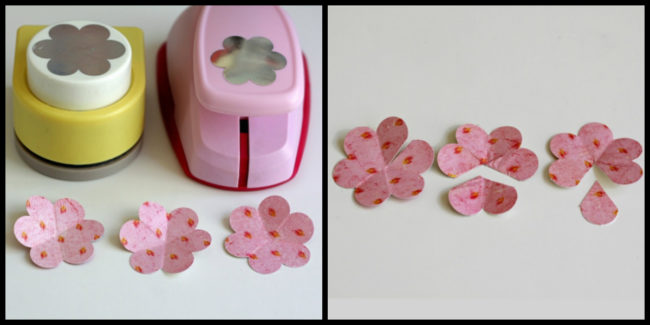
- Turn the tips of the petals.
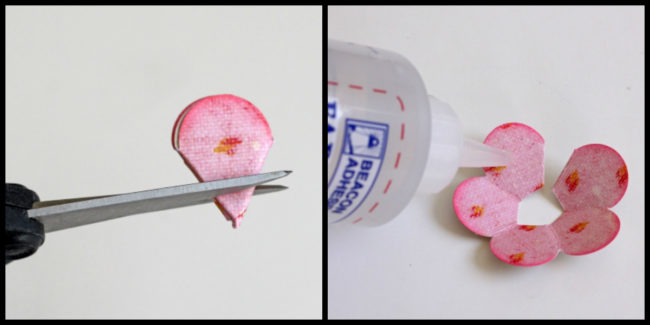
- Fold each part along the imaginary lines passing between the petals so that the resulting workpiece is the size of one petal. Cut the corners, expand the part.
- Glue the edges of the petals in each part.
- Using a knitting needle or brush, tighten the edges of the petals outward.
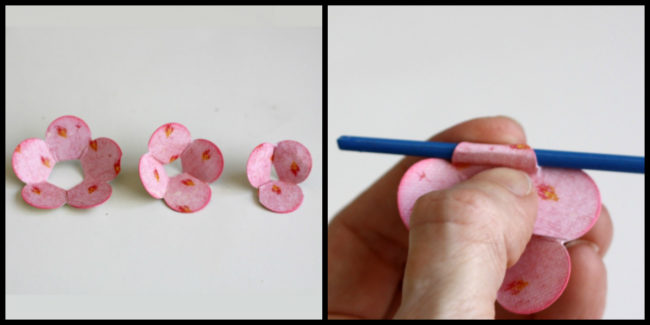
- Glue three parts so that the petals are located in a checkerboard pattern.
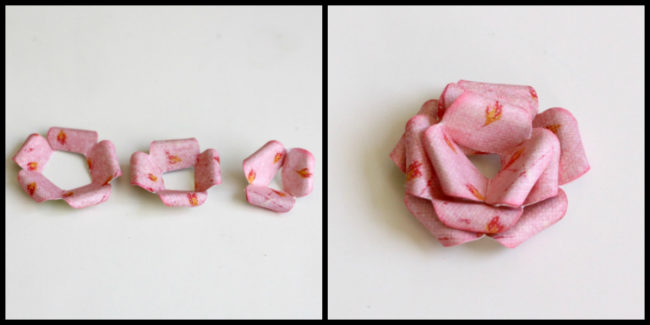
- With the help of a knitting needle or brush, twist the edges of the parts of two and one petals out. To turn a large part into a cook, try on a flower, cut off the excess at the base. Inside the resulting boat, paste the workpiece made by turning one petal into a tight heap.
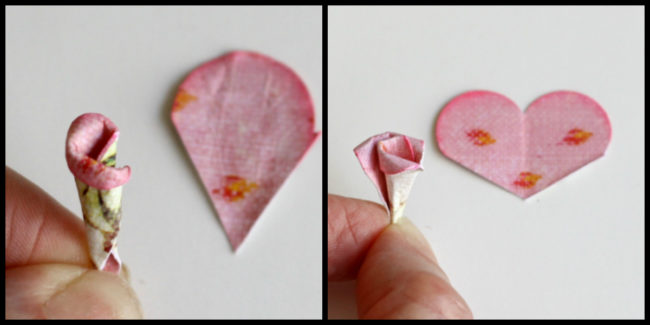
- Paste the middle into the center of the rose.
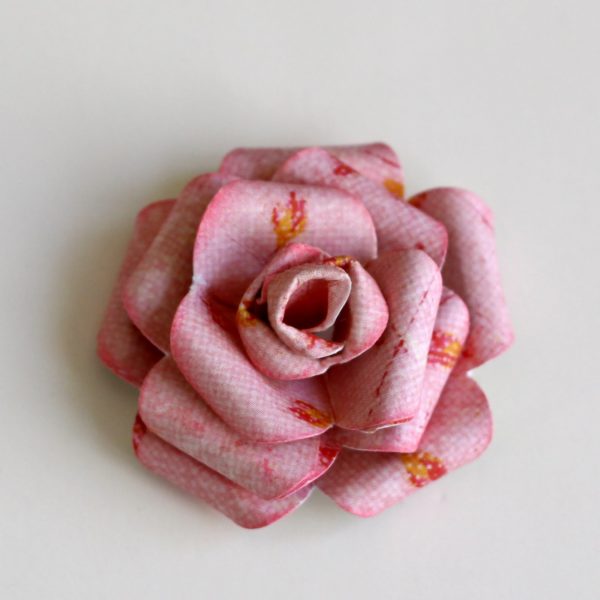
- Make the required number of such flowers of different colors and sizes, glue the frame with them.
- If desired, you can decorate the craft with other decorative elements.
Paper frame
It will be required:
- vine paper: office paper, notebook sheets, newspapers, magazines, advertising avenues, etc.;
- scissors;
- pVA glue;
- glue-pencil;
- spoke;
- cardboard is ordinary and corrugated;
- a few sheets of A4 paper;
- putty, putty;
- sandpaper;
- brush;
- chancellery knife;
- protective substrate for the working surface;
- scotch;
- varnish;
- oppression;
- a small piece of textiles;
- paints - optional.
Paper photo frame: Production:
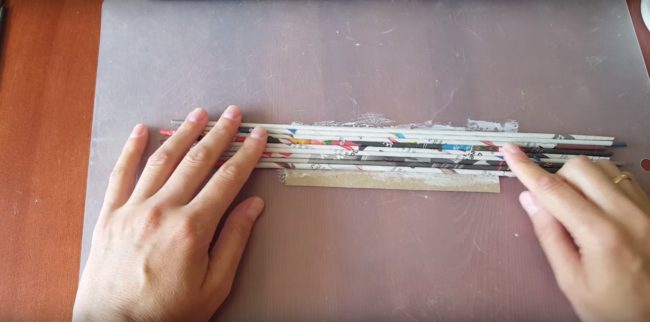
- Cut the paper into long strips with a width of about 5 cm with a width. Starting from the corner, wind it tightly onto the knitting needle, fix it with glue, remove from the knitting needles. A detailed description of the manufacturing technique of a paper vine can be found in the video.
- Cut the basis of the future photo frame from the cardboard, apply glue to the front part, glue it tightly with paper tubes. Cover the glued paper vine with glue. Let dry, put under oppression.
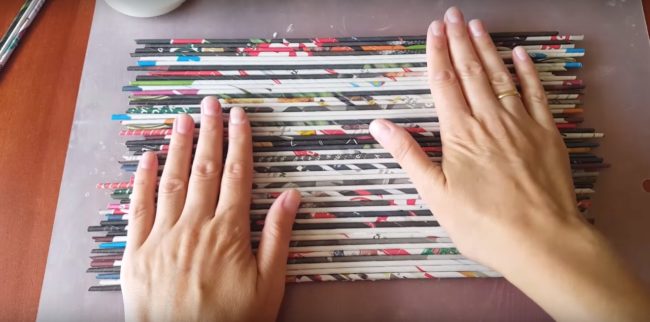
- On a cardboard rectangle about 3 cm wide and a slightly smaller length than the length of the base for the frame, also apply glue, tightly stick the tubes, cover them with glue. Put under oppression after the part dries.
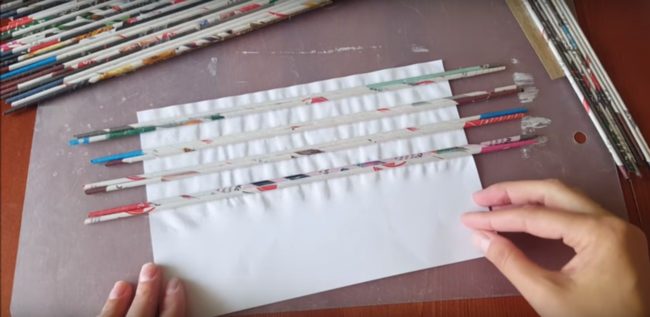
- On a sheet of paper at a certain distance from each other, glue 4 pairs of paper tubes. Cover with glue, give time to dry, put under oppression.
- Cut the workpiece from cardboard, the length and width of which per centimeter are larger than the size of the photo. Clog the place for the photo with tape, leaving the allowances from above and along the side edges untouched.
- Get out the workpiece from under the oppression. Cut off excess paper and tubes with scissors or an office knife.
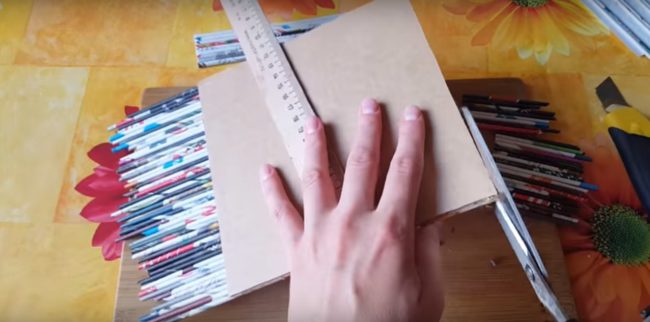
- On a sheet of paper, draw and cut a rectangle, the length and width of which is a centimeter larger and width of the cardboard substrate for the photo. Cut it.
- Clock a paper rectangle around the perimeter with steam paper tubes. Leave dry.
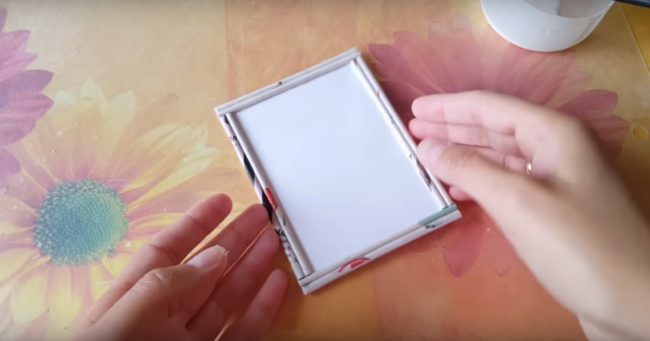
- Gently cut the resulting frame from the tubes.
- On the basis of the frame, glue the rectangular substrate under the photo. Glue a small frame of paper vine to the substrate and base. Put the frame under oppression.
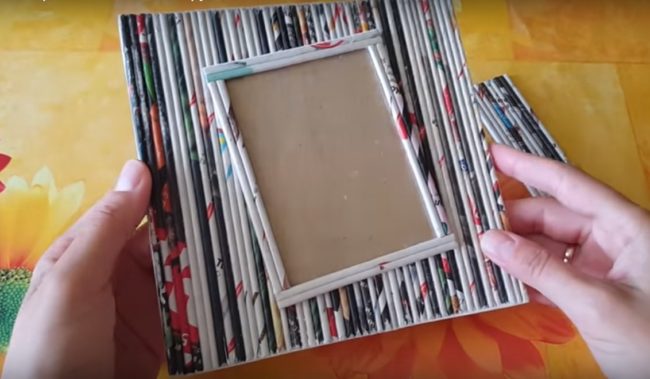
- Glue a loop or leg to the back of the frame. To create the latter, a cardboard rectangle and a square piece of matter, the side of which should be equal to the width of the legs, will be required with tubes. Fold the fabric horizontally in half, glue one half to the frame, the second - to the inside of the leg.
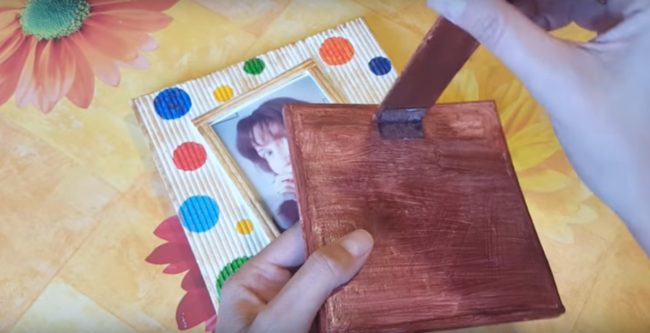
- If desired, paint and paint the frame.
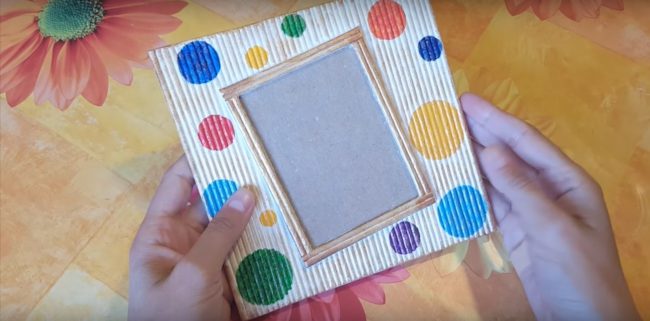
- Cover the frame with varnish. After drying, insert a photo.
Conclusion
With your own hands from paper, you can create frames that complement the interiors of a wide variety of styles. The basic framework for the picture or photo from paper is universal. Delicate frames decorated with volumetric flowers will be appropriate in living rooms and bedrooms of romantic natures. Cute, bright frames from colored paper feel great in children's rooms. Understanding paper vines can decorate their home with extraordinary creative personalities.


Comments
a couple of years ago, there was no side of metrogils from the same problem, there were no side effects ...
I’m not a fan of peeling at all, it saves from acne of metrogil, it also smoothes it ...
Great article! ...
I take the second course of the Capsules Climafite 911. The tides went very quickly. It became calmer, irritability went away and I sleep well ...
i also noticed - it is worth nervous, everything immediately affects the face. Therefore, I try to avoid conflicts and unpleasant people. Of the creams, I like Miaflow from wrinkles - smoothes not only small wrinkles ...