The secret of the popularity of antistress toys lies in two factors: enjoyable colors and extremely soft filler or filler in the form of a granulate, the effect on which causes pleasant tactile sensations. Toys-"flap" are doubly useful for young children. They not only help relieve nervous tension, but also favorably affect the development of fine motor skills. Below are descriptions of how to independently make anti-stress toys of different types. Everyone will be able to choose the option, based on their own taste, skills and the availability of materials and tools for manufacture.
Content
- How to make anti -stress from ball and flour
- How to make anti -stress from a ball and lizun
- How to make an antistress ball without lizun
- How to make anti -stress from lizun and polymer clay
- How to make anti -stress out of paper
- How to make anti -stress from PVA
- How to make anti -stress from light plasticine and foam
- How to make anti -stress at home from light plasticine and lizun
- How to make anti -stress with your own hands from silicone and oil
- How to make a soft toy anti -stress
- Conclusion
How to make anti -stress from ball and flour
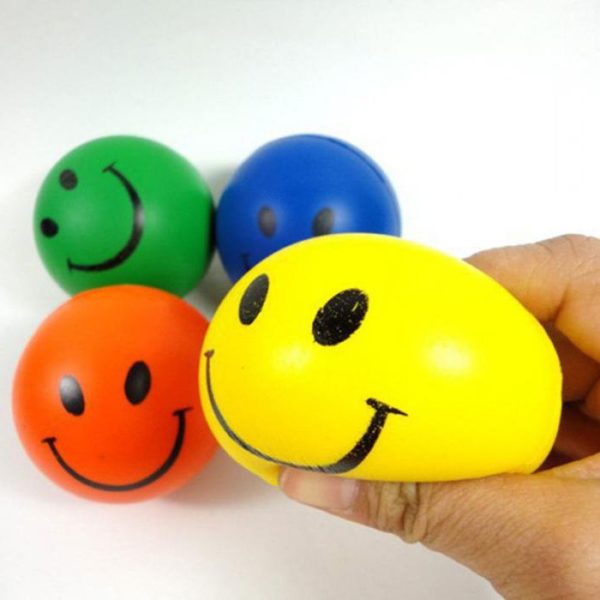
This is one of the simplest and most affordable methods for making antistress toys. As a result, it turns out a pleasant ball to the touch, which can be deformed in every possible way: flattened, stretched, etc.
It will be required:
- balloon;
- flour (can be replaced with starch);
- scissors;
- watering can, empty plastic bottle;
- pencil/straw for cocktails/long thin stick;
- decorating tools: permanent markers, plastic eyes for toys and so on.
Step -by -step instructions: how to make anti -stress from flour
- Before filling with flour or starch, the ball must be stretched by inflating and releasing air.
- There are several ways to fill the ball with flour. You can first fill the flour into the bottle with a watering can, then inflate the ball, and without letting out the air out of it, pull the bottle on the neck. After the bottle turns over, its contents are easily sprinkled into the ball. The latter is carefully removed from the neck, the tail of the ball is tied with a knot.
You can cut the plastic bottle across, pull the ball over the neck and pour flour through the resulting watering can.
The ball must be filled with flour quite tightly. - The excess tail of the ball is cut off with scissors.
- The toy is decorated. The easiest way to draw funny faces with a permanent marker.
- After drying the pattern, you can use the toy.
How to make anti -stress from a ball and lizun
From the usual balloon and lizun, cooked independently or bought in the store, you can make several variations of relaxing toys.
It will be required:
- balloons;
- lizun;
- scissors;
- the grid (fishing, used to pack fruits, stockings in a grid associated with a thin thread, a ball with many cut openings), permanent markers, glitter - optional.
Step -by -step instructions: how to make a ball of anti -stress from Lizun and Ball:
- Fill a lizun ball. It is convenient to do this with a syringe without a needle. Toys look beautiful if Lizun and the ball are either in the same color scheme or contrast with each other.
- To release air from the ball, tie the tail on the knot, cut off the excess. The basic version of the anti-stress-lysun is ready.
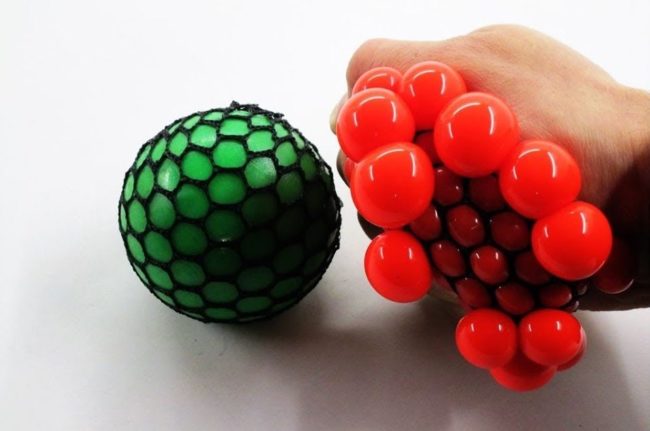
- You can make a toy more interesting by mixing lizun with sparkles, using several lizun colors, coloring the ball with permanent markers or wrapping the finished ball with a net. In the latter case, when compressed, the toy will resemble a grape bunch.
How to make an antistress ball without lizun
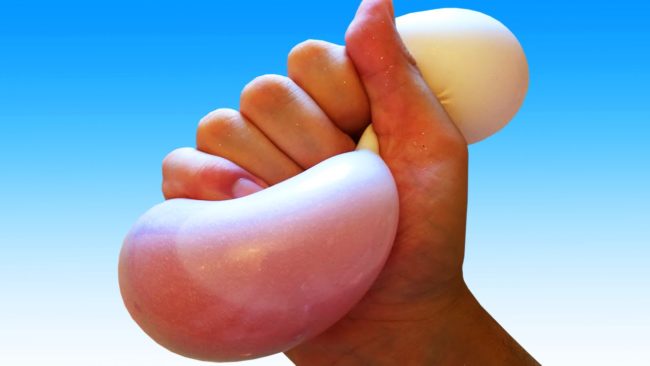
It does not matter if Lizuna or time is not for its manufacture. As a filler for the ball, you can use liquid soap, hair gel, gelatin with water or even just water.
It will be required:
- ball;
- water or other filler;
- scissors, glitter, dyes - at will.
Step -by -step instructions: how to make anti -stress from water or liquid soap and ball
- Stretch the ball by one -time pouting and releasing air.
- Fill the ball with the selected filler. For beauty, you can mix liquid with dyes or sparkles.
- Tie the tail on the knot, if desired, cut off the excess.
How to make anti -stress from lizun and polymer clay
Antistress toys with lizun are made not only in the shell from the ball. From polymer clay and lizun, for example, you can make cool bright relaxes-toys in the form of small fruits.
It will be required:
- polymer clay of different colors;
- foil;
- lizun;
- acrylic paints, brush;
- transparent nail polish;
- glitter, broth (if necessary);
- rockbrush;
- chancellery knife or scalpel;
- nail file with high abrasiveness;
- disposable gloves.
Step -by -step instructions: how to make anti -stress without a ball of polymer clay and lizun:
- The base rolled out of the foil, reminiscent of the future fruit or berry. This is done so that the fruits are hollow. For, for example, a watermelon will need a spherical workpiece.
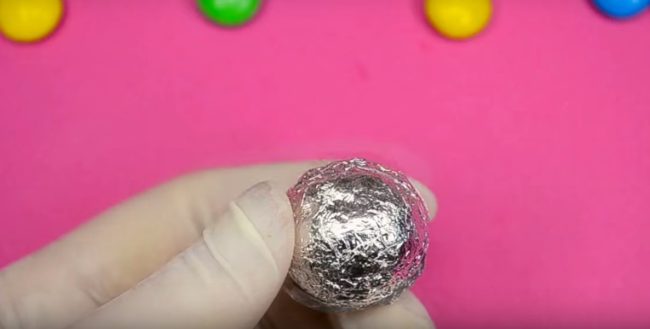
- Polymer clay of the necessary colors is rolled into thin “pancakes”. The base from the foil is wrapped in the resulting layers of the material. Excesses are cut off, the seams are smoothed. To create a watermelon, the base will alternately lend out clay of red, white and green.
- The future Tykvin is divided into two halves by cutting polymer clay along the “equator”. You do not need to cut foil.
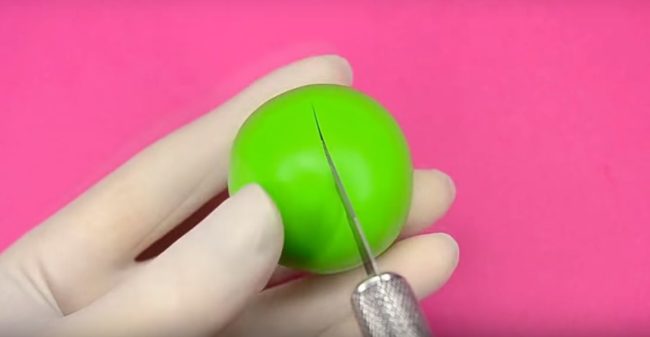
- The workpiece is baked at a temperature of 110 degrees 25 minutes.
- Foil is removed from clay.
- The edges of the clay hemispheres are polished by a file.
- The peel is painted or tinted with acrylic paints. To give greater realism, the watermelon on its surface draws uneven “meridians” lines of several shades of green.

- After the paint dries, the outer surface of the clay shell is treated with colorless varnish.
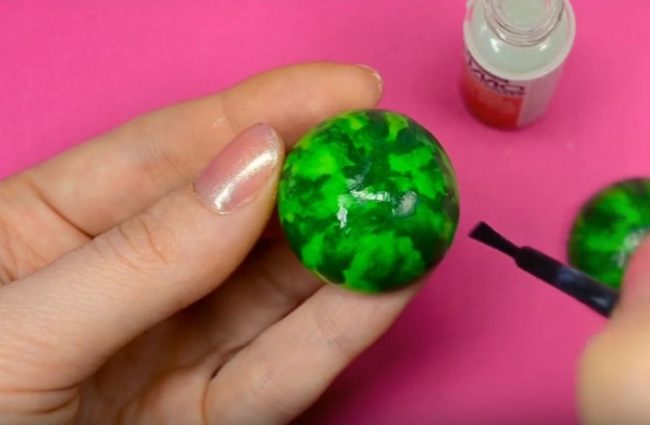
- Lizun is placed in the middle of the toy. In the case of a watermelon, you will need a “filling” of red color, mixed with a black glitter imitating bones.
- Antistress toy is ready. It is recommended to store it in tightly closed containers. Lizun, if necessary, can be replaced with a new one.

How to make anti -stress out of paper
With the help of the art of origami, you can also make an interesting relaxation-toy-hexaflexagon. He will have to tinker with him, but the result is worth it. As a result, an unusual figure will be obtained, which resembles a kaleidoscope in motion.
It will be required:
- square sheets of coated paper of the same size - 3 pieces. For beginners in Origami, it is recommended to use paper of different colors for convenience. The optimal side of the square for the first samples is 15-20 centimeters;
- decorating tools - optional.
Step -by -step instructions: how can you make an anti -stress Origami:
- In the manufacture of origami, it is important to observe accuracy and carefully work out all the bends.
- A sheet of paper folds in half, unfolds.
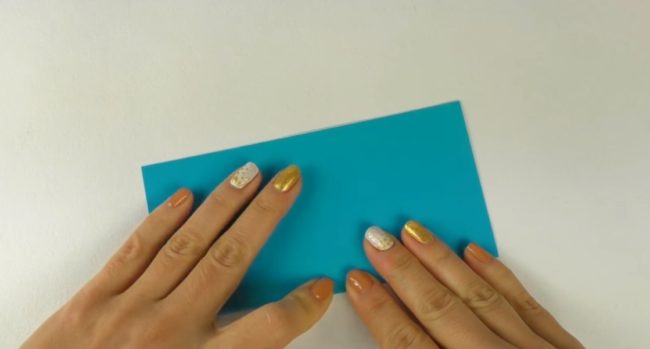
- Next, the figure must be folded so that the sides parallel to the bend lay on the fold line.

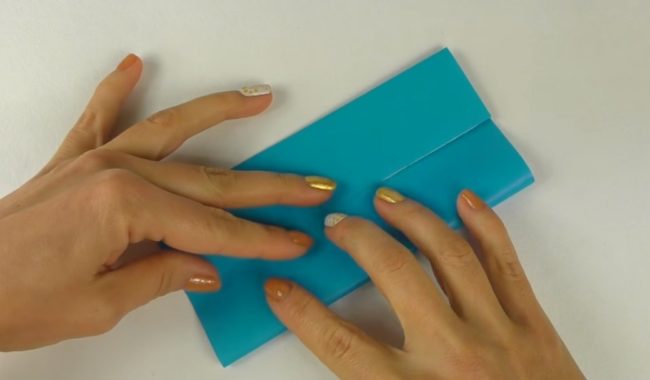
- The resulting rectangle is bent in half, the bend is worked out, the starting position is returned.

- The narrow sides of the rectangle are placed on the resulting fold line, which forms two new folds.
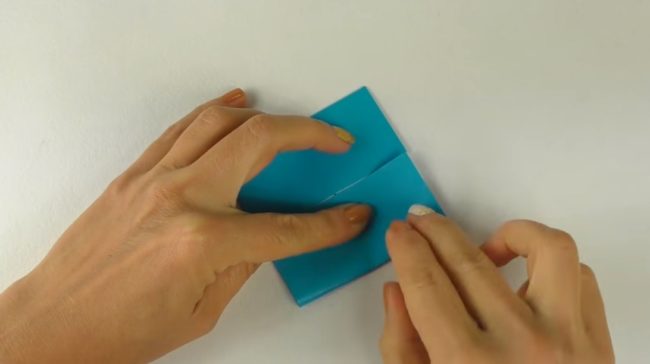
- The figure again unfolds to a rectangle. The edges of the parts are bent inside so that the resulting folds form rhombuses.

- Then the figure is folded so that the resulting two folds form the diagonals of a rectangle.
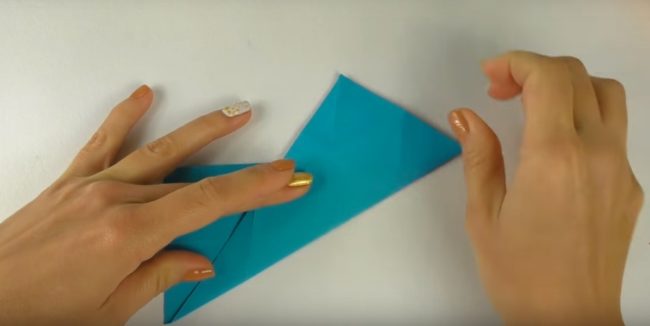
- The vertical bends of the rectangle are re -worked out.
- The above actions are carried out with two other details of the future hexaflexagon.
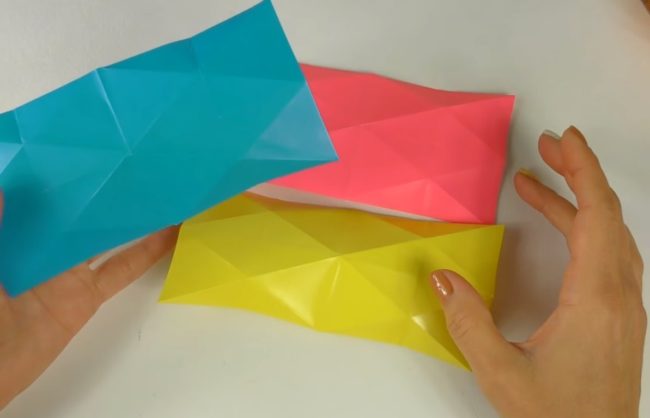
- The assembly of the figure begins. Elements are inserted into each other as shown in the photo. The detail is crap.

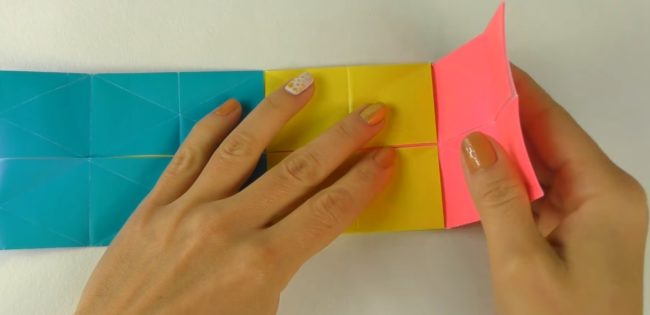
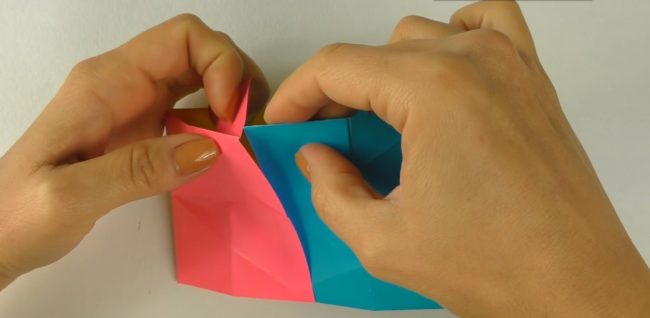
- By working out vertical bends in the middle of each edge, the resulting triangular prism turns into a hexagonal.
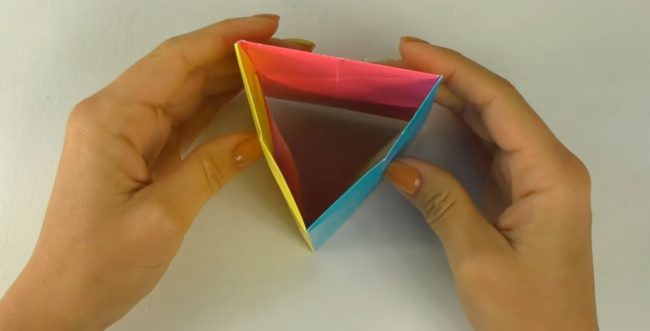
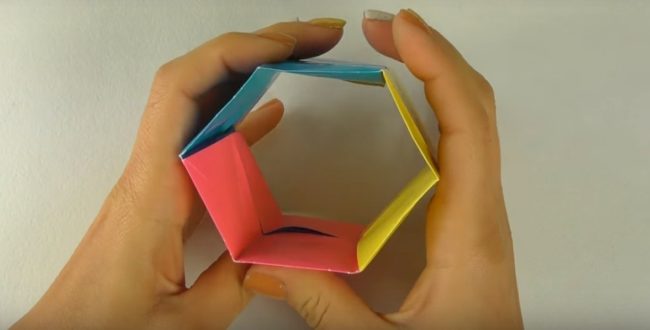
- At the top of each face of the fold, a small inverted triangle is formed. All three triangles must be bent inside and work out bends.

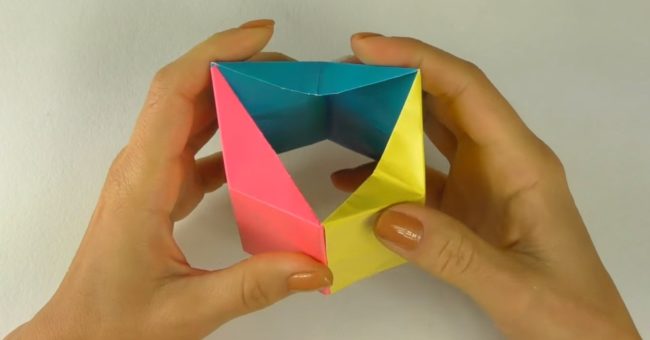
- Next, two -tone rhms bend inside. Do not forget to carefully work out the bends and correct, if necessary, the edges of the part.
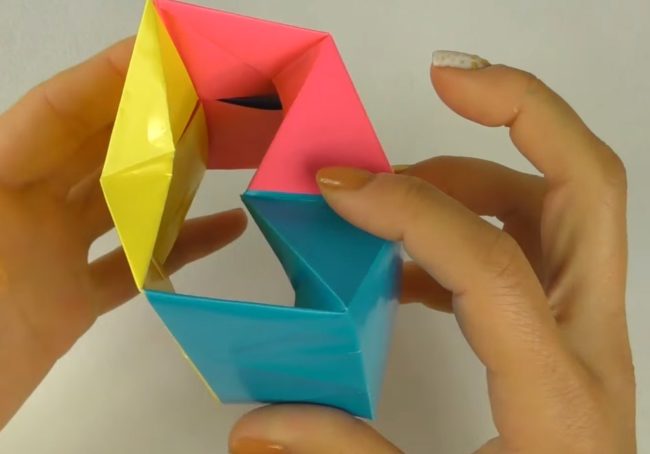
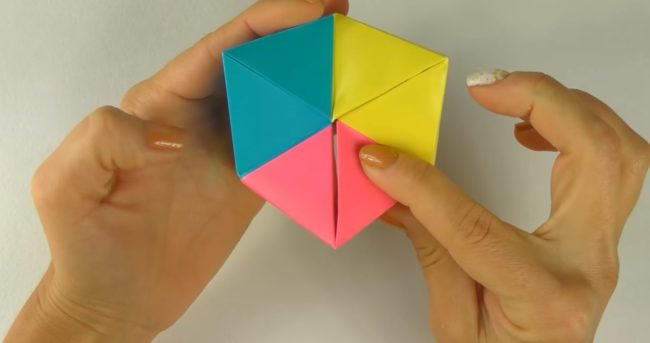
- Then the figure must be crank by pressing on two -tone rhombuses and single -color triangles. As a result of this, after studying the bends, such a detail will be obtained.
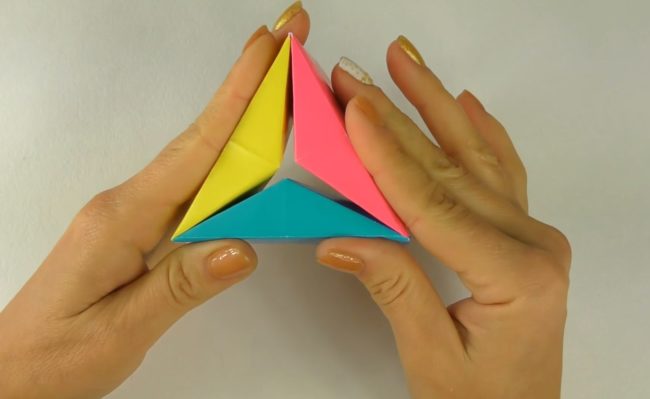
- We turn the craft. View from below.
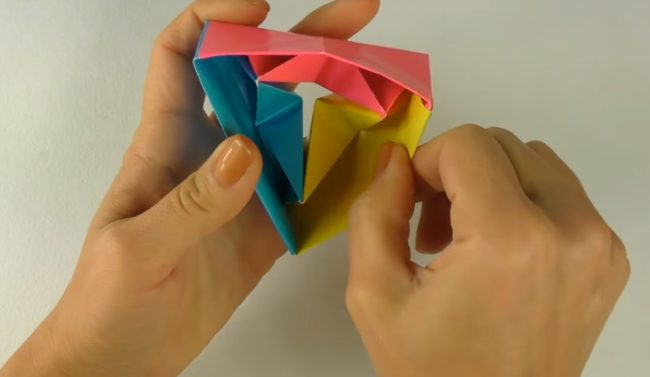
- Then you need to bent all three small inverted triangle inside and simultaneously press on them.
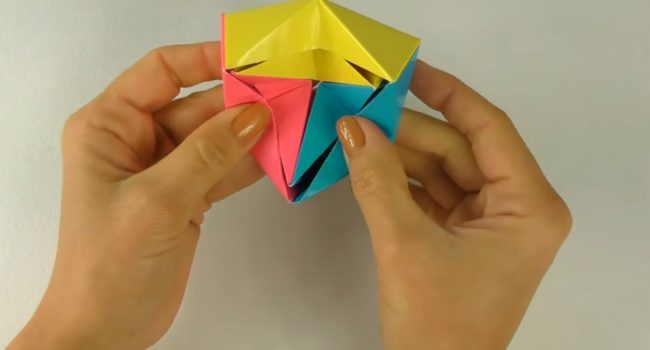
- As a result, the upper faces of the moving origami will take the shape of a rhombus.
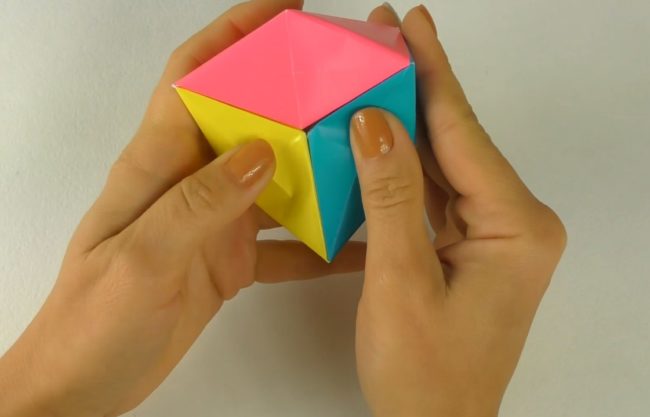
- Side view.
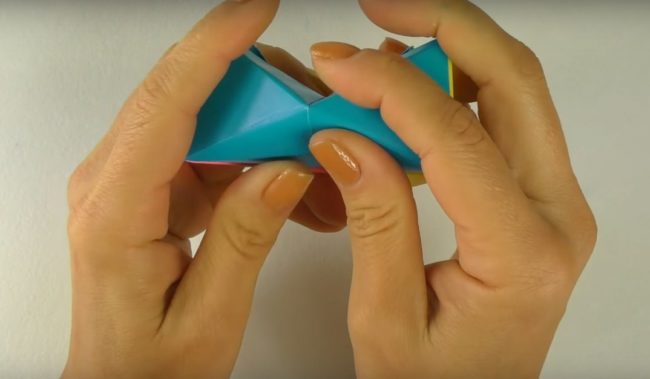
- The toy is ready. It can be endlessly twisted towards yourself or from yourself.

If desired, you can decorate hexaflexagon with drawings or sparkles.
In the video published below, how to make an anti -stress Origami, the process of manufacturing hexaflexacgon or, as it is also called, an infinite postcard, is shown in the most detailed and clearly as possible.
How to make anti -stress from PVA
All the familiar PVA glue can be tried to turn into a home -made smart plasticine (aka handg). The factory chewing gum does not stick to the hands, and depending on the type of effect on it, it can be either elastic, and hard or even fragile. Its homemade twin, even if it does not have all the above functions, but does not stick to my hands, is pleasant to the touch and copes well with the relaxation function.
It will be required:
- pVA glue - 240 grams;
- a solution of diamond greens - 20 milliliters;
- sodium tetraberate - 60 milliliters;
- plastic container and spatula for mixing.
Step -by -step instructions: how to make anti -stress from glue
- Pour the glue into a container, add a “green” to it, mix well.
- Pour sodium tetrable into the resulting mixture. In the process of kneading, the mixture will be relaxed on a thick mass and liquid.
- After squeezing the liquid, smart plasticine is ready.
How to make anti -stress from light plasticine and foam
From these materials, it turns out to be an unusually beautiful and pleasant to the touch Relax toy.
It will be required:
- light plasticine of at least two colors;
- a rounded foam of a rounded shape/layer of foam about 5 centimeters wide, pencil, round template;
- chancellery knife;
- scissors;
- decor at will.
Step -by -step instructions: how to make a “volume” of light plasticine and foam:
- The base of the toy in the form of a flattened circle is cut out of foam rubber. In order to make the toy even you need to or circle something round of a suitable size, cut out the most carefully and smoothed the sharp edges, or take a finished rounded sponge. A small round hole is carefully cut in the center of the workpiece.
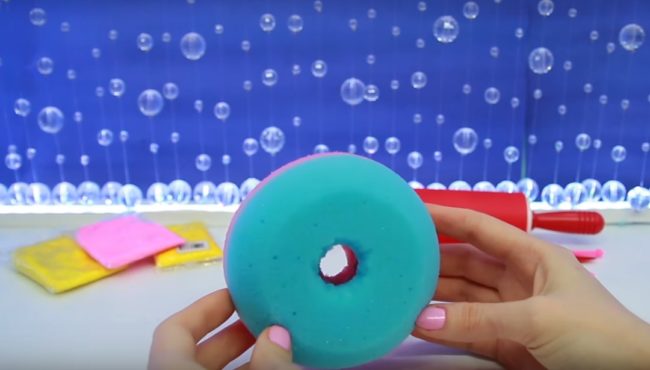
- Light plasticine is rolled into a layer of several millimeters thick.
- The foam workpiece is completely turned out by plasticine chosen for the "test" color. You need to start the process with the center of the figure.
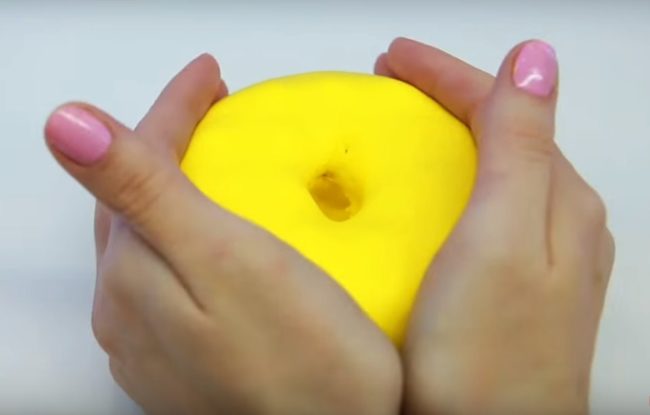
- To simulate the glaze, a round layer of light plasticine of a different color is placed on top of a sealed workpiece. A hole is formed in the center of the layer, the transition between plasticine flowers is smoothed out. To simulate the fluxes, the glazes of the circle stretch down, the seams are practically not smoothed.
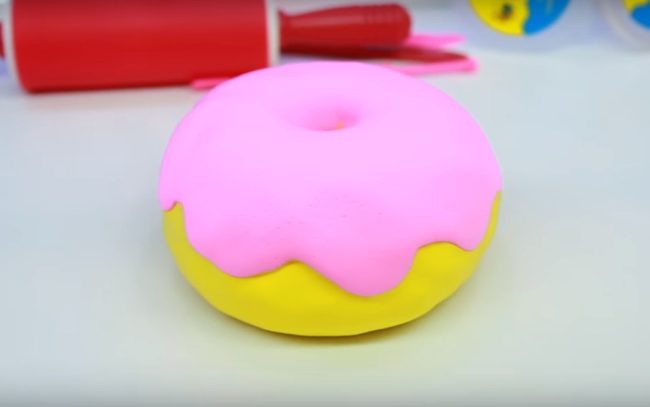
- The donut is given 24 hours to dry.
- You can decorate the donut with a grave of light plasticine, glued on thermocles, or with multi -colored sprinkling with acrylic paints.
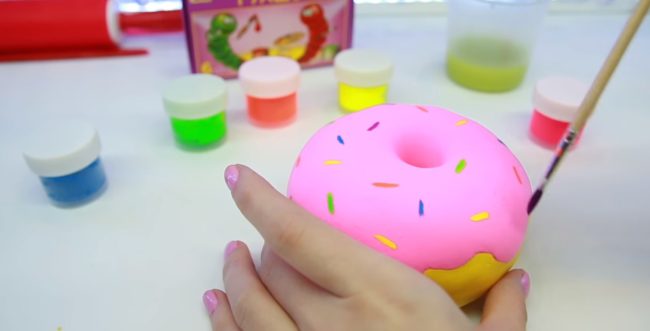
- For air circulation, it is necessary to cut light plasticine in a circle. This is done from the inner hole of the donut.
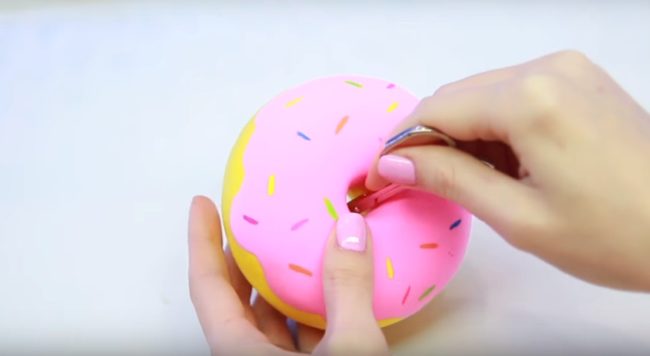
How to make anti -stress at home from light plasticine and lizun
From the above materials, excellent “volumes” are obtained in the form of fruits or berries.
It will be required:
- light plasticine;
- foam;
- lizun;
- scissors;
- rockbrush;
- plastic spatula;
- chancellery knife.
Step-by-step instructions: how to make an antistress toy of light plasticine and lizun:
- The base is cut out of the foam, the shape of which is determined by the type of future toy. For the lobules of watermelon, orange or lemon, you need a semicircle.
- Light plasticine is rolled out with a rolling pin.
- The basis is fuel with light plasticine, irregularities are smoothed with a spatula. To create a watermelon, you will need two red semicircles and a strip of plasticine to simulate the pulp, a strip of white and green plasticine for creating peel and small drop -shaped parts of black light plasticine to decorate a slice of seeds.
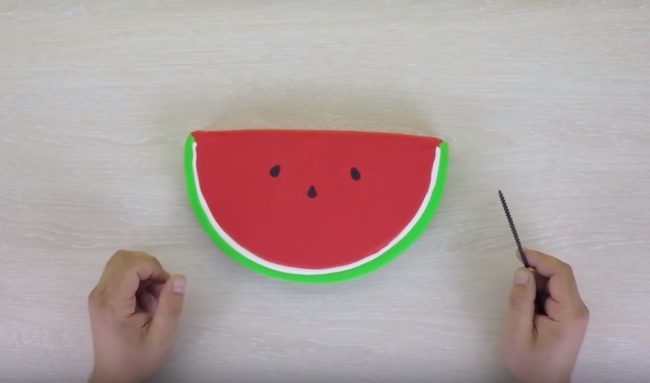
- The resulting workpiece should dry in a limbo for 7-10 days.
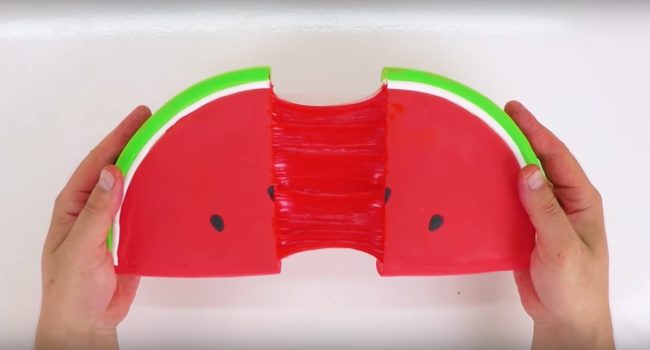
- The slope is cut in half, the polystyrene is removed, red lizun will be observed in both halves.

- The toy is ready.
How to make anti -stress with your own hands from silicone and oil
From ordinary silicone sealant and vegetable oil, you can make a funny toy that, in its properties, resembling popular squash.
Squares are small-sized elastic bends, which can also be used to decorate phones, notebooks and other things. Squats are produced in the form of baking, vegetables, fruits, berries, animals. Below it is told how to make the sweetest catfish cats at home.
It will be required:
- silicone sealant;
- vegetable oil;
- light plasticine or Play-dah;
- disposable gloves;
- acrylic paints, brushes;
- dots of different sizes;
- scissors;
- mixing capacity;
- board/silicone rug/plastic napkin to protect the table;
- case for phone/notebook and materials for decoration;
- super glue.
Step -by -step instructions: how to make an anti -stress cover or notebook:
- The workplace is prepared.
- The toy is made by casting, so first of all you need to make a shape. To do this, in a piece of light plasticine or Play-dah dots, the figure of the future cat is squeezed out.

- To protect your hands, gloves are put on.
- The vegetable oil is thoroughly mixed with silicone, if necessary, the mixture is painted with acrylic paints.
- The shape of light plasticine is filled with the resulting mass. It will take several hours to solidify a small cat.
- Faithing figures without effort are removed from the form.
- For absorption of excess fat, it is recommended to roll cats in talc or starch.
- The extra edges of the figures are carefully cut by scissors.
- To paint the cats, a mixture of acrylic paints and silicone sealant is used.
- After a couple of hours, the painted areas will dry out and the catfish cats will be ready for the game.

- To the in advance with the help of the paint of glitter nail polishes, felt and other things, the resulting squals are glued to the super glue.
How to make a soft toy anti -stress
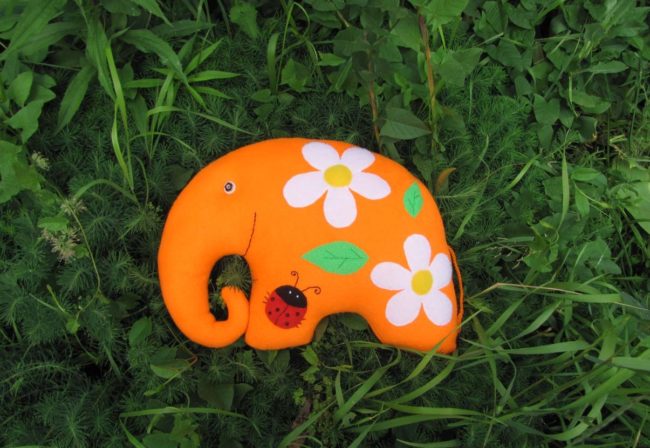
Any small soft toy can be improved by partially or completely replacing the filler with beads, beads, balls made of polystyrene foam and so on. Or you can sew a knit-toe with your own hands with your own hands.
It will be required:
- textile;
- needle, threads;
- filler;
- pencil/crayon;
- scissors;
- paper.
Step -by -step instructions: how to make anti -stress from a soft toy or textile:
- A simple pattern of the future toy is cut out of paper.
- Both sides of the patterns are transferred to the wrong side of the fabric with a pencil.
- The resulting parts are cut into account 5-7 millimeters of allowances on the seams, folded in the front side inward and stitched. For further filling of the toy, it is necessary to leave a hole of 5 centimeters long.
- So that there are no assemblies on the toy in places where there are recesses or bulges, small cuts are made perpendicular to the seam.
- The workpiece is turned to the front side, tightly filled with balls or beads.
- The hole for stuffing is sewn up with a hidden seam.
- If necessary, the toy is decorated with applique, embroidery, etc.
Conclusion
“Mnushki” are not only beautiful, but also good for health. It is not necessary to purchase a factory toy-antistress, since making it yourself will not be difficult.


Comments
a couple of years ago, there was no side of metrogils from the same problem, there were no side effects ...
I’m not a fan of peeling at all, it saves from acne of metrogil, it also smoothes it ...
Great article! ...
I take the second course of the Capsules Climafite 911. The tides went very quickly. It became calmer, irritability went away and I sleep well ...
i also noticed - it is worth nervous, everything immediately affects the face. Therefore, I try to avoid conflicts and unpleasant people. Of the creams, I like Miaflow from wrinkles - smoothes not only small wrinkles ...